-
Notifications
You must be signed in to change notification settings - Fork 1
Item Manager
QiuHanWen edited this page Mar 24, 2023
·
1 revision
Click top menu button Alive Cursor/Item Manager to open the Item Manager window, here you can manage information for all items. It has the following panel:
Type in the desire item name in New Item Name textfield, then press Create button, a new folder with the input name will be created under Assets/Items folder.

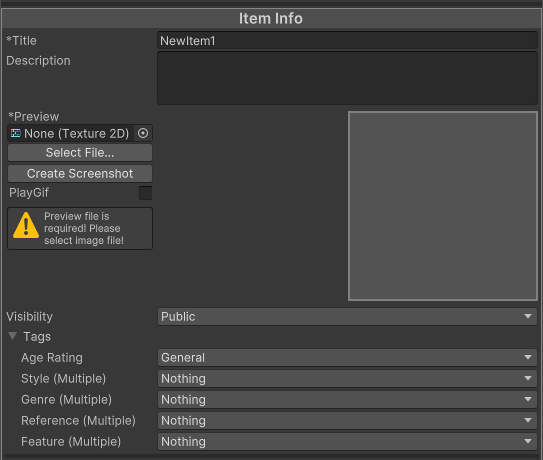
Here you can setup item's info, make sure these fields are properly set so that the users can easily know what your mod is about.

This panel is about edit item.

This panel is about build item.

This panel is about upload item to workshop.

Item folder:
- Should contain all custom assets of this item (Models, textures, scripts, etc.), or else the assets will be missing after exported (Unless they are Unity's default assets or Third-Party Plugins's built-in assets).
Item name:
- Should not be empty (Duh!).
- Should not start with empty character.
- Can't contain any illegal filename characters.
Item preview file:
- You need to setup preview before build item.
- If you select an image asset that is not part of the project, it will get cloned into
[ItemRootFolder]/Datasfolder. - You can click
Create Screenshotbutton to capture screenshot, or use ShareX or Captura to record gif files. - Only jpg, jpeg, png and gif with lowercase extension is supported.
- File size should be lower than 1024KB, you can optimize gif files on ezgif.com.