-
Notifications
You must be signed in to change notification settings - Fork 87
Ingenic USB Cloner
The Ingenic USB Cloner application is a PC side utility that interfaces with the "USB-Boot" mode built into Ingenic SOCs. By placing the SOC into "USB-Boot" mode, you are able to use the Ingenic USB Cloner to directly flash the firmware chip without physically removing, or interfacing to the flash chip. This method simplifies firmware backup and installation on capable devices.
This guide provides step-by-step instructions for completing a full backup and writing a firmware binary to your device. It is designed to walk you through the process, helping you become familiar with the Ingenic Cloner tool. However, please note that this guide is not intended to be an all-inclusive reference and does not cover all features of Cloner. It focuses on the basic steps needed to perform the outlined tasks, offering a foundation for using the utility effectively.
Tip
For better success and compatibility, we strongly recommend using the Linux version of Ingenic USB Cloner.
Download the Cloner application for your operating system using the links below. Extract the program to a working directory on your computer.
- Ingenic Cloner for Linux
Ingenic Cloner for Windows
Navigate to the cloner-2.5.xx-ubuntu_alpha directory, with "xx" indicating your downloaded version of Cloner.
Important
Windows users may need to install additional drivers for support. See the Vendor Documentation PDF Guide for additional details.
Create a folder named 0_Firmware_Root inside the Cloner directory.

Caution
The 0_Firmware_Root directory MUST be created and correctly named to ensure backups are completed successfully. Backup operations will fail if this directory is missing.
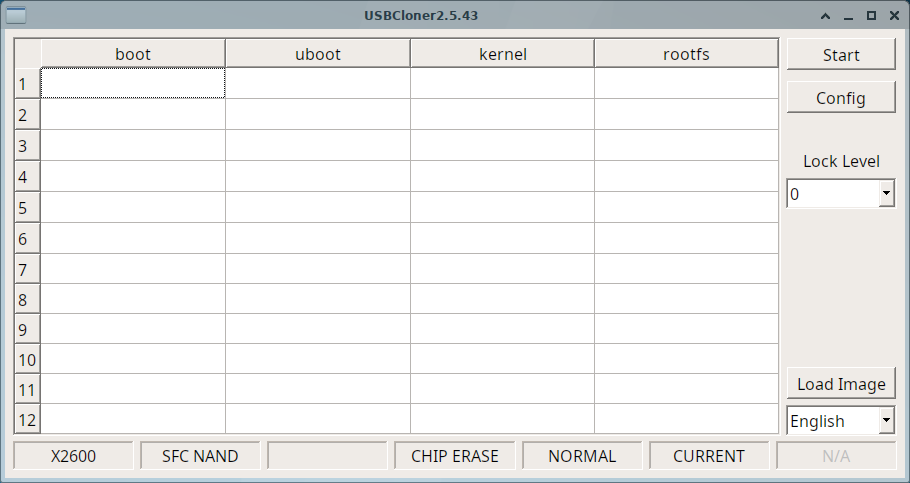
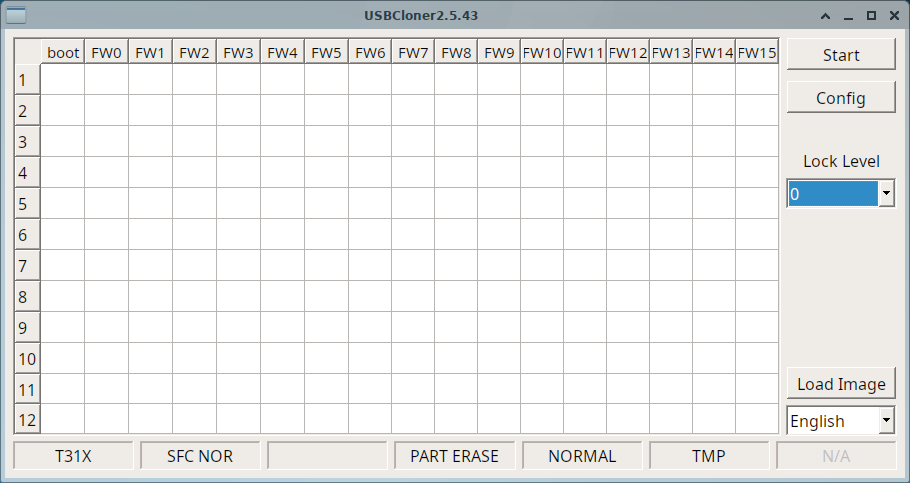
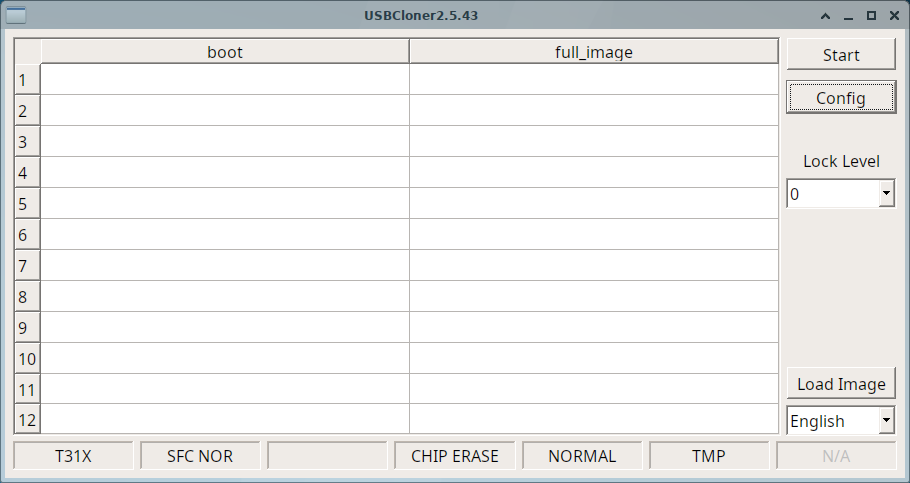
Open the Cloner application. Ensure you are using version 2.5.43 for compatibility.
- Download the latest configuration bundle from here.
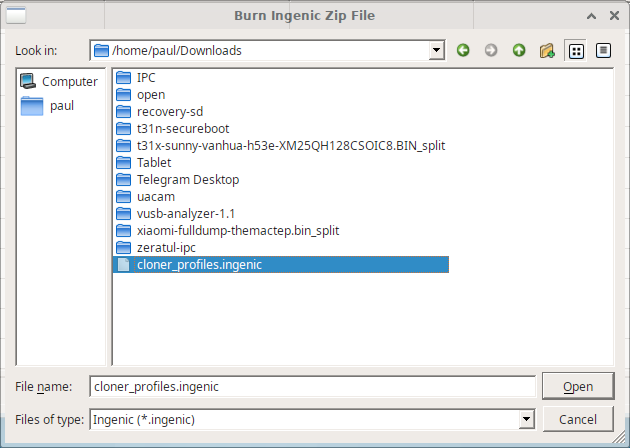
Click Load Image and select the downloaded cloner_profiles.ingenic file.
Important
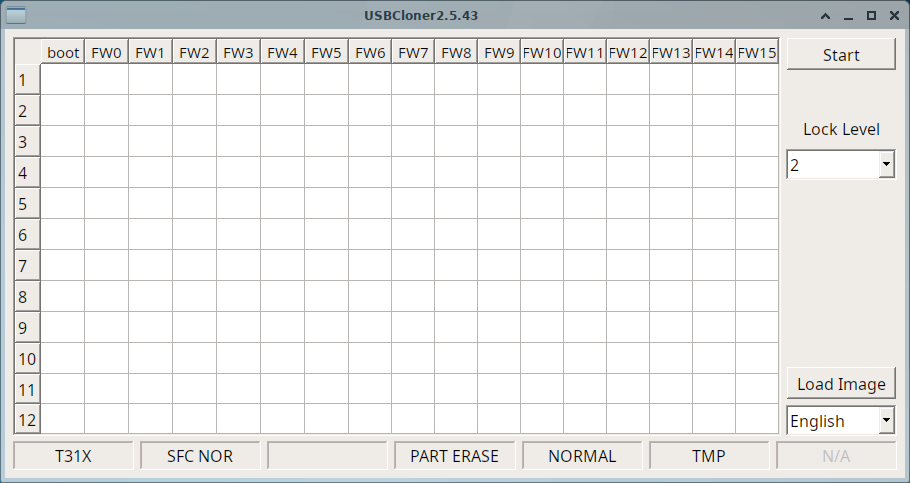
The options described in the screenshots will not match if you did not load the cloner_profiles.ingenic bundle as outlined in the previous steps.
Change the Lock Level from 2, to 0
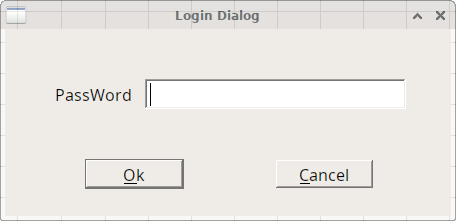
Enter !@# (exclamation mark, "at" symbol, number sign) as the password. Click OK.
After entering the password in the previous step, the Config button should now appear in the main screen. Click the Config button in the top-right corner.
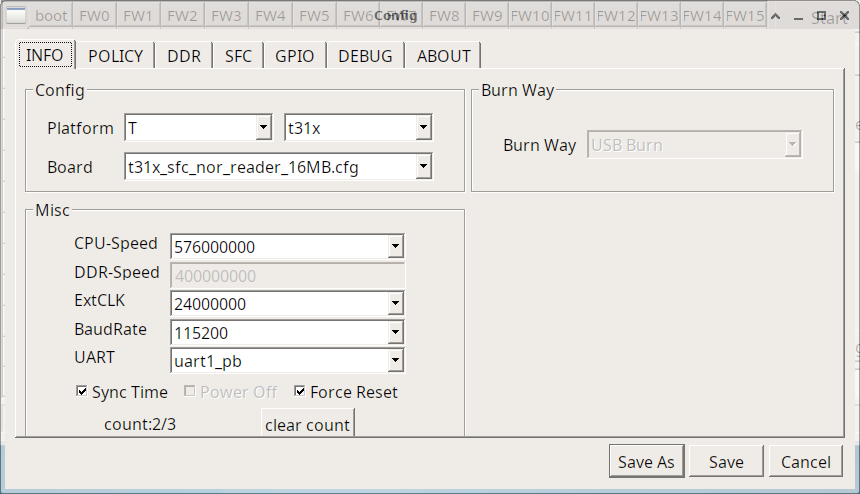
In the Config window, under the INFO tab, you have various configuration menus available:
In the Platform dropdown menu, select T. Choose the appropriate SOC version for your device next to Platform T.
Important
Selecting the correct SOC for your device is crucial. If you choose incorrectly, the cloner program won't recognize your device, halting the process. Be sure to accurately identify and select the appropriate version (e.g., t20, t21, t23, t30, t31) for your specific hardware. This step is essential for the cloner to function properly and allow you to proceed with the operation.
Next, you can proceed with either performing a backup or writing firmware.
Warning
We strongly recommend using Cloner to create a full backup of the existing stock firmware. This is an essential step if you ever need to restore the original functionality or analyze the stock firmware for compatibility.
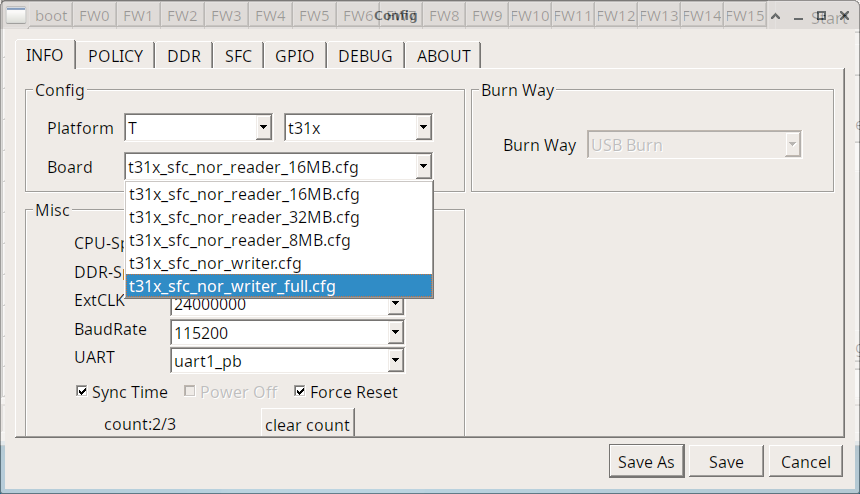
In the Board dropdown menu, choose the appropriate reader operation based on your device's flash chip size. The available options are 8MB, 16MB, and 32MB.
For the example below, we will select: sfc_nor_reader_16M.cfg for the specific SoC.

Click the Save button to save your choice and return to the main menu.

You may now begin the backup operation.
In the Board dropdown menu, select the appropriate writer operation based on your specific needs. The available options are:
- _sfc_nor_writer.cfg: for writing individual partitions
- _sfc_nor_writer_full.cfg: for writing full firmware images
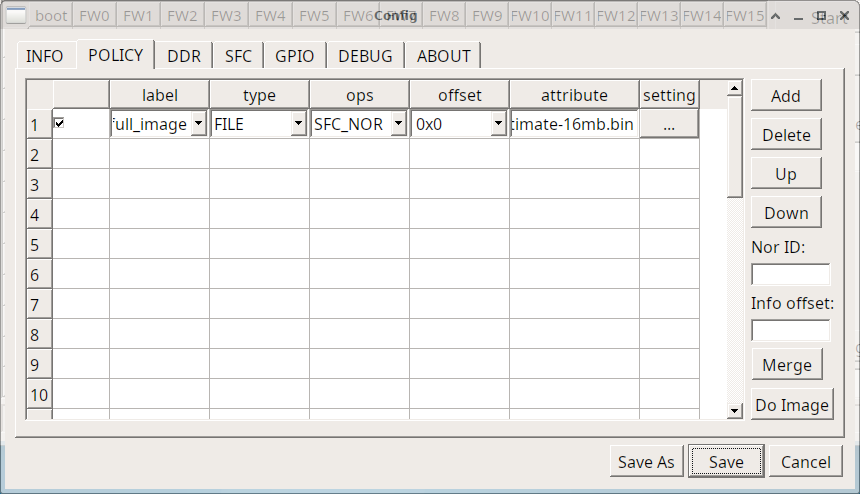
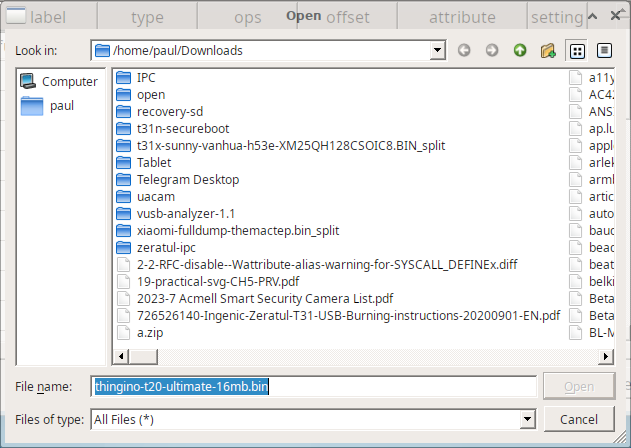
Find and click on the POLICY tab, then click ... (three dot) button in the setting column to open the file selection dialog.
Select the firmware image file you want to write, and click Open.
Once you have selected your firmware image file for writiing, click the Save button to return to the main screen.
Click Start button on the main screen.

At this stage, ensure your device is unplugged from your computer.
Connect the USB cable to the device, but leave the other end disconnected.
Important
If you are flashing a blank flash memory chip, or the bootloader is not installed, the Ingenic SoC will default to "USB-Boot" mode. Shorting pins on the flash chip is not required in this case.
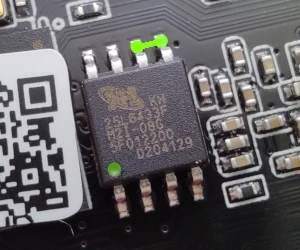
Locate the flash memory chip on the camera circuit board. Typically this is a square chip with 8 pins labeled 25Q64 or 25Q128, rarely 25L64 or 25L128. If you have trouble locating the chip, try taking some pictures of your board from both sides. You can then try and reach out to our community for further assistance.
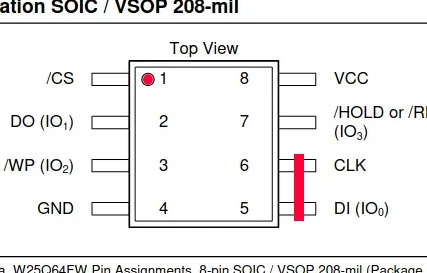
Pins 5 and 6 of the SOIC8 chip are on the opposite corner of pin 1, indicated by the embossed or drawn dot next to it.
Once you are ready to begin, short-circuit pins 5 and 6 of the flash chip with a small metal object, a screwdriver or tweezers.
Short pins 5 and 6 ON THE FLASH CHIP, not SoC or any other chip, use the photos as a reference, as described in this document.
Caution
Do not try to short-circuit any random chip! It will most likely burn your camera circuit.
While maintaining the short, connect the USB cable to the computer. Wait 5 seconds, then release the short.
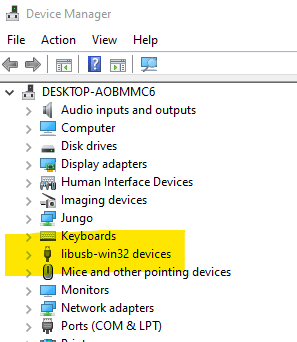
It may take up to 30 seconds for Cloner to recognize the device. On Windows, you can check if the device is detected via Device Manager, and on Linux, you can use dmesg to verify detection of the Ingenic Cloner device.
Once the device is recognized, the progress bars will change from purple to green. When all bars are green, the operations are complete.
Important
We strongly recommend running the backup process at least twice to ensure data integrity. After completing a backup, be sure to copy all files from the 0_Firmware_Root directory to a secure location, otherwise they will be overwritten! Keep both backup copies for safekeeping and future reference.
Carefully follow these steps to ensure the Cloner application is set up correctly and operates as expected.
Refer to the vendor documentation for additional in-depth information.
To initiate a Cloner session from a running system, you need to damage the bootloader to force SoC to expose USB connection on boot.
Caution
This action is irreversible, so you need to know what you are doing, and be ready to revive a possible brick!
To erase bootloder from U-Boot shell, run
sf probe; sf erase 0 +1; reset
To erase bootloder rom Linux shell, run
flash_eraseall /dev/mtd0 && restart -f
Obviously, you only want to do that for flashing a new firmware. For making a backup of the existing firmware, short pins 5 and 6 on the flash chip as described above.
