-
Notifications
You must be signed in to change notification settings - Fork 137
Brush Tools Resize
The default tool for interacting with brushes in SabreCSG is the Resize tool. This tool allows you to quickly select, move, rotate, and scale brushes.
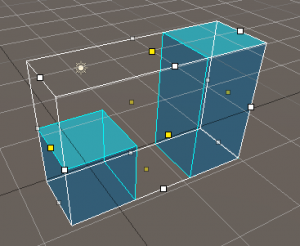
In Resize mode, selected brushes have a white wireframe bounding box drawn around them. Even with complex, non-cuboid brushes, the bounding box will be cuboid; this distinction is important because, when using the Resize tool, you interact with the brush by interacting with its bounding box.

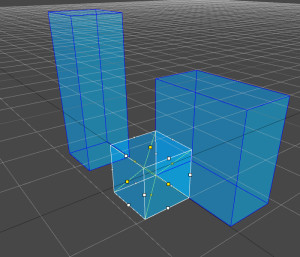
Prior to editing a brush, it is necessary to select it. With the Resize tool, this simply means clicking on the brush. The white bounding box in Resize mode isn't used for selection, so it is necessary to click a face of the brush itself to select or deselect it. However, because the brushes are transparent, you can select a brush that is behind another brush by clicking again. By repeatedly clicking the same position, you can cycle through the possible selections, from closest to most distant. Sometimes it will be faster to reposition the camera before selecting a brush, but at other times cycling through brushes is more convenient, such as in levels with many subtractive brushes.

Cycling the selection by clicking repeatedly
You can also select multiple brushes at once by holding Shift while clicking. This is useful for duplicating and translating multiple brushes simultaneously, or for deleting groups of brushes. To remove a brush from the selected group, hold Ctrl and click.
When editing groups of brushes, the bounds will be for all the selected brushes. If Unity is set to Global orientation then the bounds will be aligned with the world axis, if Unity is set to Local then the bounds will be aligned to the rotation of the first selected brush.

Selecting multiple brushes in Resize mode
You can also select brushes through Unity’s Hierarchy window. The brushes under CSGModel in the Hierarchy are ordered as they are created; that is, the top brush was there first, and the bottom brush was there last. If you build out part of a level, and then decide you don’t like it, you can select the last brush, then hit Shift+Up to quickly select the changes, and then hit Delete to remove them. This is often faster and allows for greater control that using Undo repeatedly.
With more complicated levels, it is useful to create groups of brushes nested within the CSGModel. To do this, you can right click CSGModel in Unity’s Hierarchy window, and then Create Empty. After doing this, you should drag the group of brushes into the new GameObject, to treat it as their parent. Or, if you didn’t create the brushes before creating the empty GameObject, then when you create a new brush you should nest it. Either way, when you duplicate a brush with a parent, the new duplicate brush will also be a child to that parent. Creating groups like this lets you quickly select similar brushes, and keep your Hierarchy window organized. It can also let you disable or enable groups, so that SabreCSG ignores them during rebuild. For example, it is good practice to keep a level’s basic geometry in one group, and keep a level’s more detailed geometry in a different group; this will let you save time during partial rebuilds, and also allow you to divide your work when applying materials.
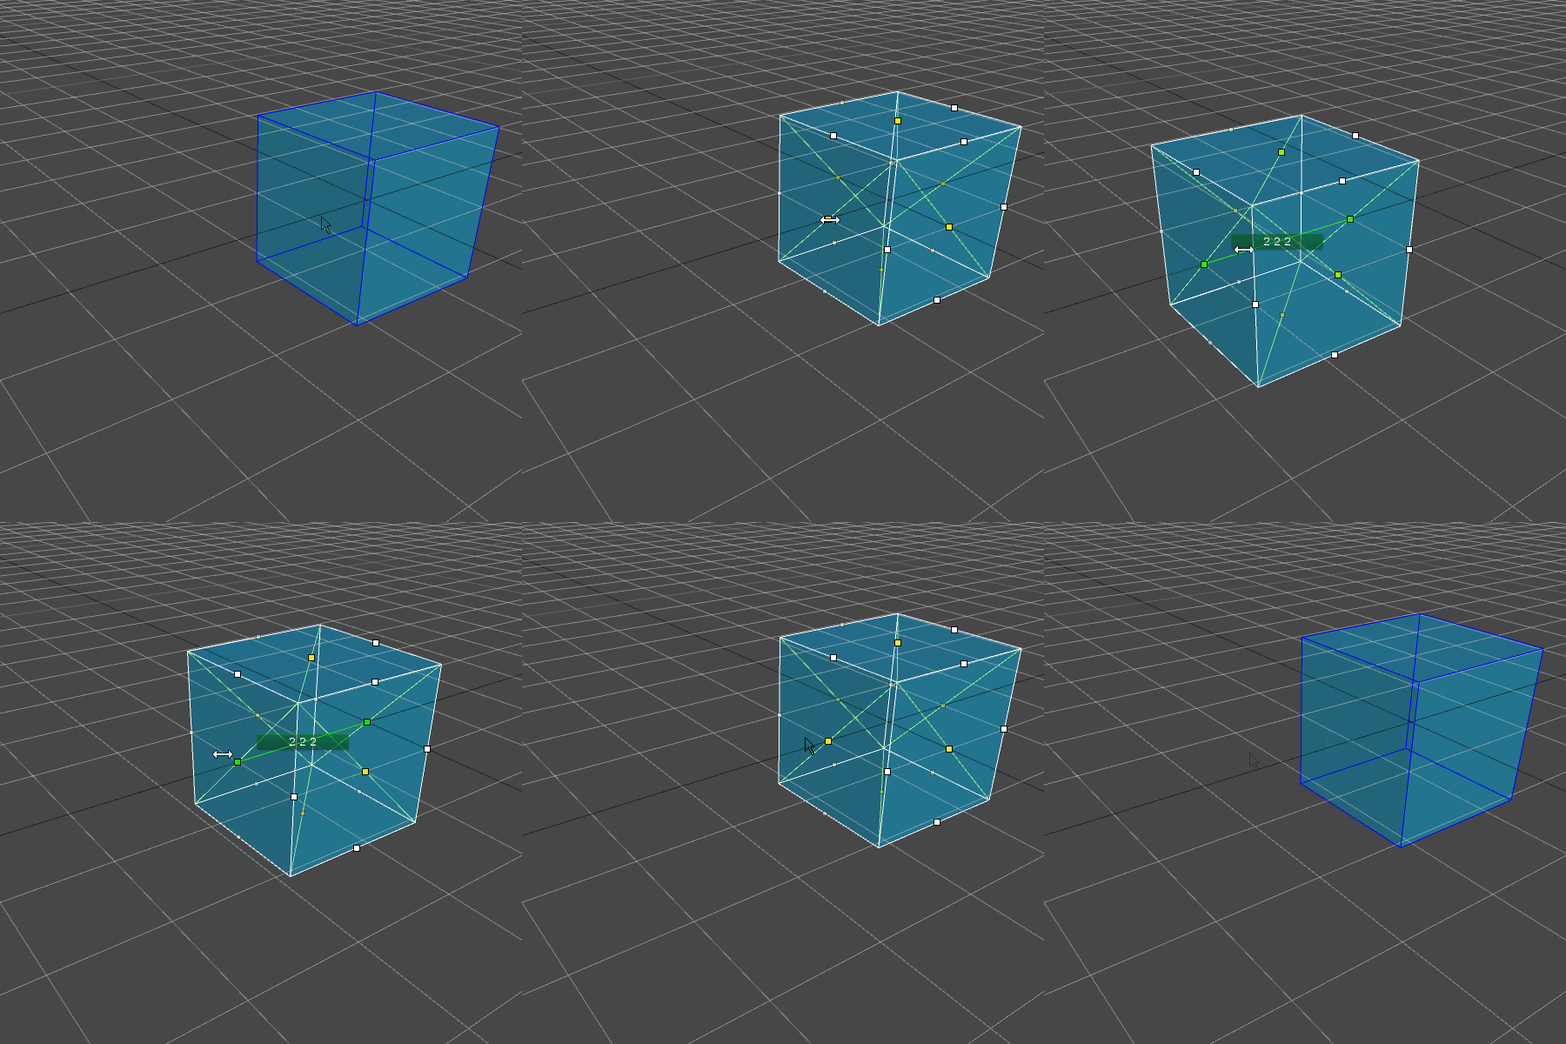
Once you have selected a brush in Resize mode, white and yellow handles will appear at the center of edges and faces of the brush’s bounding box. When you click any of these handles, a green line will appear between it and the one across the center from it. For example, by clicking the yellow resize handle on the top of a bounding box, a green line will appear between it and the yellow resize handle on the bottom of the bounding box. Dragging the clicked handle will lengthen or shorten the brush along the green line or axis. Yellow handles allow you to resize the brush in one axis, while white handles allow you to resize the brush in two axes.

Scaling a brush in Resize Mode
When resizing, the dimensions of the brush will be displayed showing the width, height, and length. When starting a level, it is often useful to quickly create several large brushes to form a base; the displayed dimensions let you quickly create a brush of the right shape and volume.

Scaling a brush
With more complex brushes, scaling can force the vertices out of alignment with the grid. Because of this, it is sometimes better to perform these edits in Vertex mode to begin with, but it is also possible to snap the vertices back into grid alignment in Vertex mode as described later.
There are several ways to move a brush in Resize mode, and the most useful will depend on the situation and the camera position. All of these modes will require you to first have a brush or brushes selected.
The most direct way to move a brush is to click and drag a face of the bounding box. This will move the brush according to the axes that the face is on. That is, the final position after moving the brush will be coplanar to the original position of the face. For example, clicking and dragging the top of a selected brush will let you move the brush along the X and Z axes.

Moving by dragging a face
When moving a brush by dragging its bounds, if you press Ctrl while dragging the selected brushes will be duplicated and you will be moving the duplicated brushes. This is a fast way of duplicating and moving existing brushes with a single mouse interaction.
Another way to move a brush is to click one of the resize handles, hold Ctrl, and then drag the mouse. Any time you click a resize handle, a green axis line appears between the selected handle and the one across the center from it. Moving the brush this way occurs along that green axis. For example, by clicking one of the yellow resize handles in the middle of the bounding box’s face and holding Ctrl, dragging the mouse will only move it along that green axis, effectively locking movement to one axis. Using one of the white resize handles centered on bounding box’s edges will allow you to move the brush along two axes in a way that is similar to clicking and dragging the bounding box’s faces.

Moving by clicking a handle, holding Ctrl, and dragging
To rotate a selected brush, hold control and then click and drag one of the resize handles. The axis of rotation will depend on the handle you click. By default, rotation will snap in units of 15 degrees. You can change the degree of snapping or toggle angular snapping altogether in the SabreCSG toolbar at the bottom of the active scene view.

Rotating a brush in Resize mode
Unless the rotation is in units of 90 degrees, the vertices of a rotated brush will no longer be aligned with the grid. This can make it difficult to align the brush with other brushes and create seamless levels. In vertex mode, there is an option to realign selected vertices to the grid. Sometimes it is useful to rotate a brush, use it as a rough guide for other brushes, and then delete the guide once you are done.

Rotating a brush
In addition to moving and rotating brushes through the resize bounds, you can also use Unity style widgets to translate and rotate them. To activate these widgets select the Translate or Rotate button near the top of the scene view while in Resize mode. Both widgets behave very similarly to their counterparts in Unity, except that they are tied to the SabreCSG snapping values which can be configured (or disabled) on the bottom toolbar.

Unity style widgets in action
For more information visit the official http://sabrecsg.com/ website, or join the official discord server:

Tutorials
Brush Tools
Primitive Brushes
Compound Brushes
Resources
Requests for comments
