简体中文 · English
This project is an open-source image upload tool designed to help users easily upload images to a Cloudflare R2 bucket and manage their image hosting needs. It provides a simple and efficient way to integrate with Cloudflare R2, allowing users to host images for free while maintaining full control over their data.
- Free and Open-Source: This tool is completely free and open-source, allowing users to modify and extend it according to their needs.
- Cloudflare R2 Integration: Seamlessly integrates with Cloudflare R2, leveraging its reliable and scalable storage infrastructure.
- Customizable Configuration: Users can easily configure the tool to match their specific requirements, including bucket settings and domain associations.
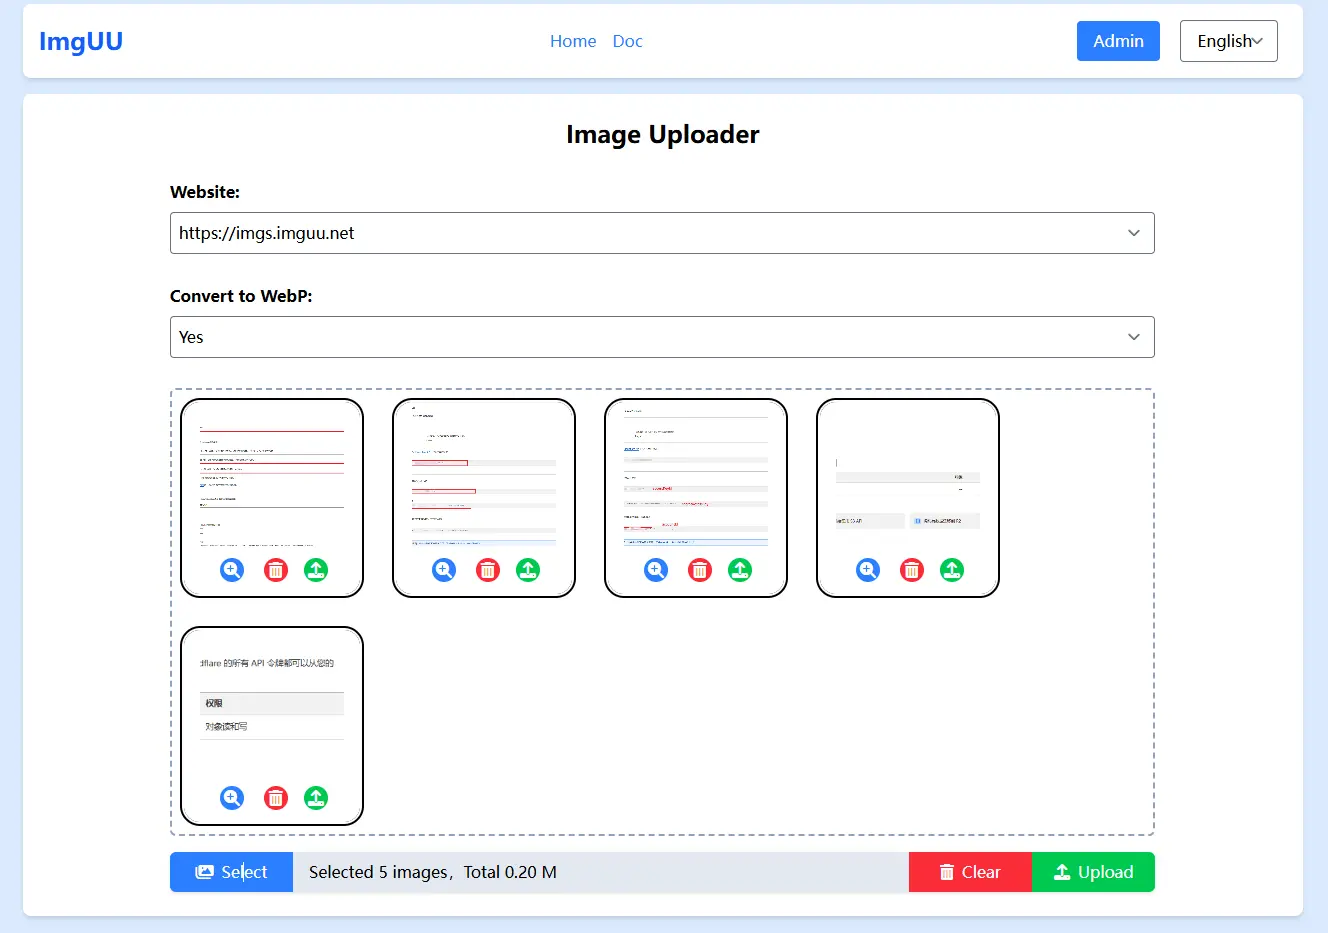
- User-Friendly Interface: The tool provides an intuitive and user-friendly interface for uploading images and managing uploads.
- Support for Multiple Formats: Supports various image formats and can be extended to support additional formats as needed.
| feature | Open Source | imguu.net |
|---|---|---|
| Github login | ✅ | ✅ |
| Upload website config | ✅ | ✅ |
| Storage config | ✅ | ✅ |
| Upload records | ✅ | ✅ |
| Convert to WebP | ❌ | ✅ |
- A Cloudflare account.
- A domain that is already configured with Cloudflare.
-
Create a Cloudflare R2 Bucket:
- Log in to your Cloudflare account.
- Navigate to the R2 Object Storage section.
- Create a bucket named
imguu(or any name you prefer). - Set the location based on your target audience's region and choose the standard storage class.
-
Create an API Token:
- Create an API token with access to the specified bucket.
- Set the TTL to permanent (or as needed).
- After creation, you will receive the following configuration parameters:
accessKeyIdsecretAccessKeyaccountId
-
Associate the Bucket with a Domain:
- Navigate to the
imguubucket settings. - Enter a domain (either the main domain or a subdomain) hosted on Cloudflare.
- Follow the prompts to connect the domain with the bucket.
- Navigate to the
-
Configure the Tool:
- Log in to the tool using your GitHub account.
- Enter the bucket configuration details obtained from Cloudflare.
- Set up the upload site and path templates as needed.
-
Upload and Test:
- Select the upload site.
- Drag and drop or copy and paste images into the upload window.
- Click "Upload" to start the process.
-
View Upload Records:
- You can view the upload records in the tool's backend.
- Get github login config
github.com -> Settings -> Developer Settings -> OAuth Apps -> New OAuth App
- Config
.env
cp .env.example .env
- Init D1 database
npm run initSql
- Deploy
npm run deploy
We welcome contributions from the community! If you would like to contribute, please follow these steps:
- Fork the repository.
- Create a new branch for your feature or fix.
- Make your changes and commit them.
- Push your changes to your fork.
- Submit a pull request to the main repository.
If you encounter any issues or have questions, please feel free to open an issue on the GitHub repository. We are here to help!
This project is licensed under the MIT License. See the LICENSE file for details.
This project is inspired by the need for a simple and efficient image hosting solution. Special thanks to the Cloudflare team for providing such a powerful and reliable storage service.