This package provides an XBlock for use with the open edX platform which provides a staff graded assignment. Students are invited to upload files which encapsulate their work on the assignment. Instructors are then able to download the files and enter grades for the assignment.
Note that this package is both an XBlock and a Django application.
Since this involves changing version-controlled files in edx-platform, it's a good idea to create
a branch in that repo for all SGA development. All of the edits below refer to edx-platform files or
configuration files in devstack. No files in the edx-sga repo need to be edited to install and use
the SGA XBlock in devstack.
-
Configure file storage
For file storage, SGA uses the same file storage configuration as other applications in edX, such as the comments server. devstack defaults to local storage, and fullstack defaults to S3. Using local file storage is the easiest option for hacking on and debugging SGA locally.
To configure SGA to use local storage, edit
lms/envs/private.pyto include these settings (and create the file if it doesn't exist yet):MEDIA_ROOT = "/edx/var/edxapp/uploads" DEFAULT_FILE_STORAGE = 'django.core.files.storage.FileSystemStorage'You can also configure S3 to be used as the file storage backend. Ask a fellow developer or devops for the correct settings to enable this. If you're using ansible to provision devstack, you may want to refer to this edX article on configuring data storage.
-
Add SGA to the Advanced Module List for your course in Studio
Open Advanced Settings for your course in Studio ("Settings" drop down in the top nav > "Advanced Settings"), and add
"edx_sga"to the "Advanced Module List" value (i.e.: the value for "Advanced Module List" should be a JSON list, and that list should include"edx_sga"). -
If necessary, add SGA to installed Django apps
NOTE: This is only needed if
edx_sgais not somehow included inINSTALLED_APPSalready. In edx-platform, an app can make its way intoINSTALLED_APPSin a few different ways, so the easiest thing to do is grep your edx-platform branch for 'edx_sga' and see if it appears inINSTALLED_APPS/OPTIONAL_APPS/etc. All releases of edx-platform since Dogwood already includeedx_sga, so this step is likely unnecessary.If SGA is not already an installed app, add this as a top-level setting in
/edx/app/edxapp/lms.env.jsonand/edx/app/edxapp/cms.env.json:"ADDL_INSTALLED_APPS": ["edx_sga"],Also in
/edx/app/edxapp/cms.env.json, add this to theFEATURESobject:"ALLOW_ALL_ADVANCED_COMPONENTS": true, -
Add the package as a dependency (or install manually)
If you want devstack to install a local branch of
edx-sgaand use any local changes that you make, you'll need to do the following:-
Find any requirements files that list an
edx-sgadependency and comment out those lines (there are many requirements files in theedx-platformrepo, and they're all.txtfiles, as is convention with pip). Note that the app as it's recognized by Django isedx_sgawith an underscore, but the repo isedx-sgawith a dash. -
Sync/mount your
edx-sgarepo directory to the Docker container or Vagrant VM (depending on which method you use to run devstack on your machine).-
In Vagrant, you can add this to the
Vagrantfilewithin theVagrant.configureblock (after runningvagrant uporvagrant reload, the directory will be mounted).:config.vm.synced_folder '/path/to/your/edx-sga', '/edx/app/edxapp/venvs/edxapp/src/edx-sga/', create: true, owner: 'edxapp', group: 'edxapp'
-
-
Add the mounted
edx-sgarepo directory as a dependency inrequirements/private.txt(creating the file if necessary):-e /edx/app/edxapp/venvs/edxapp/src/edx-sga
You should now be able to work with SGA blocks when you run LMS or Studio, and any local changes you make to SGA should be seen if you restart the server.
If the steps above don't suit your purposes (or they simply don't work), you may also try installing SGA manually (NOTE: These are old instructions):
sudo su - edxapp -s /bin/bash . edxapp_env pip install -e git+https://github.com/mitodl/edx-sga@release#egg=edx-sga -
Create a branch of edx-platform to commit a few minor changes:
-
Add SGA to the platform requirements
In
requirements/edx/github.txt, add:-e git+https://github.com/mitodl/edx-sga@release#egg=edx-sga -
Add appropriate
edx_sgasettings- In both
cms/envs/common.pyandlms/envs/common.py, add'edx_sga'toOPTIONAL_APPS - In
cms/envs/common.py, add'edx_sga'toADVANCED_COMPONENT_TYPES
- In both
-
Configure file storage
In production, the edx-platform uses S3 as the default storage engine. If you want to use file storage see the devstack/full instructions above. To configure S3 storage properly in the platform, set the following values in your
/edx/app/edxapp/lms.auth.jsonfile or, preferably, in your additional yaml overrides in your edx/configuration setup."AWS_ACCESS_KEY_ID": "your bucket AWS access key ID", "AWS_SECRET_ACCESS_KEY": "Your bucket AWS access key secret", "AWS_STORAGE_BUCKET_NAME": "Your upload bucket name",
-
Change Advanced Settings
- Open a course you are authoring and select "Settings" ⇒ "Advanced Settings
- Navigate to the section titled "Advanced Module List"
- Add "edx_sga" to module list.
- Studio should save your changes automatically.
-
Create an SGA XBlock
- Return to the Course Outline
- Create a Section, Sub-section and Unit, if you haven't already
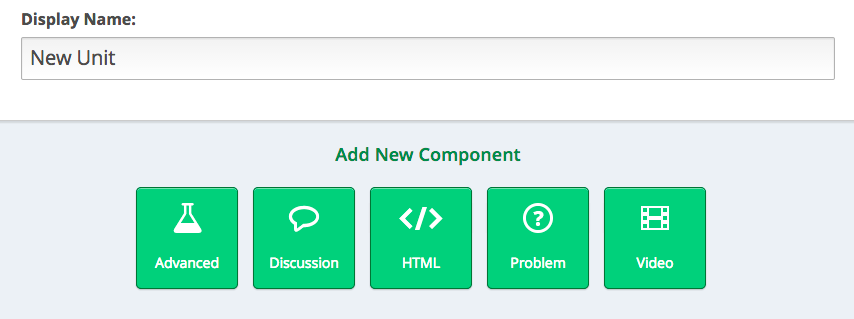
- In the "Add New Component" interface, you should now see an "Advanced" button
- Click "Advanced" and choose "Staff Graded Assignment"
-
Write a question with an SGA response
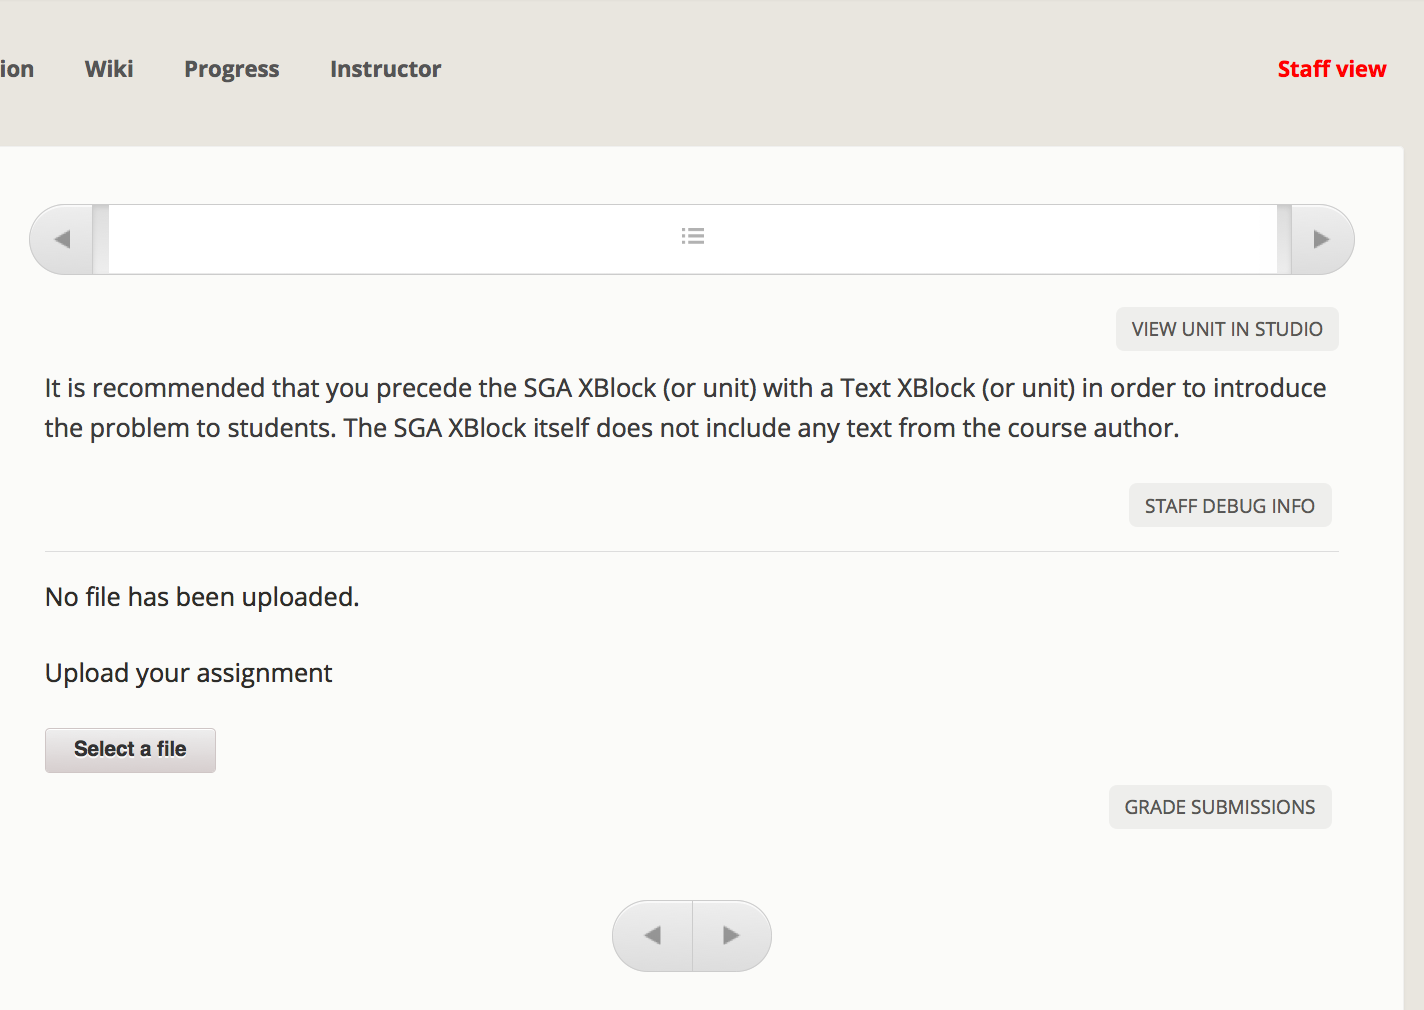
Since the Staff Graded Assignment doesn't support text within the problem, it is recommended to precede the SGA XBlock with a Text or HTML XBlock with instructions for the student. We recommend something using the following template:
Use the "Select a File" button below to choose the file you wish to have
graded. After you have chosen the file the button will change to the
name of the file. Click the button again to Upload.

When the upload is complete, a link will appear with the name of your
file. Click it to confirm that the upload was successful. You can replace
this file by simply selecting another file and uploading it. After
the due date has passed, you will no longer be able to upload files.
Note that any file type can be uploaded. If you expect a particular file type from your students, you should specify it in the instructions. If you wish students to upload multiple files, you can recommend they zip the files before uploading.
-
Settings
-
display_name: The name appears in the horizontal navigation at the top of the page
-
Maximum Score: Maximum grade score given to assignment by staff
-
Problem Weight: Defines the number of points each problem is worth.
-
Show Answer: Specifies if and when the student will see the correct answer to the problem.
-
Solution: The solution that is shown to the student if Show Answer is enabled for the problem.
-
Grading Policy
SGA XBlocks inherit grading settings just like any other problem type. You can include them in homework, exams or any assignment type of your choosing.
XML for an SGA XBlock consists of one tag with the five attributes mentioned above. It is recommended to also include a url_name attribute. For example:
<vertical display_name="Staff Graded Assignment">
    <edx_sga url_name="sga_example" weight="10.0" display_name="SGA Example" points="100.0" showanswer="past_due" solution="solution text" />
</vertical>
You can specify the following values for the show answer attribute.
- always
- answered
- attempted
- closed
- correct_or_past_due
- finished
- past_due
- never
-
Navigate to the student view (LMS) of the course and find the vertical with your Staff Graded Assignment. (If you are in Studio, click "View Live").
-
If you are Course Staff or an Instructor for the course, you will see a "Grade Submissions" button in the lower right corner of the XBlock (Be sure you are in "Staff View" indicated by a red label in the upper right corner of the page; if it says "Student View" in green, click on it once.)
-
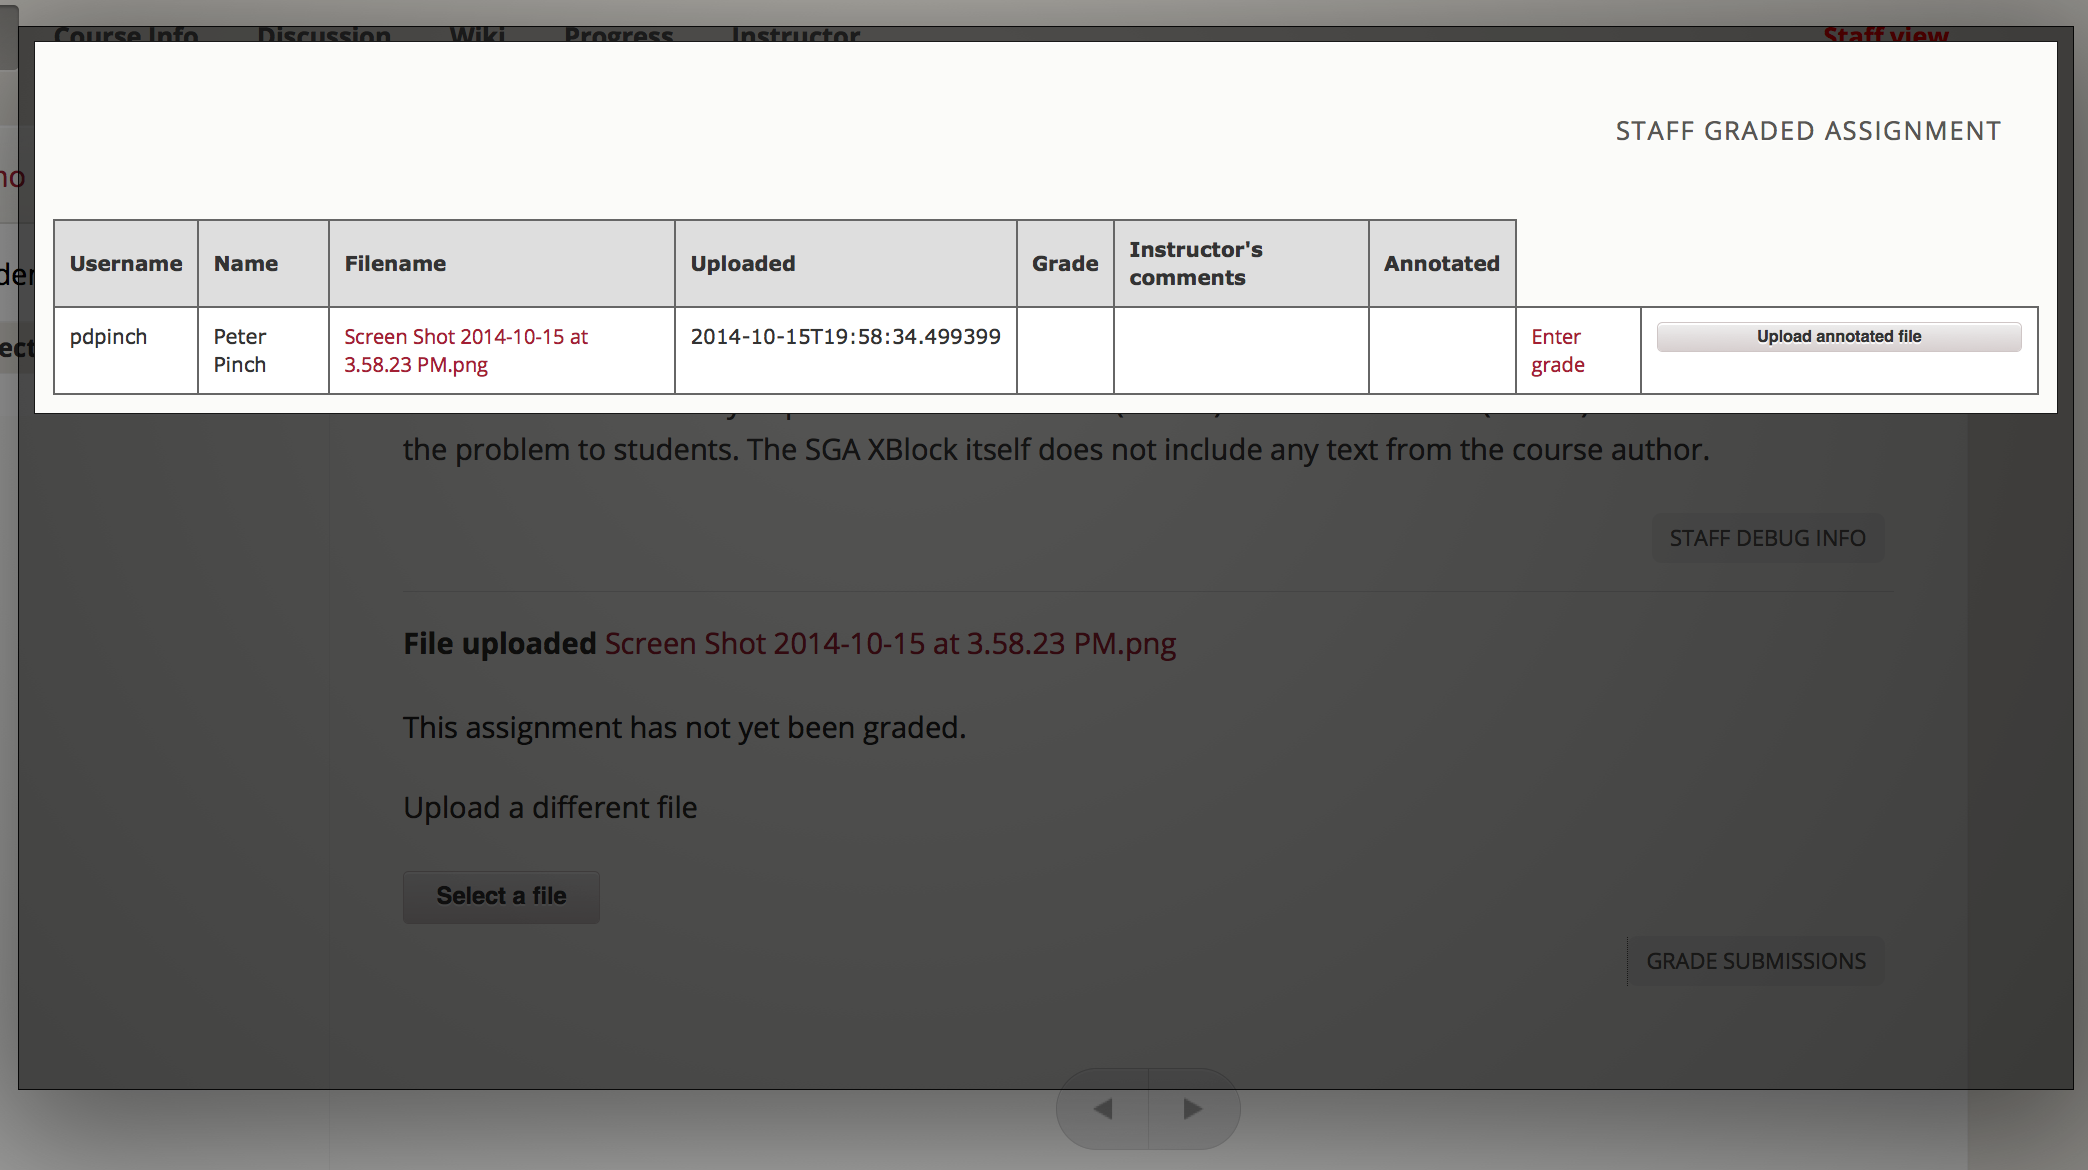
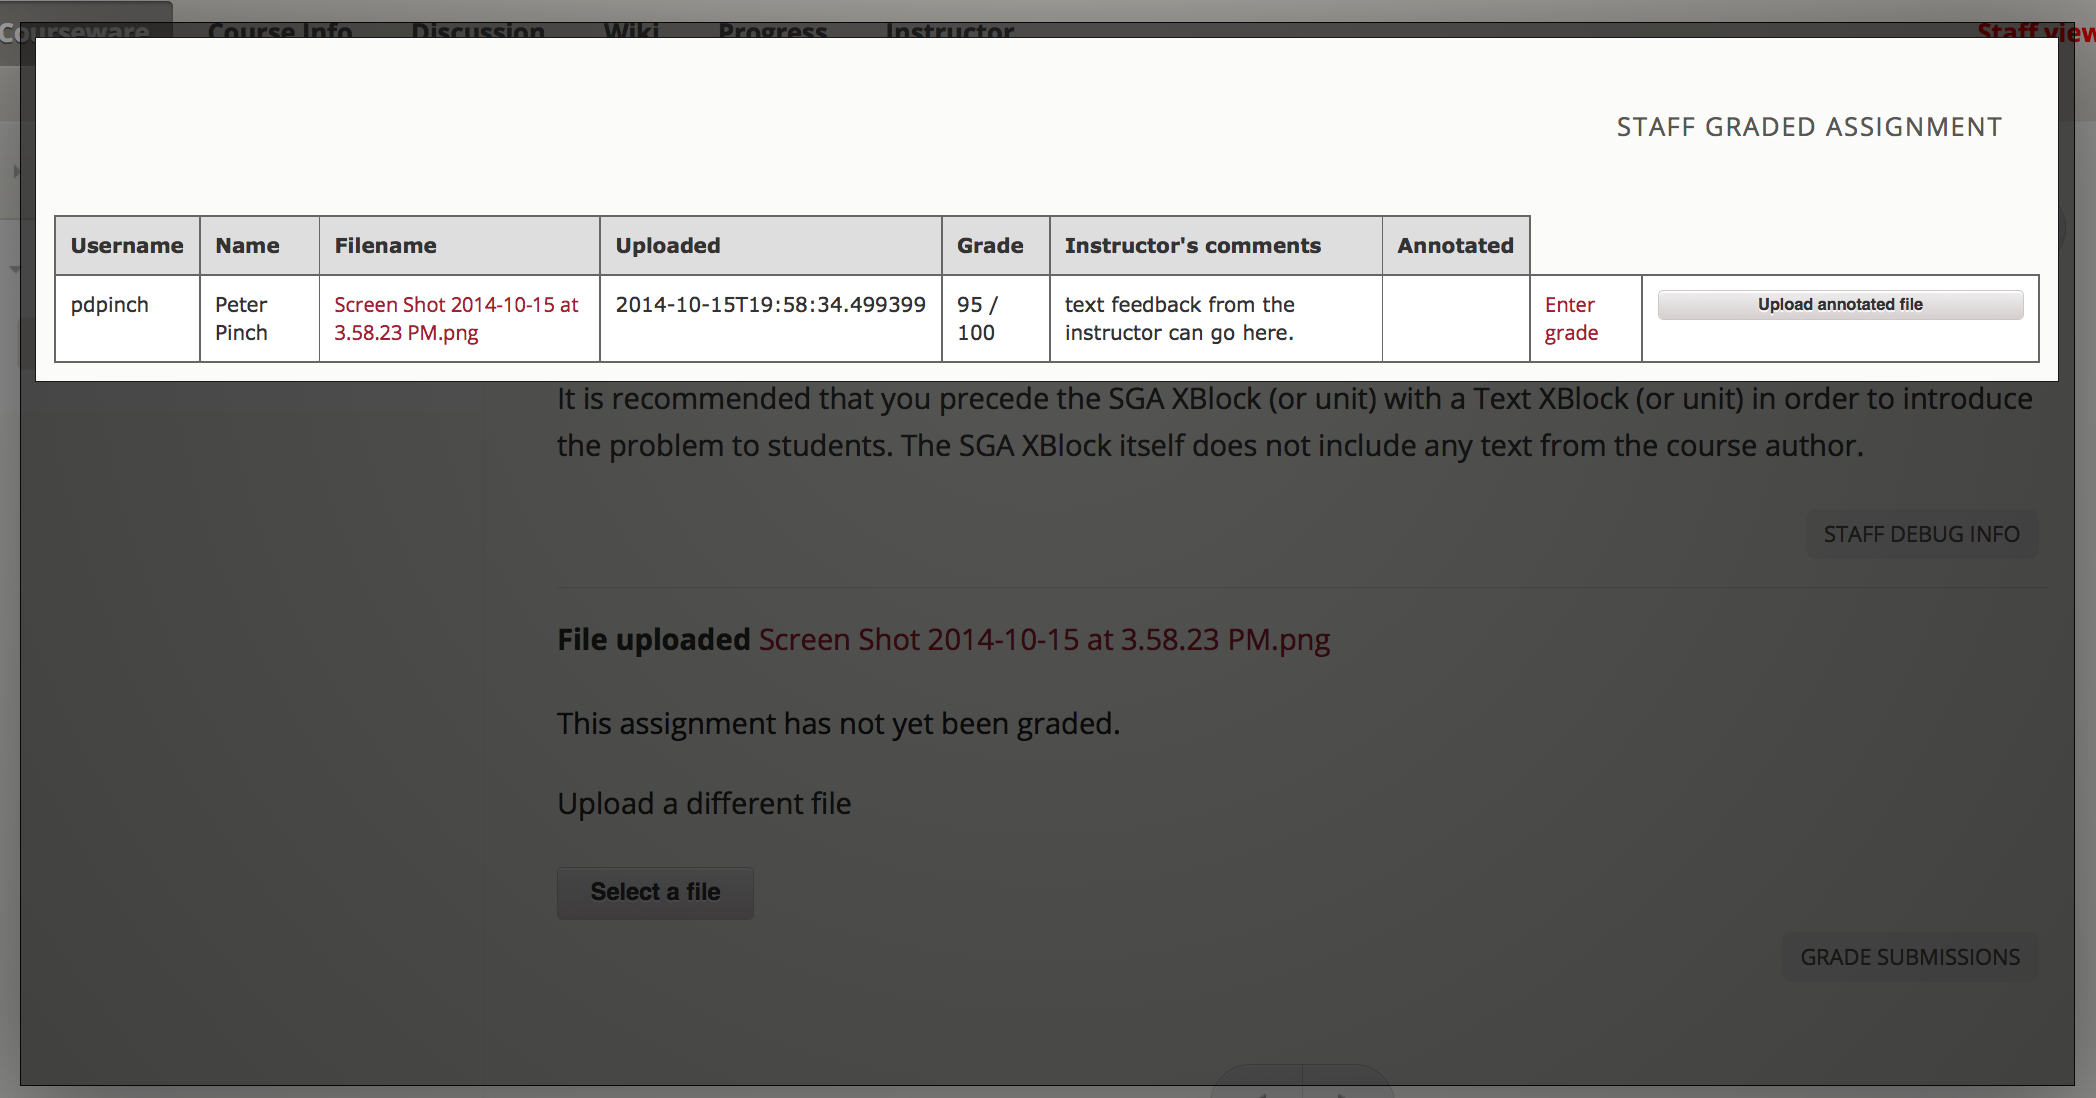
When you click "Grade Submissions" a grid of student submissions will display in a lightbox. Columns for username, (full) name, Filename and Uploaded (time) will be filled in.
-
Click the filename in any row to download the student's submission. If it can be displayed in your browser, it will.
-
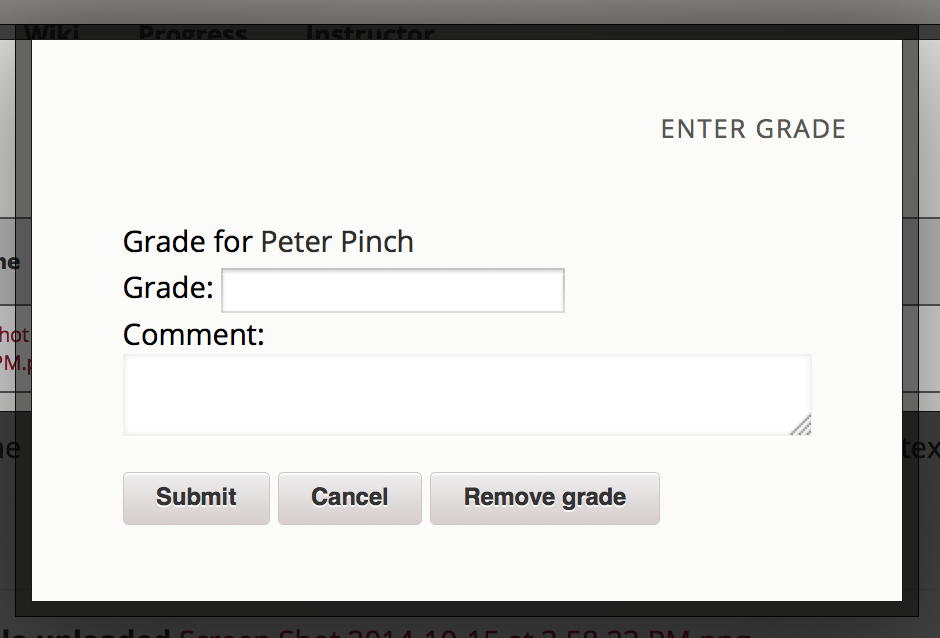
Click the Enter grade link to bring up an interface to enter grades and comments.
-
The grades and comments will appear in the grid. Use the "Upload Annotated File" button to upload a file in response to the student's submission. The student will be able to view the file along with her grade.
-
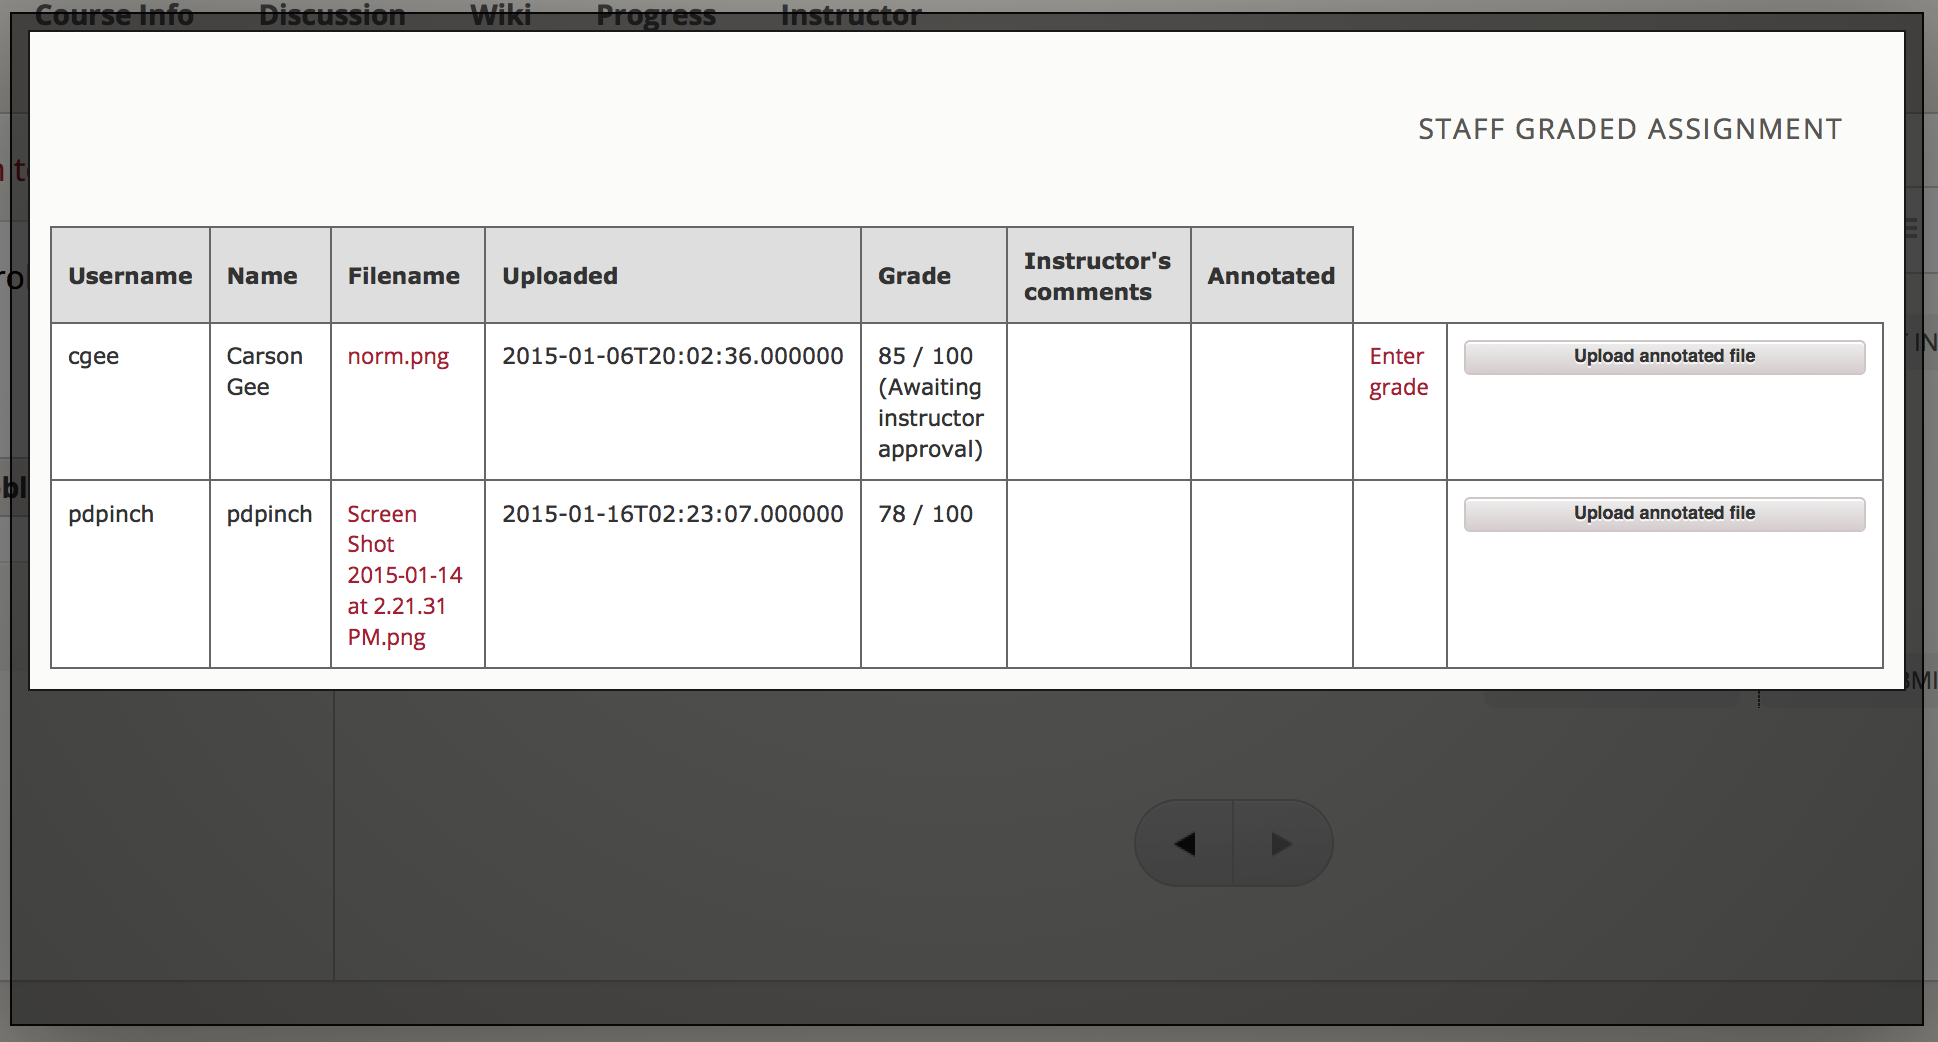
Course staff can enter grades, but they are not final and students won't see them until they are submitted by an instructor. When a grade is waiting for instructor approval, it appears in the submissions grid with the text
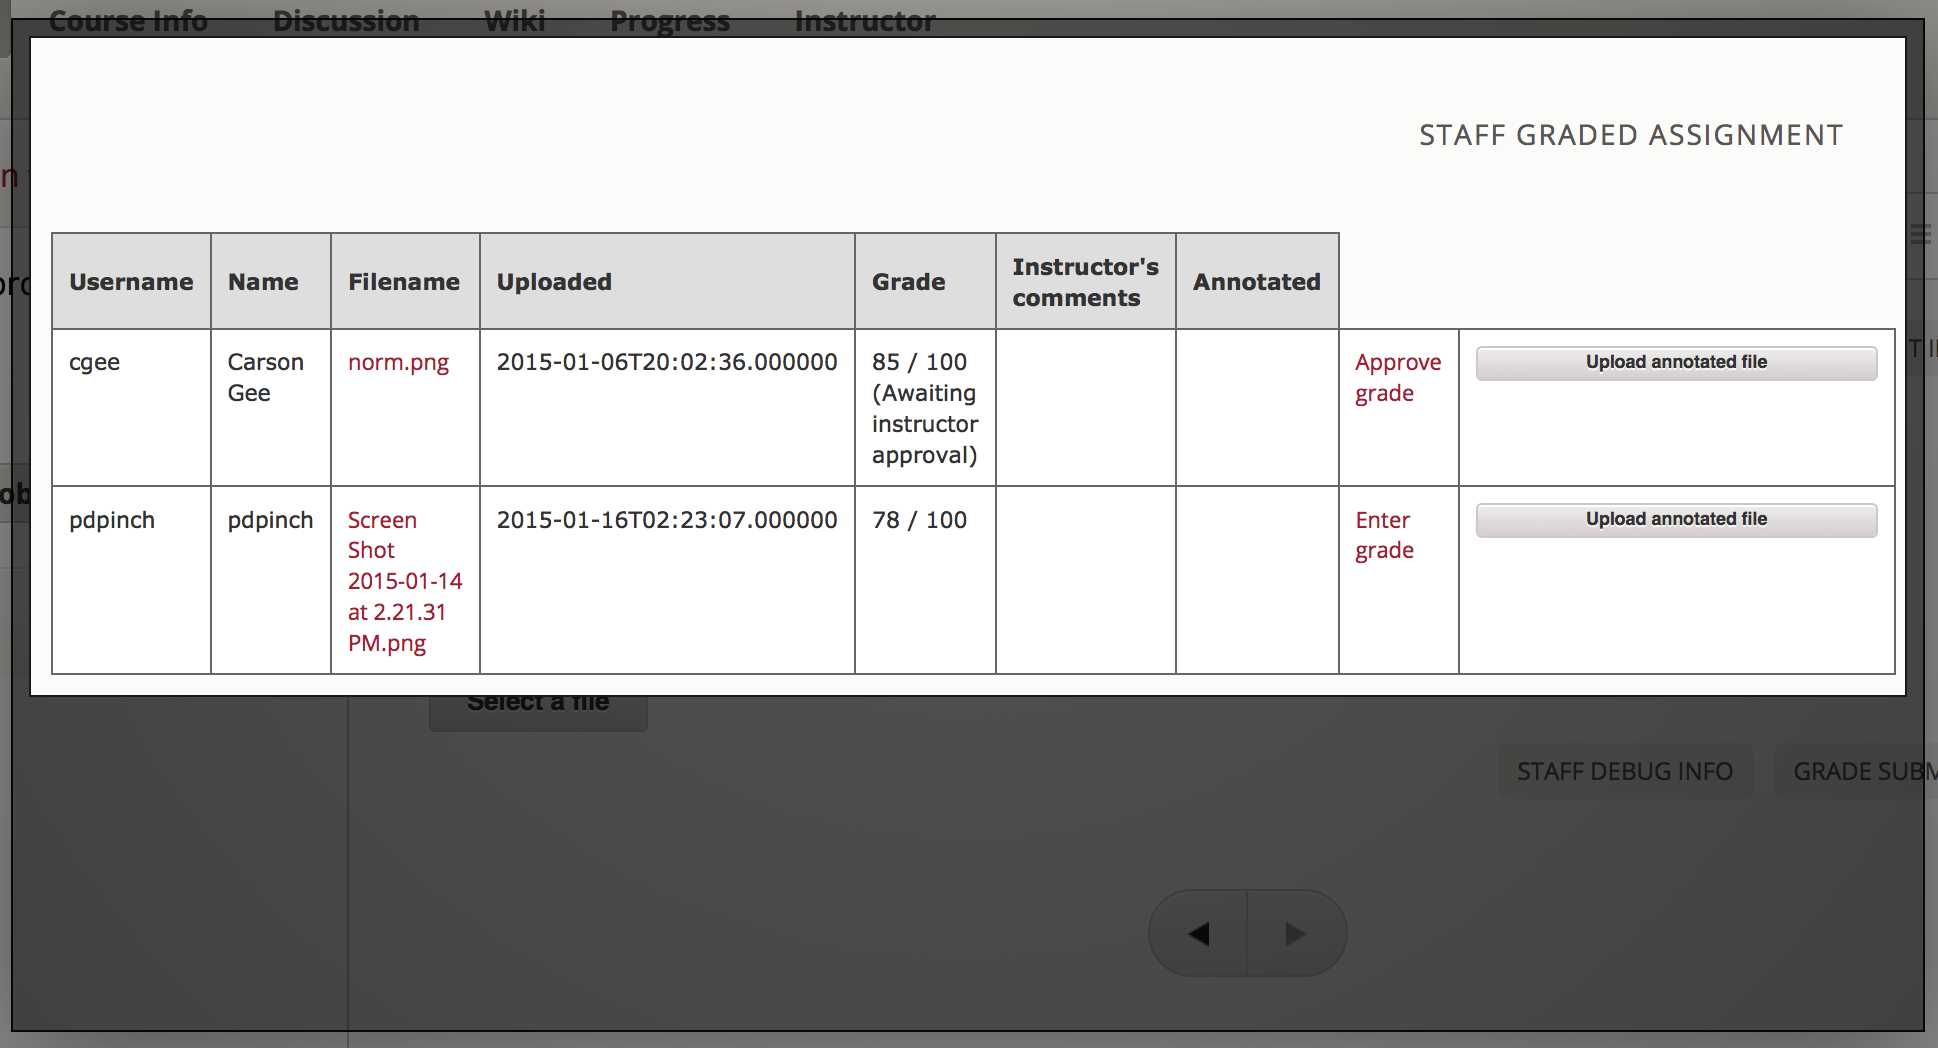
(Awaiting instructor approval)after it.After a course staff member has submitted a grade, the instructor will see a link to Approve grade instead of Enter grade.
Clicking Approve grade will open the same grading dialog box where, in addition to approving the grade, she can change the grade and the comment.
Once the instructor has approved or entered a grade, course staff members cannot change it. However, the instructor can always change a grade.
-
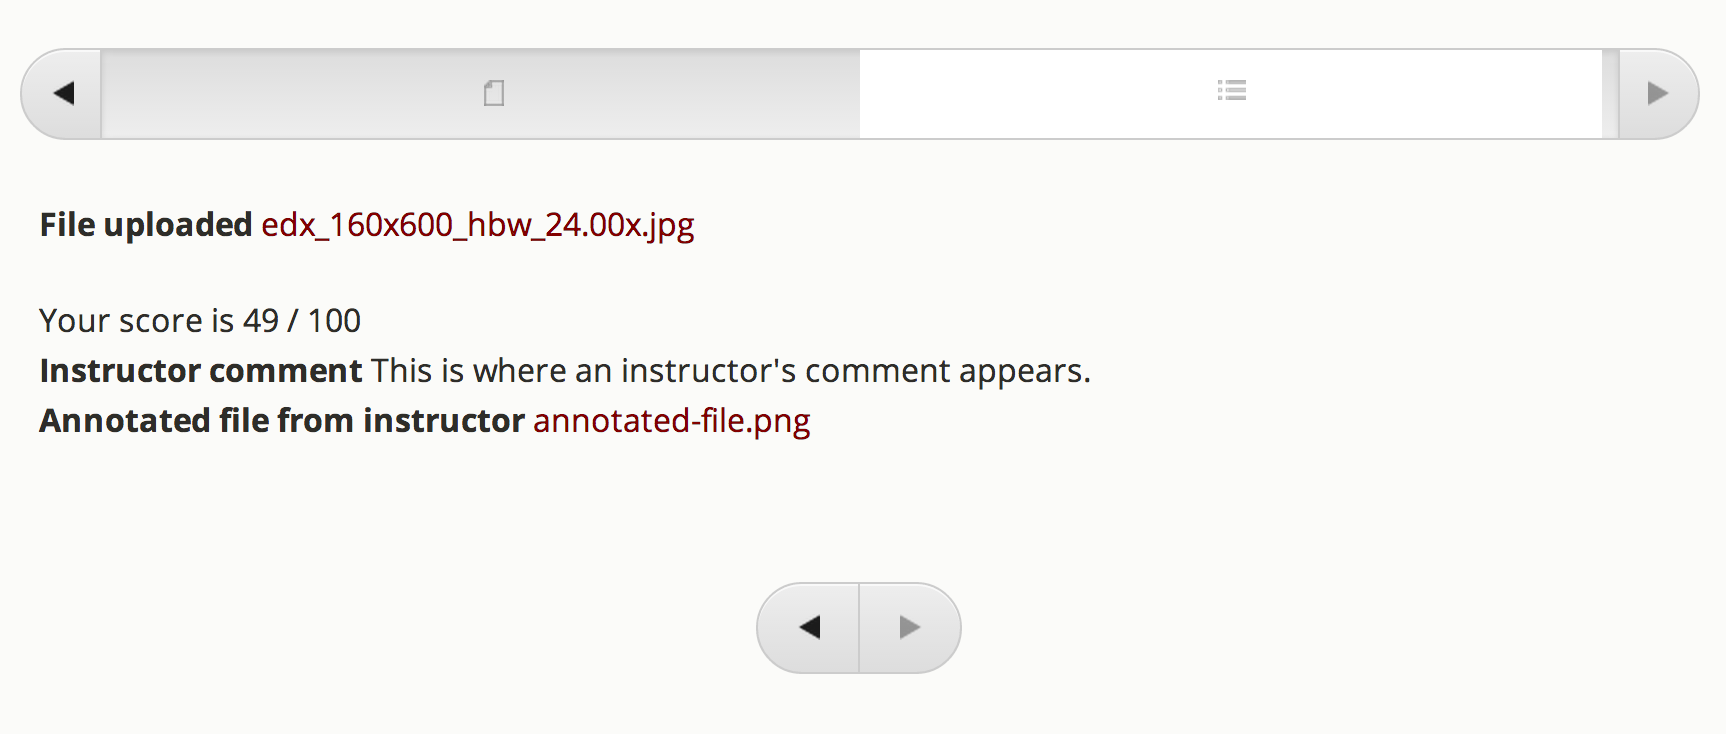
After the grade has been approved, the student will be able to see it inline and also in her progress page. Annotated files, if any, will be available for download.
Assuming edx-sga is installed as above, integration tests can be run in devstack with this command:
python manage.py lms --settings=test test edx_sga.tests.integration_testsTo run tests on your host machine (with a mocked edX platform):
# Run tests using different versions of Django
tox
# Run tests using a specific version of Django
tox -e py27-django111
To get statement coverage (in devstack):
coverage run --source edx_sga manage.py lms --settings=test test edx_sga.tests.integration_tests
coverage report -m
