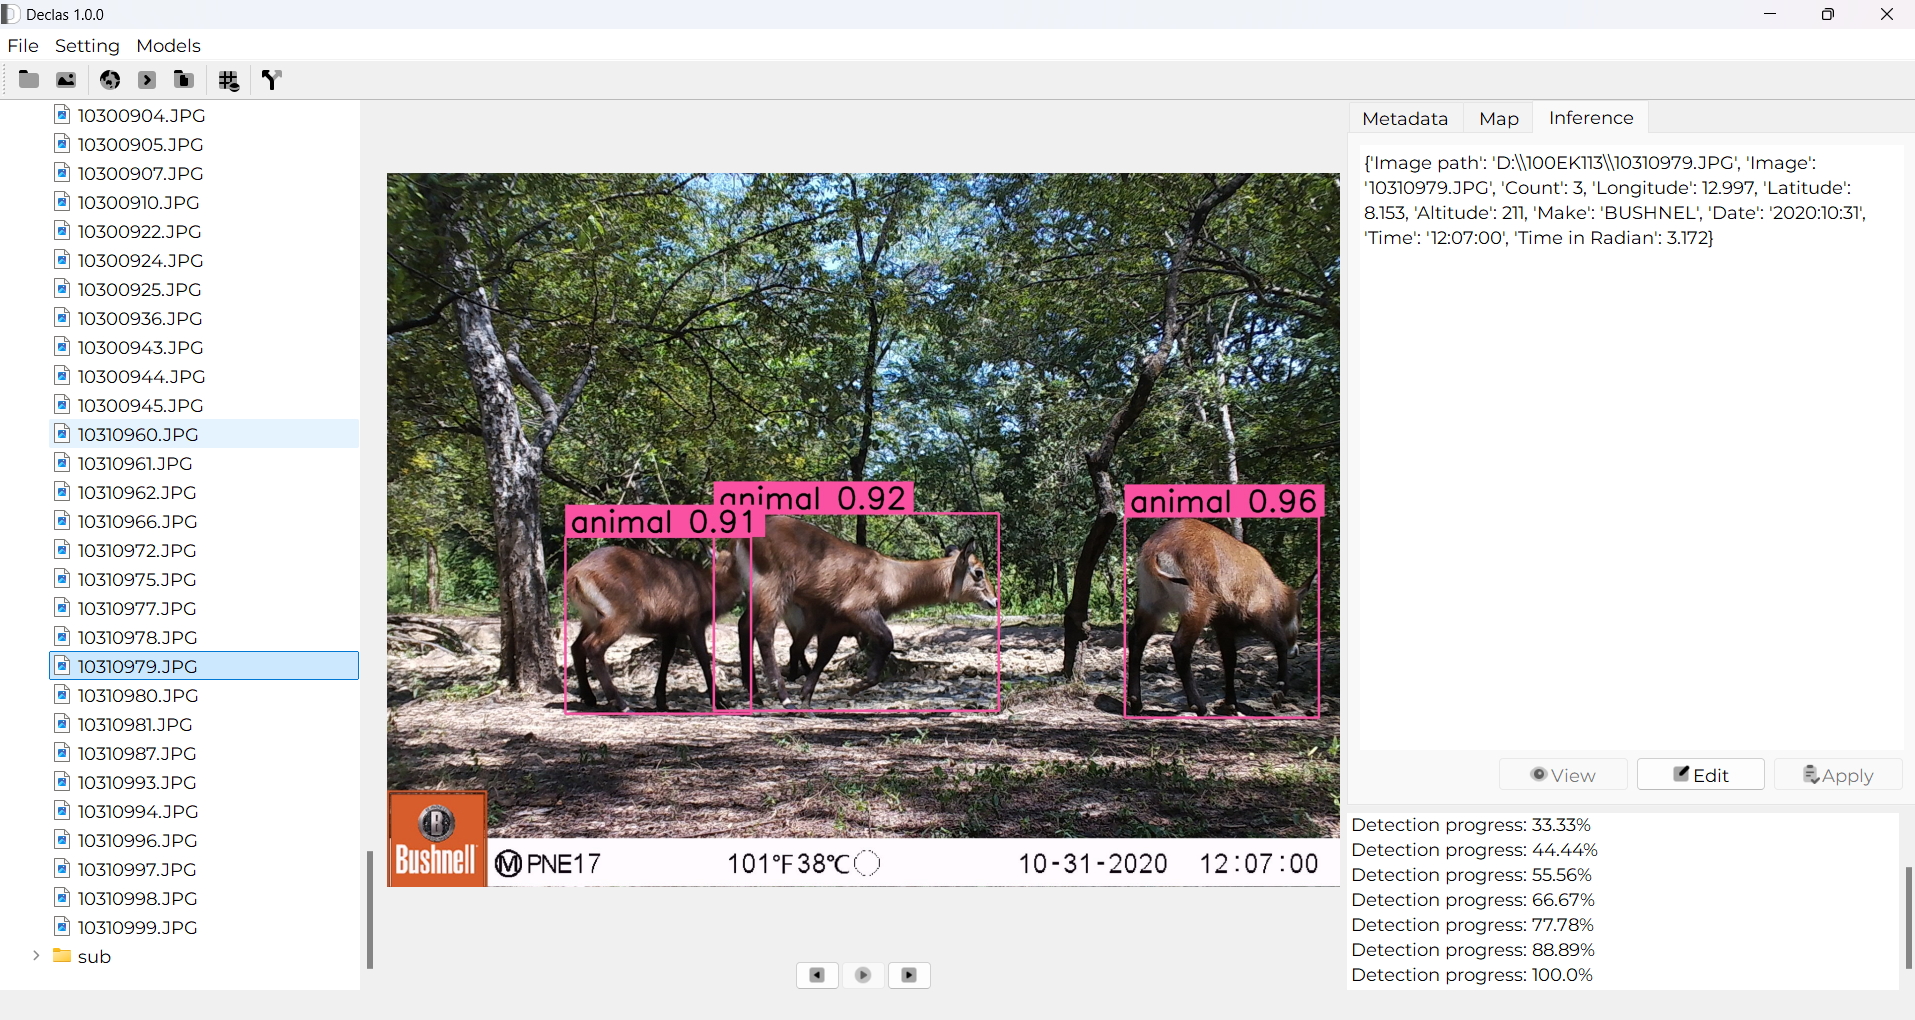
Declas is an open source software designed for animal detection and species classification on camera trap data. It leverages computer vision models, saving the time for data processing and cleaning, and improving the accuracy of data analysis.
- 🦌Animal detection and Species identification
- 👨🏾💻User-Friendly Interface
- 🗃️Mass detection or classification - Analyse single image or folder(s) with high optimization.
- ⚙︎Customizable Settings - Adjust settings and parameters for animal detection and species recognition based on specific requirements.
- 📄Comprehensive Reports - Generate detailed reports with detected animals or recognized species and relevant metadata in JSON and CSV.
- 🌫️Filter images - Separate empty images from images with at least one animal
- 🤖Extensibility - Easily extendable to include more species or custom recognition models.
This guide will provide step-by-step instructions to install and run the Declas software from source on Linux, macOS, and Windows systems.
-
Download the zip file.
-
Unzip the downloaded file and go into
Declasfolder. Double-clickDeclas.exefile to launch the software. -
Create a shortcut on Desktop (optional) pressing
Shift+Right clickonDeclas.exe. Got toSend to->Desktop (create shortcut). On the Desktop, the shortcut can be renamed asDeclas.
-
Download and install Python 3.7+ from python.org.
-
Important: During installation, ensure that the option to "Add Python to PATH" is selected.
-
Verify the installation by opening Command Prompt and running:
python --version
Download and install Git from git-scm.com. During the installation, use the default settings. Verify the installation by opening Command Prompt and running:
git --versionTo create a virtual environment, run the following commands in Command Prompt or PowerShell:
python -m venv venv
venv\Scripts\activate
You will need to activate the virtual environment by running venv\Scripts\activate.
Clone the repository by running the following commands in Command Prompt:
git clone https://github.com/yourusername/declas.git
cd declasInside the project directory, install the dependencies using:
pip install -r requirements.txtMake sure the virtual environment is activated if you're using one.
To run the Declas software, execute the following in Command Prompt or PowerShell:
python main.py-
Open a terminal and install Python 3.7+ using the following commands:
sudo apt update
sudo apt install python3 python3-pip
-
Verify the installation:
python3 --version
To clone the repository, Git must be installed. Install Git.
It's a good idea to use a virtual environment to isolate dependencies. Set up a virtual environment with:
python3 -m venv .venv
source .venv/bin/activate
You'll need to activate the virtual environment doing: source .venv/bin/activate.
Once Git is installed, clone the repository using the following commands:
git clone https://github.com/stangandaho/declas.git
cd declasInside the project directory (declas), install the required Python libraries by running:
pip install -r requirements.txtMake sure the virtual environment is activated before running the above command if you're using one.
Once all dependencies are installed, you can run the Declas software using:
python3 main.py-
Open the terminal and install Python 3.7+ using Homebrew. If you don’t have Homebrew installed, first install it by running:
/bin/bash -c "$(curl -fsSL https://raw.githubusercontent.com/Homebrew/install/HEAD/install.sh)" -
Once Homebrew is installed, use it to install Python:
brew install python
-
Verify the installation:
python3 --version
To clone the repository, Git must be installed. Install Git. Verify the installation:
git --versionTo create a virtual environment, run the following commands:
python3 -m venv venv
source venv/bin/activate
You'll need to activate the virtual environment by running source venv/bin/activate.
Once Git is installed, clone the repository using:
git clone https://github.com/stangandaho/declas.git
cd declasInside the project directory, install the required dependencies:
pip install -r requirements.txtMake sure the virtual environment is activated before running this command if you're using one.
To run Declas, execute:
python3 main.py-
Pip not found or outdated:
-
If you encounter an error related to
pip, ensure thatpipis installed and up to date:python -m ensurepip --upgrade pip install --upgrade pip
-
-
Permission Denied (Linux/macOS):
-
If you encounter permission issues during installation, try using
pipwithsudo(Linux/macOS):sudo pip install -r requirements.txt
-
-
Virtual Environment Not Activated:
- Ensure that your virtual environment is activated before running
pip installorpython main.py.
- Ensure that your virtual environment is activated before running
-
Python Not Recognized on Windows:
- If you encounter errors like "python not recognized", ensure Python was added to the system's PATH. You can modify the PATH manually through System Properties > Environment Variables or reinstall Python with the option to add to PATH selected.
If you encounter any issues, feel free to check the GitHub Issues page for possible solutions or create a new issue if the problem persists.
I welcome contributions from the community. If you'd like to contribute:
- Fork the repository.
- Create a new branch for your feature or bugfix.
- Submit a pull request detailing the changes you've made.
Declas is licensed under the MIT License. See LICENSE for more information.
For any inquiries or support, please contact me at [email protected].
