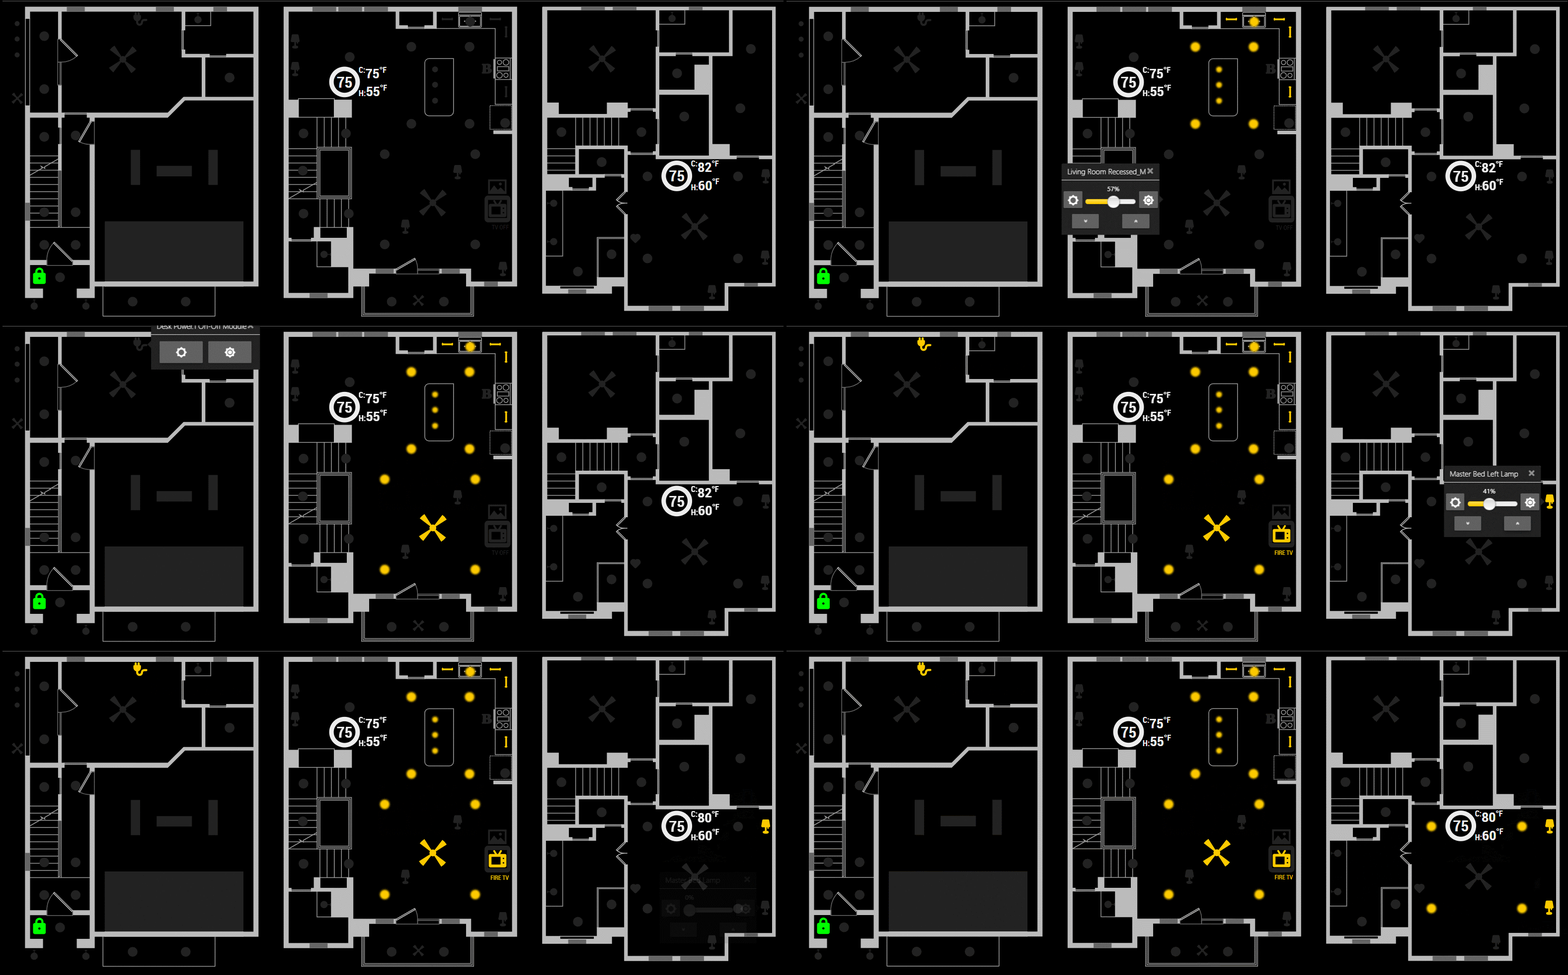
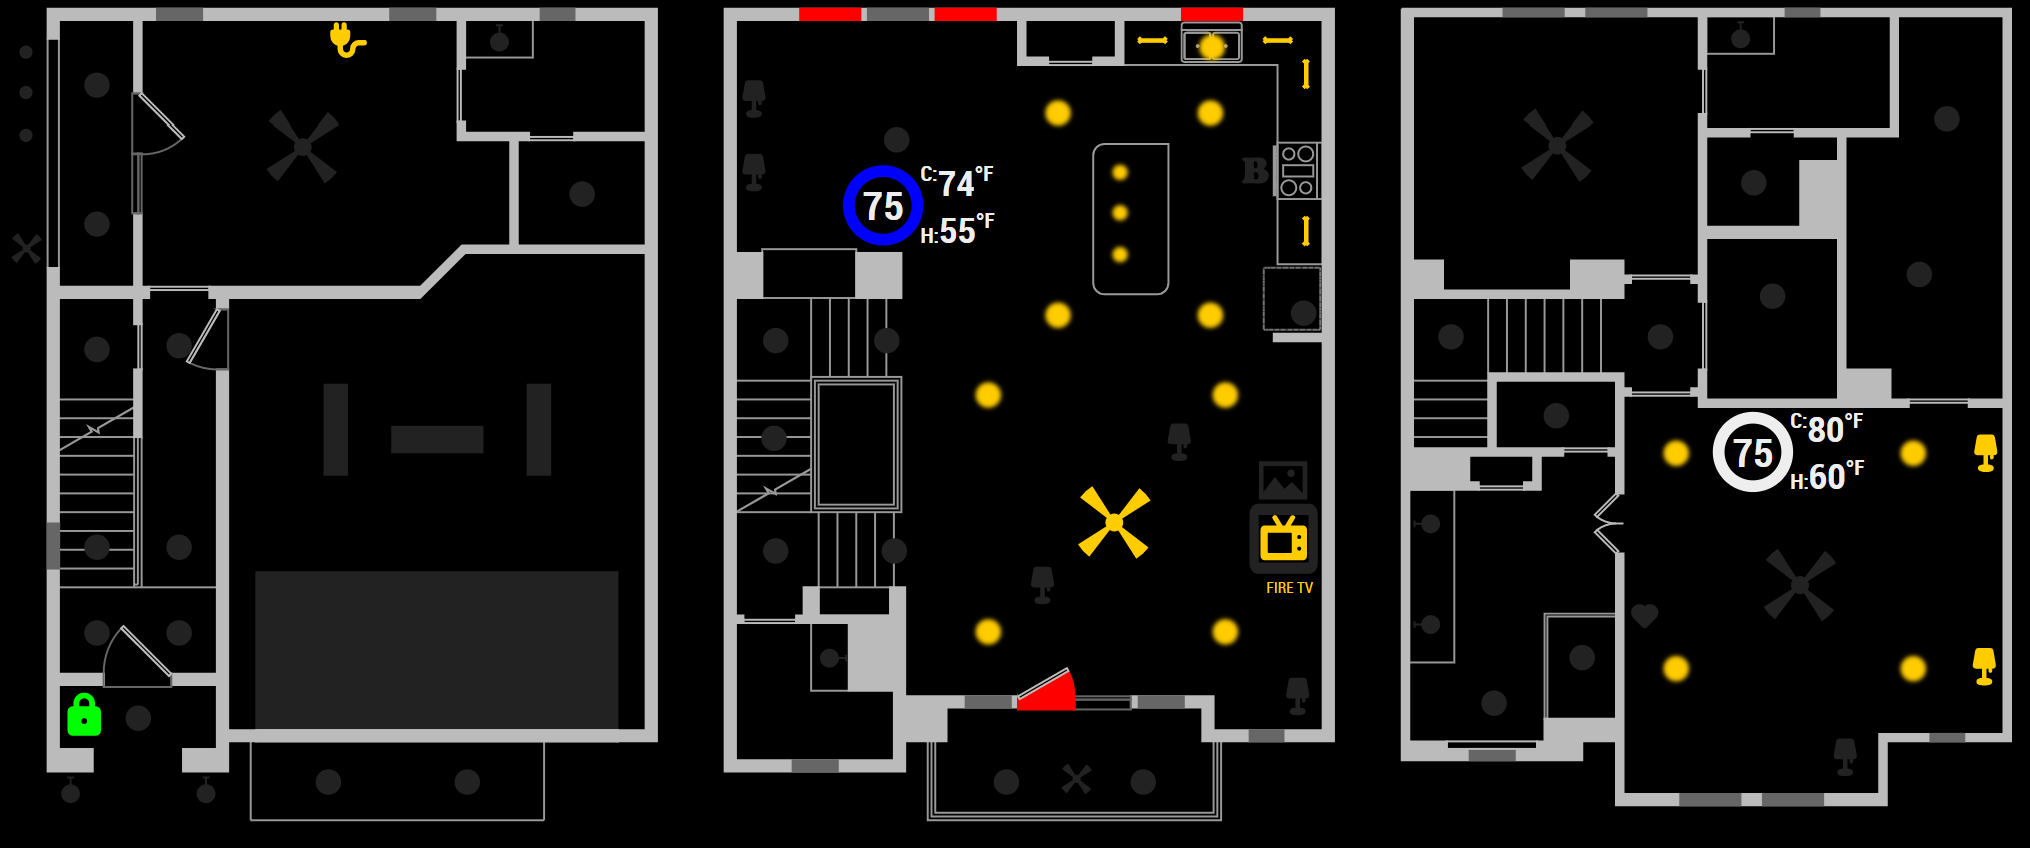
This is a module for the MagicMirror² to connect to an ISY device from Universal Devices. (http://www.universal-devices.com) and display a floor plan showing live updates of which Insteon or Z-Wave devices are on.
To use this module, add the following configuration block to the modules array in the config/config.js file:
var config = {
    modules: [
        {
            module: 'MMM-ISY',
            position: 'middle_center',
            config: {
                // See below for configurable options
            }
        }
    ]
}Animated View:
Static View:
The floor plan is an SVG (Scalable Vector Graphics) image which the module uses to link back to ISY Devices, Variables, & Programs(future).
You create an SVG file and add shapes/images/icons to represent your ISY Nodes/Variables. As long as the ids match up (see requirements below), your SVG comes to life and displays your entities' states in real time. If you're not familiar with SVG, it is a vector image in XML format, which allows a browser to interact with individual paths and shapes inside the file.
- You must create your own floor plan in your favorite SVG editor, such as Inkscape (Free, Open-source) or Adobe Illustrator, and save it in the module directory as
floorplan.svg. Seefloorplan.svg.examplefor an example. - Main SVG tag must include the following attributes:
Note: The
<svg ...
height="100%"
width="100%"
viewBox="0 0 1024 418"
class="isyFP"
preserveAspectRatio="xMaxYMax"
id="ISYFloorPlan"
...>
viewBoxattribute can be any size, it just must be present or the image will not scale in the browser. Here it's set to the unscaled dimension of the image. - IDs for ISY entities:
- Insteon Devices:
- ID must be of the form:
i_12AB561where the ISY Address for the device is12 AB 56 1. Omit leading zeros from Insteon Addresses where required (just like ISY does). For example, if the actual Insteon Address isAB.01.45, ISY will report it asAB 1 45 1and the SVG the ID should bei_AB1451.
- ID must be of the form:
- Insteon Thermostats:
- Recommendation is to copy the template from the bottom of
floorplan.svg.exampleand modify the graphics to suit your needs. Replace the first part of the tags with your thermostat's address, but the ids tails need to remain the same to update.- Thermostat Group:
i_12AB561-- same as above. - Current Temperature:
i_12AB561_CT - Heat Set Point:
i_12AB561_HSP - Cool Set Point:
i_12AB561_CSP - Current Status:
i_12AB561_ST-- Use CSS classes to customize the look for each status. The module will add a class with the name of the current status. In the example, the outer ring will turn blue when the unit is "cooling" and red when the unit is "heating" or white for "off". - Relative Humidity:
i_12AB561_RH
- Thermostat Group:
- Recommendation is to copy the template from the bottom of
- ISYv5 Node Server Nodes:
- ID must be the same as the node name in ISY: e.g.
n001_dsc1_z02. The module will look for any SVG tags that start withn0for these nodes.
- ID must be the same as the node name in ISY: e.g.
- Variables:
- ID must be of the form:
var_TYPE_ID. TYPE is the varable type in ISY, 1=INT, 2=STATE. ID is the variable ID from ISY. For ISY State Variable #46, the SVG ID would be:var_2_46.
- ID must be of the form:
- Programs: (future)
- ID must be of the form:
prog_PROGIDwhere PROGID is the ISY program ID; e.g.prog_00A1.
- ID must be of the form:
- Insteon Devices:
- Use Unique IDs:
- All SVG IDs should be unique. If you have multiple elements in your SVG for one device (e.g. 4 circles to represent 4 lights on 1 switch), the paths should be combined into 1, or the elements should be grouped together (in Inkscape use Ctrl+K to combine paths or Ctrl+G to create a group--the proper ID label should be placed on the group tag).
- Add CSS Classes:
- The module uses CSS classes "isyON" and "isyOFF" to toggle devices ON and OFF.
- In the SVG, each entity should be how you want it to look when "OFF".
- Add the class "isyOFF" to each entity (e.g.
<circle class="light isyOFF">. - You can customize what "ON" and "OFF" looks like for different devices or device types by customizing the CSS. The example above added a class "light" to the tag, so in the CSS, a custom
.light.isyON { }can be used to specify what "ON" looks like for type "light". Place any CSS customizations in~/MagicMirror/css/custom.css.
- Clone the repo into your
~/MagicMirror/modulesdirectory - Run the following to install the dependencies & edit your ISY configuration
cd MMM-ISY
npm install
cp isy.json.example isy.json
nano isy.json
Note: for security reasons, the ISY settings are not stored in the MagicMirror's config.js file.
- This module uses the
shbatmfork ofrodtoll'sisy-jsto connect to the ISY via WebSocket. This fork has been modified to include Insteon Thermostats as well as some minor bugfixes that make this module work smoother. rodtollalso has a greatfake-isy-994itool which can be used for testing withouth actually connecting to your ISY and manipulating devices.
| Option | Description |
|---|---|
maxWidth |
Optional Maximum width of the module. Default: 98% |
enableControls |
Optional Choose to enable the control subsystem, allowing you to control the devices by clicking on the individual devices in the graphic. Default: false. |
nodes |
Optional Array of ISY Nodes customizations. By default, you do not need to provide a list of nodes in the config. As long as the elements in your floorplan.svg are tagged properly, they will automatically be updated. This setting is used to provide advanced node properties. See Advanced Properties below. |
variables |
Optional Array of ISY Variable customizations, similar to nodes above. |
floorplan |
Optional to set a custom file name for the base floorplan. Default: floorplan.svg |
thermostats |
Optional An object representing the Insteon Thermostats to display. Example: thermostats: {'i_2517A4': { position: { left: 44%, top: 42%, zoom: 1.5 }', showRelHum: true, showSetPoints: true }}Note: only include the base Insteon address in the device address (leave of the trailing 1, 2, 3, that the ISY enumerates). |
.position |
The CSS Style to be applied describing the position and size of the T-Stat. |
.showRelHum |
Whether or not to show the relative humidity reported by the device. |
.showSetPoints |
Whether or not to show the Heating and Cooling Setpoints. If false only the current temperature is shown. |
Advanced Properties can be set for individual nodes and variables, which lets you customize how they behave, such as setting custom On and Off values, inverting On and Off, or even performing an action when the device/variable changes by sending a module notification.
This example customizes the n001_dsc1_z02 element, which in this case is the motion sensor for the Alarm. Instead of just turning "ON" it flashes the element on the floor plan. It also sends a notification to the MMM-OnScreenMenu module to turn on the monitor when motion is detected and turn it off when it clears.
nodes: {
    'n001_dsc1_z02': {
        onVal: 1,
        offVal: 0,
        flash: true,
        notifyOn: {
            notification: "ONSCREENMENU_PROCESS_ACTION",
            payload: 'monitorOn'
        },
        notifyOff: {
            notification: "ONSCREENMENU_PROCESS_ACTION",
            payload: 'monitorOff'
        }
    }
}| Option | Description |
|---|---|
onVal & offVal |
The values to use for when to show the Variable as "On" or "Off" on the floor plan. |
inverted: true |
Invert the normal ON and OFF states (e.g. Garage Door sensor). Cannot be used with flash use onVal: 0, offVal: 1 if you want to flash an inverted node. |
flash: true |
Optional Setting this to true will show the device pulsing on and off. The actual animation can be changed by overriding the isyFlashNode class in the MMM-ISY.css file. |
notifyOn & notifyOff |
Optional To send a module notification when a variable changes, add one or both of these. Format: { notification: "NOTIFICATION_TEXT", payload: "payload to send" } |
useProp |
Optional Add to use a property other than ST for the devices' Current State (e.g. GV3). See CHANGELOG v1.0.5 for details. |
customStatusText |
Optional If you have a text span in the SVG file for a device, named (node address)_tspan and provide and provide an object with text to use for each status, the text will be updated. See text under the TV icon in the screenshot above for demo. |
showStatusText |
FUTURE Optional If you have a text span in the SVG file for a device, named (node address)_tspan and showStatusText: true in your config for that node, the text will be updated with the formatted status (e.g. dimming level in %). |
{
    module: 'MMM-ISY',
    position: "middle_center",
    header: "House Status",
    config: {
        nodes: {
            'n001_dsc1_z02': {
                onVal: 1,
                offVal: 0,
                flash: true,
                notifyOn: {
                    notification: "ONSCREENMENU_PROCESS_ACTION",
                    payload: 'monitorOn'
                },
                notifyOff: {
                    notification: "ONSCREENMENU_PROCESS_ACTION",
                    payload: {
                        actionName: "delayed1",
                        action: "monitorOff",
                        delay: 60000,
                    }
                }
            },
            "i_2277CB1": { inverted: true },
            "n007_h1509751175b7e": { useProp: "GV3", offVal: 0 }
        },
        variables: {
            "var_2_48": { onVal: 1, offVal: 0 }
        },
        thermostats: {
            'i_2517A4': { position: {left: '42%', top: '30%' }, showRelHum: true, showSetPoints: true },
            'i_251A84': { position: {left: '73%', top: '21%' }, showRelHum: false, showSetPoints: true }
        },
    }
},- Use of SVG format inspired by: Home Assistant-HA-Floorplan Plugin

