-
Notifications
You must be signed in to change notification settings - Fork 0
Home
Google Tag Manager (GTM) allows you to implement Seedtag-universal Tag pixels easily. This article will guide you through adding and configuring the Seedtag tag in GTM in a few simple steps.
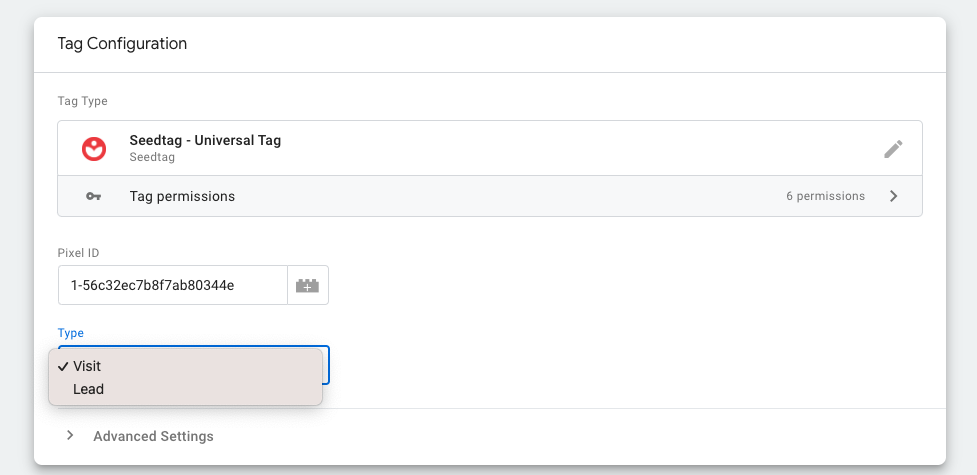
To get started with tracking via Seedtag, you'll need to create the necessary tags in GTM. Seedtag - Universal Tag, supports both Visit and Lead tags.
Navigate to the Templates section in GTM.

In the Tag Templates section, click "Search Gallery" to find the Seedtag - Universal Tag.

Click "Add to workspace" to install the Seedtag template.

Create a new tag by navigating to the “Tags” section and clicking "New".

Select the Seedtag - Universal Tag for your tag configuration.

Enter your Pixel identifier. Set the type to "Visit" for tracking visits across all pages.

Note: Please check with your support representative for your Pixel ID
Set up the trigger for the Visit tag by choosing 'All Pages' (Page View trigger) to ensure it fires on all page views.

We need to setup an additional trigger to track Qualified visits. A qualified visit is when the user stays on the website for 30 seconds.
You can create this timer Trigger by selecting 'Triggers' on the left navigation pane and then 'New'.
Set a name, click the 'Trigger Configuration' box and choose 'Timer' trigger type.
Set values as seen on following screenshot:

Event name must be set to seedtag.timer.
Interval value must be set to 30000 (30 seconds).
A Page URL condition must be set to match any page (regex .*).
You must add the two triggers on the visit tag to track both visits and quailified visits:

Follow the same steps as for the Visit Pixel but set the tag type to "Lead".

Define a specific trigger that corresponds to the advertiser's definition of a lead event, such as a form submission. If you don’t already have a trigger for the lead event, Create a new trigger for the Lead event.

Choose from the available options that match your needs for the Lead event trigger.

Assign the created trigger to your Lead tag.

No need to to create a new Time trigger instance, you can assign the one created in Visit steps to your Lead Tag.
Save the Lead tag.

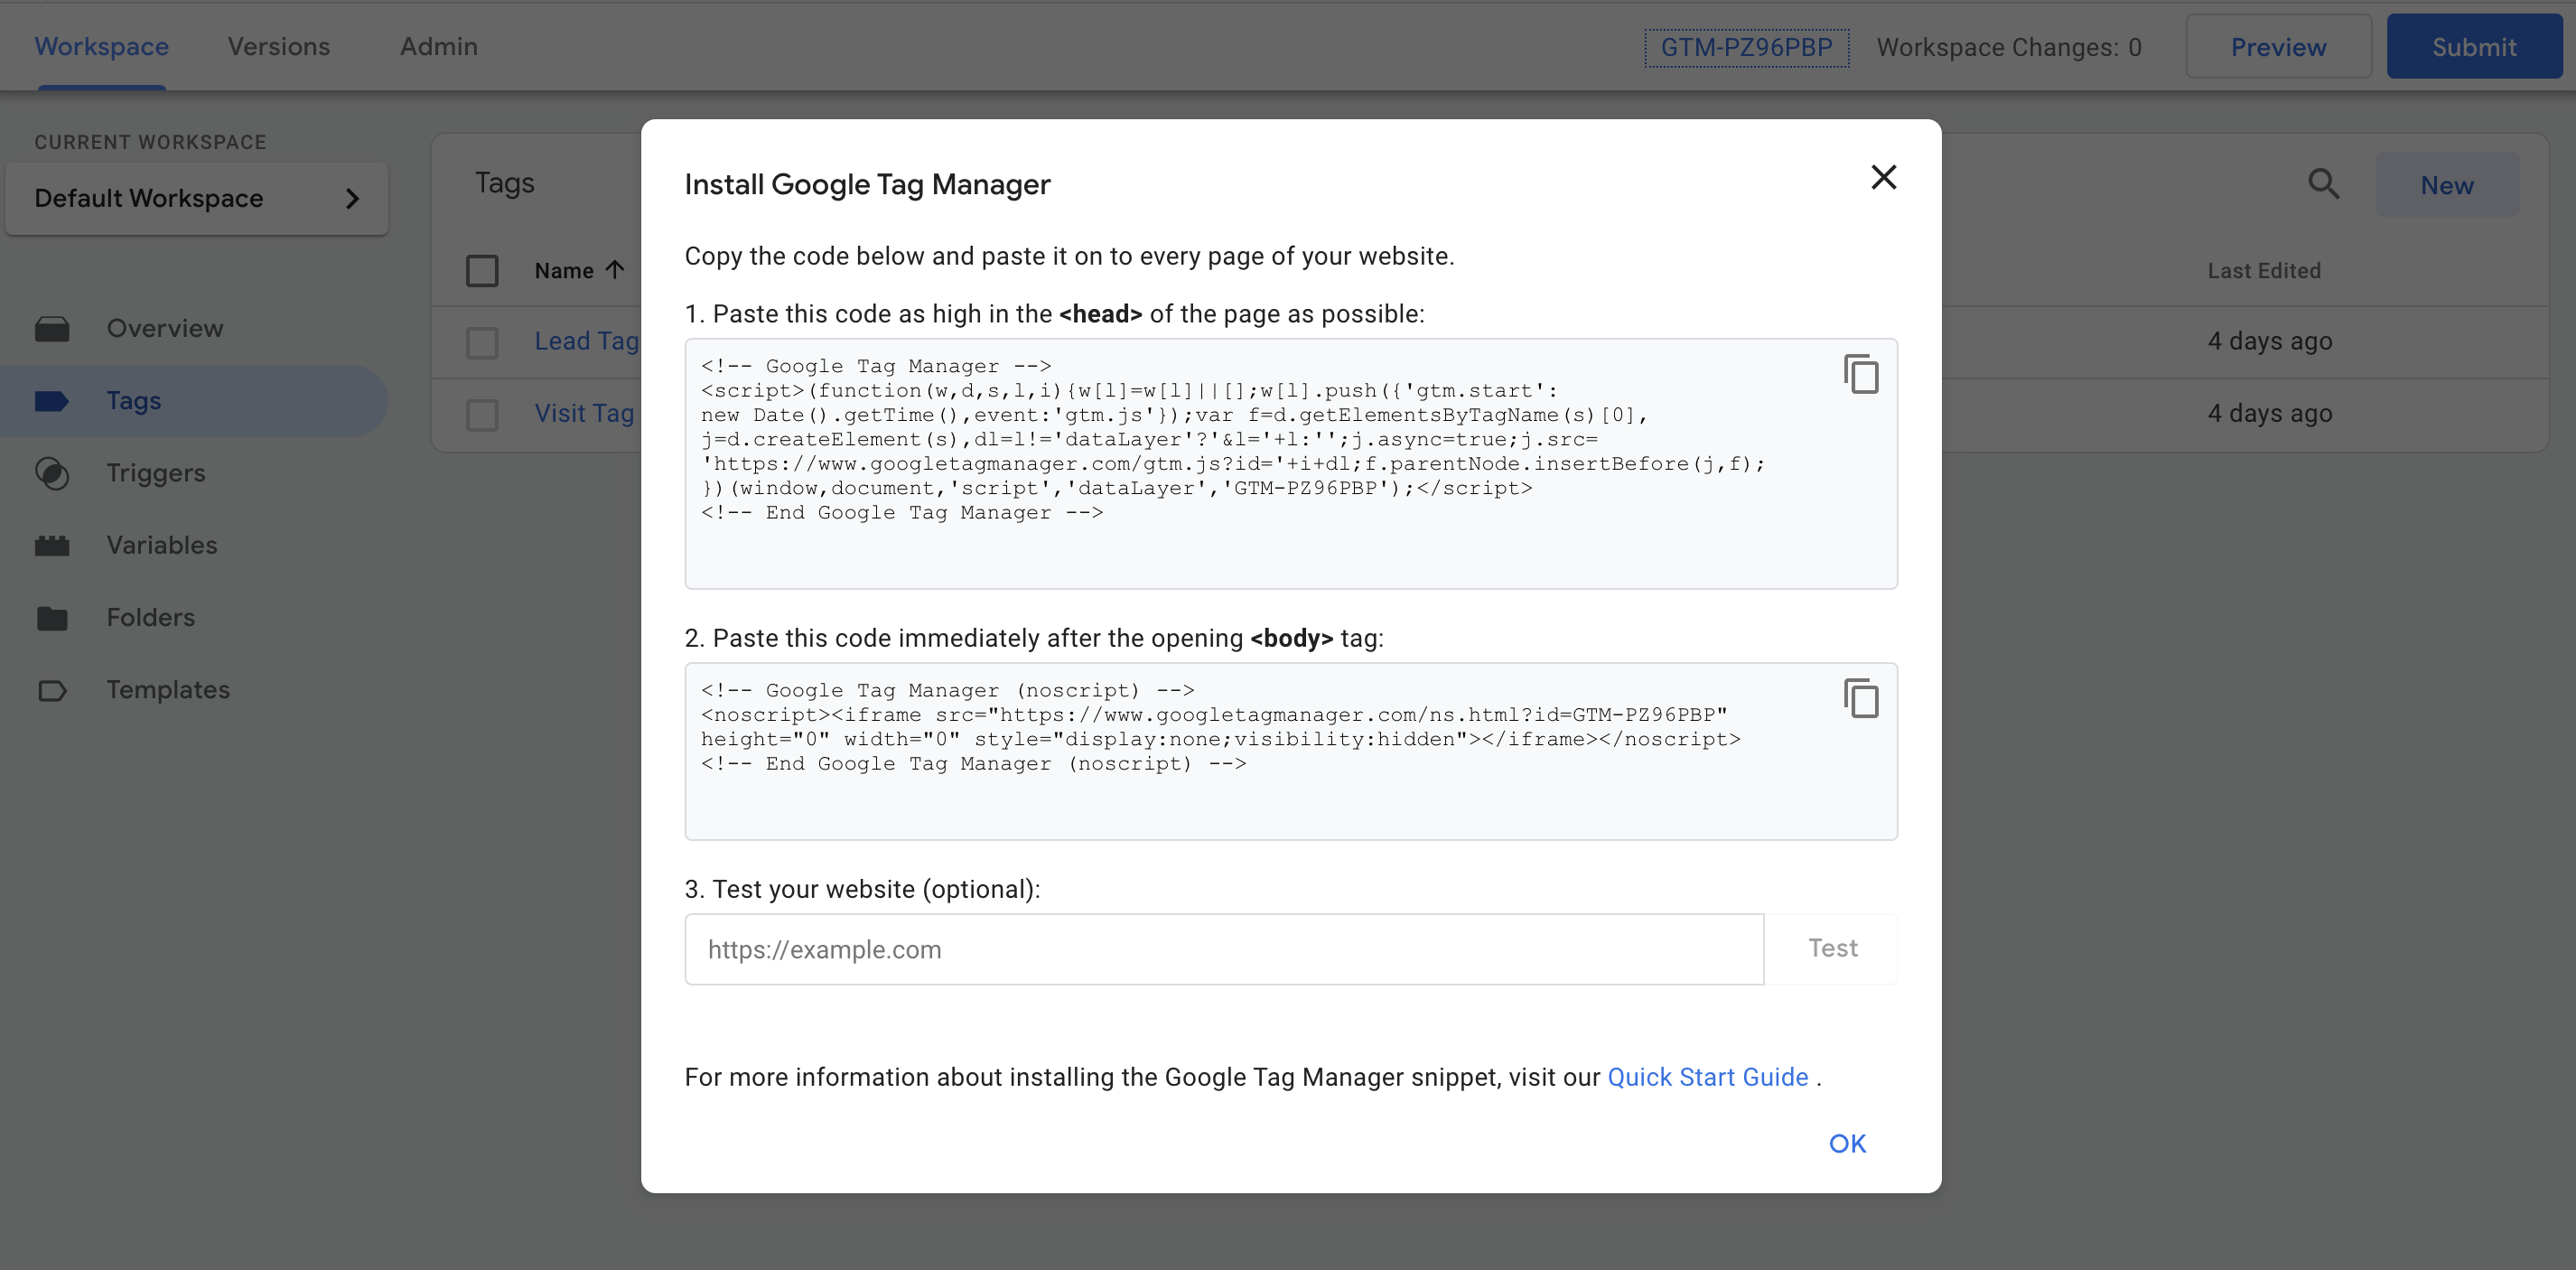
You can now integrate your tags into your pages by clicking on gtm identifier to show snippet to copy paste

Your configuration is ready to be published, you can click on Submit in top right and then on Publish.
For support and troubleshooting, reach out to the Seedtag support team for assistance. [email protected]