-
Notifications
You must be signed in to change notification settings - Fork 12
Debug A LAS2peer Project
This tutorial shortly explains how to use the Eclipse debug functionalities to debug your las2peer services. We use the Ant build scripts that are provided with the LAS2peer-Template-Service project to debug into the unit tests. If you want to execute your service on a running node directly, or use a modified build file, the steps to be taken should be still similar, just adjust the target in the first step accordingly. An example for that is given in the last section of this tutorial. Additionally, if the las2peer service is running inside a Docker container, another debug possibility is presented using IntelliJ.
Debugging a las2peer application is simple! In just three steps, you can debug your services like any other Java application developed with Eclipse.
First, you have to add the following two lines of code to the JUnit target of your 'build.xml':
[..]
<junit fork="yes" haltonerror="yes" haltonfailure="yes" printsummary="yes">
    <jvmarg value="-Xdebug" />
    <jvmarg value="-Xrunjdwp:transport=dt_socket,server=y,suspend=y,address=5432" />
    <classpath>
[..]
Toggle breakpoints in your service (or your test) code ('Run -> Toggle Breakpoint' for example). Then execute your build script to run the JUnit-test target.
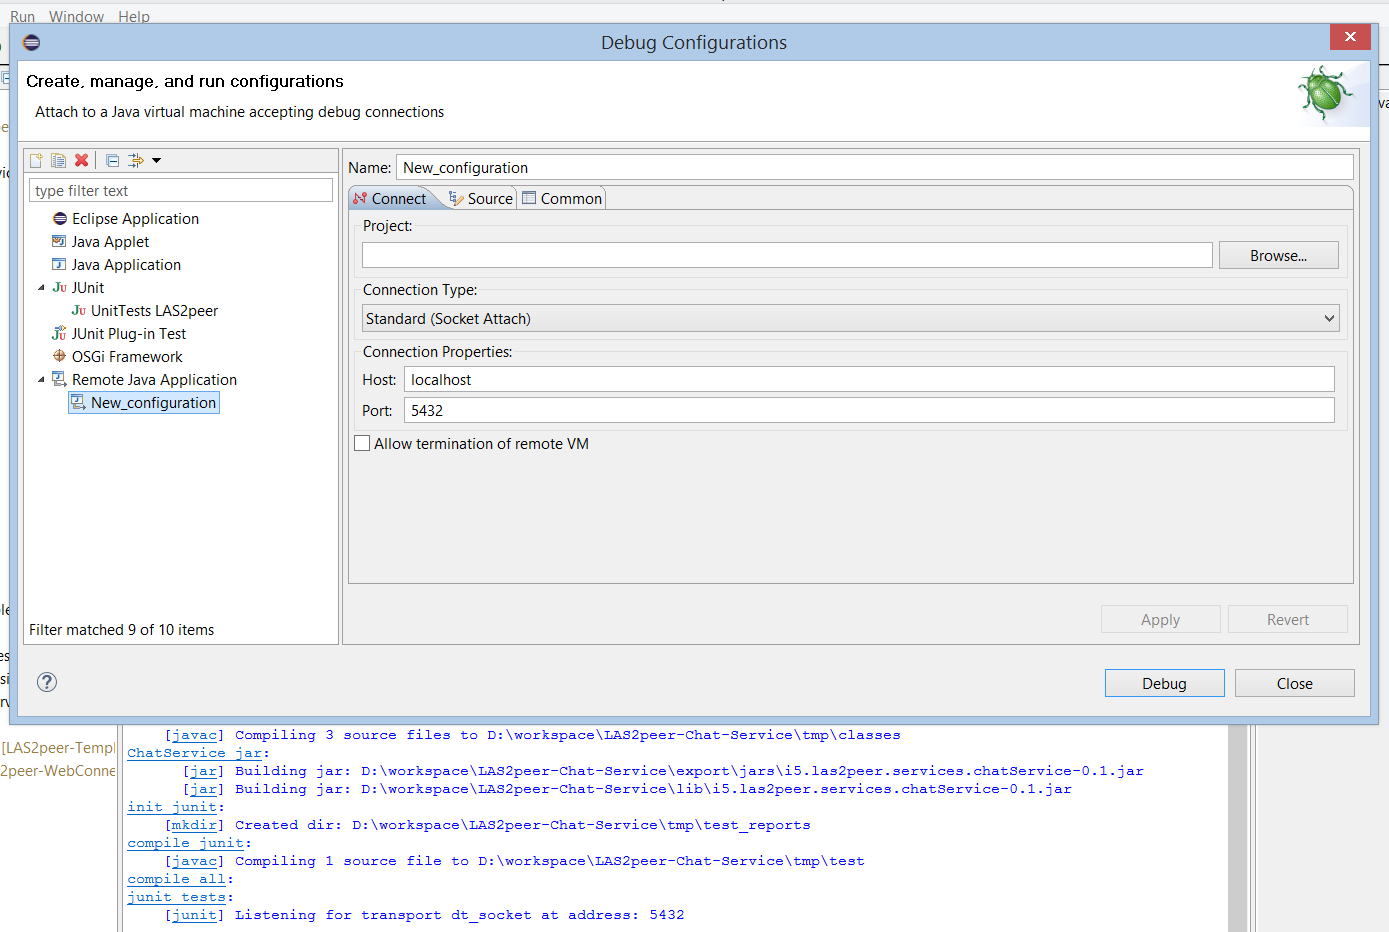
In Eclipse, please click on "Run -> Debug Configurations" and add a new 'Remote Java Configuration' in this window. Then, please add 'localhost' as host and '5432' as port of the new configuration. Of course, you can also change the port by changing it here and in the lines added in step one of this tutorial. Just make sure you choose a port that is not currently occupied at your machine.

Now you can launch your new configuration and at the first breakpoint, Eclipse should open the debug perspective, where you can view your debug information. Please note that Eclipse saves your new 'Remote Java Configuration', so the next time you want to debug your service, you can just use the existing one for that.
The following ant target can be included in your build script to enable debugging a running las2peer node. Additionally, please check "Allow termination of remote VM" in the dialog of the debug configuration creation (see last step). Since las2peer uses its own command line, it is not possible to interact via the Eclipse console with the L2PNodeLauncher, so you will have to add every command that should be executed to the build target.
<target name="run" depends="jar">
	<java classname="i5.las2peer.tools.L2pNodeLauncher"
		classpathref="libraries"
     	failonerror="true"
     	fork="true">
        <jvmarg value="-Xdebug" />
        <jvmarg value="-Xrunjdwp:transport=dt_socket,server=y,suspend=y,address=5432" />
    	<arg value='-p'/>
		<arg value='9011'/>
    	<arg value='uploadStartupDirectory("etc/startup")'/>
		<arg value='startService("i5.las2peer.services.servicePackage.ServiceClass","SampleServicePass")'/>
		<arg value='startWebConnector'/>
 	</java>
</target>
If you prefer running las2peer from the console, you can start it without modifying the buildscript starting the Node using the following commend:
java -Xdebug -Xrunjdwp:transport=dt_socket,server=y,suspend=y,address=5432 -cp "lib/*" i5.las2peer.tools.L2pNodeLauncher -p 9011
To start debugging a running las2peer node inside a docker container, you need to have IntelliJ installed. As a student one can get a free license for it.
After you have opened IntelliJ select your folder, where your las2peer service is residing, where in the best
case a Dockerfile is present.
If it is not present, create one to put the las2peer service in a container to be run.
When setting up the debug functionalities the first time for the service, click on Run in IntelliJ and select Edit Configurations.
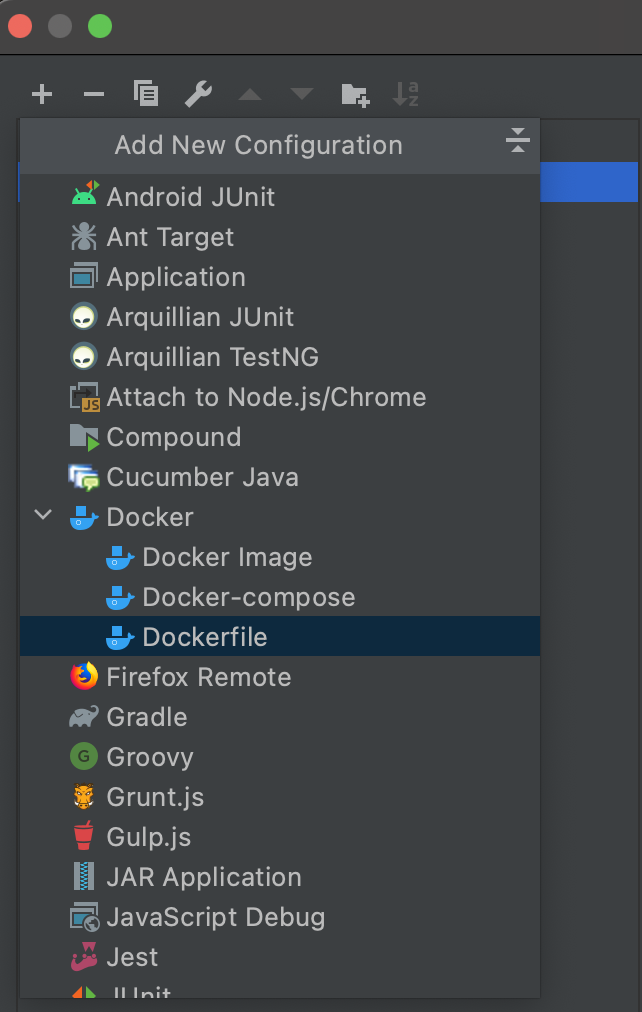
Now click on the "+" sign to add a Dockerfile configuration to IntelliJ.

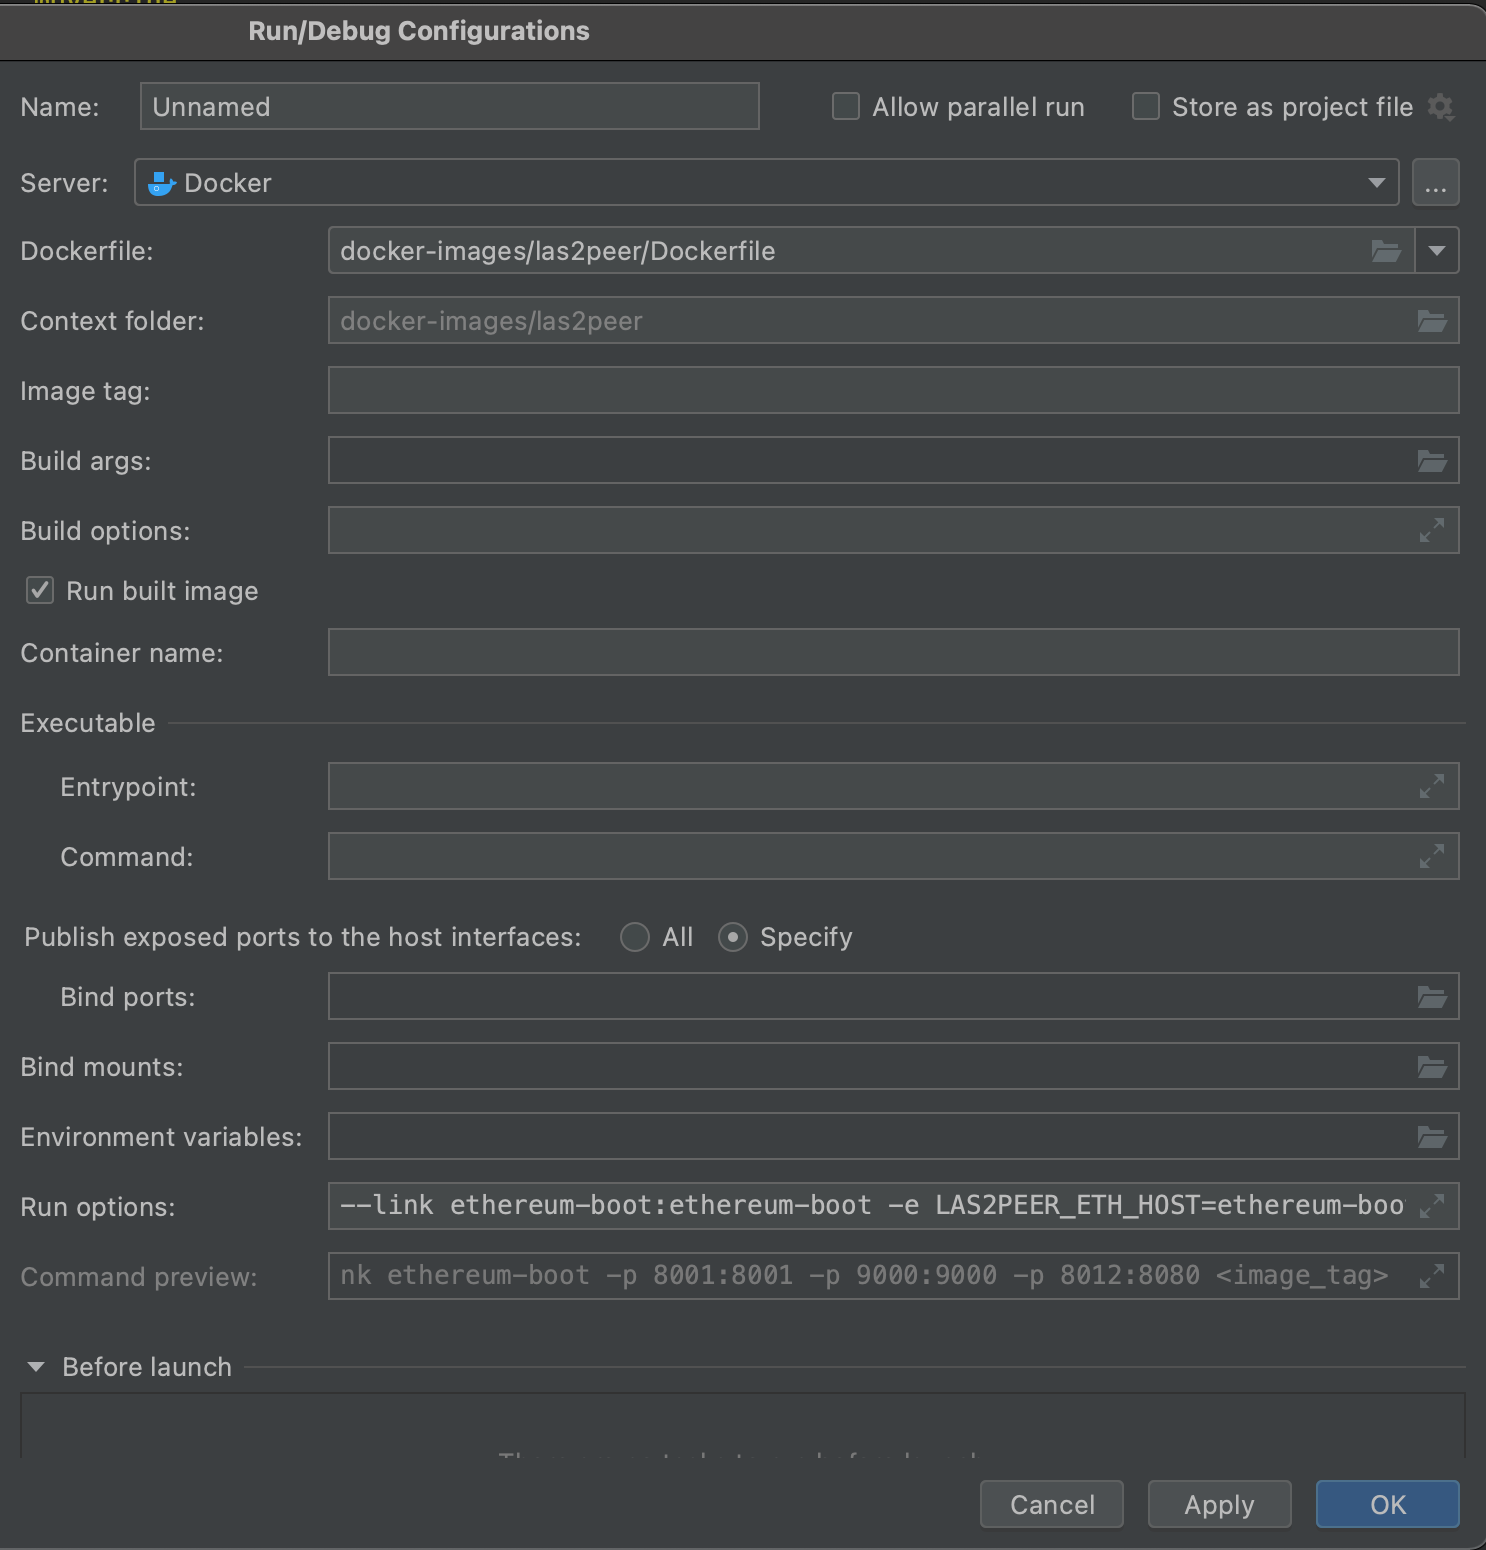
Here under the Dockerfile section select your Dockerfile from the project if not done automatically.
Additionally, if you have to provide any start commands to the usual docker run command, you can set them simply in the Run options.

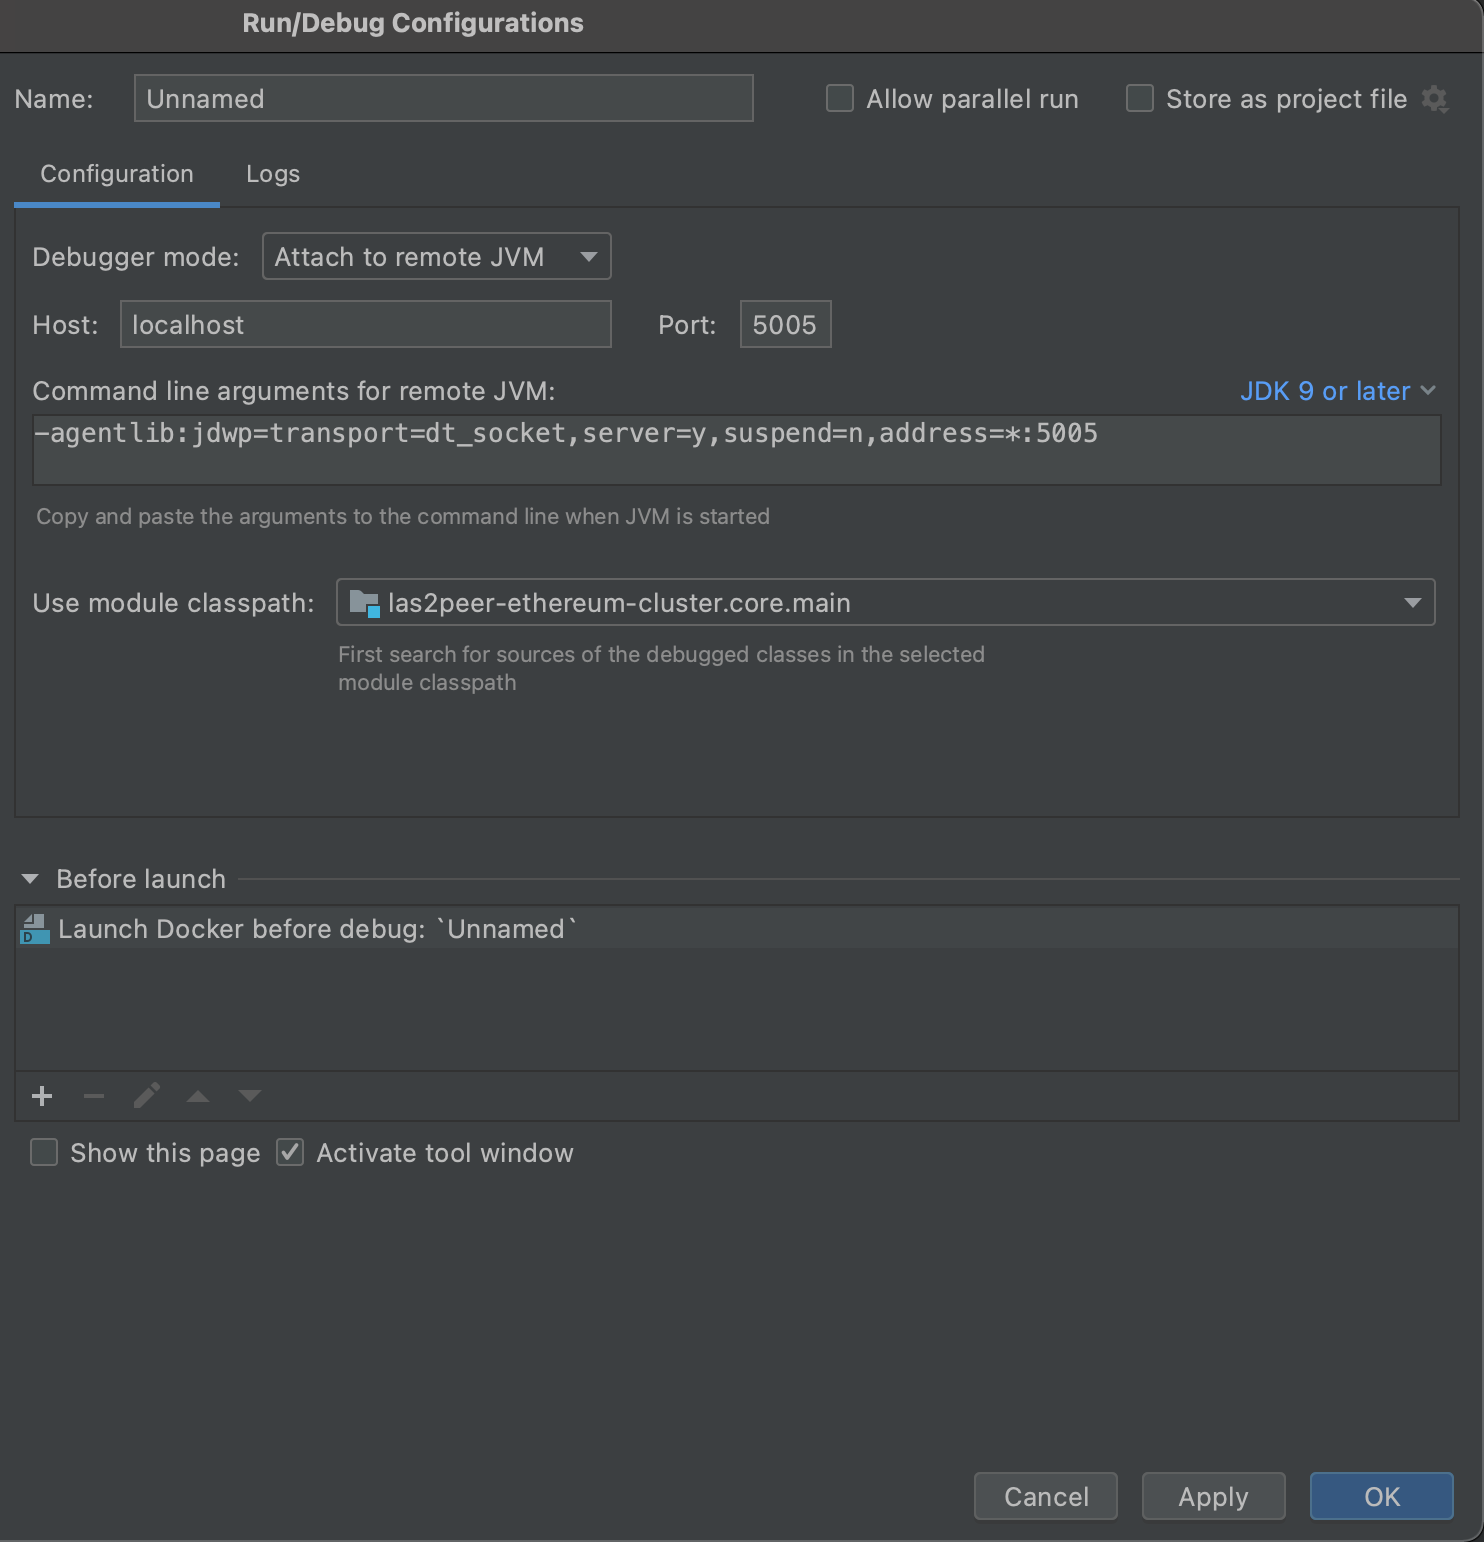
The last configuration is to add the debug configuration found under the name Remote, when clicking on the "+" sign to add a new configuration.

Here you can now select your Java version which is used in your service, the "Command line arguments for remote JWM" will be important in second.
In the Use module classpath you can select where it should start search for classes, which you wan to debug your service.
The last important setting on this page is adding under the Before launch setting the created docker configuration from before.
Therefore, click on the "+" sign in that section and select Launch Docker before debug.

The really last thing is copying the "Command line arguments for remote JWM" mentioned earlier and paste it inside of the docker entry file, where usually the java run command is saved as a string.
Simply paste it like here.

Now you should be able to start your debugging session by clicking on the debug icon in IntelliJ on the top right and selecting the Remote configuration which you set up earlier.
Your service should be started in a Docker container and you can use breakpoints to go trough your problematic code sections.
Like this you can also debug the las2peer core, for that simply paste the source code of the las2peer core where your service is located and you should be able to debug that code too, without any additional configuration.
las2peer has its own class loader implementation to provide dynamic deployment of services and service isolation. When debugging a project (for example using Eclipse), las2peer's class loader is not used; the default class loader is used instead. This may lead to unexpected behavior when using 3rd party libraries of different versions in multiple services. Also, the jUnit tests of las2peer core will not pass in Eclipse, you have to run ant junit instead. For more information read about Class Loading.