-
Notifications
You must be signed in to change notification settings - Fork 15
How to create Client ID and Client Secret
-
Your Moodle site must use HTTPS.
-
You must use a Google Workspace organizational account. It is possible to create the keys with a personal account, but you will have to go through Google verification before using it in production.
-
Teachers who will use the Google Meet™ for Moodle plugin must also have an account with the same organization. If you intend to create the keys with a personal account, this is not necessary.
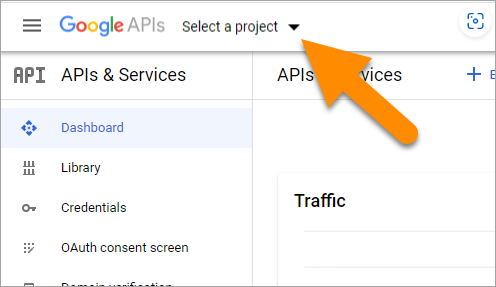
To set up an OAuth 2 client with Google, log in to the Google Developers Console and click the arrow by 'Select a project'.
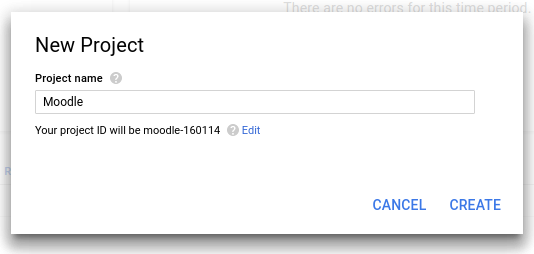
Click 'Create a new project'
Give it a name. The name is not visible to anyone so you can choose any name you like.
For the Google Meet™ for Moodle plugin to work, you need to enable the Google Calendar API and the Google Drive API.
Open the API library in the Google API console. The API Library lists all available APIs, grouped by product family and popularity.
Search the Google Calendar API and click the Enable button.
Search the Google Drive API and click the Enable button.
If prompted, accept the API Terms of Service.
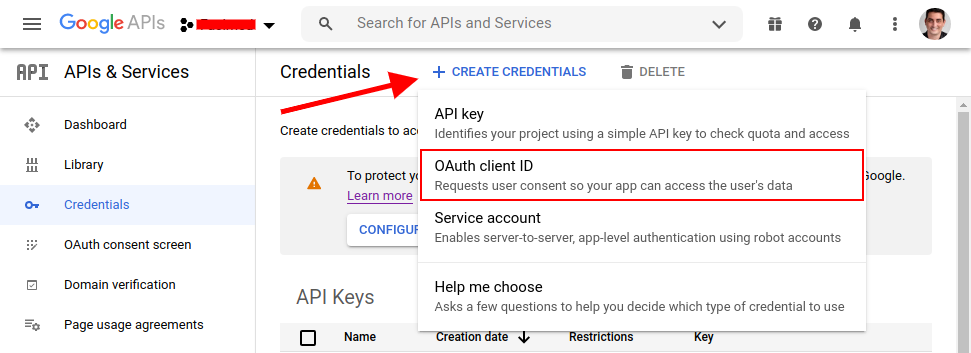
Open the Credentials page in the "APIs & Services" console.
Click Create credentials > OAuth client ID.
To create an OAuth client ID, you must first set a product name on the consent screen, click Configure consent screen button.
If you are creating with a Google Workspace organizational account, select Internal in the User type section. Remembering that teachers who will use the Google Meet™ for Moodle plugin must also have an account in the same organization.
If you don't have an organizational account, you'll need to select External and go through the Google verification process. To learn more, visit Unverified Apps and Verify your site ownership.
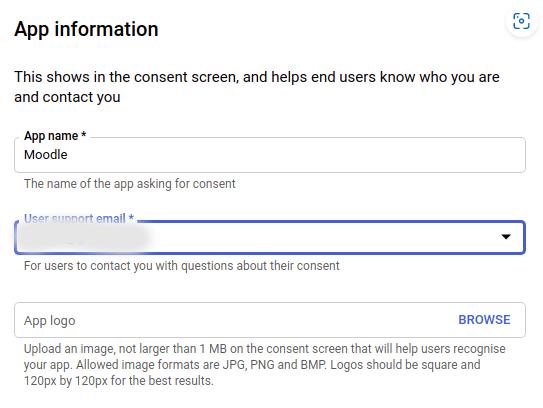
In step 1, OAuth consent screen, enter your Moodle site data. This is where you provide the public information that is shown to users when they are asked to authorise your application. Setting a product name is the minimum information that is required, but the more information you provide here - the more confidence users will have when granting this authorisation.
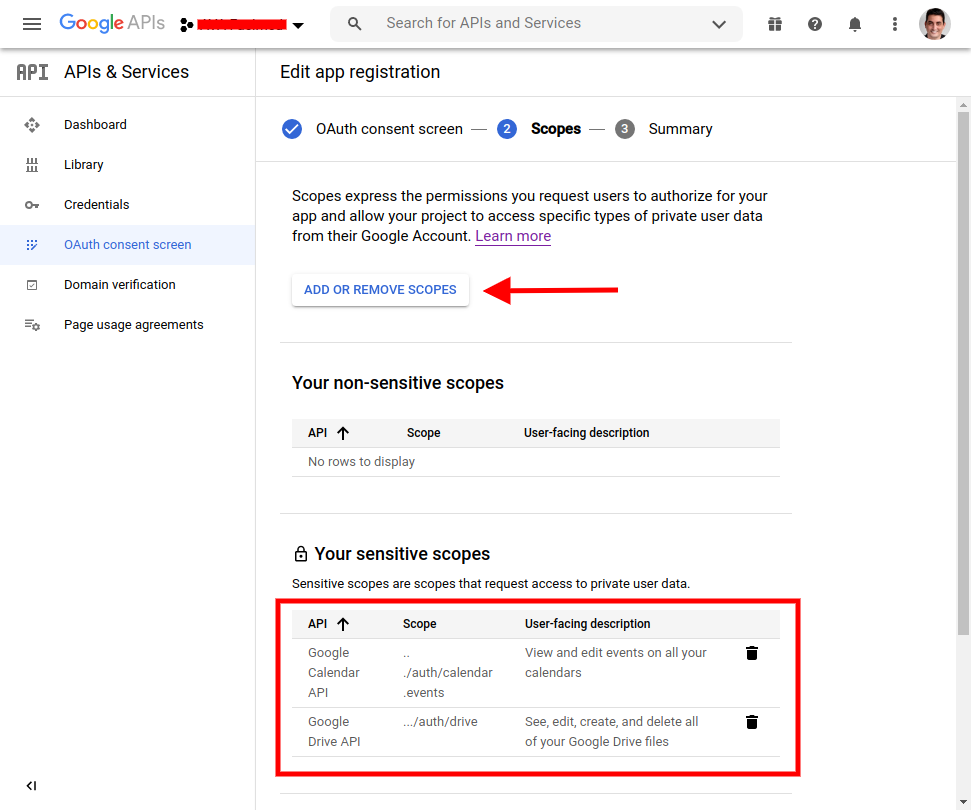
In step 2, Scopes, click the Add or remove scopes button and add the scopes below:
Click the Save and continue button.
Return to the Credentials page in the "APIs and services" console. Click Create credentials > OAuth client ID again.
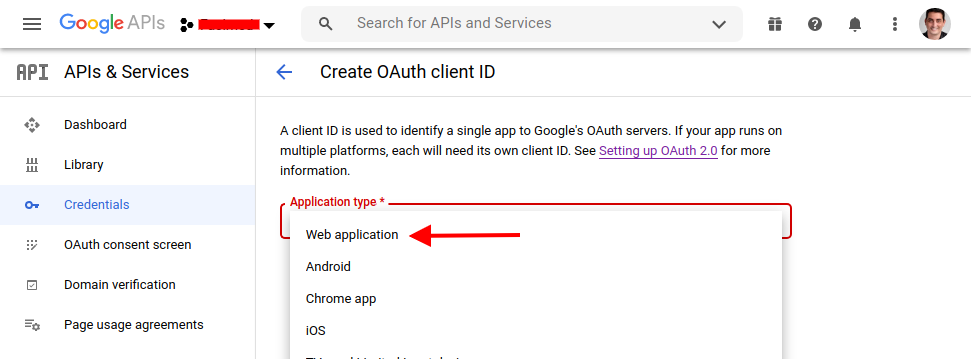
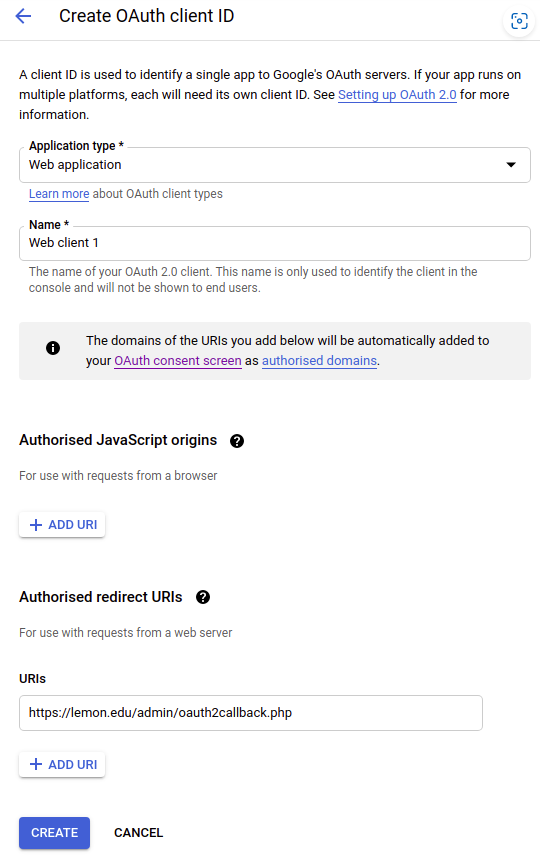
In Application type, select the Web application.
Click to add an authorised redirect URI. This must be set to "your moodle site url + /admin/oauth2callback.php". If your Moodle site was accessible at https://lemon.edu/ then this callback URL should be set to https://lemon.edu/admin/oauth2callback.php.
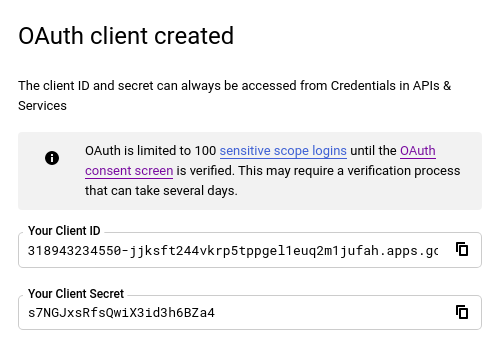
When you have saved the information on this page, Google will give you the client ID and client secret that you need to enter into Moodle.
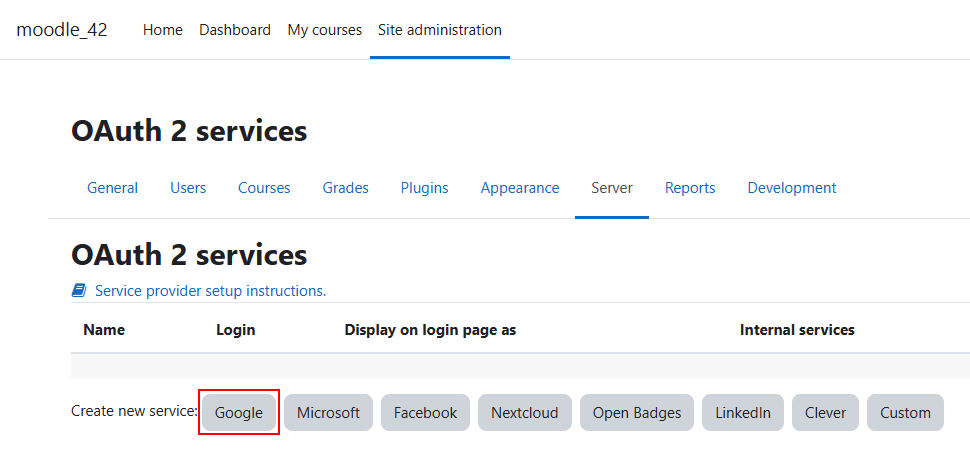
Go to Site Administration > Server > OAuth 2 Services and click to add a Google service.
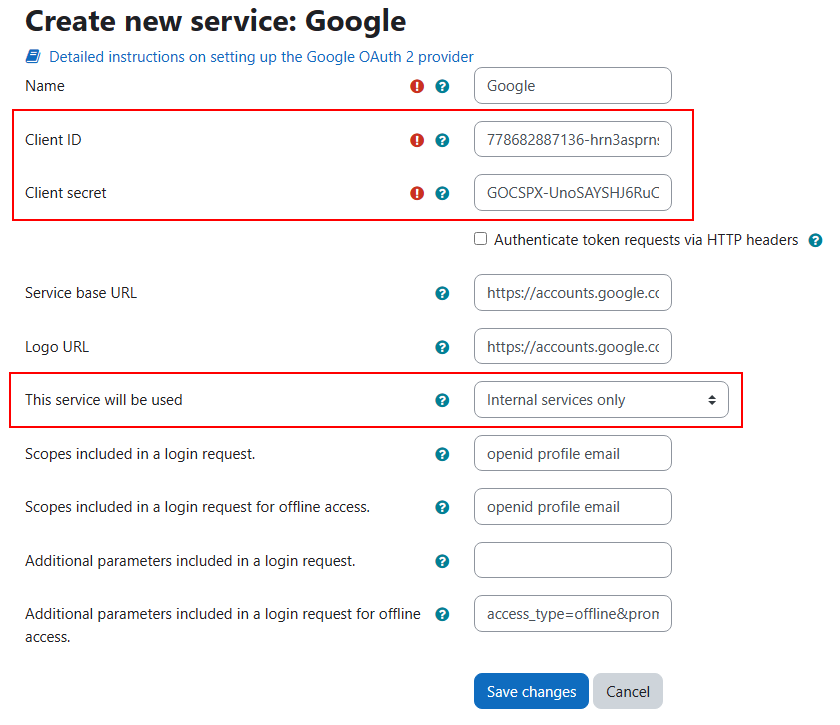
Enter the Name, Client ID, Client secret and in the option 'This service will be used' select 'Only internal services'. Do not change the other fields.
©2018 Google LLC All rights reserved.
Google Meet and the Google Meet logo are registered trademarks of Google LLC.
