This is an announcement service for JupyterHub that you can manage through a JupyterHub-styled UI. You can use it to communicate with your hub's users about status, upcoming outages, or share news. It allows you to post a current announcement, and show previous announcements in reverse chronological order. It provides a REST API hook that you can use to post the latest announcement on JupyterHub itself (with custom templates). Announcements are visible even to users who are logged out.
pip install jupyterhub-announcement
You can run this service either as a hub-managed service or as an external service. Here's an example configuration for a hub-managed service you can place in a JupyterHub config file:
c.JupyterHub.services = [
    {
        'name': 'announcement',
        'url': 'http://127.0.0.1:8888',
        'command': ["python", "-m", "jupyterhub_announcement"]
    }
]
Here's the config if you set it up as an external service, say, in another Docker container called announcement:
import os
c.JupyterHub.services = [
    {
        'name': 'announcement',
        'url': 'http://announcement:8888',
        'api_token': os.environ["ANNOUNCEMENT_JUPYTERHUB_API_TOKEN"]
    }
]
You have to specify the API token for the hub and the announcement service to share here.
Starting with JupyterHub 2.0, you will need to set user access through appropriate definition of c.JupyterHub.load_roles.
See the hub-managed service example to see how.
The service also has its own configuration file, by default announcement_config.py is what it is called.
The configuration text can be generated with a --generate-config option.
If you're running a hub with internal SSL turned on, you'll want to take advantage of the SSL option settings.
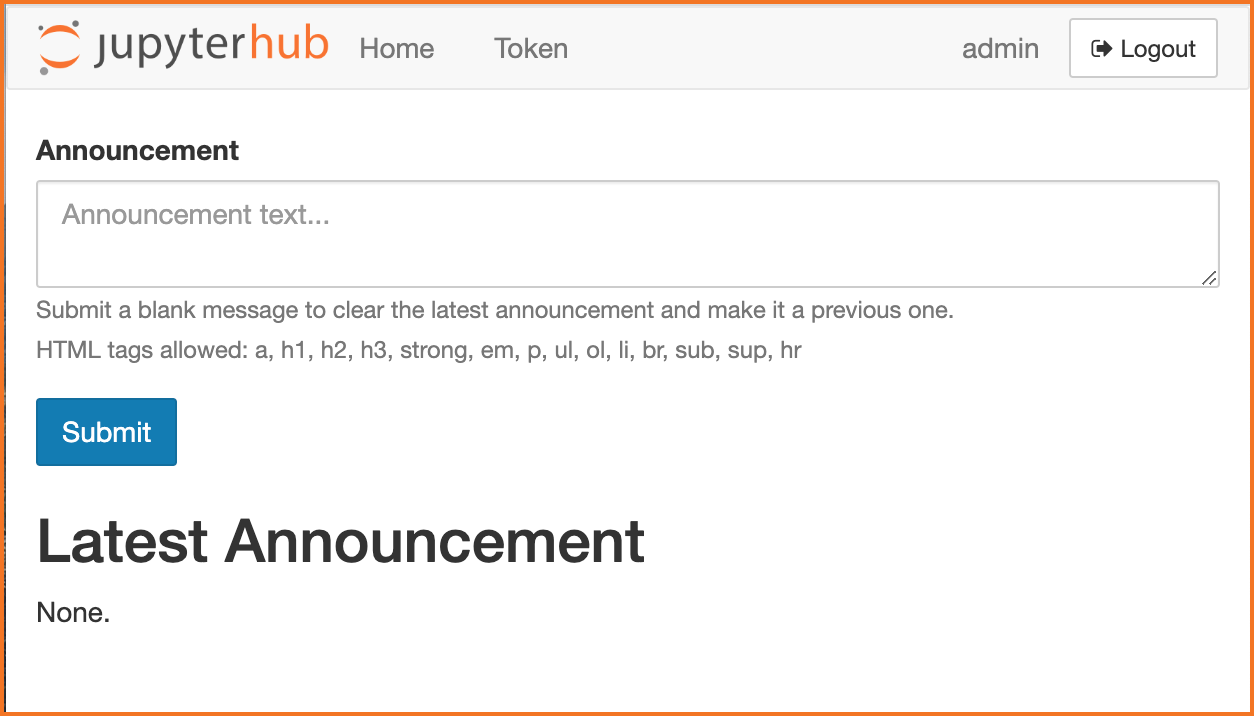
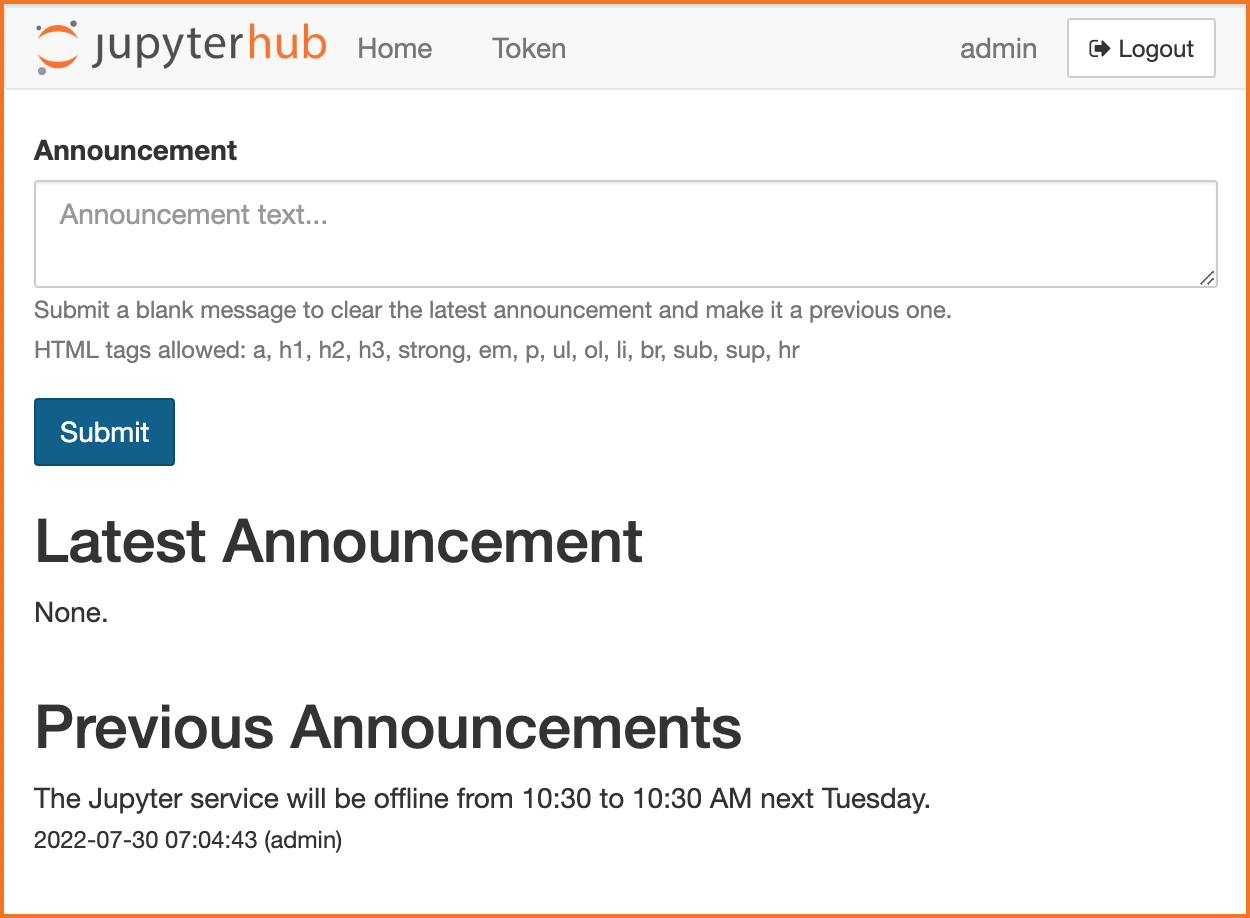
What does it actually look like when it runs? Start up the hub. Log in as an admin user, then go to
http://localhost:8000/services/announcement/
You should see:
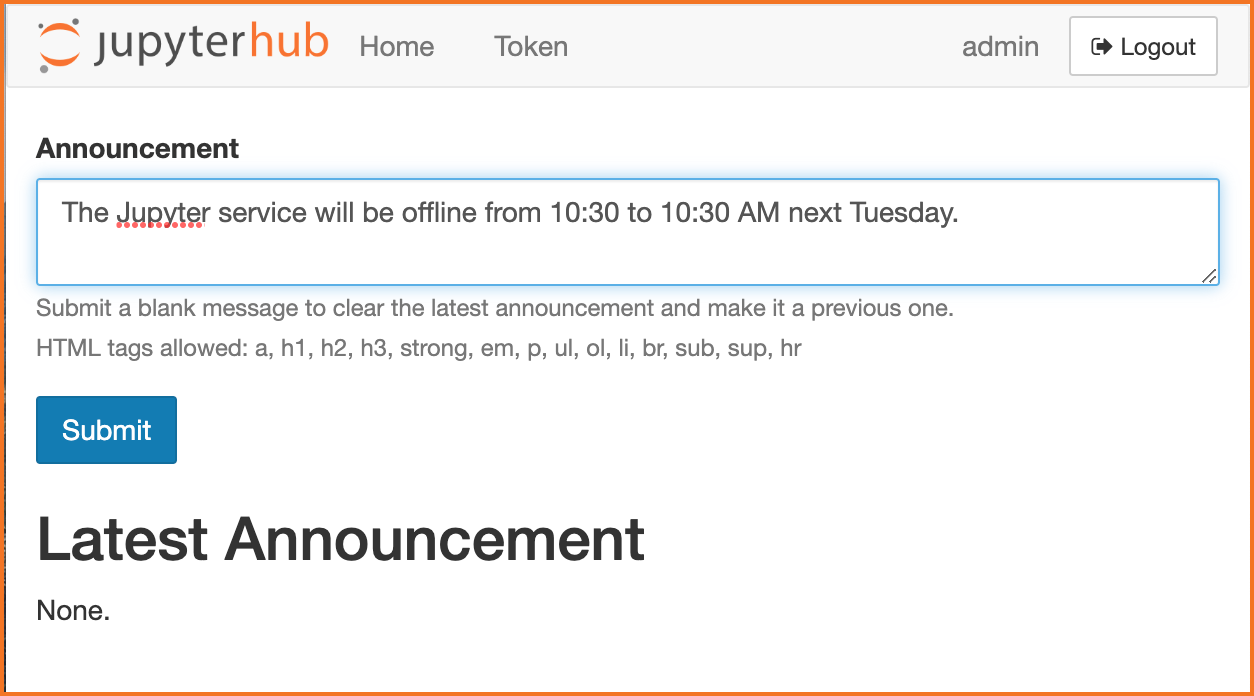
You'll now see the same page as before but with a text box. Enter a message. Please note that your input will be sanitized. For security reasons, a few HTML tags such as "<iframe>" or "<script>" will be automatically removed.
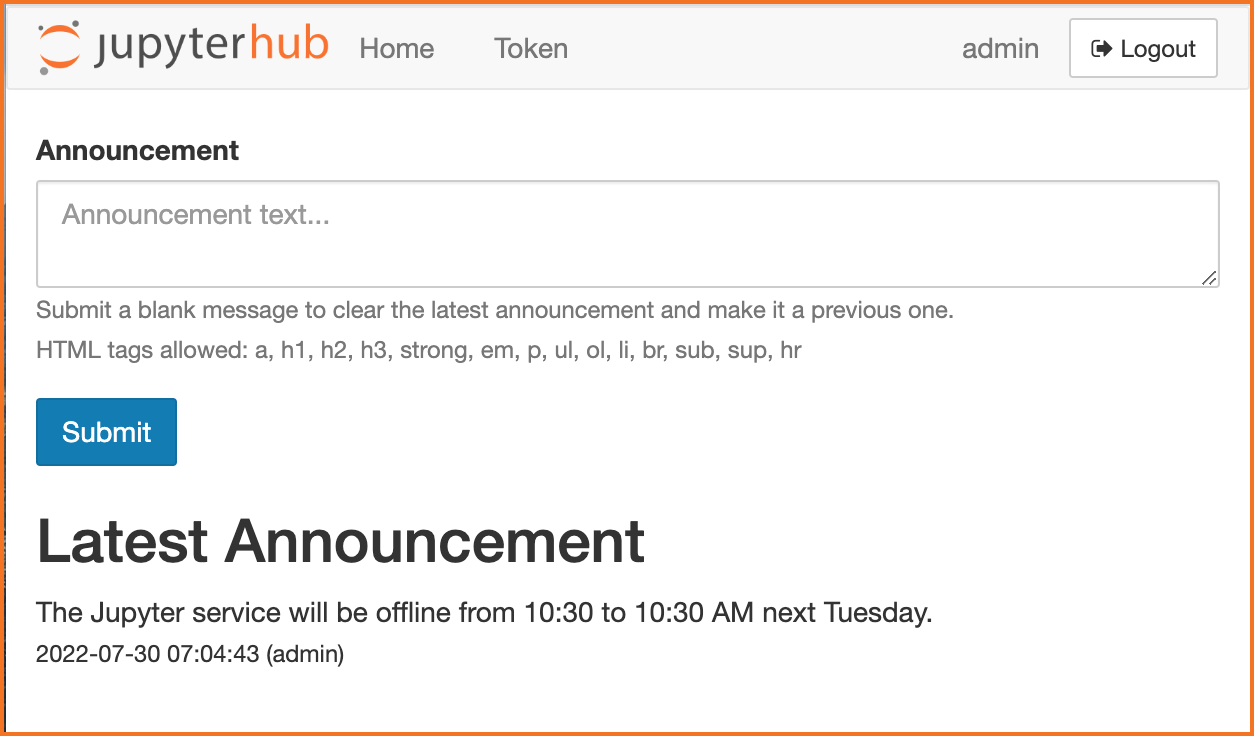
That becomes the Latest Announcement.
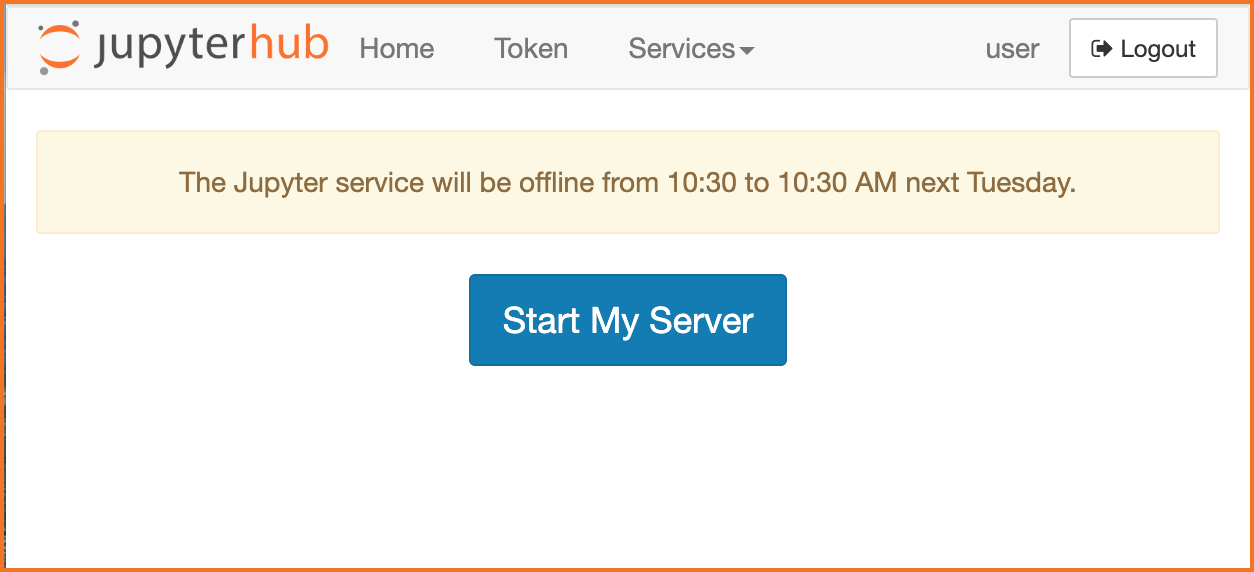
On the hub, a user will see the announcement posted.
If you enter an empty message, it clears that message and demotes it to a Previous Announcement.
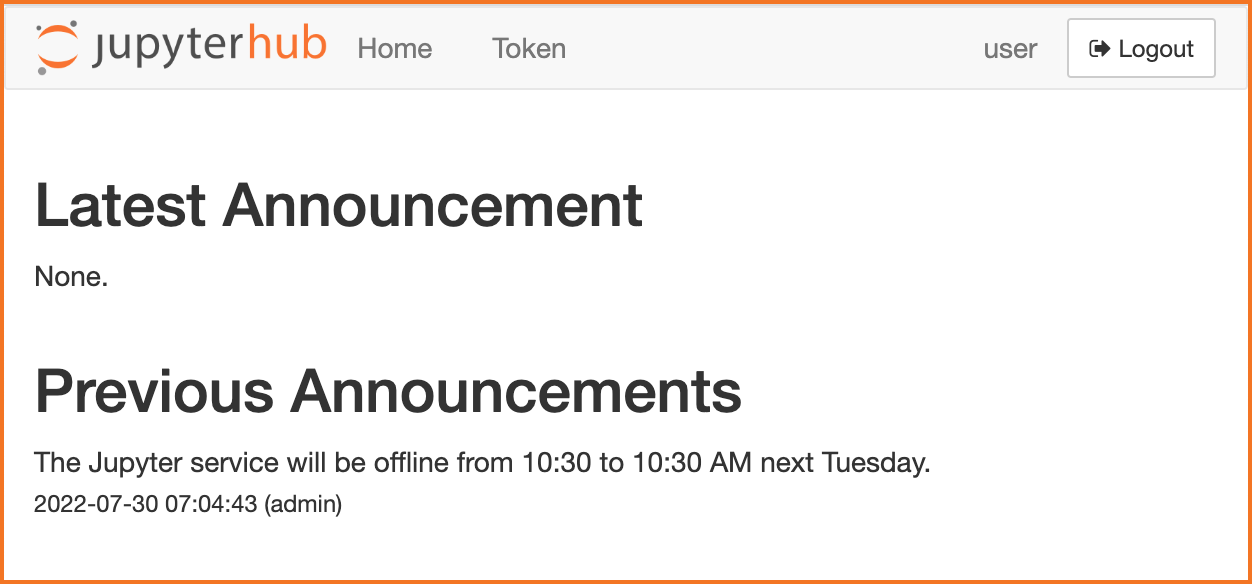
Go on. Add a few more. Then log out. Now log in using a test user who is not an admin. Point back at the announcement page and there you see all these wonderful communications your friendly admin sent to you.
Log out again and have a look. You can see them even if you're logged out.
/services/announcement/latest- gets the latest announcement as JSON object./services/announcement/list- gets the latest N announcement as JSON list of objects.- To set N, you set
default_limitin config - To override the defult_limit use the following URL parameter
/services/announcement/list?limit=2
- To set N, you set
You can make a call out to the service to get the announcement from the hub, if you customize the page template. Users may like that. If the latest announcement has been cleared or there are no announcements yet, an empty announcement will be returned.
Here are more details on how you can use the REST endpoint in a custom template.
This example extends the JupyterHub page.html template to make a little AJAX call to the announcement service.
To make it work you must
- Create a directory somewhere the hub can reach, let's use
/opt/templatesfor instance. - Add the template to
/opt/templates/page.html - Finally, set
c.JupyterHub.template_paths = ["/opt/templates"]in your JupyterHub configuration file.
Note the first line that says we are extending a template.
{% extends "templates/page.html" %}
{% block announcement %}
<div class="container announcement"></div>
{% endblock %}

{% block script %}
{{ super() }}
<script>
$.get("/services/announcement/latest", function(data) {
  var announcement = data["announcement"];
  if(announcement) {
    $(".announcement").html(`<div class="panel panel-warning">
      <div class="panel-heading">
        <h3 class="panel-title">Announcement</h3>
      </div>
      <div class="panel-body text-center announcement">
        ${announcement}
      </div>
    </div>`);
  }
});
</script>
{% endblock %}
BE CAREFUL It should be pretty clear at this point that you want to ensure your admins can be trusted!
The following example uses a react component to display the last N announcements as bootstrap toast (See image below).
There's a hook in the configuration that lets you add a custom message above all the annoucements. A good use for this message would be to include a link to a more general system status or message of the day (MOTD) page.
Announcements are retained in the queue for up to some configurable lifetime in days. After that they are purged automatically. By default announcements stay in the queue for a week.
By default the service does nothing to persist announcements.
You can change this behavior by specifying persist_path for the AnnouncementQueue object.
If this is set, then at start up the service will read this file and try to initialize the queue with its contents.
If it is set but the file doesn't exist, that's OK, the queue just starts off empty.
On update, the file is over-written to reflect the current state of the queue.
This way if the service is restarted, those old announcements aren't lost.
The persistence file is just JSON.
BE CERTAIN access to this file is protected!

