-
Notifications
You must be signed in to change notification settings - Fork 72
Recording MIDI with DR 880
This is an example of recording a Midi pattern into MusE 3.0.2 using Qjackctl and a Boss DR-880 with USB Midi.
The basic procedure should be the same for most devices but device details do differ from one to another. e.g., some devices always require enabling the Midi channels to send, they don't default to any channel being ON.
-
Prepare the device for transmitting Midi.
DR-880 Midi settings:
- Connect the DR-880 to the computer.
- Go to the pattern you want to transfer.
- Press Edit.
- Scroll through the list to "USB".
- Set Mode to "MIDI".
- Exit once, then Exit again to the Edit list.
- Select "Midi -> Setting".
- Note the Channels for Drum and Bass; defaults are 10 and 2.
- Set "Sync Mode" to "Internal".
- Exit once, then Exit back to the Pattern screen.
-
Start MusE.
-
Go to Qjackctl:
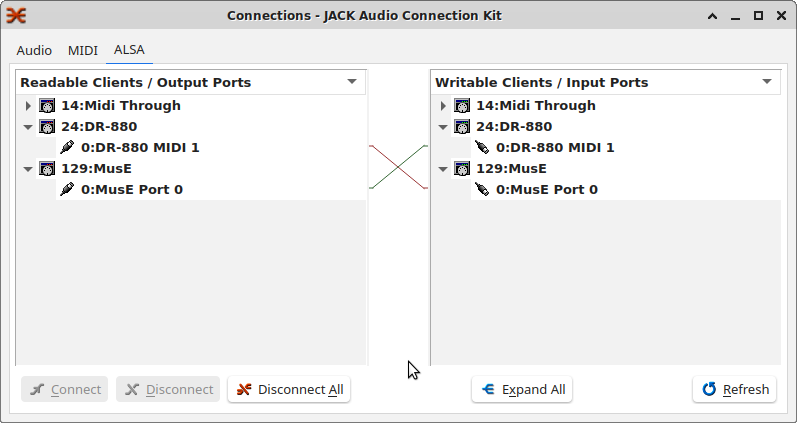
- Open Connect -> ALSA.
- Connect "Readable clients -> "0:DR-880 MIDI 1" to "Writable clients -> 0:MusE Port 0".
-
To also use the DR-880 as the output device:
Connect "Readable clients -> "0:MusE Port 0" to "Writable clients -> 0:DR-880 MIDI 1".
-
In MusE:
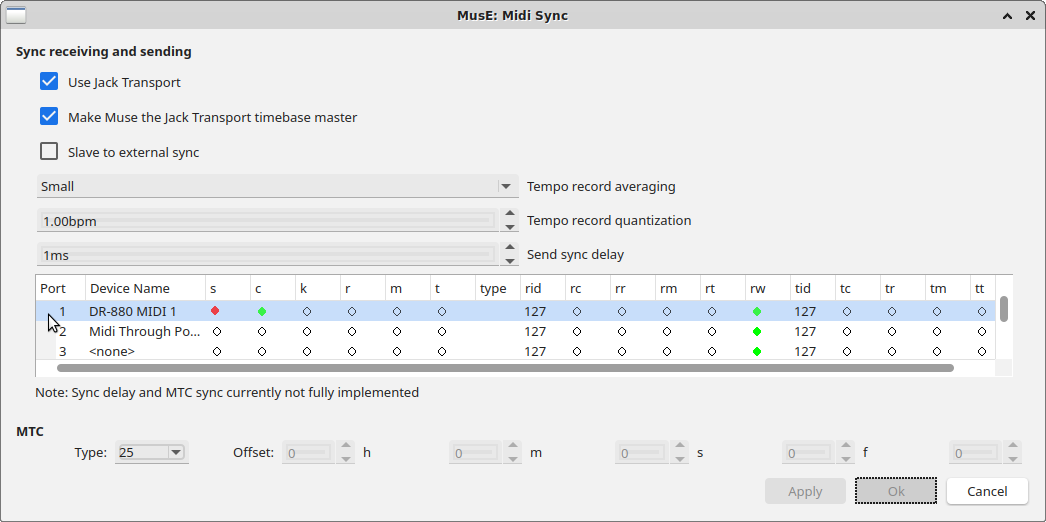
- Go to "Muse Settings -> Midi sync"; this shows a table of devices and their sync options.
-
Set the JACK options:
- Use Jack Transport: ON
- Make Muse the Jack Transport time base master: ON
- Slave to external sync: OFF
-
Set the DR-880 row to:
- s(ync) - ON
- c(lock) - ON (set by MusE)
- rw (Receive start rewinds before playing) - ON
- rid = tid = 127 (all)
- all others OFF
-
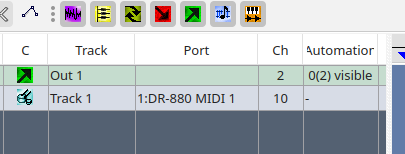
Add a Drum track to Muse. The Ch output column should show 10, the default drum channel. However, that might not be what the input channel is set to.
-
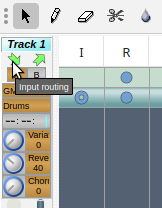
Click the Track 1 input routing arrow on the track mixing strip.
-
Either "Omni" or 10 should be selected.
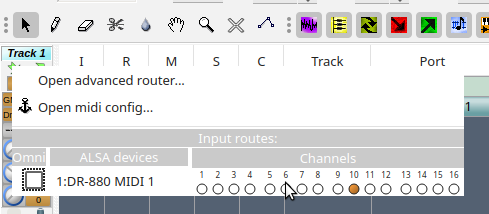
-
Left Click the Port entry, select "Open midi config".
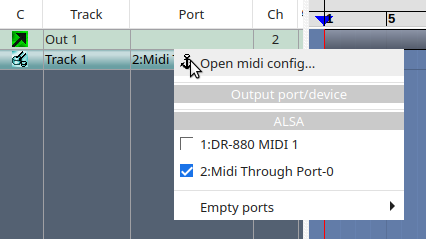
-
Under "Usable devices" in the DR-880 row, select I and O.
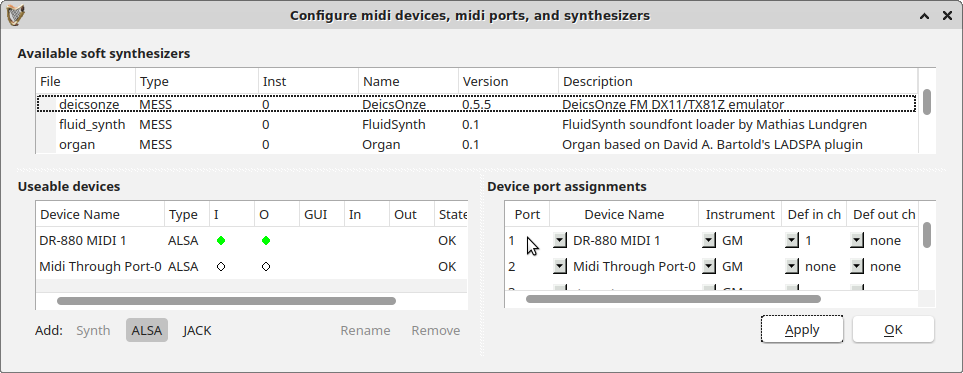
-
Under "Device port assignments", set Port 1 (for example) to DR-880 MIDI 1.
-
Select an Instrument. GM is OK.
-
For subsequent tracks, set "Def in ch" ("Default in ch") to "none", "all", or a specific channel transmitted by the device; for the DR-880 it's typically 10 for drums, 2 for bass.
NOTE: "Def in ch" will be applied to tracks added after this one. It does not affect the track input channel set above.
-
Click OK to save.
-
-
Left Click the track Port entry again.
-
Select DR-880 MIDI 1.
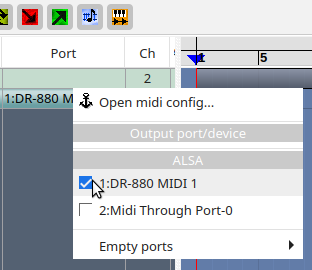
-
-
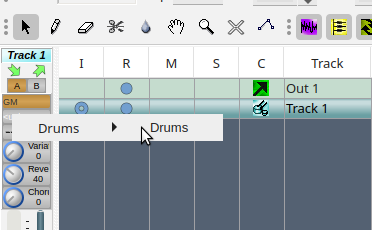
In the track mixing strip, left Click the instrument input.

-
Select a drum kit.
-
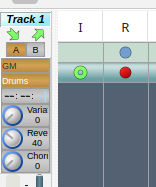
Set the track to record.
-
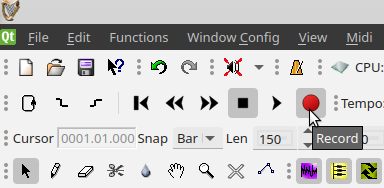
Click the RECORD button.
-
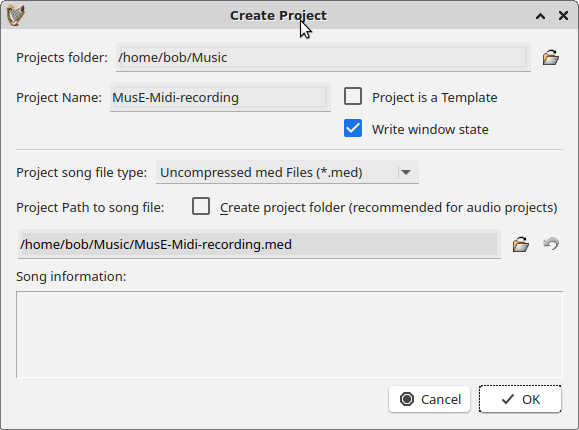
The Create Project dialog appears; fill it out and click OK. MusE should now be in standby mode.
-
To record, the transport has to be rolling. One way to do this is to click PLAY on the MusE transport panel.
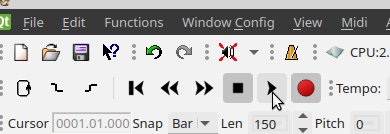
The track starts filling with an empty region: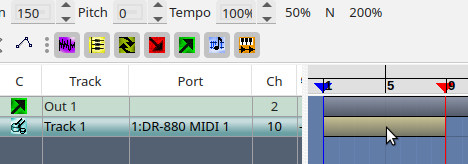
-
Press the play button on the DR-880.
-
In MusE, press the STOP button. The track should show the pattern just played.

If the pattern isn't recorded, a common problem is that the device Midi output channel numbers don't match the MusE input channels. Reviewing those before doing anything else is a good first step.
Media
Documentation
- Introduction
- Getting up and running
- Beginners tutorial
- Basic overview of MusE
- Projects
- Editing in MusE
- Drum editor
- Event editor
- Mastertrack editor(s)
- The Panic Toolbar
- Tracks and parts
- Routes
- Track soloing
- Scripts
- Plugins
- Metronome Configuration
- Automation
- Configuration
- Usage of the editors
- Useful keyboard shortcuts
Documentation (Español)
- Introducción
- Para ponerse en marcha
- Tutorial para Principiantes
- Descripción básica de MusE
- Proyectos
- Edición en MusE
- Editor de percusión
- Editor de eventos
- Editor de la Pista Maestra (Mastertrack)
- Barra de herramientas de pánico
- Pistas y Partes
- Rutas
- Pista solistas (Track soloing)
- Programas (Scripts)
- Complementos (plugins)
- Configuración del Metrónomo
- Automatización
- Configuración