-
Notifications
You must be signed in to change notification settings - Fork 7
Creating Your First Custom Tool
This is a walkthrough of creating a custom tool for Alteryx using the Omnibus framework. The tool we are going to create is an XML Input tool along the lines of the JSON Input tool.
It based on version 0.5.2 of the Omnibus.Framework Nuget packages.
I have Xml documentation on the code samples but this is optional.
The TMD: sections will contain a few extra details, but feel free to skip!
You will need to have a version of Visual Studio installed. Visual Studio Community edition should be perfectly fine, but screenshots in this post are from Visual Studio 2017 Professional.
You need to have Alteryx Designer installed on the same machine. The framework needs access to this to get the required DLLs. It will work with either an Admin or User install but will choose the Admin version if found over the User version.
The OmniBus Framework is built on top of .Net 4.5. As I believe this is a requirement for Alteryx (the GUI is a .Net application) if you have Alteryx installed it should be present.
The process was developed on Windows 10 and has dependencies on PowerShell version 3.0 or above. This was installed inside Windows 8 and can be downloaded for Windows 7 if needed.
As the Omnibus also use this library, you need to ensure you either remove them or are running the same version of them as the packages. If not then you may find some issues with compatibility.
-
Open Visual Studio
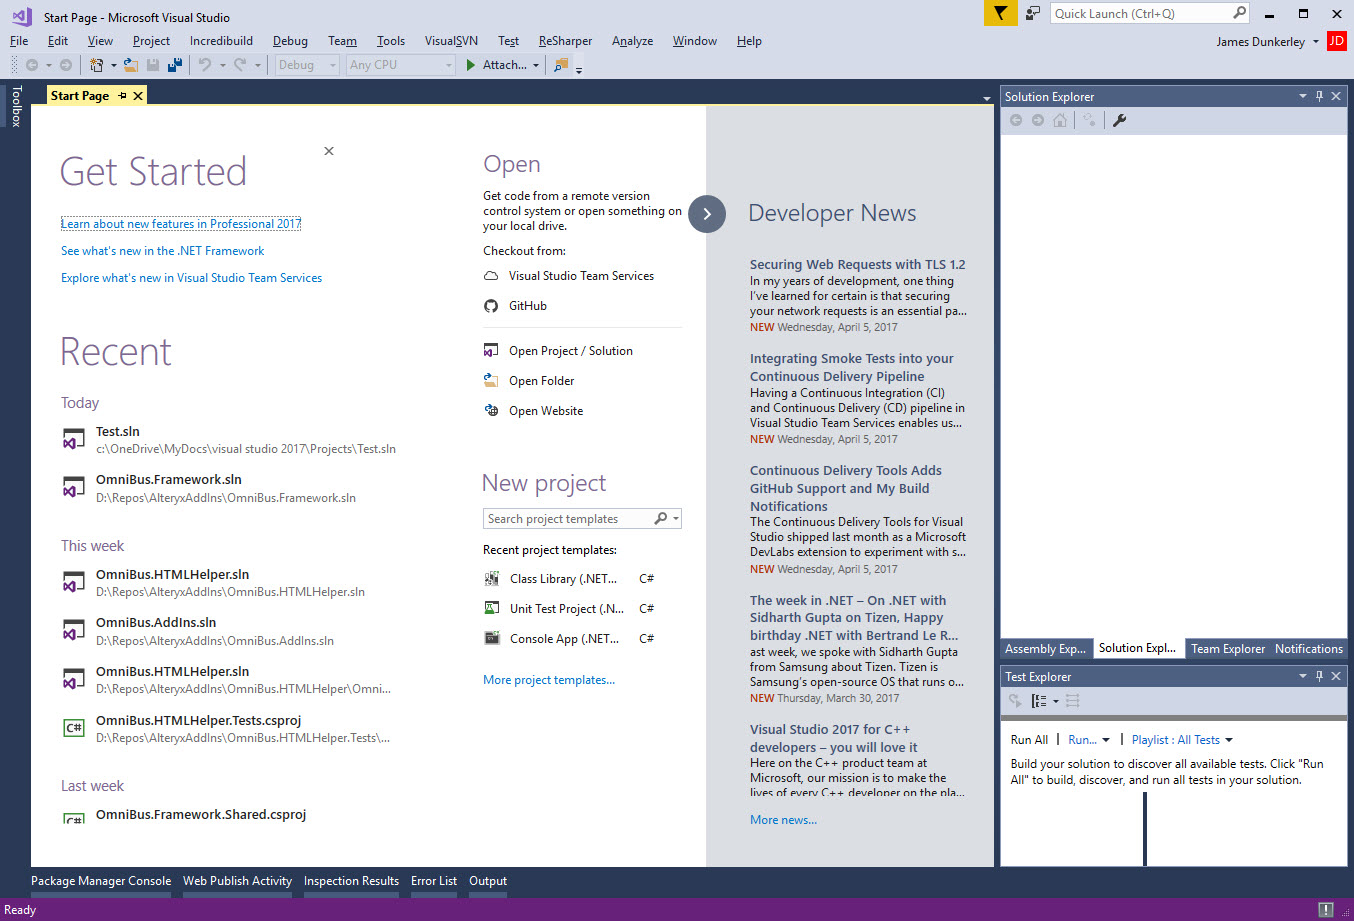
-
Create a New C# Class Library Project (File => New Project... or Ctrl-Shift-N)
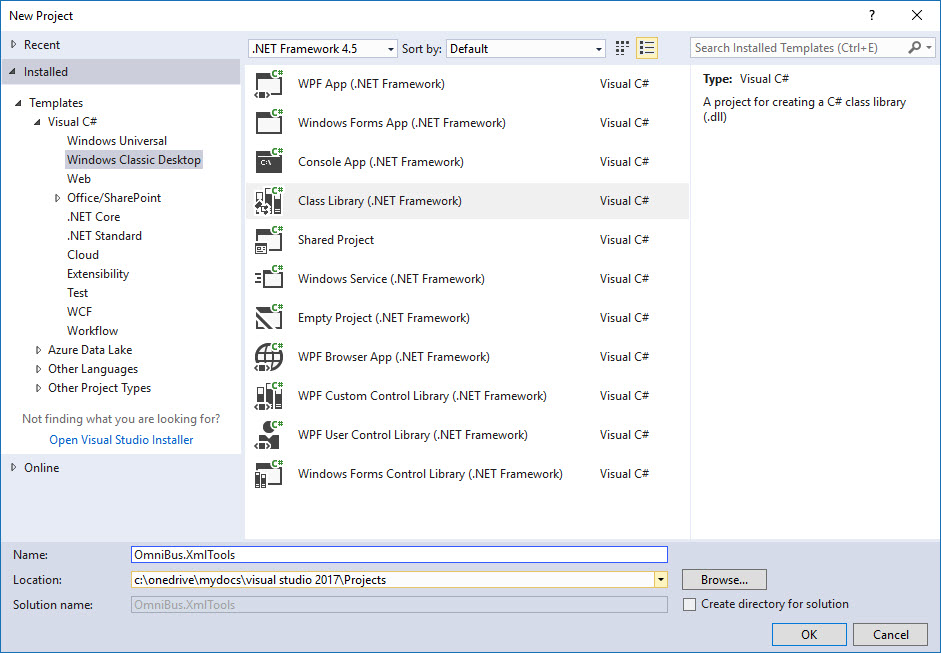
- This must be a Windows Classic Desktop, not .Net Core or .Net Standard
- You need to target at least .Net 4.5 (as this is the version used by the framework)
-
Add the following NuGet Packages:
- Omnibus.Framework.GUI
- Omnibus.Framework
- Omnibus.Framework.Shared This will be added when you add either of the first two
You can either do this using the Package Manager Console or via Manage Nuget Packages:
- Right click on the Project and go to Manage Nuget Packages
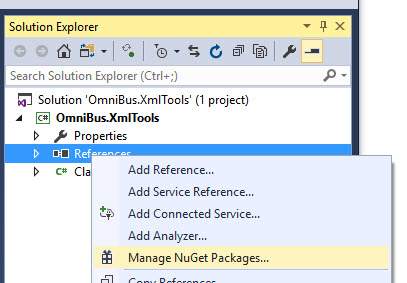
- Search for Omnibus
- Click the Install button next to GUI and Framework to install
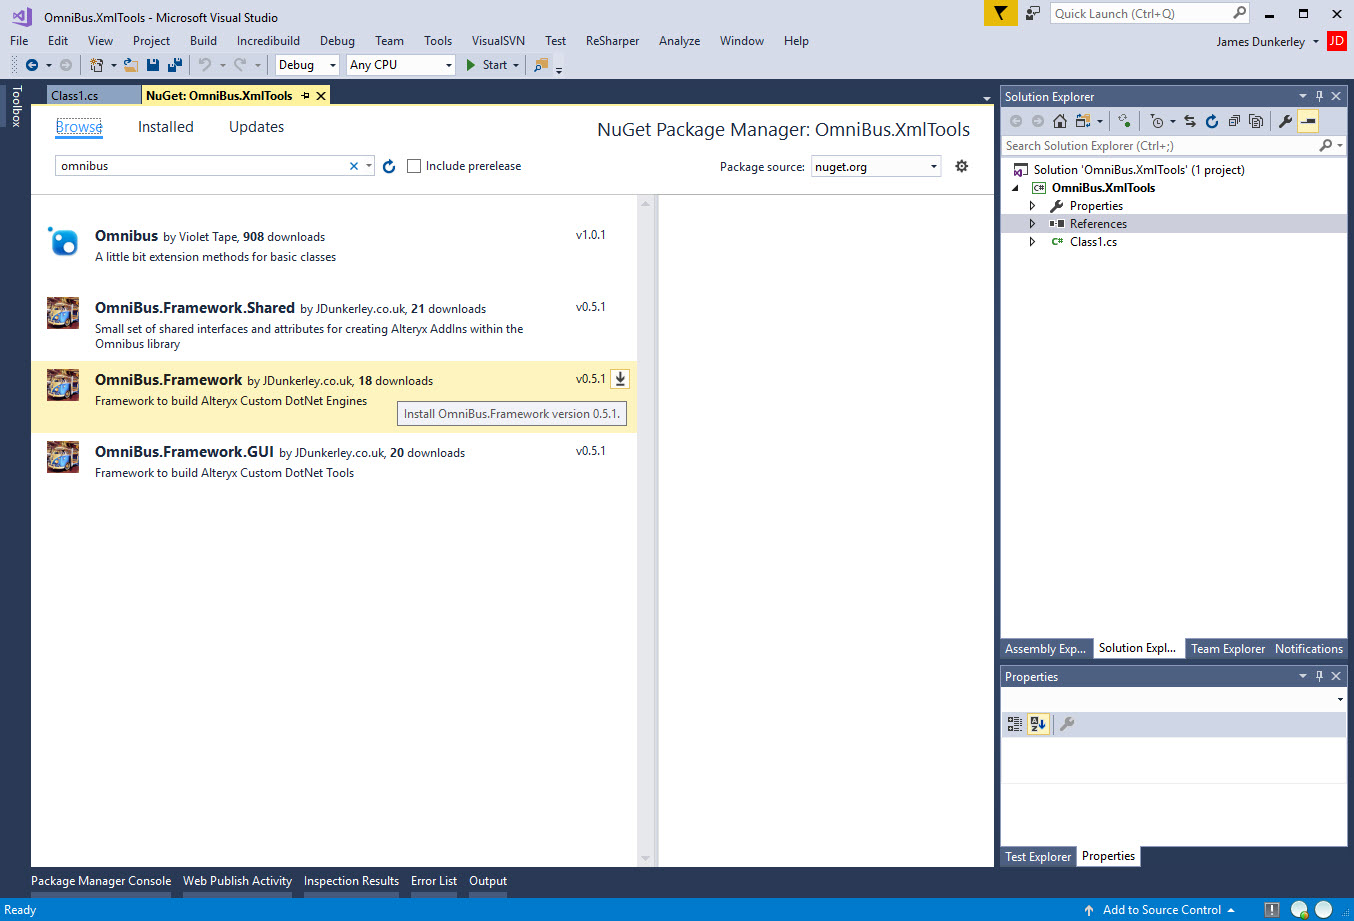
-
After this your project should look like this: assets/newTool/Solution Explorer.jpg
Installation of the Omnibus.Framework.Shared will do a couple of things to your project
- It sets the target platform to be 64-bit
- It will locate the Alteryx install directory and add a reference to AlteryxRecordInfo.dll
- It also sets Copy local for this dll to be false
Installation of the Omnibus.Framework.GUI will do the following
- It will set the debug action to start Alteryx within Debug mode
- It will add System.Drawing and System.Windows.Forms
- It will locate the Alteryx install directory and add a reference to AlteryxRecordInfo.dll
- It also sets Copy local for this dll to be false
- Finally it will set up and configure Install.bat and Uninstall.bat scripts
- These will create a tool group with the project name
- They are set to copy to the output directory on a build
- I still have to see what happens when I upgrade the packages expect there will be a warning message
A custom tool consists of three parts:
- Configuration object
- Engine
- Plug In (The name of this class will be used by Alteryx in the tool bar)
I like calling the engine class <PlugIn>Engine and the configuration class <PlugIn>Config.
- Remove the default Class1.cs
- Add a new class (Shift-Alt-C) with code like:
namespace OmniBus.XmlTools
{
    /// <summary>Configuration Class for <see cref="XmlInputEngine"/></summary>
    public class XmlInputConfig
    {
        /// <summary>Returns a string that represents the current object.</summary>
        /// <returns>A string that represents the current object, used as the Default Annotation for Alteryx.</returns>
        public override string ToString() => string.Empty;
    }
}This class will hold the configuration of the object. It is also responsible for creating the Default Annotation for the tool, using the ToString method of the class. To get started, we will just create an empty class returning an empty string:
Note: The default serialiser in the framework is based off the XmlSerilaiser in .Net. There is also a pretty basic prototype of one which matches Alteryx formats. At the moment it can't cope with very complex objects. Currently just numeric types, strings and dates. This will be improved in the next versions of the framework.
- Add another new class for the engine
- This needs to be derived from BaseEngine with a type argument of the Config type you created before.
using OmniBus.Framework;

namespace OmniBus.XmlTools
{
    /// <summary>Read An Xml File Into Alteryx.</summary>
    public class XmlInputEngine : BaseEngine<XmlInputConfig>
    {
    }
}The engine class is the guts of the tool. The Omnibus.Framework package has a BaseEngine<TConfig> which has the interface needed by Alteryx INetPlugIn.
- Add another class for the engine
- This needs to be derived from the BasePlugIn with type arguments of the Engine class and Config class you created.
using AlteryxGuiToolkit.Plugins;

using OmniBus.Framework;

namespace OmniBus.XmlTools
{
    /// <summary>Tell Alteryx About The Config And Engine.</summary>
    public class XmlInput : BaseTool<XmlInputConfig, XmlInputEngine>, IPlugin
    {
    }
}This class tells Alteryx Designer about the class. The Omnibus.Framework.GUI package has a BaseTool<TConfig,TEngine> which will provide all the bootstrapping needed for Alteryx. It also will provide a PropertyGrid as a property grid for Alteryx.
If you move to an HTML designer then this class isn't needed. However, for getting started and debugging this place holder class and GUI is an easy way forward.
- Build In Debug Mode
- Go to the bin/Debug folder
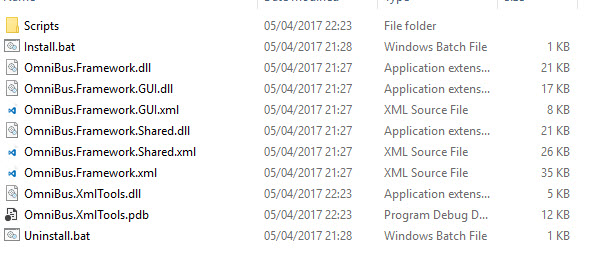
- Run Install.bat
- Accept In UAC
- Start Debugging within Visual Studio
- Alteryx Should Start and a new entry in the ribbon should be there

- It is helpful to pin this ToolGroup so you can easily get to it
- Exit Alteryx
- This batch file uses PowerShell to Request UAC and then calls Scripts/Installer.ps1.
- The batch file specifies the name of the Ini file which will be written to Alteryx's *Settings\AdditionalPlugins* folder (the 2nd parameter in the Argument list)
- It also specifies the ToolGroup (the 3rd parameter) for Alteryx to add the tool.
- The Ini file will tell Alteryx where to load the DLL from and where to place it in the ribbon:
[Settings]
x64Path=C:\OneDrive\MyDocs\Visual Studio 2017\Projects\OmniBus.XmlTools\bin\Debug
x86Path=C:\OneDrive\MyDocs\Visual Studio 2017\Projects\OmniBus.XmlTools\bin\Debug
ToolGroup=OmniBus.XmlTools
- Go back to Engine class
- Add using statements for
OmniBus.Framework.AttributesandOmniBus.Framework.Interfaces:
using OmniBus.Framework.Attributes;
using OmniBus.Framework.Interfaces;- Add a new Property of type IOutputHelper with a get and set called Output
- Add a CharLabel attribute with 'O' as a parameter to the class. It should look like:
        /// <summary>Gets or sets the output stream.</summary>
        [CharLabel('O')]
public IOutputHelper Output { get; set; }- Rerun the debugger
- Drag the new tool to workflow
- It should have an O output connection and the Configuration panel should show an empty Property grid.

- If run the workflow all should be happy but no data will be pushed to the output.
- The framework looks for all IOutputHelper properties as output connections
- The
CharLabelattribute is optional and adds a letter label if found- If you have more than one then ordering is by default by Property name
- You can use an
Orderingattribute to override the name ordering- While this walkthrough is not going to deal with Input connections, they work in a similar way
- The framework searches for
IInputProperty- They should be
readonlyauto properties (i.e. nosetneeded)- The base constructor will set them up with instance classes
- There are events allowing you to hook into the life cycle from Alteryx
- This will be covered in the next walkthrough
- By default the Omnibus Framework, does not return debug messages to the UI. This can be useful and is worthwhile at an early. Add the following block to the engine class:
#if DEBUG
        /// <summary>Tells Alteryx whether to show debug error messages or not.</summary>
        /// <returns>A value indicating whether to show debug error messages or not.</returns>
        public override bool ShowDebugMessages() => true;
#endif-
As we have no Input connections we need to override
PI_PushAllRecordsin the Engine class -
Our first task is to define the meta data. This tool wil output 2 columns in its first version:
- XPath
- InnerText value
- InnerXml value
-
The code below will
Initthe output connection with columns and thenCloseit to tell Alteryx it is complete./// <summary> /// The PI_PushAllRecords function pointed to by this property will be called by the Alteryx Engine when the plugin /// should provide all of it's data to the downstream tools. /// This is only pertinent to tools which have no upstream (input) connections (such as the Input tool). /// </summary> /// <param name="nRecordLimit"> /// The nRecordLimit parameter will be < 0 to indicate that there is no limit, 0 to indicate /// that the tool is being configured and no records should be sent, or > 0 to indicate that only the requested /// number of records should be sent. /// </param> /// <returns>Return true to indicate you successfully handled the request.</returns> public override bool PI_PushAllRecords(long nRecordLimit) { this.Output.Init( FieldDescription.CreateRecordInfo( new FieldDescription("XPath", FieldType.E_FT_V_WString), new FieldDescription("InnerText", FieldType.E_FT_V_WString), new FieldDescription("InnerXml", FieldType.E_FT_V_WString))); this.Output.Close(true); return true; }
-
Rerun the debugger
-
Drag the new tool onto the workflow run it and then we can look at the Browse Anywhere output.

-
Now lets give Alteryx some data, first lets add a line before the
this.Output.Init(line which will print out debug messages of the record limit asked for:- If Alteryx asks for
0records then it is wanting the meta data only and we should handle that case - IF a negative number is passed then all record should be sent
- Otherwise you should limit at that amount.
- If Alteryx asks for
this.DebugMessage($"{nameof(nRecordLimit)} Called with {nameof(nRecordLimit)} = {nRecordLimit}");- Re-running the debugger, we can see the new message in the Messages pane:

- Lets add a place holder function returning an initial value:
/// <summary>
/// Read All The Xml From A Document
/// </summary>
/// <returns>List of nodes</returns>
public IEnumerable<object[]> ReadNodes()
{
yield return new object[] { "/doc", "Text & Help", "Test & Help" };
}- Now we need to handle this within
PI_PushAllRecords. If we add the following just before thethis.Output.Close(true);then it will iterate over all the results fromReadNodesand push them to Alteryx. In addition, it will also send out row count and data updates every 100 records (and at the end).
            if (nRecordLimit != 0)
            {
                var nodes = this.ReadNodes();
                if (nodes == null)
                {
                    return false;
                }

                long recordCount = 0;
                foreach (var data in nodes)
                {
                    this.Output.PushData(data);
                    recordCount++;

                    if (recordCount % 100 == 0)
                    {
                        this.Output.PushCountAndSize();
                    }

                    if (nRecordLimit == recordCount)
                    {
                        break;
                    }
                }
            }

this.Output.PushCountAndSize();- At this point, we have a functional if slightly useless tool. Rerunning the debugger and running the tool in a workflow yields the following:

- You can override various functions of the Engine

- This permits you to get to the raw Alteryx SDK if you need
ShowDebugMessagesallows you turn on error trapping
- Override with a lambda expression returning
trueand extra details will be shown in the the Designer- If you override the
PI_Addconnections methods, you will need to call through to the base method for the framework to work correctly.- There isn't access to the
PI_Closeor thePI_Initmethods.
OnInitCalledallows you to do initialisation after the Framework has handled it.OnCloseCalledwill be added in a later version
- The Omnibus framework will set the size parameter itself for various types
- For variable length strings it default to 1,073,741,824 as a maximum length
- For fixed length string fields you must set a size
- You must set a size and scale for fixed decimals
- It is not a good idea to send row counts and size too often as this has a detrimental effect on performance. Once every 100 (or even more) rows is sufficient.
- As working with an IEnumerable, there is not a row count. If you have a known size then you can use
this.Output.UpdateProgress(percent)method to update progress- The
PushDatafunction is easy for programming against but you may want to use thePushfunction working with theRecordobject for higher performance (I haven't benchmarked the effect of the helper)
- Alteryx expects a 171 x 171 pixel png image
- The Omnibus.Framework will search for an embedded image in the dll(s) containing the engine or the plugin
- It must be named the same as the PlugIn
- Create your tool's logo, add to the project, then set build action to be embedded resource
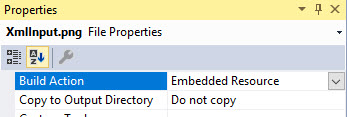
- Rerun the debugger and your tool should have it's logo
- We need to dd the ability to specify the filename of the Xml
- Add a string property to the config class called FileName
- The description attribute gives some text displayed to the user in the PropertyGrid
        /// <summary>
        /// Gets or sets the file name containing the Xml
        /// </summary>
        [Description("Specify the filename of the XML file")]
public string FileName { get; set; }- The UI is based on top of the
System.Windows.Forms.PropertyGrid - To add an
OpenFileDialogwe need to do the following:- Add a reference to
System.Design - Add the following attribute to the property:
- Add a reference to
[Editor(typeof(System.Windows.Forms.Design.FileNameEditor), typeof(System.Drawing.Design.UITypeEditor))]It is beyond the scope of this tutorial to show you how customise the OpenFileDialog. This is something I am thinking of for later versions of the framework
- We also want the configuration object to produce the default annotation. Following Alteryx's Input tool style, this should be the filename.
- Change the ToString method to the following:
        /// <summary>Returns a string that represents the current object.</summary>
        /// <returns>A string that represents the current object, used as the Default Annotation for Alteryx.</returns>
        public override string ToString()

        {
            try
            {
                return string.IsNullOrWhiteSpace(this.FileName) ? string.Empty : System.IO.Path.GetFileName(this.FileName);
            }
            catch
            {
                return String.Empty;
            }
}- Rerun Alteryx and now when you access the tool you will have the option to select a filename which will then be displayed as a default annotation: assets/newTool/withFIleNameConfig.jpg
- The Omnibus framework has a few extra attributes for setting up the property grid
FieldListAttributespecifies a set of valid values (useful for fixed list of types)InputPropertyAttributespecifies an input property (useful for picking a specific incoming field)
-
The cofiguration will be automatically deserialised into a
ConfigObjectproperty of the engine. -
Now we want to adjust the existing
ReadNodesfunction to read the configuration- If the filename is set and the file exists then it should try and load it
- If the filename doesn't exist then a nice error message should be sent
- If the Xml fails to parse then a nice error message should be sent
-
Replace the exisitng
ReadNodesfunction with:
        /// <summary>
        /// Read All The Xml Nodes From A Document
        /// </summary>
        /// <returns>List of nodes</returns>
        public IEnumerable<object[]> ReadNodes()
        {
            if (string.IsNullOrWhiteSpace(this.ConfigObject.FileName))
            {
                this.Message("You need to specify a filename.", MessageStatus.STATUS_Error);
                return null;
            }

            if (!System.IO.File.Exists(this.ConfigObject.FileName))
            {
                this.Message($"File {this.ConfigObject.FileName} could not be read.", MessageStatus.STATUS_Error););
                return null;
            }

            var document = new XmlDocument();

            try
            {
                document.Load(this.ConfigObject.FileName);
            }
            catch (XmlException ex)
            {
                this.Message($"Error reading XML: {ex.Message}");
                return null;
            }

            return this.ReadNodes(document.DocumentElement);
}- Next, add the method below to recursively scan an XmlNode's child nodes and produce a
Enumerableset of results (the detail of this is beyond scope of this tutorial):
        /// <summary>
        /// Read All The Xml Nodes From A Node
        /// Recursive scan from input node
        /// </summary>
        /// <returns>List of nodes</returns>
        public IEnumerable<object[]> ReadNodes(XmlNode node, string path = "")
        {
            if (node == null)
            {
                return Enumerable.Empty<object[]>();
            }

            path = path + "/" + (node is XmlAttribute ? "@" : "") + node.Name;

            var nodes = node.ChildNodes.Cast<XmlNode>();
            var txtNodes = nodes.Where(x => x.Name == "#text").ToArray();

            var txt = txtNodes.Length == 0 ? node.InnerText : null;
            if (txtNodes.Length == 1)
            {
                txt = txtNodes[0].InnerText;
                nodes = nodes.Where(n => n.Name != "#text");
            }

            IEnumerable<object[]> result = new[] { new object[] { path, txt, node.InnerXml } };

            if (node.Attributes != null)
            {
                result = result.Concat(node.Attributes.Cast<XmlNode>().SelectMany(n => this.ReadNodes(n, path)));
            }

            return result.Concat(nodes.SelectMany(n => this.ReadNodes(n, path)));
}These are not included in this tutorial but will eventually be part of the XML Input tool within the OmniBus add ins
- Allow for wildcards in the filename and searching subfolders (much like Alteryx's Input tool)
- Allow user to decide to include the filename in output
- Allow user to include/exclude the InnerXml
Developing Functions
Grouped Record ID