-
Notifications
You must be signed in to change notification settings - Fork 21
Part 2. Finding the Button's Address
To find (and subsequently use) your Dash button's hardware address, we need to use Node JS. This can be installed on any computer - Mac, Linux (Raspberry Pi), or Windows.
Our final project hinges on having a computer that's connected to the same network as our button that is running an uninterrupted Node script, so keep that in mind when choosing your device. An at-home desktop or Raspberry Pi would be perfect.
I choose to use a Pi 3, but a Pi Zero with a WiFi dongle would work too!
To install Node JS on your computer, follow the appropriate instructions:
Alex Horton wrote a fantastic module just for what we're trying to do called node-dash-button. We need to install it, along with the node package manager (npm) and libpcap. Enter these commands in the command line:
sudo apt-get install npm
sudo apt-get install libpcap-dev
npm install node-dash-button
Note: "sudo" may not be necessary if you're installing on something other than a Pi - it's always good to try without it first. If you get a permissions error on install, then you need to use it.
We've found a simple way to find your dash button address.
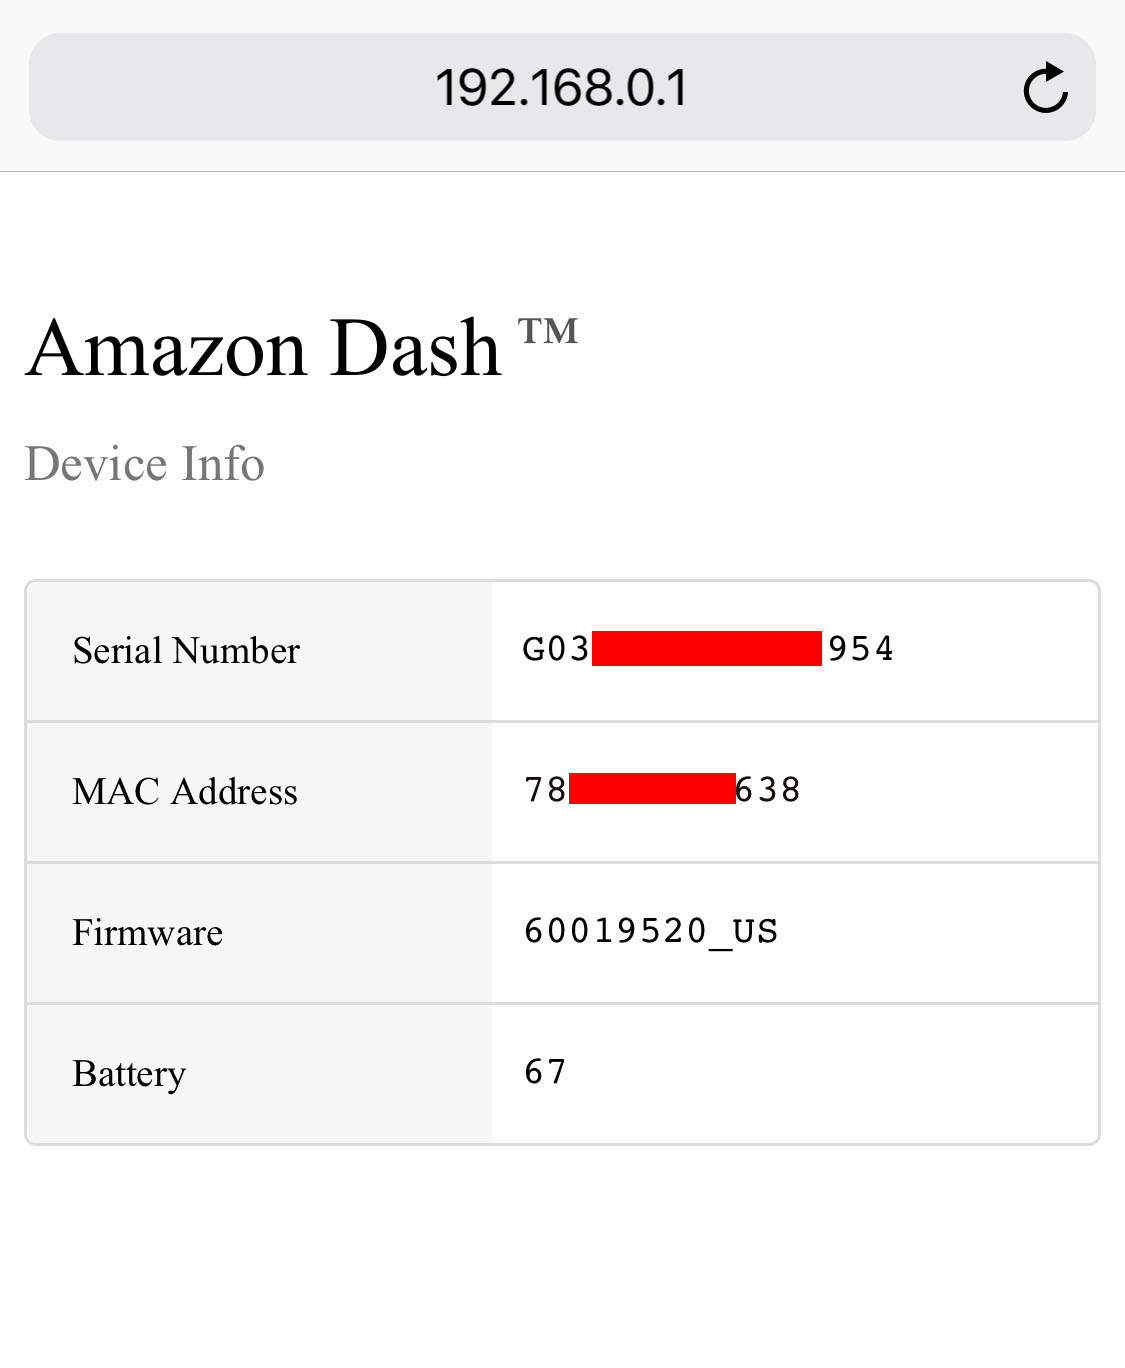
First, hold down the button on your dash button for about 5 seconds until the LED begins to slowly strobe blue. On your phone, open your wifi settings and find the 'Amazon Configure Me' wifi. Once connected to this, open your web browser and go to 'http://192.168.0.1'.

The address that we're looking for is MAC address and will look like "ab:64:be:8b:ce:82".
You can confirm that you found the correct address by writing a simple script to print a message every time the button is pressed.
Create a new script inside of the node-dash-button directory.
sudo nano button_test.js
And copy-paste the following into the file:
var dash_button = require('node-dash-button'),
    dash = dash_button('xx:xx:xx:xx:xx:xx'), //REPLACE WITH YOUR ADDRESS
    exec = require('child_process').exec;

dash.on('detected', function() {
    console.log('Button pushed!');
});
Replace the x's on the second line with your newly found button address. Save the file with Ctl-x, y.
Start the script and press your button.
sudo node button_test.js
You should see "Button pushed!" print out. Now that we can detect button presses, we can trigger actions based on them!
<< Part 1: Setting up the Dash Button - Part 3: Triggering an Alert on a Press >>
Initial State (https://www.initialstate.com)
(c) 2018 Initial State Technologies, Inc.