-
Notifications
You must be signed in to change notification settings - Fork 347
Home
💁♀️ Participate in Discussions where you can see Announcements, Polls, Q&A, etc.
AndroidViewClient is an extension to monkeyrunner a 100% pure python library and tools that simplifies test script creation and android test automation, providing higher level operations and the ability of obtaining the tree of Views present at any given moment on the device or emulator screen and perform operations on it.
As it's 100% pure python it doesn't require monkeyrunner, jython or any interpreter other than python.
Interaction with Views is completely device independent and you don't have to take into account different screen sizes, resolutions or densities as the operations can be specified by View attributes instead as by (x,y) coordinates. Attributes such as content description, text, id or autogenerated unique id can be used to select a View.
AndroidViewClient is commonly used to create tests scripts but can be in stand-alone scripts as well. Test script creation can be even further simplified and automated by using Culebra. Culebra is fully described in its own page.
🚀 Check Examples and Screencasts and videos page to see it in action.
It is usually convenient to use a virtual environment to easily switch between multiple versions of Python if the one installed in your system or the one required by other tools is different.
AndroidViewClient supports Python 3 and Python 2.7.x and a virtual environment would isolate your system from this dependency.
ℹ️ : This is the preferred installation method
For example, install pyenv as indicated by its documentation.
$ mkdir avc-workdir
$ cd avc-workdir
$ pyenv install 3.x
$ pyenv local 3.x
$ pip3 install androidviewclient --upgrade
and if everything went well
$ culebra --version
culebra 20.0.0b4
That's it! You have a working installation of AndroidViewClient that you can upgrade it later using pip too. 🙌
$ mkdir avc-workdir
$ cd avc-workdir
$ pyenv install 2.7.15
$ pyenv local 2.7.15
$ pip install androidviewclient
and if everything went well
$ culebra --version
culebra 15.5.1
That's it! You have a working installation of AndroidViewClient that you can upgrade using pip. 🙌
There are a lot of ways of installing or upgrading AndroidViewClient but this is perhaps the easiest one, no wonder why the command name just mentions it.
This method installs the latest release version of AndroidViewClient.
If you don't have easy_install installed install the package python-setuptools
$ sudo apt-get install python-setuptools
Alternatively, if you install packages via pip you can use it to install setuptools too. AndroidViewClient requires Python 2 and is not compatible with Python 3.
$ pip install -U setuptools # not needed on Ubuntu
Then
$ sudo easy_install --upgrade androidviewclient
Run
pip install androidviewclient
Latest versions use matplotlib as a dependency and its installation may require you have python development environment installed. So if you are receiving an error like this
 error: command 'x86_64-linux-gnu-gcc' failed with exit status 1

  ----------------------------------------
  Failed building wheel for subprocess32
  Running setup.py clean for subprocess32
Failed to build subprocess32
Installing collected packages: subprocess32, pytz, six, python-dateutil, cycler, numpy, matplotlib
you should install python-dev
sudo apt install python-dev
and retry the pip command.
When installing the tool for the first time run the following commands respectively:
- sudo apt-get install python-pip
- sudo apt-get install git
- sudo pip install git+https://github.com/dtmilano/AndroidViewClient.git
Please note that, using pip method will install the development version on your machine. This cutting edge version includes the most up-to-date patches and it's usually not as stable as the release.
If you are using Microsoft Windows you may find this discussion about setuptools helpful and interesting: how to use python's easy install on windows
However, as a quick hint:
You can refer to the following link: (https://pypi.python.org/pypi/setuptools) and follow the provided instructions under "Windows (simplified)".
Darpan Dodiya has written an excellent setup tutorial for Windows:
How To Install, Setup And Use AndroidViewClient On Windows
Strictly speaking, AndroidViewClient does not require installation to be used. Downloading the required components is all you need.
Download the zip or tag.gz from releases, expand it, set the environment
$ export ANDROID_VIEW_CLIENT_HOME=/path/to/androidviewclient/
and your ready to go.
AndroidViewClient uses adb to connect to the devices so it should be available.
INFORMATION: Problems has been reported with some
adbinstalled from unofficial packages or repositories, so to be sure install it from https://developer.android.com/studio/index.html
This distribution includes the following AndroidViewClient tools:
$ dump --help
$ culebra --help
Culebra GUI also provides an easy way of getting started.
Before you begin, you can verify that your environment has been correctly setup after following the steps mentioned in Installation.
There is a simple script in examples that would help you do this verification.
$ cd /path/to/androidviewclient
$ cd examples
$ python3 check-import.py
if everything is fine, you will receive
OK
however, if something went wrong you will receive the corresponding exception.
Use the --debug command line option to help you find the problem.
You may receive an exception like
Traceback (most recent call last):
  File "check-import.py", line 35, in <module>
    import com
ImportError: No module named com
this is due to the fact that python was not able to find the requested modules. To solve the problem you must set ANDROID_VIEW_CLIENT_HOME environment variable pointing to the directory containing the modules.
$ export ANDROID_VIEW_CLIENT_HOME=/path/to/androidviewclient/
Also, as a quick check of having the right directory set in ANDROID_VIEW_CLIENT_HOME you can do
$ cd $ANDROID_VIEW_CLIENT_HOME
$ ls -l
and the directories and files in the folder should be similar to
total 80
-rw-r--r--   1 diego  staff  11358 21 Jan 22:30 LICENSE
-rw-r--r--   1 diego  staff    493 21 Jan 22:30 README.md
-rwxr-xr-x   1 diego  staff   1299 21 Jan 22:30 avc-version
-rw-r--r--   1 diego  staff   2181 21 Jan 22:30 build.xml
drwxr-xr-x  59 diego  staff   2006 21 Jan 22:30 doc
drwxr-xr-x   9 diego  staff    306 21 Jan 22:32 docs
drwxr-xr-x  32 diego  staff   1088 21 Jan 22:30 examples
-rw-r--r--   1 diego  staff    206 21 Jan 22:30 project.properties
-rw-r--r--   1 diego  staff    962 21 Jan 22:30 setup.py
drwxr-xr-x   4 diego  staff    136 21 Jan 22:30 src
drwxr-xr-x   5 diego  staff    170 21 Jan 22:30 tests
drwxr-xr-x   4 diego  staff    136 21 Jan 22:30 tools
drwxr-xr-x   3 diego  staff    102 21 Jan 22:30 uml
-rw-r--r--   1 diego  staff   4416 21 Jan 22:30 viewclient.epydoc
Alternatively, you can set PYTHONPATH environment variable instead of ANDROID_VIEW_CLIENT_HOME. The only advantage in using this is that Eclipse and PyDev set this variable automatically from your project configuration. so if you are running scripts from the IDE there are no extra steps.
However, if you are running scripts from the command line you can still use this variable.
$ export PYTHONPATH=/path/to/androidviewclient
See API Documentation.
Depending on various conditions some implementation may be the correct for your case.
See also:
This is just an illustrative quick example of AndoidViewClient capabilities. The complete set of examples can be found here.
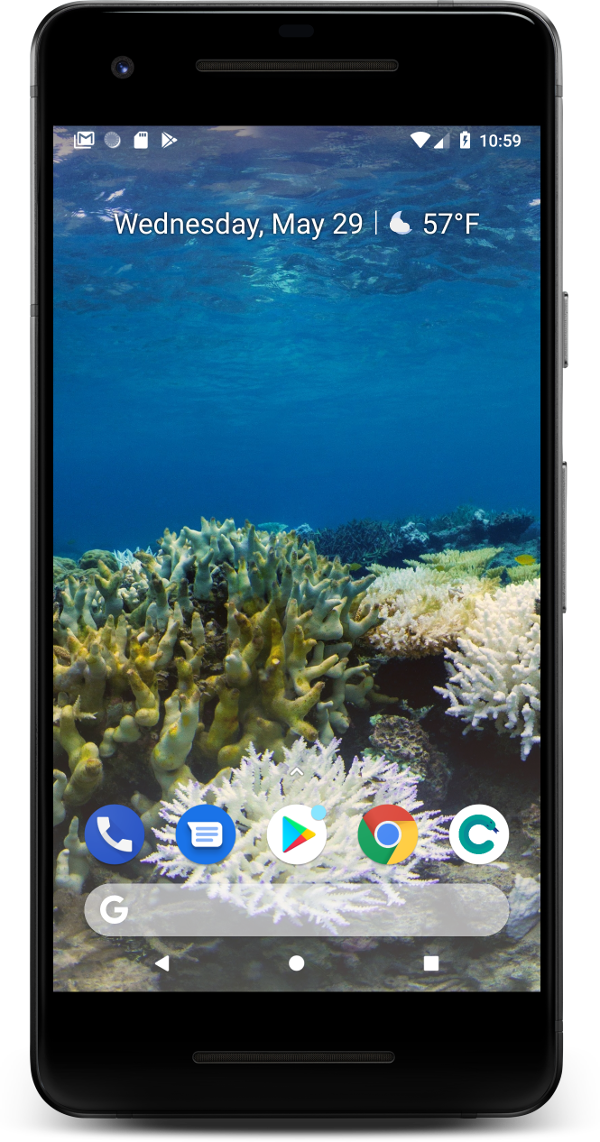
The device shows several shortcuts, like Phone, Messages, Play Store, Chrome, etc.

dump.pyhas evolved from this simple script to a full-fledged tool that has been moved to thetoolsdirectory.See the dump for details.
We call this script simple-dump.py
#! /usr/bin/env python
'''
Copyright (C) 2012  Diego Torres Milano
Created on Feb 3, 2012

@author: diego
'''


import sys
import os

try:
    sys.path.insert(0, os.path.join(os.environ['ANDROID_VIEW_CLIENT_HOME'], 'src'))
except:
    pass

from com.dtmilano.android.viewclient import ViewClient

ViewClient(*ViewClient.connectToDeviceOrExit()).traverse()Running the previous script as:
$ ./simple-dump.py [serialno]
produces:
android.widget.FrameLayout
   com.android.launcher3.Workspace com.google.android.apps.nexuslauncher:id/workspace
      android.widget.FrameLayout com.google.android.apps.nexuslauncher:id/search_container_workspace
         android.widget.TextView com.google.android.apps.nexuslauncher:id/clock Wednesday, May 29
         android.widget.LinearLayout com.google.android.apps.nexuslauncher:id/title_weather_content
            android.widget.TextView com.google.android.apps.nexuslauncher:id/title_weather_text 57°F
   android.widget.ImageView com.google.android.apps.nexuslauncher:id/all_apps_handle
   android.view.ViewGroup com.google.android.apps.nexuslauncher:id/layout
      android.widget.TextView  Phone
      android.widget.TextView  Messages
      android.widget.TextView  Play Store
      android.widget.TextView  Chrome
      android.widget.TextView  Culebra Tester
   android.widget.FrameLayout com.google.android.apps.nexuslauncher:id/search_container_hotseat
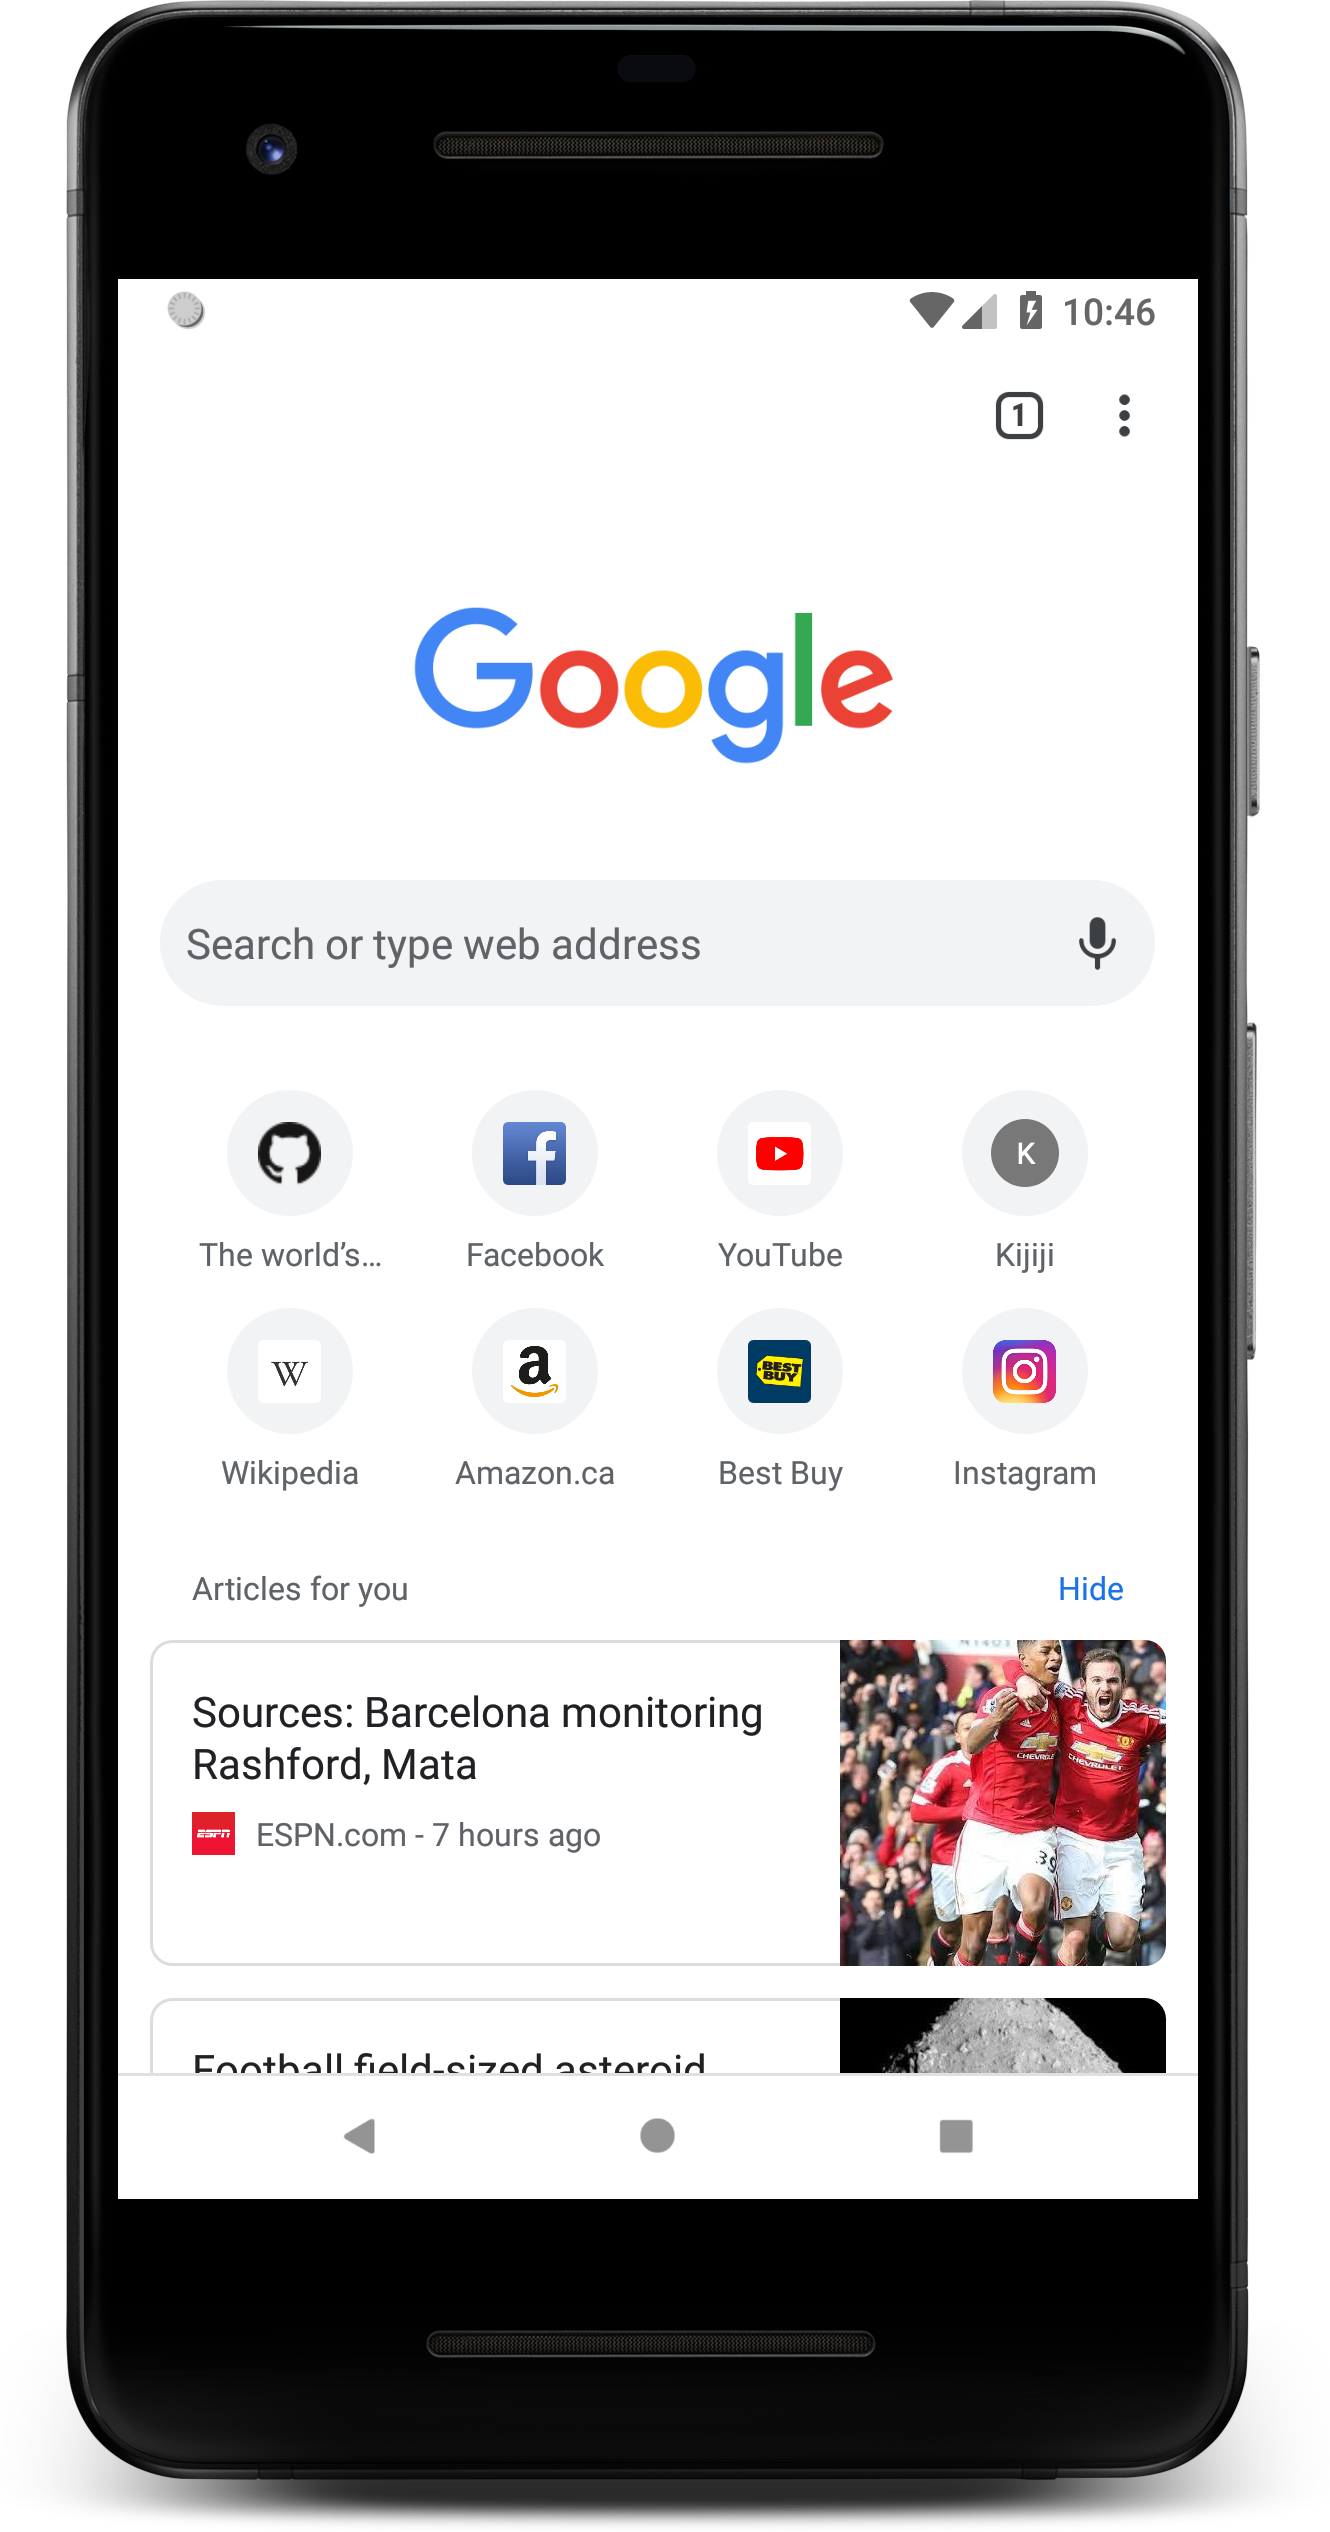
To complete our simple example let's say we want to touch Chrome shortcut to open the application. We can name this script simple-interaction.py
#! /usr/bin/env python
# -*- coding: utf-8 -*-
"""
Copyright (C) 2019  Diego Torres Milano
Created on Jun 7, 2019

@author: diego
"""

from com.dtmilano.android.viewclient import ViewClient

vc = ViewClient(*ViewClient.connectToDeviceOrExit())
vc.dump(window=-1)
vc.findViewWithContentDescriptionOrRaise(u'''Chrome''').touch()Running the previous script as:
$ ./simple-interaction.py [serialno]
produces:

Copyright (C) 2012-2023 Diego Torres Milano
Licensed under the Apache License, Version 2.0 (the "License"); you may not use this file except in compliance with the License. You may obtain a copy of the License at
http://www.apache.org/licenses/LICENSE-2.0
Unless required by applicable law or agreed to in writing, software distributed under the License is distributed on an "AS IS" BASIS, WITHOUT WARRANTIES OR CONDITIONS OF ANY KIND, either express or implied. See the License for the specific language governing permissions and limitations under the License.
