Currently working on .Net MAUI migration (maui_migration branch)
- Create a reusable RadialMenu without relying on any CustomRenderer
Install NuGet package: Xamarin.Forms.RadialMenu or download repo and compile it manually so you can reference it from your target project :D
1.- Just reference it in your View and set MenuItemsSource property:
<ContentPage xmlns="http://xamarin.com/schemas/2014/forms"
             xmlns:x="http://schemas.microsoft.com/winfx/2009/xaml"
             <!-- REFERENCE XAML NAMESPACE-->
             xmlns:radial="clr-namespace:Xamarin.Forms.RadialMenu;assembly=Xamarin.Forms.RadialMenu"
             x:Class="Xamarin.Forms.RadialMenu.MainPage">

    <Grid>   <!-- IT IS RECOMMENDED TO USE WITHIN A GRID SO IT TAKES ADVANTAGE OF GRID OVERLAPPING-->
        <Grid.RowDefinitions>
            <RowDefinition></RowDefinition>
            <RowDefinition Height="40"></RowDefinition>
        </Grid.RowDefinitions>
           <local:RadialMenu BackButtonImageSource="back_circle.png"         <!-- CHILD MENU BACK BUTTON IMAGE-->
                          OuterCircleImageSource="outer_circle.png"          <!-- OUTER CIRCLE IMAGE-->
                          MainMenuCloseButtonImageSource="close_circle.png"  <!-- CLOSE IMAGE-->
                          MainMenuImageSource="menu_circle.png"              <!-- MAIN MENU IMAGE-->
                          MenuItemsSource="{Binding MenuItems}"
                          Grid.Row="0" x:Name="Menu"
                          CloseMenuWhenChildTapped="false"
                          ChildGrowAnimationDuration="400"
                          ChildShrinkAnimationDuration="400"
                          MenuOpenAnimationDuration="800"
                          MenuCloseAnimationDuration="800"
                          IsMenuSandboxEnabled="False"
                          MenuItemAppearingDuration="100"
                          MenuItemHidingDuration="80"
                          ChildGrowEasing="{x:Static Easing.SpringOut}"
                          ChildShrinkEasing="{x:Static Easing.CubicOut}"
                          MenuOpenEasing="{x:Static Easing.BounceIn}"
                          MenuCloseEasing="{x:Static Easing.BounceOut}"
                          IsShadowVisible="True">

                           <!--HORIZONTAL/VERTICAL OPTIONS ARE DIFFERENT FOR EACH PLATFORM -->
                            <!--For Android use Center for Horizontal and Vertical -->
                            <!--For iOS use Fill for Horizontal and Vertical -->
                            <!--THIS ENSURES CLICK EVENTS PROPAGATES ONLY IN MENU AND NOT THROUGH ENTIRE GRID -->

                           <local:RadialMenu.HorizontalOptions>
                            <OnPlatform x:TypeArguments="LayoutOptions">
                                      <On Platform="Android" Value="Center" />
                                      <On Platform="iOS" Value="Fill" />
                                      <On Platform="UWP" Value="Center" />
                                  </OnPlatform>
                              </local:RadialMenu.HorizontalOptions>
                              <local:RadialMenu.VerticalOptions>
                                  <OnPlatform x:TypeArguments="LayoutOptions">
                                      <On Platform="Android" Value="Center" />
                                      <On Platform="iOS" Value="Fill" />
                                      <On Platform="UWP" Value="Center" />
                                  </OnPlatform>
                            </local:RadialMenu.VerticalOptions>
                </local:RadialMenu>
                <Label x:Name="Notifier" Grid.Row="1" HorizontalTextAlignment="Center"></Label>

        <!--ON ANDROID MAKE SURE IMAGES EXISTS IN RESOURCES FOLDER BEFORE RUNNING APP.OTHERWISE IT MAY CRASH-->

........
2.- And your ViewModel/Codebehind code will look similar to:
            //Add items at initialization. Otherwise items won't show
            vm = new MainMenuViewModel();
            BindingContext = vm;
           vm.MenuItems = new ObservableCollection<RadialMenuItem>()
            {
                new CustomizedItem()
                {
                    AppearingOrder = 0,
                    Source = "menu_paint.png",
                    WidthRequest = 38,
                    HeightRequest = 38,
                    VerticalOptions = LayoutOptions.Center,
                    HorizontalOptions = LayoutOptions.Center,
                    Location = Enumerations.Enumerations.RadialMenuLocation.N,Title="North",
                    ChildItems=new ObservableCollection<RadialMenuItem>()
                    {

                            new RadialMenuItem()
                            {
                                Source = "menu_lorry.png",
                                WidthRequest = 38,
                                HeightRequest = 38,
                                VerticalOptions = LayoutOptions.Center,
                                HorizontalOptions = LayoutOptions.Center,
                                Location = Enumerations.Enumerations.RadialMenuLocation.N

                            },
                        new RadialMenuItem()
                        {
                            Source = "menu_lorry.png",
                            WidthRequest = 38,
                            HeightRequest = 38,
                            VerticalOptions = LayoutOptions.Center,
                            HorizontalOptions = LayoutOptions.Center,
                            Location = Enumerations.Enumerations.RadialMenuLocation.Ne
                        }, new RadialMenuItem()
                        {
                            Source = "menu_factory.png",
                            WidthRequest = 38,
                            HeightRequest = 38,
                            VerticalOptions = LayoutOptions.Center,
                            HorizontalOptions = LayoutOptions.Center,
                            Location = Enumerations.Enumerations.RadialMenuLocation.E

                        },

                    }
                },

            new CustomizedItem()
            {
                AppearingOrder = 0,
                Source = "menu_cow.png",
                WidthRequest = 38,
                HeightRequest = 38,
                VerticalOptions = LayoutOptions.Center,
                HorizontalOptions = LayoutOptions.Center,
                Location = Enumerations.Enumerations.RadialMenuLocation.Se,
                Title = "SE"
            },
            new RadialMenuItem()
            {
                AppearingOrder = 0,
                Source = "menu_award.png",
                WidthRequest = 38,
                HeightRequest = 38,
                VerticalOptions = LayoutOptions.Center,
                HorizontalOptions = LayoutOptions.Center,
                Location = Enumerations.Enumerations.RadialMenuLocation.Sw
}}; //Animations**
ChildShrinkEasing
ChildGrowEasing
MenuOpenEasing
MenuCloseEasing
//*************//
BackButtonImageSource //Child menu back button image
OuterCircleImageSource //Outer menu circle backg image
MainMenuCloseButtonImageSource //Main Opened menu close button image
MainMenuImageSource //Closed menu button image
MenuItemsSource //Menu items
CloseMenuWhenChildTapped //Trigger close logic when a child menu item is tapped. Otherwise triggers back
ChildGrowAnimationDuration="600" //Child menu easing animation duration (Open)
ChildShrinkAnimationDuration="600" //Child menu shrinking animation duration (Closing)
MenuOpenAnimationDuration="100" //Main menu open animation duration
MenuCloseAnimationDuration="100" //Main menu close animation duration
IsShadowVisible="True" //Enable/Disable background shadow. For android only Api>=21 supported
  Menu.ItemTapped += async (sender, location) =>
            {
                  var textLocation = location.ToString();
            };

   Menu.ChildItemTapped += async (sender, child) =>
            {
                Notifier.Text = $"Parent:{child.Parent.Location.ToString()} Child:{child.ItemTapped.ToString()}";
                await Task.Delay(5000);
                Notifier.Text = "";

            };

    Menu.MenuClosed += async (s, a) =>
            {

            };

    Menu.MenuOpened += async (s, a) =>
            {

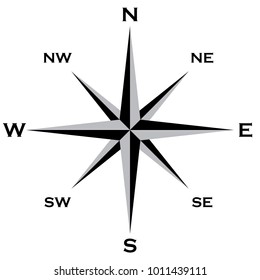
};Project contain an enumeration which is used to set each menu item location within RadialMenu. By default it follows clockwise to animate items when showing(First North then North-East and so on).
        public enum RadialMenuLocation
        {
            N = 0,//North
            Ne = 1,//North-East
            Nw = 7,//North-West
            S = 4,//South
            Se = 3,//South-East
            Sw = 5,//South-West
            W = 6,//West
            E = 2//East
        }
Items relies on a base class called RadialMenuItem, which exposes a virtual method called Draw. By default this method is in charge of drawing each item in the position we manually set in the beginning.
    public virtual void Draw()
      {
          var itemGrid = new Grid();
          if (Source != null)
          {
              itemGrid.Children.Add(new Image() { Source=this.Source});
              this.Content = itemGrid;
          }
      }
In case you want to add other items than JUST Images you can!. Just create a class that inherits from RadialMenuItem, override Draw() and build your own element (just make sure to use Labels and Images since tapped event behaves nicely this way). After this just use it normally when creating the menu items list in your VM.
public class CustomizedItem:RadialMenuItem
  {
      public override void Draw()
      {
          var itemGrid = new StackLayout(){Spacing=0};
          if (Source != null)
          {

              itemGrid.Children.Add(new Image(){Source=Source});
              var label = new Label() {FontSize=11,
                VerticalOptions = LayoutOptions.End,TextColor=Color.White,
                HorizontalTextAlignment=TextAlignment.Center,
                Text= Title,
                Margin=new Thickness(0,1,0,0)};
              itemGrid.Children.Add(label);
              Content = itemGrid;
          }
      }
  }


  vm.MenuItems = new ObservableCollection<RadialMenuItem>()
          {
              new CustomizedItem()
              {
                  Source = "menu_paint.png",
                  WidthRequest = 38,
                  HeightRequest = 38,
                  VerticalOptions = LayoutOptions.Center,
                  HorizontalOptions = LayoutOptions.Center,
                  Location = Enumerations.Enumerations.RadialMenuLocation.N,Title="North"
              }
};Currently custom rendererers are only available for Android and iOS (UWP coming soon) and they add Dragging capability to your RadialMenu and it is completely optional for you to use it or not.
You can find the Android renderer here:
- https://github.com/arqueror/Xamarin.Forms-RadialMenu/blob/master/Xamarin.Forms.RadialMenu.AndroidCore/DraggableViewRenderer.cs
- NuGet: Xamarin.Forms.RadialMenu.AndroidCore
You can find the iOS renderer here:
- https://github.com/arqueror/Xamarin.Forms-RadialMenu/blob/master/Xamarin.Forms.RadialMenu.iOSCore/DraggableViewRenderer.cs
- NuGet: Xamarin.Forms.RadialMenu.iOSCore
Call Abstractions.Init() on each platform
- Draggable renderer for UWP
- Alan Beech (https://github.com/alanbeech) for the base code used for this repo.
- CrossGeeks (https://github.com/CrossGeeks) for the Drag renderer base code.
Your caffeine helps me a lot ✨
Happy coding! ✨ 🐫 💥


