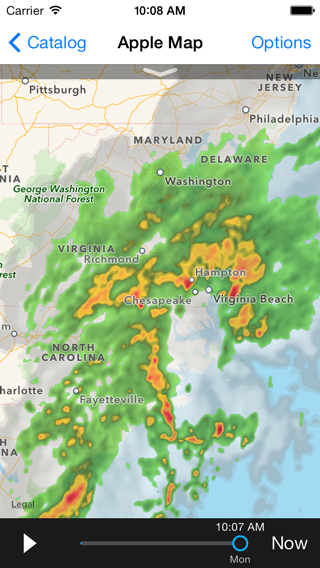
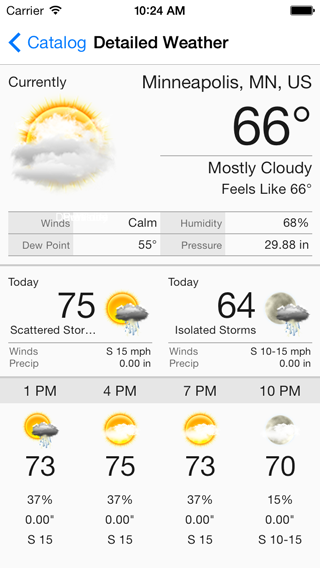
The AerisWeather SDK for iOS allows a developer to quickly and easily add weather content and functionality to their iOS applications quickly and easily without having to code anything themselves. It utilizes the AerisWeather API and Aeris Maps Platform (AMP) backends for weather data and imagery and makes integrating your application with your AerisWeather account considerably easier and more efficient.
The AerisWeather SDK is broken up into multiple modules, allowing you to only include the components you need. However, some of the components have dependencies on one or more of the others as it simple builds upon them.
- AerisWeatherKit.framework - Core weather library used to interact with and parse AerisWeather API data.
- requires the core AerisCore and AerisCoreUI modules that are also distributed with the SDK.
- AerisMapKit.framework - Complete interactive weather map solution utilizing the Aeris Maps (AMP) API.
- requires AerisWeatherKit.framework
- AerisMapboxMapKit.framework - Extension of the AerisMapKit module to support the Mapbox iOS SDK
- requires AerisWeatherKit.framework, AerisMapKit.framework
- requires Mapbox iOS SDK
- AerisGoogleMapKit.framework - Extension of the AerisMapKit module to support using the Google Maps SDK.
- requires AerisWeatherKit.framework, AerisMapKit.framework
- requires Google Maps SDK
We have a migration guide available to help you transition to version 3.0 of the SDK if you're projects are already using 2.0.
We have in-depth installation and setup guides available for you to get started using the AerisWeather SDK for iOS.
The following are basic installation instructions to follow to get the SDK integrated with your project based on your desired method. Select one of the following methods to integrate the SDK based on your preferred method, but don't use more than one method as that will result in duplicate copies of the SDK and compiler errors.
-
Make sure you have CocoaPods installed and working. If you don't have CocoaPods installed on your system, follow the installation instructions to get started. If you're new to or unfamiliar with CocoaPods, also make sure to review its usage guide to learn more about how to get started with CocoaPods for your project.
-
Add the
AerisWeatherpod to yourPodfile. This will add the base AerisWeatherKit.framework and its core dependencies to your project.pod 'AerisWeather'
-
If you want to also use any of the weather mapping functionality available in our iOS SDK, you'll need to also include the
Mapspod:pod 'AerisWeather/Maps' # include this if using Mapbox for maps in your project pod 'AerisWeather/Mapbox' # or include this if using Google Maps for maps in your project pod 'AerisWeather/Google'
-
Run
pod installfrom the Terminal at the root of your project where yourPodfileis located. -
Open your
*.xcworkspacefile with Xcode. Do NOT use*.xcodeprojas you'll receiveld: library not founderrors for the AerisWeather libraries. -
Under the Build Phases tab of your Target, click the + button on the top-left and select New Run Script Phase. Setup the build phase as follows, and make sure this phase is below the Embed Frameworks phase:
Shell /bin/sh

bash "${BUILT_PRODUCTS_DIR}/${FRAMEWORKS_FOLDER_PATH}/AerisCore.framework/strip-frameworks.sh"

Show environment variables in build log: Checked
Run script only when installing: Not checked

Input Files: Empty
Output Files: Empty
-
Follow our setup guide to start using the SDK.
-
Install the latest version of Carthage.
-
Add the following to your
Cartfile:binary "https://www.aerisweather.com/downloads/ios/AerisWeather.json"
-
Run
carthage update. -
In your app target's General settings tab, under the Linked Frameworks and Libraries section, drag and drop all the
Aeris###.frameworkfiles (e.g.AerisCore.framework,AerisWeatherKit.framework, etc) you wish to use from theCarthage/Build/iOSfolder on disk. -
In the Build Phases tab, click the + icon and choose New Run Script Phase. Create a Run Script phase and add the following to the script area below the shell:
/usr/local/bin/carthage copy-frameworks
-
Then add the framework paths to the Input Files for this script phase:
$(SRCROOT)/Carthage/Build/iOS/AerisCore.framework
$(SRCROOT)/Carthage/Build/iOS/AerisCoreUI.framework
$(SRCROOT)/Carthage/Build/iOS/AerisWeatherKit.framework
...
-
Review the Carthage setup documentation for more information about setting up your project.
-
Under the Build Phases tab of your Target, click the + button on the top-left and select New Run Script Phase. Setup the build phase as follows, and make sure this phase is below the Embed Frameworks phase:
Shell /bin/sh

bash "${BUILT_PRODUCTS_DIR}/${FRAMEWORKS_FOLDER_PATH}/AerisCore.framework/strip-frameworks.sh"

Show environment variables in build log: Checked
Run script only when installing: Not checked

Input Files: Empty
Output Files: Empty
-
Follow our setup guide to start using the SDK.
-
Download the latest version of the AerisWeather SDK for iOS and decompress the downloaded archive file.
-
With your project open in Xcode, select your Target. Under the General tab, find Embedded Binaries and then click the + button.
-
Click the Add Other... button, navigate to the
Aeris###.framework` files you need located within the decompressed directory you downloaded and select them. Make sure to check the Destination: Copy items if needed checkbox when prompted. -
Under the Build Phases tab of your Target, click the + button on the top-left and select New Run Script Phase. Setup the build phase as follows, and make sure this phase is below the Embed Frameworks phase:
Shell /bin/sh

bash "${BUILT_PRODUCTS_DIR}/${FRAMEWORKS_FOLDER_PATH}/AerisCore.framework/strip-frameworks.sh"

Show environment variables in build log: Checked
Run script only when installing: Not checked

Input Files: Empty
Output Files: Empty
-
Follow our setup guide to start using the SDK.
Check out the included demo project, under the Demo directory, which contains a variety of example views using different components of the SDK, including pre-built weather views and weather maps utilizing different mapping libraries. Since the project's AerisWeather SDK dependencies in the demo project are installed and managed using CocoaPods, you will need to open the Demo/AerisDemo.xcworkspace.
For complete details and instructions on installing and getting started with the AerisWeather SDK for iOS, refer to our complete Getting Started and API documentation.
Feel free to submit a new ticket with any questions, bug reports or feature suggestions you have. You can also reach out to us on Twitter at @AerisDeveloper.

