-
Notifications
You must be signed in to change notification settings - Fork 4
Cyphal application
The following hardware are required:
| № | Required device | Example | Image |
|---|---|---|---|
| 1 | Target device | Mini v2 or Micro node | 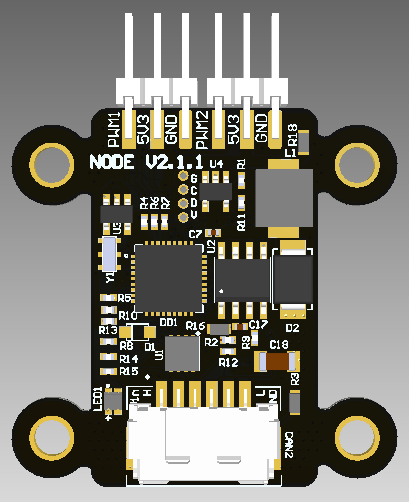 |
| 2 | Programmer, CAN-sniffer | RL sniffer and programmer | 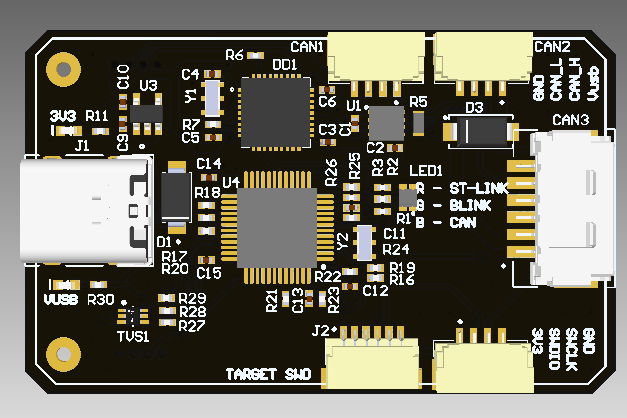 |
Actually the repository can be suitable for any RaccoonLab nodes with HW version v2 (it basically means a stm32f103 board with a few specific design rules), but it is primarily intended for RaccoonLab Mini v2 node.
You are expected to use the following software:
- stm32 related: cmake, arm-none-eabi-gcc, stlink,
- (optional) STM32CubeMX or STM32CubeIDE,
- (recommended) Yakut CLI,
- (optional) Yukon GUI.
The project depends on a few libraries which are attached to the repository as submodules. The dependency graph can be illustrated as shown below:
A few notes:
- Libs/stm32-cube-project is a project generated with the STM32CubeMX. It is based on .ioc file corresponded to the default firmware of the Mini v2 node. You may only need to change it if you want to use an a different peripheral configuration.
- Src/libparams is a simple library with ROM driver implementation that allows to store configuration parameters in persistent memory.
- Libs/Cyphal (cyphal_application) is a general-purpose application based on the Cyphal libcanard, o1heap and other libraries with minimal required features to start and some features related to UDRAL/DS015.
The project is based on the CMake build system, but it is suggested to interract with Makefile. This is just a wrapper under CMake, useful for its autocompletion.
Check Makefile for additional commands and details.
The main commads are following:
1. Generate DSDL
Before first build you need to generate DSDL with:
make generate_dsdlThis command calls the script to generate C++ headers for Cyphal data types serialization using nunavut. The output goes into build/compile_output and build/nunavut_out folders. It is expected that you doesn't often change DSDL, so you typically need to call it only once.
2. Build an exacutable and run in SITL mode
make sitl_cyphal run3. Build and upload a binary
To build a binary and upload it to the target, you can type:
make cyphal uploadThe result binary will be built in automatically created build folder.
When you run make cyphal before actual build process, a few additional source files are automatically generated into build/src such as:
- build/src/git_software_version.h that has info about the software version based on latest git tag,
- build/src/git_hash.h with info about the current commit,
- params.cpp and params.hpp - C++ source and header files with parameters array and enums based on all associated yaml files with registers (you can find generated files in the same folder: build/src),
- Src/cyphal_application/README.md with info about the supported interface and not port-related registers.
The periphery drivers are divided into 2 groups.
The drivers interfaces are represented by classes defined in header files in Src/periphery folder as shown below:

An actual implementation toy can find in source files in [Src/platform] folder. Depending in which mode you are building the application (SITL ubuntu or stm32f103) and the board type (mini v2 or a custom one) it uses different implementations:
- stm32 implementations depend on STM32CubeMX generated HAL drivers (though it is not required and you can write your optimized implementation),
- Ubuntu drivers implementations usually are just a mock drivers.
A module is a specific independant unit of an application functionality. It can be implemented in a different way, for example as RTOS task. But let's keep it baremetal for a while because typically (but not always) a Cyphal/DroneCAN application is simple and resource limited.
An example of modules for a minimal CAN-PWM application is shown below:
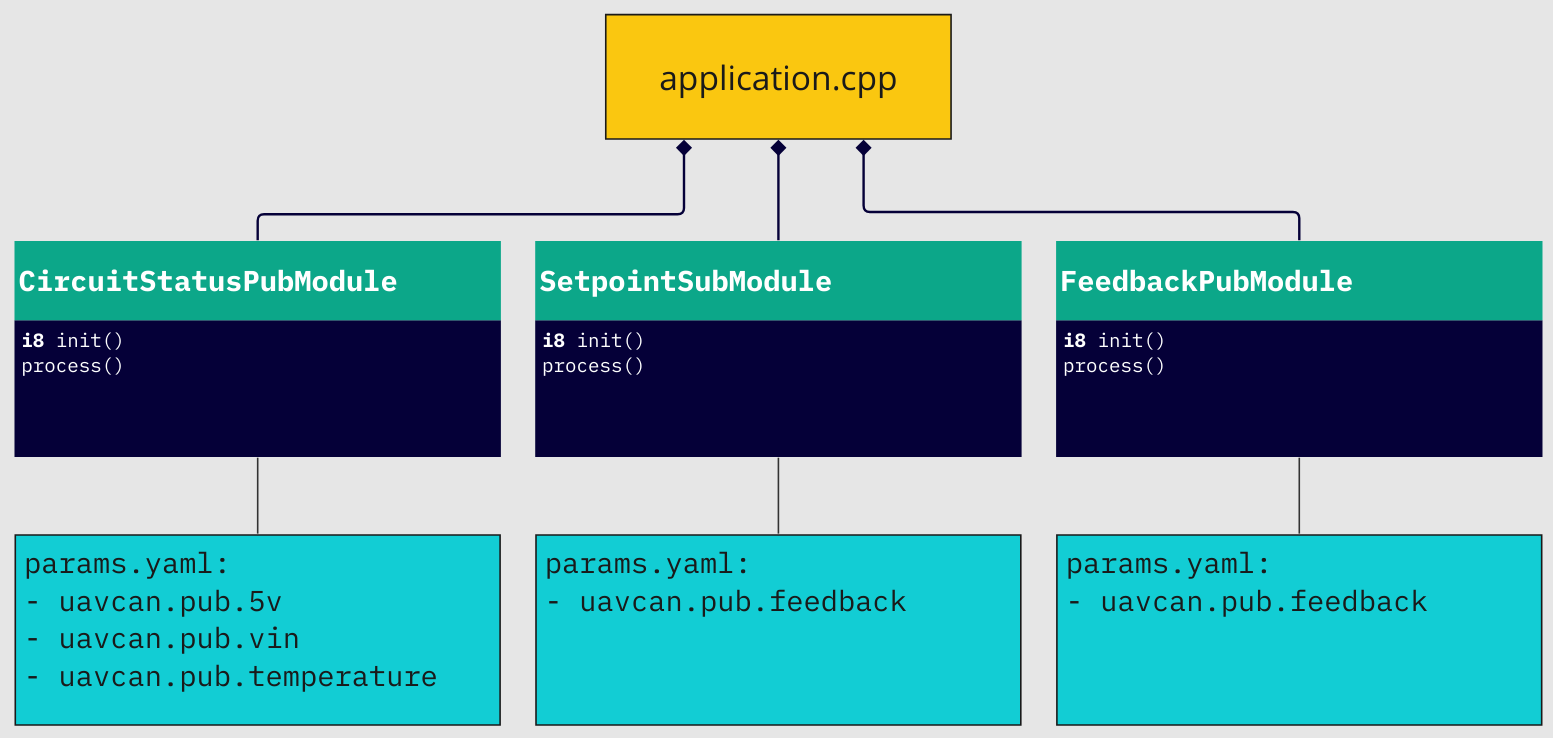
Typically, we recommend having at least CircuitStatus module that is responsible for internal status measurements including:
- 5V (after DC-DC),
- Vin (before DC-DC),
- STM32 internal temperature,
- Hardware version (from ADC_VERSION).
Some boards can have a current sensor and external temperature sensor or other ADC sensors.
Each module is expected to have a yaml file with his parameters.
After the peripheral initialization the application goes to the application_entry_point() in Src/cyphal_application/application.cpp. It is assumed that a user will provide a custom application here.
4.1. Clone the repo with submodules
git clone https://github.com/RaccoonlabDev/mini_v2_node --recursive
cd mini_v2_node
git submodule update --init --recursive
4.2. Build the project and upload the firmware
make generate_dsdl  # call once before the first build
make sitl_cyphal run
4.3. Setup the environment and run Yukon/Yukon
git clone https://github.com/RaccoonlabDev/mini_v2_node --recursive
cd mini_v2_node
git submodule update --init --recursiveAn example of connection scheme suitable for bench test for Mini v2 node and RL Programmer-Sniffer is shown below:

You can also use other sniffer and programmers. For details refer to: Programmer usage and Sniffer usage pages.
make generate_dsdl  # call once before the first build
make cyphal
make upload  #  works only with RL sniffer-programmer yet
As a short form, you can build and upload the firmware with a single command:
make cyphal uploadYakut is well-supported cli tool to interract with a Cyphal node.

Using Yukon you can visualize the node info and interface.
Configure the Yukon related environment variables using the command below (or use the official yukon/yakut instructions).
source scripts/init.sh
~/Download/Yukon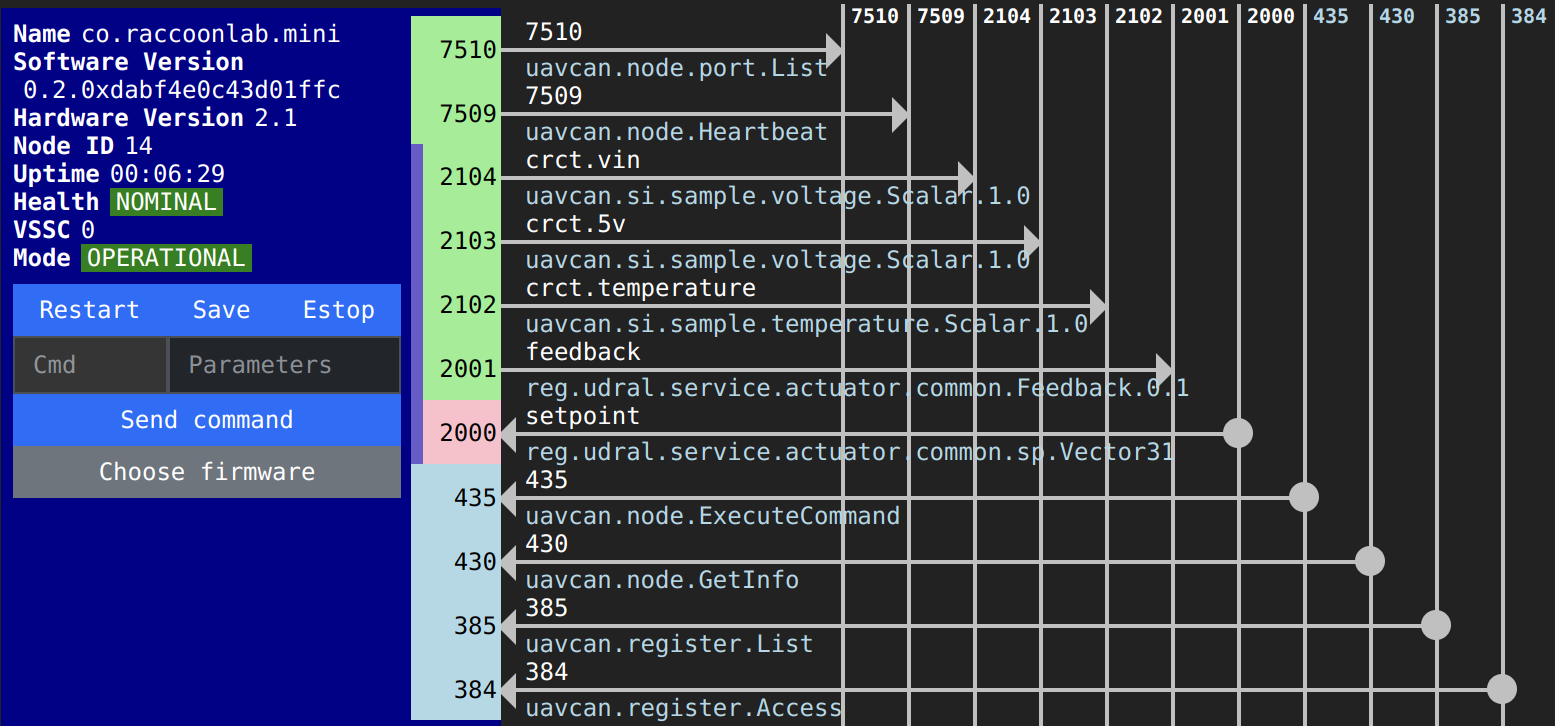
A few comments:
- Blue window has the node info,
- Green topics (port id: 7510, 7509, 2001) is what the node publish,
- Red topics (port id = 2000) is what the node subscribes on,
- Grey topics (435, 430, 385, 384) is related to RPC-services. The node can respond on node.ExecuteCommand, node.GetInfo, register.List and register.Access.
You can subscribe on topics by clicking on the related topics. Let's subscribe on CircuitStatus.
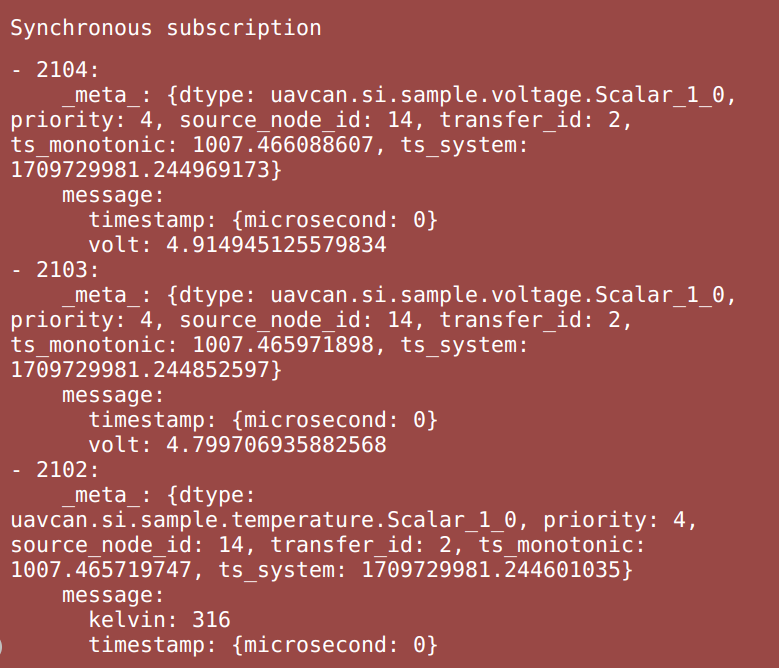
Please, refer to the Mini node docs. It has a detailed steps about how to perform bench testing of the node.
The following steps assume that you are already successful with the default application provided in this repository and want to customize it.
Make a template or fork of the repository. Then clone it. Don't forget about the submodules.
git clone https://github.com/RaccoonlabDev/mini_v2_node --recursive
cd mini_v2_node
git submodule update --init --recursive
Here, instead of RaccoonlabDev you should type the name of your org or profile.
Mini v2 node has 6 user's pins. By default 4 of them are configured as PWM and 2 of them as UART RX. The pinout configuration is shown on the image below:
| Pinout | Default config |
|---|---|
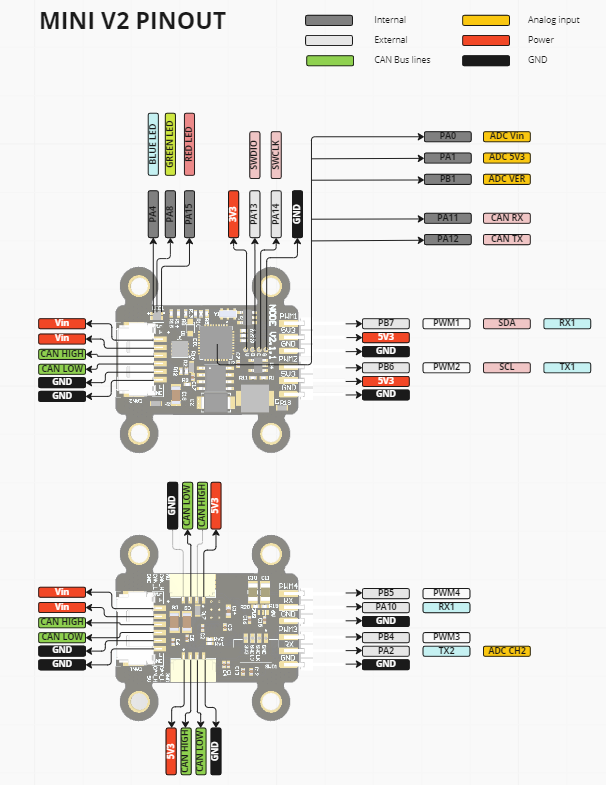 |
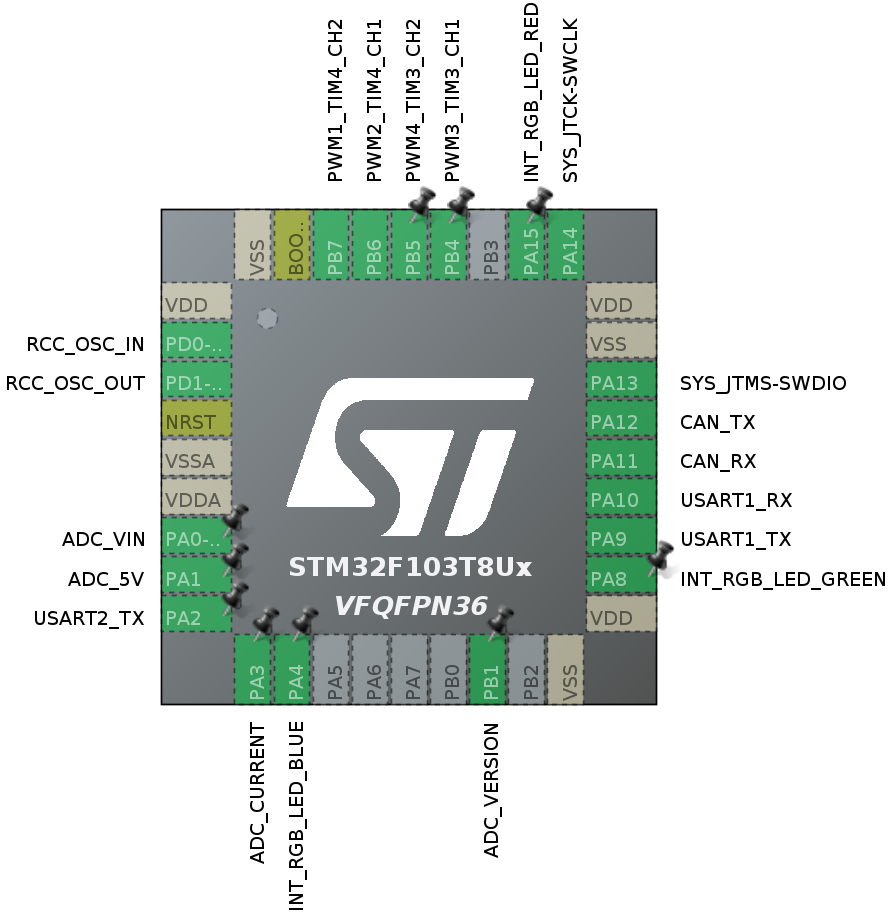 |
If you want to use a custom periphery configuration, update the Libs/stm32-cube-project/project.ioc file with STM32CubeIDE or STM32CubeMX and regenerate the project.
Since Libs/stm32-cube-project is submodule, you can either use your own submodule (make a fork or template RaccoonLabHardware/mini-v2-software) or just remove the submodule and include the source code in the root repository.
The main application is started in Src/cyphal_application/application.cpp. By default it just blinks the RGB LED, subscribes to the setpoint topic to control PWM1 and publishes a feedback with the latest applied setpoint.
Note, that the application is as simple as possible: it controls only a single PWM and doesn't have safety features like TTL, but you are free to extend it as you want.
You may consider Src/cyphal_application/setpoint and Src/cyphal_application/feedback as examples of Cyphal-subscriber and Cyphal-publisher. If you create subjects by inhereting from CyphalPublisher and CyphalSubscriber, it will automatically add all topics to the port.List array, so the node is able to advertise its capabilities. This approach doesn't automatically create registers, so you need to add them in yaml file as shown in the examples.
Each Cyphal topics requires a pair of Integer (for port id) and String (for port type) registers.
This section is in progress. Please, check examples or libparams for the details.
When you add your custom module, don't forget to add source file and path to the file with registers to Src/cyphal_application/CMakeLists.txt.
You can also easily create custom Integer and String registers. An example is shown in Src/cyphal_application/params.yaml.
make cyphal upload