-
Notifications
You must be signed in to change notification settings - Fork 20
Yearks! Another Ambilight Tutorial for Raspberry Pi and Hyperion
Extracted from the old Wordpress blog.

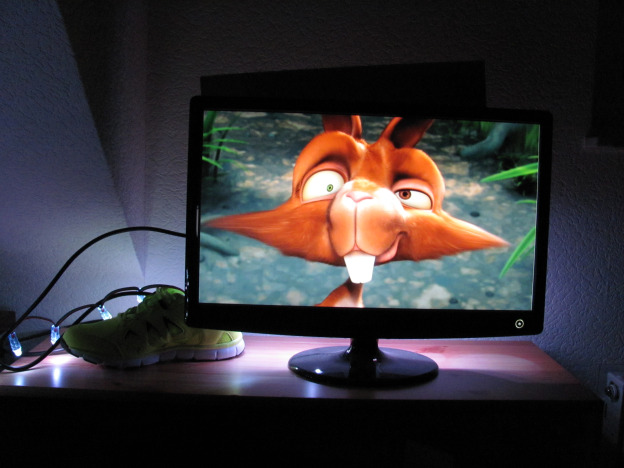
Nearly half of the people in the german Raspberry chat use their Raspberry for ambilight or at least tried it. If its really usefull for you you have to decide on your own. I will show you a very quick installation guide for this. But not as most people did it. I use my PC to play the videos and only let the Raspberry visualize the Leds. Just because my PC has got the movies, is more powerful, can play any codec and is just easier to use for me. And no damn unsharp laggy menu! The grabber stuff was too expensive, too complicated to me and i onyl watch movies on my PC not on Tv. The Software setup is very fast, I did this several times.
I wont go into detail about that. A lot of people wrote better tutorials how to fix leds. What you should know is that hyperion can handle over 50 leds with almost no cpu usage. I think 200 is still fine. Just a few things you should know when buying Leds and setting the stuff up:- They take a lot of current. For me 3,7A for 50Leds. Buy a big power supply and connect it to more than one end if you use too many leds. I used my old ATX Power supply from an old PC. Connect gnd with the green cable but have a look at the wiki page before burning your home. Do not use your Pi for power supply even if you have enough power.
- Buy Leds with 5V.
- Believe me 20€ for 50 Leds is very cheap. They are all rgb and controllable via spi. No local store sells this, and never that cheap. Be patient, i waited over one month for them.
- Do not use cables longer than 20cm to the led strip or the leds will flicker. Thats because the Pi provides 3.3V signals, not 5V. A tutorial about a level converter can be found somewhere on the Github page.
- You dont need to buy waterproof leds, they are just less flexible. IP 65/66 should be okay
- Test your leds before you put them on TV.
- They've got an in- and an output! Connect the right side. (DI, CI for Input)
- For small TVs 50 Leds are way enough. I think 25 would be okay for my 24" screen.
- You can buy the leds that i bought or led strips. Just buy what you like more, ive got both. Depends on you and your TV.
- I recomment WS2801. Cheap, via SPI and almost every Microcontroller knows them. LPD8806 are more expensive but for our use just not necessary.
- Cable setup: White to Mosi, Green to SCLK, Blue to GND. Might variate with different strips. Google the pinlayout please.
Install the newest Raspbian, expand the Filesystem in the Raspi-config and reboot. Then follow these commands (ignore #commands). Download the config tool from gihub, set your leds in the right order and save the file to your SD card. If you dont know what value to set, leave it default. I recommend to disable Frame Grabber, enable smoothing, enable xbmc checker, json and protoserver. The rest can stay default. There is not much you can do wrong here. You do not need to set Hyperion to the startupfile, thats done automatically. There is no need for overclocking!
#install Debian, expand fileystem and activate SPI in the config
sudo raspi-config

#set root pass optional
sudo passwd root

sudo apt-get update
sudo apt-get dist-upgrade
sudo apt-get autoremove
sudo rpi-update

#installation Hyperion
sudo apt-get install libqtcore4 libqtgui4 libqt4-network libusb-1.0-0 libprotobuf7 ca-certificates
cd /tmp && wget -N https://raw.github.com/tvdzwan/hyperion/master/bin/install_hyperion.sh && sudo sh ./install_hyperion.sh

#copy config from sd card
sudo cp hyperion.config.json /etc/hyperion.config.json

#Hyperion restart + test
sudo killall hyperiond
/usr/bin/hyperiond /etc/hyperion.config.json </dev/null >/dev/null 2>&1 &
hyperion-remote --effect "Rainbow swirl fast" --duration 3000

#reboot
sudo reboot
For your PC download XBMC from their website and install. Download the Plugin on Github and install it (settings, addons, install zip). In the Addon configuration only add your Pi's IP address, nothing more. Then everything should work. I also recomment to turn off settings->video->vertical synch. I know the video looks a bit worse then but with some videos i had weird lagg with Hyperion addon enabled. Its because of how that thing works and grabs the pic, you cant change this. Maybe with the new XBMC this will change.
My personal preferences are: Settings->Video->Library->Update library on startup;Group movies in sets System->Audio->Boost Audio on Downmix check for epic sound boost! Settings->Skin->Settings->Recently added Videos uncheck System > Appearance > International > Region > Central Europe System > Appearance > International > Timezone > Europe Openelec->Keyboardlayout->de while playing video: audio options: no subtitels, save as default
Finished! Boot you Pi, start your XBMC and relax. If you want to add a shutdown without ssh you might want to use an Arduino for this. Check out the Arduino - Raspberry Protocol for that.
Hyperion on Github Leds i boughtForgot anything? Thats wasnt too hard. Maybe installing the Leds, but this is the easiest softwarepart you can have. I like my setup, what do you think about using your PC for XBMC and only the Pi for Ambilight?
- Home
- Old Blog Posts
- Support/Contact
- Projects Overview
- Projects contributed to
- ArchLinux
- Raspberry