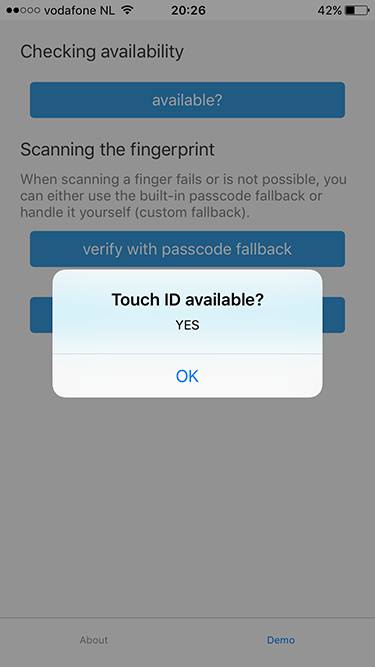
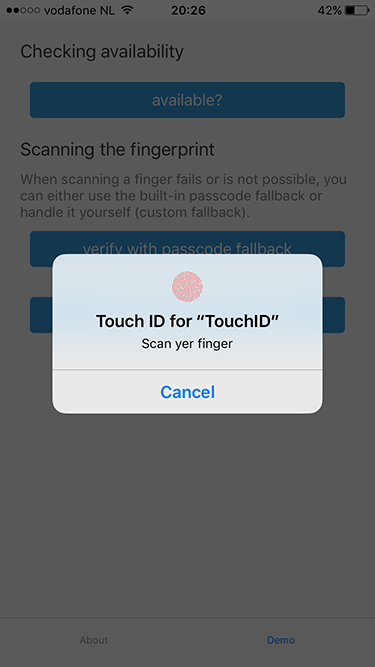
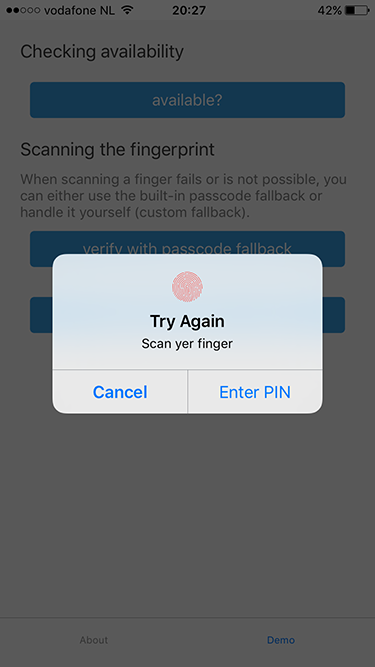
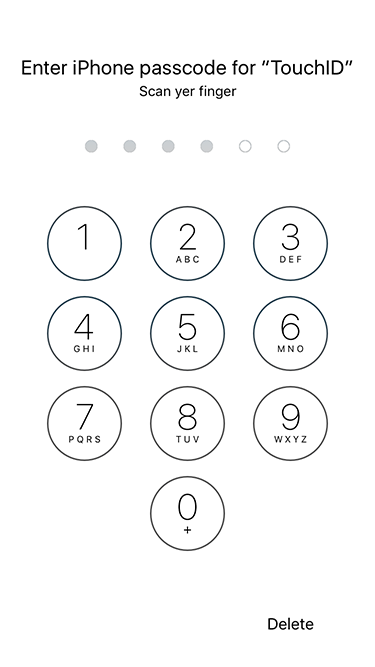
Also works with Face ID on iPhones 🚀
⚠️ Looking for NativeScript 7 compatibilty? Go to the NativeScript/plugins repo.
From the command prompt go to your app's root folder and execute:
tns plugin add nativescript-fingerprint-auth
Then open App_Resources/Android/AndroidManifest.xml and look for minSdkVersion.
If that's set to a version less than 23, add this overrideLibrary line:
  <uses-sdk
      android:minSdkVersion="17"
      android:targetSdkVersion="__APILEVEL__"
tools:overrideLibrary="com.jesusm.kfingerprintmanager"/>If you want a quickstart, check out the demo app. Run it locally using these commands:
git clone https://github.com/EddyVerbruggen/nativescript-fingerprint-auth
cd nativescript-fingerprint-auth/src
npm run demo.android # or demo.iosWant a nicer guide than these raw code samples? Read Nic Raboy's blog post about this plugin.
var fingerprintAuthPlugin = require("nativescript-fingerprint-auth");
var fingerprintAuth = new fingerprintAuthPlugin.FingerprintAuth();

fingerprintAuth.available().then(
    function(avail) {
      console.log("Available? " + avail);
    }
)import { FingerprintAuth, BiometricIDAvailableResult } from "nativescript-fingerprint-auth";
class MyClass {
private fingerprintAuth: FingerprintAuth;
constructor() {
this.fingerprintAuth = new FingerprintAuth();
}
this.fingerprintAuth.available().then((result: BiometricIDAvailableResult) => {
console.log(`Biometric ID available? ${result.any}`);
console.log(`Touch? ${result.touch}`);
console.log(`Face? ${result.face}`);
});
}Note that on the iOS simulator this will just resolve().
fingerprintAuth.verifyFingerprint(
	{
	  title: 'Android title', // optional title (used only on Android)
	  message: 'Scan yer finger', // optional (used on both platforms) - for FaceID on iOS see the notes about NSFaceIDUsageDescription
	  authenticationValidityDuration: 10, // optional (used on Android, default 5)
	  useCustomAndroidUI: false // set to true to use a different authentication screen (see below)
	})
	.then((enteredPassword?: string) => {
	  if (enteredPassword === undefined) {
	    console.log("Biometric ID OK")
	  } else {
	    // compare enteredPassword to the one the user previously configured for your app (which is not the users system password!)
	  }
	})
.catch(err => console.log(`Biometric ID NOT OK: ${JSON.stringify(err)}`));The default authentication screen on Android is a standalone screen that (depending on the exact Android version) looks kinda 'uninteresting'.
So with version 6.0.0 this plugin added the ability to override the default screen and offer an iOS popover style which you can activate by passing in useCustomAndroidUI: true in the function above.
One important thing to realize is that the 'use password' option in this dialog doesn't verify the entered password against the system password. It must be used to compare the entered password with an app-specific password the user previously configured.
The password fallback can be disabled by overriding the default use_password text to a blank string (see optional change below for details on how to do this).
If you want to override the default texts of this popover screen, then drop a file strings.xml in your project and override the properties you like. See the demo app for an example.
Use plugin version < 7.0.0 to be able to use this feature with NativeScript < 5.4.0
Skip this section if you're on NativeScript 5.4.0 or newer because it's all handled automatically!
To be able to use this screen, a change to App_Resources/Android/AndroidManifest.xml is required as our NativeScript activity needs to extend AppCompatActivity (note that in the future this may become the default for NativeScript apps).
To do so, open the file and replace <activity android:name="com.tns.NativeScriptActivity" by <activity android:name="org.nativescript.fingerprintplugin.AppCompatActivity".
Note that if you forget this and set useCustomAndroidUI: true the plugin will reject the Promise with a relevant error message.
Mandatory changes for webpack and snapshot builds (again, for NativeScript < 5.4.0 only)
If you are using Webpack with or without snapshot there are couple more changes required in order to make the custom UI work in your production builds.
First you need to edit your vendor-platform.android.ts file and add require("nativescript-fingerprint-auth/appcompat-activity");. You can see the changed file in the demo app here.
The second change should be made in your webpack.config.js file. Find the place where the NativeScriptSnapshotPlugin is pushed to the webpack plugins and add "nativescript-fingerprint-auth" in the tnsJavaClassesOptions.packages array. The result should look something like:
// ...
    if (snapshot) {
        config.plugins.push(new nsWebpack.NativeScriptSnapshotPlugin({
            chunk: "vendor",
            projectRoot: __dirname,
            webpackConfig: config,
            targetArchs: ["arm", "arm64", "ia32"],
            tnsJavaClassesOptions: {
                packages: ["tns-core-modules", "nativescript-fingerprint-auth"],
            },
            useLibs: false
        }));
    }
// ...Instead of falling back to the default Passcode UI of iOS you can roll your own. Just show that when the error callback is invoked.
fingerprintAuth.verifyFingerprintWithCustomFallback({
  message: 'Scan yer finger', // optional, shown in the fingerprint dialog (default: 'Scan your finger').
  fallbackMessage: 'Enter PIN', // optional, the button label when scanning fails (default: 'Enter password').
  authenticationValidityDuration: 10 // optional (used on Android, default 5)
}).then(
    () => {
      console.log("Fingerprint was OK");
    },
    error => {
      // when error.code === -3, the user pressed the button labeled with your fallbackMessage
      console.log("Fingerprint NOT OK. Error code: " + error.code + ". Error message: " + error.message);
    }
);iOS 11 added support for Face ID and was first supported by the iPhone X.
The developer needs to provide a value for NSFaceIDUsageDescription, otherwise your app may crash.
You can provide this value (the reason for using Face ID) by adding something like this to app/App_Resources/ios/Info.plist:
  <key>NSFaceIDUsageDescription</key>
<string>For easy authentication with our app.</string>Since iOS9 it's possible to check whether or not the list of enrolled fingerprints changed since the last time you checked it. It's recommended you add this check so you can counter hacker attacks to your app. See this article for more details.
So instead of checking the fingerprint after available add another check.
In case didFingerprintDatabaseChange returns true you probably want to re-authenticate your user
before accepting valid fingerprints again.
fingerprintAuth.available().then(avail => {
    if (!avail) {
      return;
    }
    fingerprintAuth.didFingerprintDatabaseChange().then(changed => {
        if (changed) {
          // re-auth the user by asking for his credentials before allowing a fingerprint scan again
        } else {
          // call the fingerprint scanner
        }
  });
});- 6.2.0 Fixed a potential bypass on iOS.
- 6.1.0 Fixed potentioal bypasses on Android.
- 6.0.3 Android interfered with other plugins' Intents.
- 6.0.2 Plugin not working correctly on iOS production builds / TestFlight.
- 6.0.1 Fixed a compatibility issues with NativeScript 3.4.
- 6.0.0 Allow custom UI on Android.
- 5.0.0 Better
Face IDsupport. Breaking change, see the API foravailable. - 4.0.1 Aligned with the official NativeScript plugin seed. Requires NativeScript 3.0.0+. Thanks, @angeltsvetkov!
- 4.0.0 Converted to TypeScript. Changed the error response type of
verifyFingerprintWithCustomFallback. - 3.0.0 Android support added. Renamed
nativescript-touchidtonativescript-fingerprint-auth(sorry for any inconvenience!). - 2.1.1 Xcode 8 compatibility - requires NativeScript 2.3.0+.
- 2.1.0 Added
didFingerprintDatabaseChangefor enhanced security. - 2.0.0 Added
verifyFingerprintWithCustomFallback,verifyFingerprintnow falls back to the passcode. - 1.2.0 You can now use the built-in passcode interface as fallback.
- 1.1.1 Added TypeScript definitions.
- 1.1.0 Added Android platform which will always return false for
touchid.available.


