-
-
Notifications
You must be signed in to change notification settings - Fork 310
Windows Server Firewall Setup
Sometimes images speak louder than words, so we've compiled a list of images to show you exactly what you need to do in order to allow the Master Server to work on your Windows Server either in your home or in the cloud!
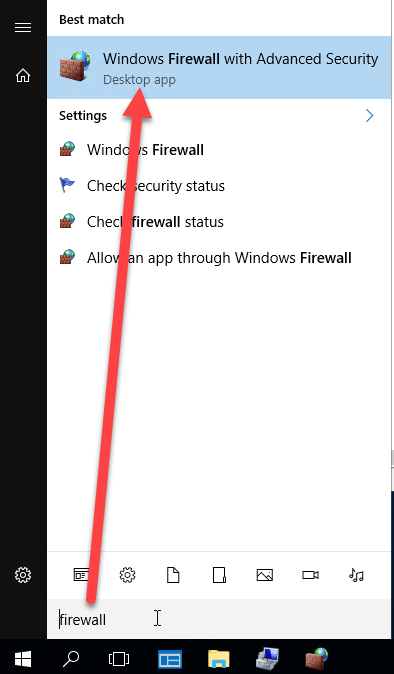
First you need to open your **Advanced Firewall Settings"

Next you need to select Inbound Rules then select New Rule...

Next you will need to select Port and then click Next

Next, make sure that TCP is selected and that you enter the correct port number for your Master Server. The default port is 15940. Then click Next

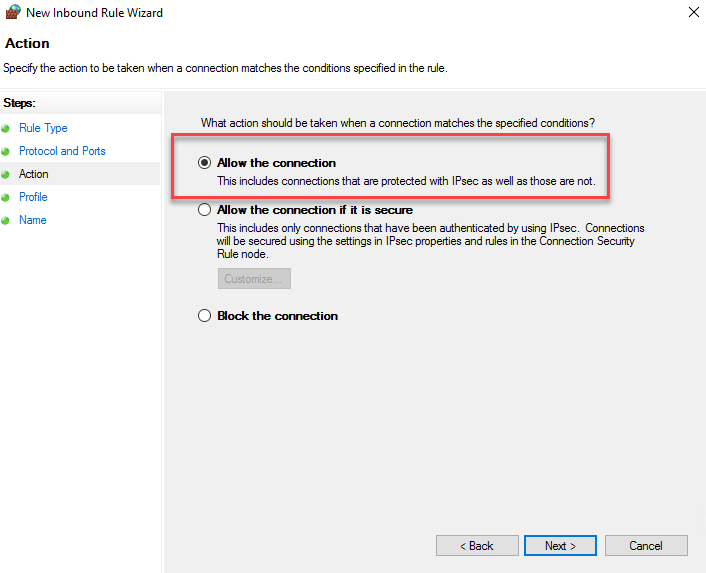
Next you need to select Allow the connection. Click Next

After that, just keep all the checkboxes at default (checked). Click Next

Lastly give it a good name that is easy to find and click Finish

That is it, you should be ready to go. If you experience any other issues, make sure that your network firewall is allowing the connection to this machine and allowing the specified port number.
Getting Started
Network Contract Wizard (NCW)
Remote Procedure Calls (RPCs)
Unity Integration
Basic Network Samples
Scene Navigation
Master Server
Netcoding Design Patterns
Troubleshooting
Miscellaneous
-
Connection Cycle Events
-
Rewinding
-
Network Logging
-
Working with Multiple Sockets
-
Modify Master and Standalone servers
-
NAT Hole Punching
-
UDP LAN Discovery
-
Offline Mode
-
Ping Pong
-
Lobby System
-
Upgrading Forge Remastered to Develop branch or different version
-
Forge Networking Classic to Remastered Migration Guide
-
Script to easily use Forge Networking from sources
-
Run Two Unity Instances with Shared Assets for Easiest Dedicated Client Workflow