-
Notifications
You must be signed in to change notification settings - Fork 25
Hackathon (Sep. 2017)
In order to get setup to build the Stingray getting started plugin you'll need a Git client to clone the content of this repository on your computer.
If you want your plug-in to include C/C++ libraries that extend the editor or the engine, you will also need:
You can find an official build of Stingray v1.9.1469 at the following location https://autodesk.box.com/shared/static/iaeqrqzs625fy9thmxk7mrwulck2cc9o.zip
You can also grab a smaller developer build that doesn't include CLIC and all mobile platform engines. This build is ideal if you wish to do everything on PC for PC. Otherwise you should grab the official build above.
Stingray v1.9.1469 Developer Build
If you want to build your own version of Stingray you can follow the instructions on the README page at https://git.autodesk.com/gameware/stingray/tree/1.9.1494.0.
Ready to change the world!?
Clone the plugin repo at https://github.com/AutodeskGames/stingray-plugin
git clone https://github.com/AutodeskGames/stingray-plugin.git MY_PLUGIN_NAME
Change MY_PLUGIN_NAME for something more interesting, like forge-plugin.
Once you have clone your plugin repo into a folder, go into that folder.
cd MY_PLUGIN_NAME
When you are in the plugin repo folder, you should be able to make a first build by running:
ruby make.rb
You can now start your Stingray Editor build and install the plugin at ./plugin/example.stingray_plugin using the Plugin Manager. For more information please see http://help.autodesk.com/view/Stingray/ENU/?guid=__stingray_help_plugins_add_remove_plugins_html.
At this stage, you probably want to rename a few things in the plugin descriptor to give a personality to your plugin. I suggest you look at how to create a cool plugin demo for how this can be done or how to define a plugin descriptor at http://help.autodesk.com/view/Stingray/ENU/?guid=__sdk_help_define_a_plugin_html.
Then I suggest you create a GitHub repo somewhere and push what you've done so far.
First let's rename the stingray-plugin origin to upstream.
git remote rename origin upstream
Now add the remote url of your new origin, i.e.
git remote add origin https://github.com/jschmidt42/giphy-plugin.git
Replace https://github.com/jschmidt42/giphy-plugin.git with your repo url.
And finally push what you have so far:
git push -u origin master
Once you renamed a few things, let your creativity and fingers guide your through a wonderful and exciting experience...
Have fun! That is the most important!
Stingray is an interactive engine (and an editor) allowing a user to author games or interactive applications (VR or otherwise). The Stingray Editor supports a flexible plugin API allowing a user to enhance the capability of the editor.
- Official Stingray Lua documentation
- For developping and debugging Lua code (both engine and editor) we suggest you use Visual Code with the Stingray Debugger extension.
- Nice Lua Cheat sheet.
| Idea | Difficulty | Description |
|---|---|---|
| Forge API | Easy | Wrap the Forge web API into some C and Lua API for Stingray |
| Load Maya Scene | Hard | Create a plugin using the OpenMaya API libs to parse and load Maya scene files on the fly. |
| FMOD integration | Easy | Create an Stingray plugin API wrapper for the FMOD sound library |
Here are a list of already existing plugins and examples that can be used either as tutorials on how to implement some specific workflows or as inspiration.
Here are the instruction to install any of the plugins described below:
1- Open Stingray Plugin Manager
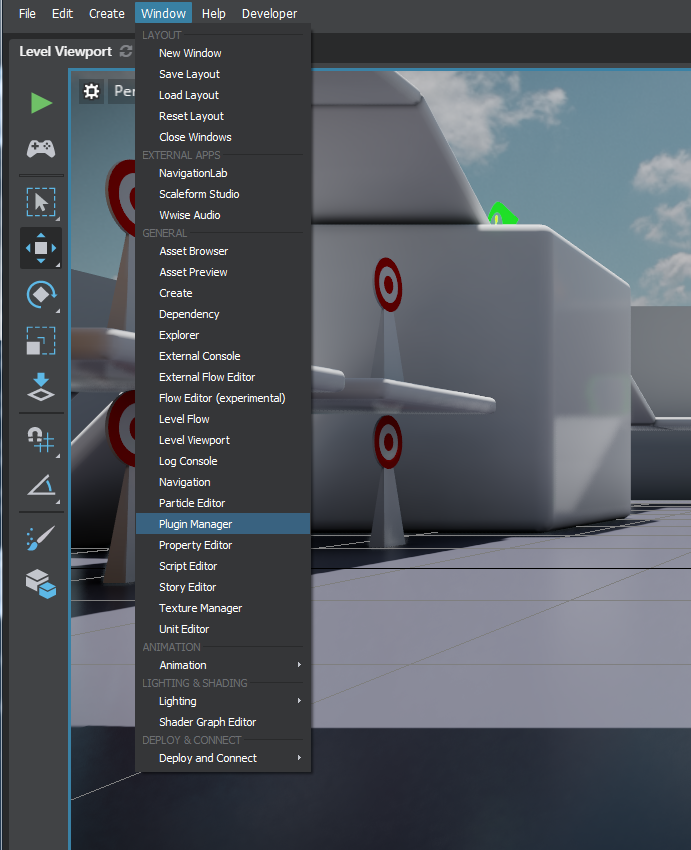
2- Press Add Plugin and navigate to the stingray-plugin-api-samples/samples folder and select the .stingray_project in one of the plugin folder:
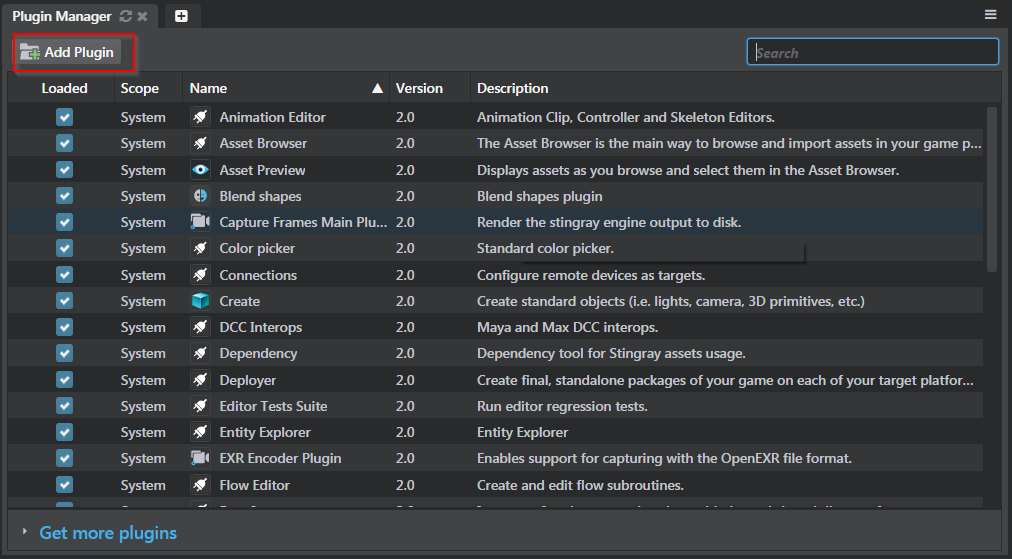
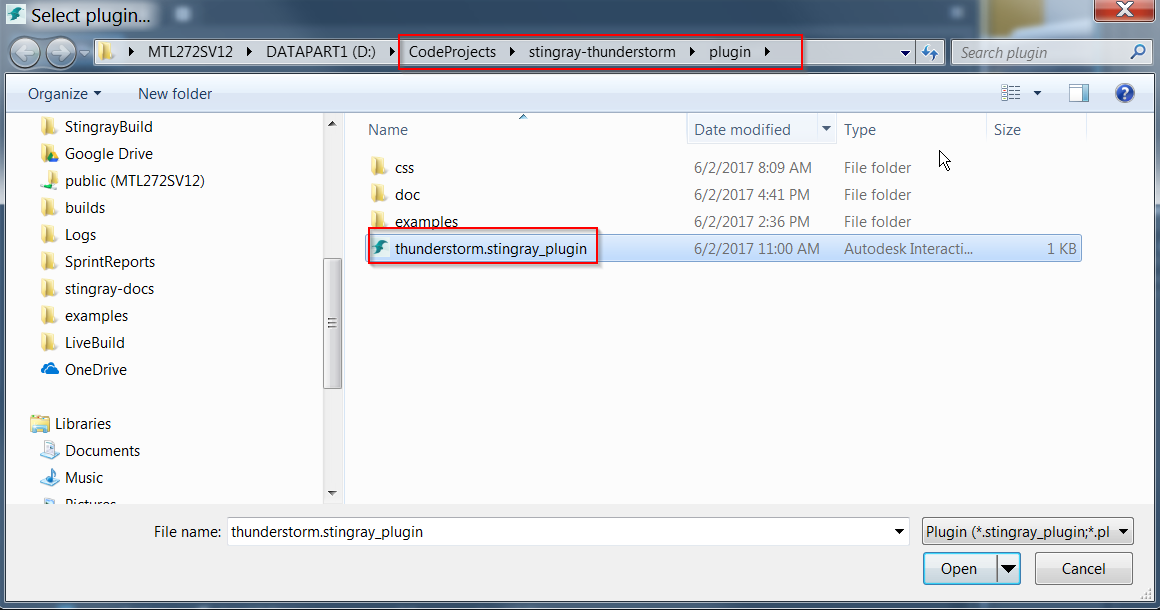
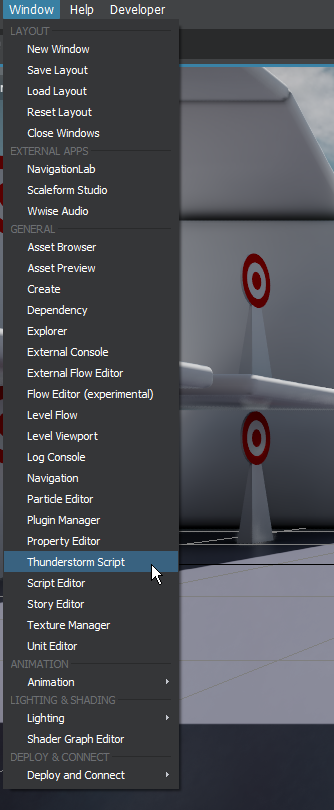
3- See what has been added to Stingray :) Usually, it will be a new menu item in the Window menu or a totally new menu in the Main menu toolbar.
The giphy plugin is a fun plugin that adds to the editor a views to download giphy images from the data giphy web service and allow the user to import them into a project to play them back at runtime on a nice unit resembling to a TV.


Here's the tutorial to create that plugin yourself https://github.com/AutodeskGames/stingray-plugin/wiki/How-to-create-a-cool-plugin.
You can also take a peek at this GitHub repo that did the job for you to assemble everything.
https://github.com/jschmidt42/giphy-plugin
- How to create a new editor tool panel
- How to fetch data from a remote server
- How to create an engine plugin
- Setup a custom material to display on a unit
- How to integrate STB to read an image
- RenderMeshAPI
Render HTML5 views in Stingray. The engine plugin uses CEF to render HTML5 content to texture buffers. Once the texture buffers are generated, the render resource is assigned to the view's material html5_texture slot.
https://github.com/jschmidt42/stingray-html5


- How to create an engine plugin
- CEF integration in the engine
- RenderMeshAPI
This repository contains a lot of different plugin examples covering most of the extensions systems of Stingray. Here are a few notable examples part of this repository:
This example showcases how to create an editor tool with an embedded viewport. You can code all the viewport interaction using the Lua API.
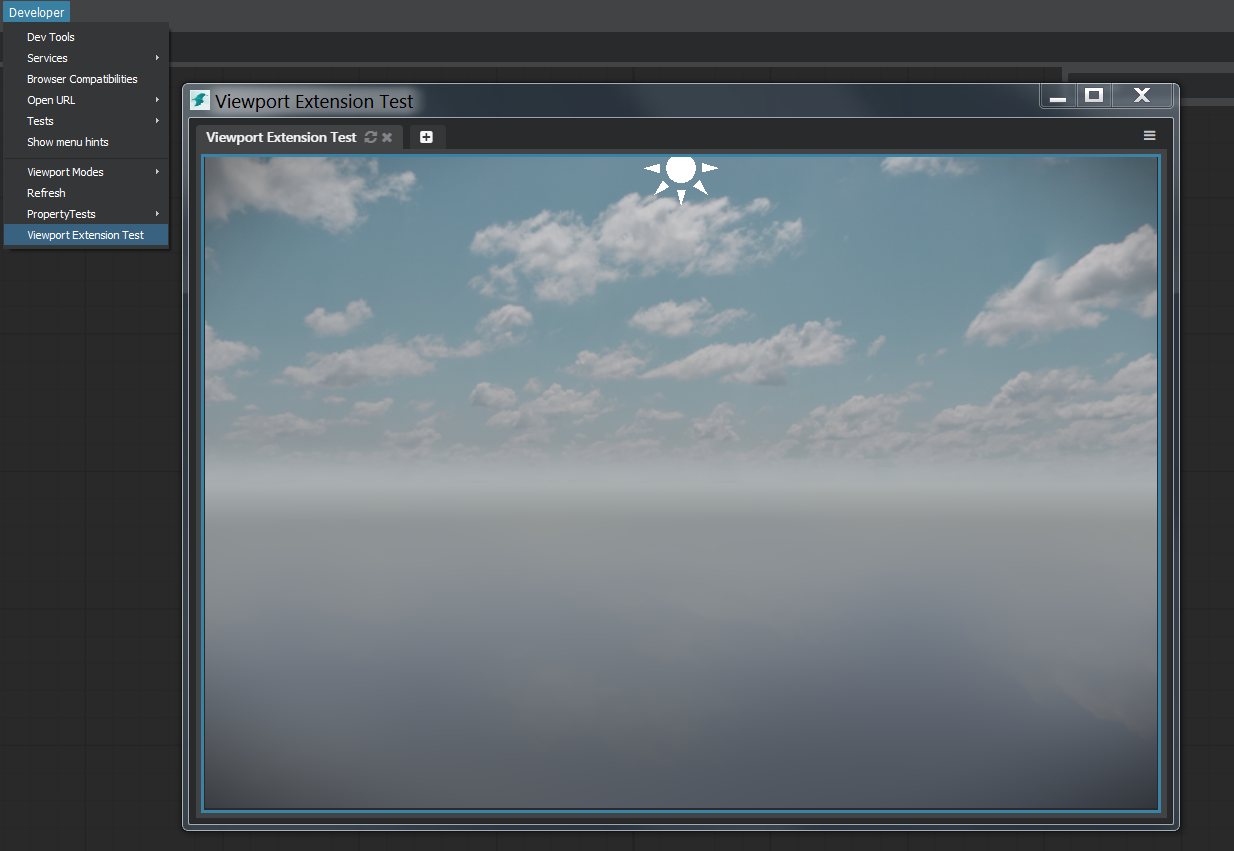
See the viewport extension documentation for more information.
This example shows how to create a custom Stingray Importer. You will be able to add a new file extension support. This example adds support for .obj file.
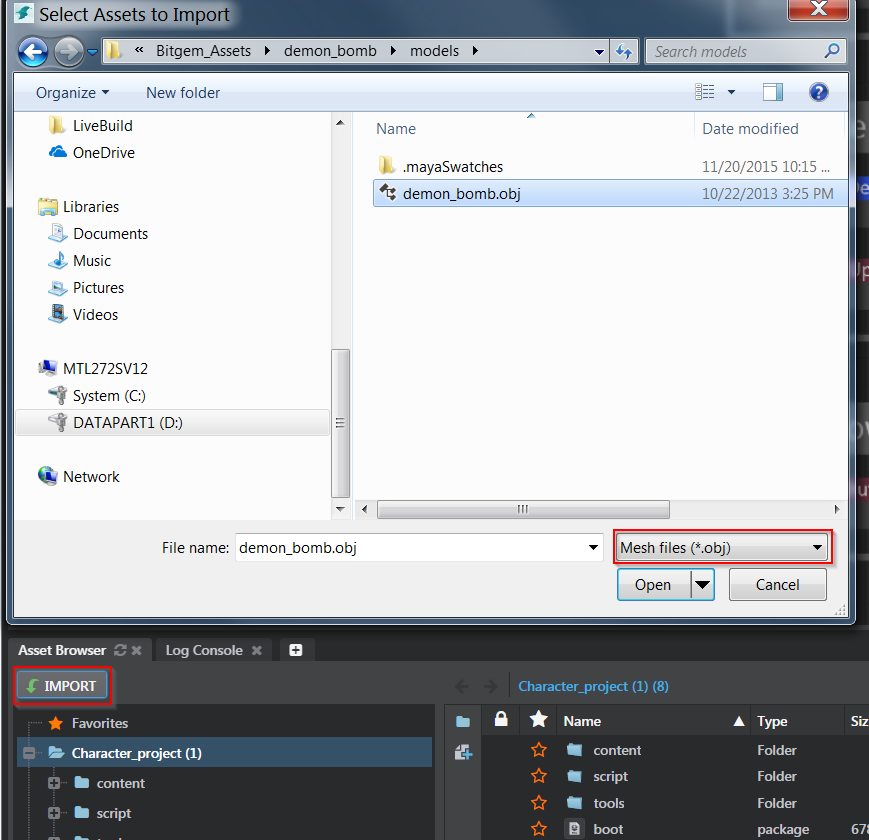
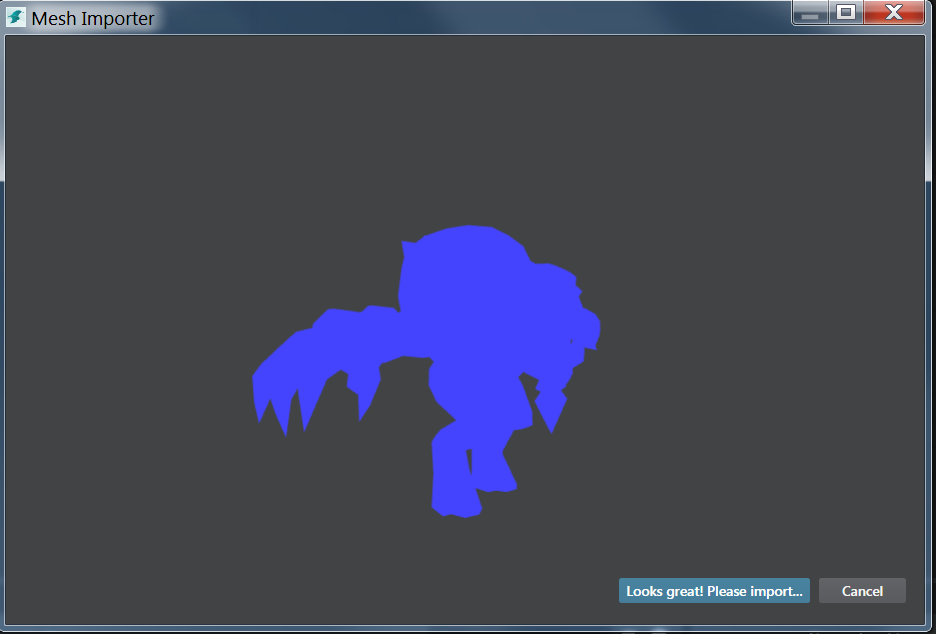
You can even provide a custom viewing and acceptance dialog:
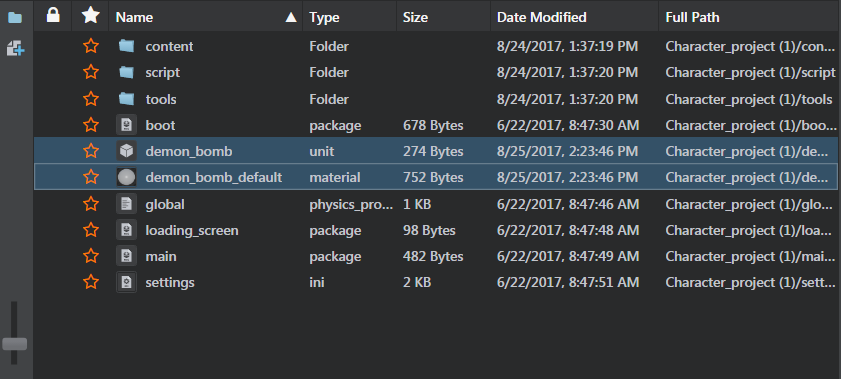
And then the importer generates new stingray assets (unit and material):
- Importer extension
- Understanding the action system will help creating custom importer workflow as well.
- How to create a new dialog tool panel
This is a plugin containing multiple UI example. All these examples uses the Mithril web framework. All examples are available through the Developers Menu:
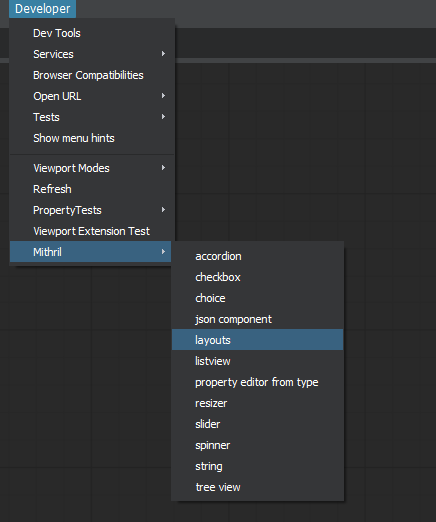
-
layoutshows how to place ui on screen:
More documentation on layout can be found here.
-
list-view: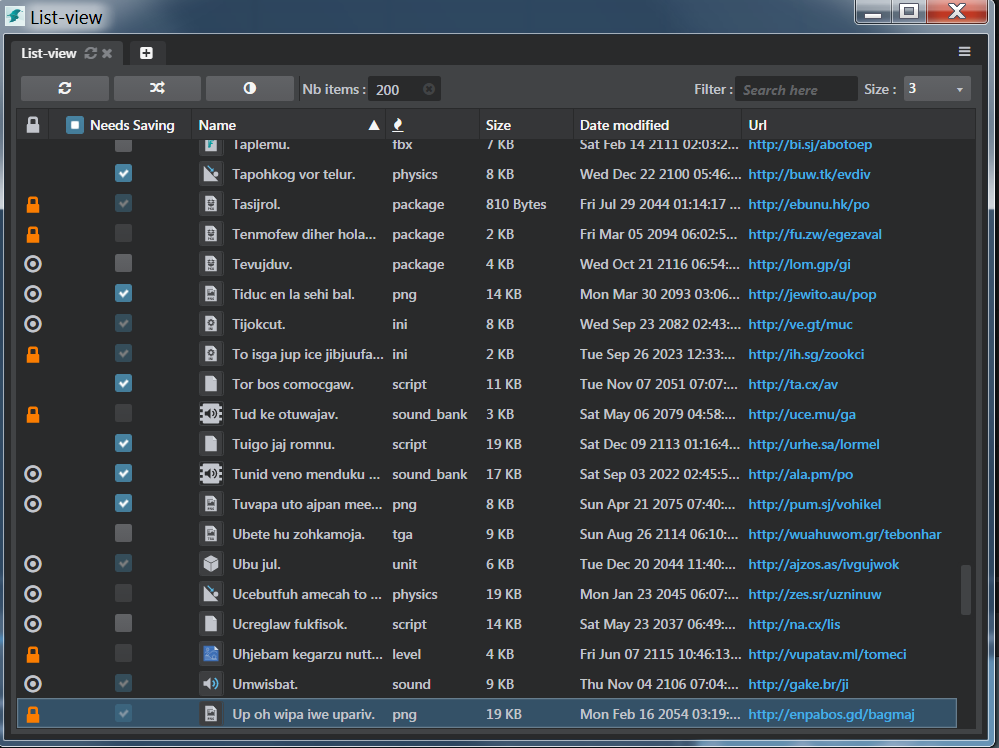
-
tree-view: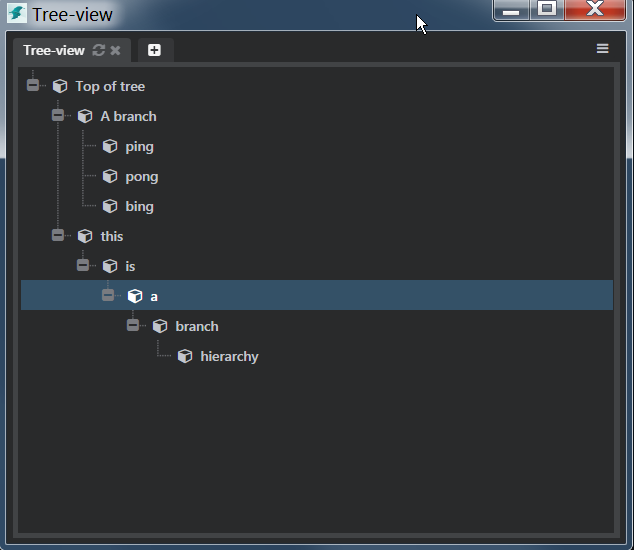
This plugin shows how to connect using a web socket API to the Autodesk Thunderstorm service which can be used to execute scripts that will generate arbitray shapes. The plugin will create a new stingray unit out of those shapes and you will be able to use those shapes in Stingray level.
- Property editor (see official documentation)
- Websocket communication
- Exporting a
.unitand.materialand.bsi - Triggering compilation
This plugin showcases how to create a new Flow node (using the engine SDK) and make this node available to the Flow Editor.
- The engine flow node code is located in the folder
engine. - Everything you need to setup in the editor is in the folder
plugin. - You will need to run
ruby make.rbat the root of the plugin to build and package everything.
- Creating a runtime flow node
- Adding flow definition to make the node is available in the editor.
