By: Mark Fisher January, 2019 - July, 2019
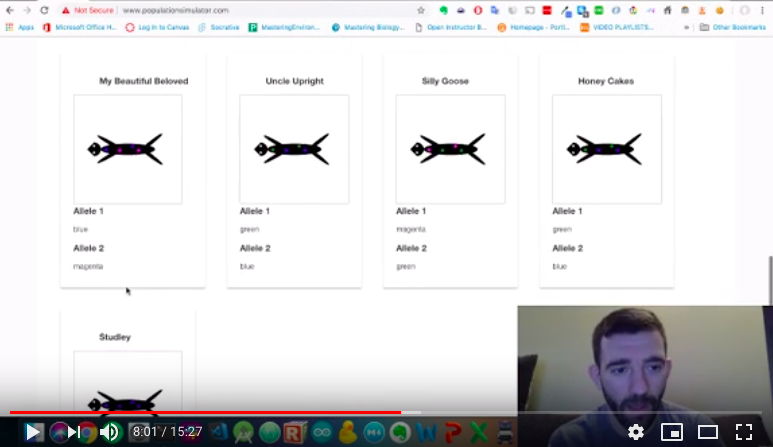
Click image below to watch the tutorial video!
The concept of genetic drift in population genetics is a notoriously difficult concept to teach and to learn. DraggleSimulator is an open-source simulation webapp that allows students to create a metapopulation of fictitious, diploid, monogamous, and simultaneously-hermaphroditic animals with replacement-level fertility (2 offspring per couple) called draggles and track it across generations. Upon creation, this metapopulation satisfies all assumptions of Hardy-Weinberg Equilibrium except infinite population size (thereby only allowing the sampling error that accounts for genetic drift). By experimenting in either a guided fashion as seen in this example instance (Population Simulator)[https://www.populationsimulator.com/] or in a less-structured fashion, students can explore how allele frequencies can change in populations even in the absence of nonrandom mating, natural selection, mutation, or migration. They can compare how allele frequencies change in populations of different sizes or in metapopulations of the same total size but with different numbers of isolated subpopulations. For instance, I used the simulation to help students explore the effects of dividing populations into isolated subpopulations (a.k.a., fragmenting) on genetic diversity.
The simulation tracks individuals over the course of any number of generations with respect to one gene that is necessary and sufficient to determine spot color in the fictitious draggles. Currently, the simulation tracks three alleles at this gene (although it should not be difficult to extend this).
At the beginning of the simulation, users are able to specify parameters including:
- population size
- number of subpopulations into which the metapopulation is split
- number of generations to follow the metapopualtion
- starting allele frequencies of three alleles of the spot color gene
Each generation of the simulation, the user must answer several questions about allele frequencies of the current generation of the metapopulation. Then, the user is prompted to assign two individuals in the same subpopulation that are currently unmated (the "Shuffle and Designate a Random Pair to Mate" button) to form a mated pair for each subpopulation. Afterwards, users are taken a to a new component of the app that displays the mated pairs and prompts the user to generate two offspring (this should be easily extensible to more or fewer offspring by other contributors). Once all possible offspring are generated for each pair (i.e., currently 2 to reflect replacement-level fertility), the user is then escorted to a new component that displays the new generation of offspring as a fresh metapopulation. If this is not the final generation, the user is again prompted to answer questions about allele frequencies for the new generation. The sequence of components continues as described above until the final generation selected by the user at the beginning of the simulation is reached. At this point, the user is guided to a final component. Instructors can add any questions they might like to this component, or they can link students to google sheets or google forms to make collaborative spreadsheets and answer easily-graded questions.
How to Set Up Your Own Google Sheets and Google Forms Questions at https://www.populationsimulator.com
Populationsimulator.com is connected to a database, such that you can enter your own URLs to customize DraggleSimulator with your own questions and to track your own class's data. Simply navigate to the expandable menu on the top left of the site in your browser, and click, "Instructors":
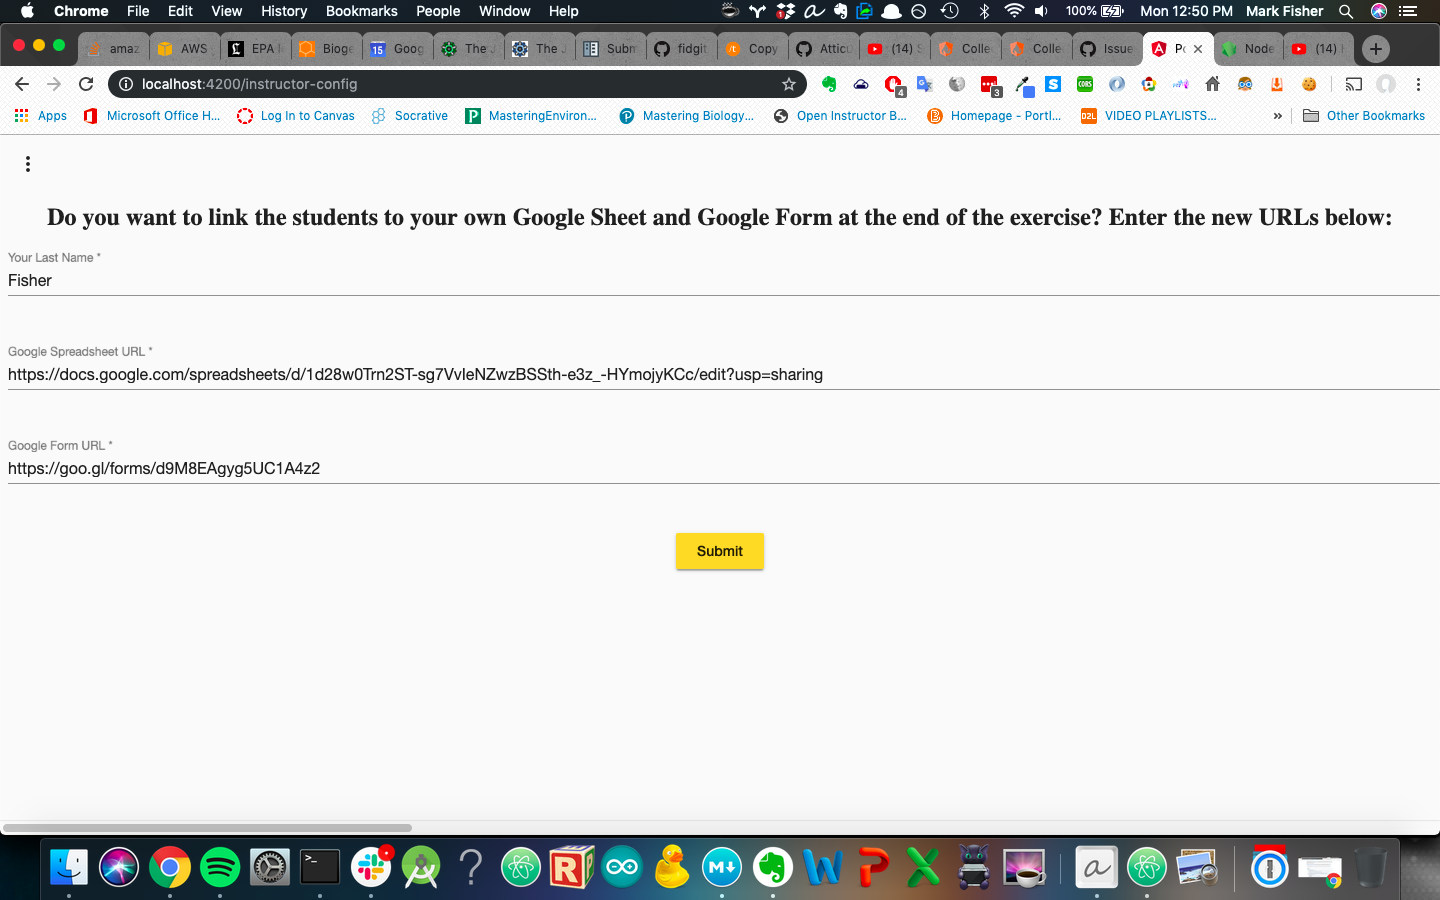
Fill out your information and provide your custom URLs:
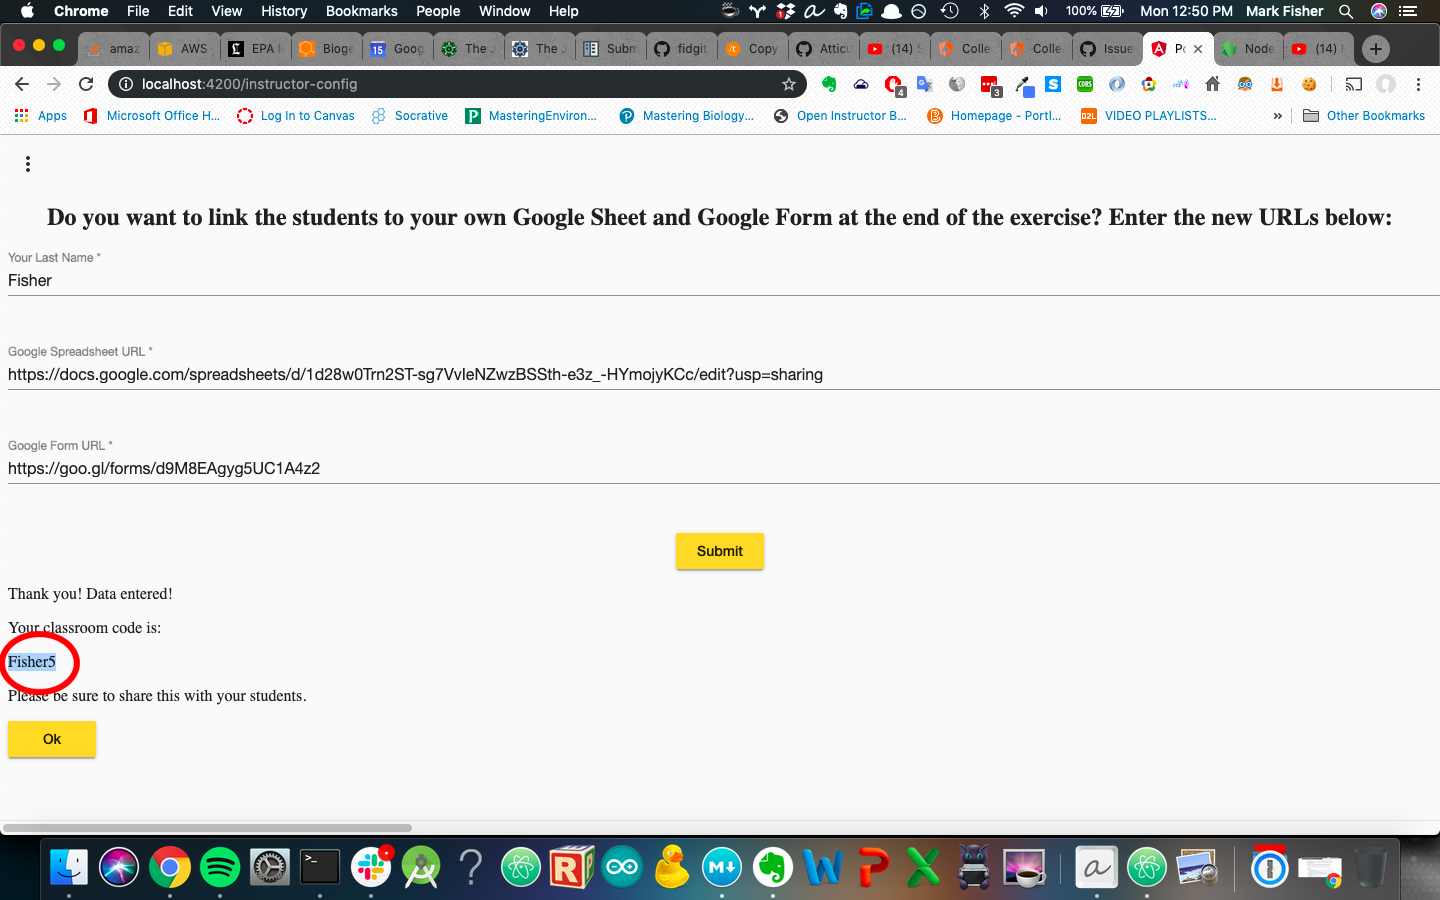
Click submit, and wait for the database to return a code (a.k.a, "classroom code" or perhaps, "room number"). Make sure that you communicate this code to your students!
DraggleSimulator currently only simulates genetic drift, but contains object models for metapopulations, populations, mated-pairs, organisms, genotypes, genes, and alleles. Consequently, the infrastructure for simulating other forces or combinations of forces that drive evolutionary change is already in place. The current infrastructure of DraggleSimulator is also amenable to the addition of alleles to the single gene ("spot color") currently tracked or indeed to the addition of more genes (perhaps to teach about linkage disequilibrium).
The questions are managed and persisted across the components by injecting a service called QuestionService. Each question is an instance of the "problem" object model.
Similarly, the metapopulations, which, depending on user input from the form, consist of one or more subpopulations, are persisted across components by injecting a service called PopulationManagerService. Both of these services currently track the status of their respective data using various flavors of the rxjs Subject pattern (either BehaviorSubjects or ReplaySubjects). There is currently no "Generation" model explicitly; all generations are currently tracked as a BehaviorSubject of an array of Metapopulation models (each tracking the metapopulation in one generational snapshot). This BehaviorSubject, along with many of BehaviorSubject objects that track various metapopulation features and statistics are housed in the PopulationManagerService.
DraggleSimulator is not currently optimized to be viewed on a mobile device, but it should be possible to improve some of the css to improve this.
Classroom codes (see How to Set Up Your Own Google Sheets and Google Forms Questions at https://www.populationsimulator.com section above) are persisted on a dynamoDB table using Amazon Web Services. Each classroom code returned to the user (presumably an instructor) will be unique.
Known and resolved bugs are tracked here
If, during npm install and then ng serve, you have issues related to "Error: ENOENT: no such file or directory, scandir '**/node_modules/node-sass/vendor'", please see this github issue. You may need to do the following:
npm update
npm install
nodejs node_modules/node-sass/scripts/install.js
npm rebuild node-sass
If you find a new bug or issue to which you'd like to draw my attention, please post about it here
-
Install node pacakge manager (npm). Navigate into the project repo (using cd in your terminal). Type
npm installand maybe go grab a coffee... -
Set up an account with google's firebase, and follow these instructions to hook up your database to this code.
-
Create a file in the ./src/app directory called, 'masterConfiguration.ts'. In it, add the contents below. You can get the firebaseConfig details from your firebase console in your project.
export const masterConfigProperties = {
  lastName: "Default",
  googleSheetUrl: "https://docs.google.com/spreadsheets/d/1d28w0Trn2ST-sg7VvIeNZwzBSSth-e3z_-HYmojyKCc/edit?usp=sharing",
  googleFormUrl : "https://goo.gl/forms/d9M8EAgyg5UC1A4z2",
  amountToCharge: 300
};
export const firebaseConfig = {
    apiKey: "your_data_here",
    authDomain: "your_data_here",
    databaseURL: "your_data_here",
    projectId: "your_data_here",
    storageBucket: "your_data_here",
    messagingSenderId: "your_data_here",
    appId: "your_data_here",
    measurementId: "your_data_here"
  };
- Create a file in the ./functions directory called, 'service-account.json'. In it, add contents below. It's actually simpler to download the json file wholesale from Firebase (under project settings --> click the "service account" tab, select node.js, click, "Generate new private key", and download):
{
  "type": "service_account",
  "project_id": "your_project_id_from_firebase",
  "private_key_id": "your_private_key_id_from_firebase",
  "private_key": "-----BEGIN PRIVATE KEY-----\n_your_private_key_here_from_firebase",
  "client_email": "your_client_email_from_firebase",
  "client_id": "your_client_id_from_firebase",
  "auth_uri": "your_auth_uri_from_firebase",
  "token_uri": "your_token_uri_from_firebase",
  "auth_provider_x509_cert_url": "your_auth_provider_x509_cert_url_from_firebase",
  "client_x509_cert_url": "your_client_x509_cert_url_from_firebase"
}
- Create a file in population-fragmentation/src/app/ called constants.ts, with the following contents:
export var constants = {
    awsAccessKeyId: "YOUR_ACCESS_KEY_HERE",
    awsSecretAccessKey: "YOUR_SECRET_ACCESS_KEY_HERE"
};
Paste your access key ID and secret access key into the relevant text fields of the code.
- Type
ng serveto run a dev server. Navigate tohttp://localhost:4200/in a browser. The app will automatically reload if you change any of the source files.
Note that these instructions are not exhaustive, and it is not recommended to set up your own hosted instance if you are unfamiliar with AWS
- In your terminal, type
git clone https://github.com/Atticus29/population-fragmentation.git - In your terminal, type
cd population-fragmentationto navigate into the new directory. - Sign up for AWS (Amazon Web Services) here. It will require your credit card, but it won't charge you unless you start using non-free-tier services.
- Watch this tutorial for setting up an AWS S3 bucket for static website hosting. If confusing, watch more than one. There are many tutorials on youTube for setting up an AWS S3 bucket for static website hosting that are good, but it many take more than one of them to help wrap your brain around the concept. Don't give up!
- Acquire IAM credentials and record the access key ID and the secret key as described in the video above.
- Create a file in population-fragmentation/src/app/ called constants.ts, with the following contents:
export var constants = {
    awsAccessKeyId: "YOUR_ACCESS_KEY_HERE",
    awsSecretAccessKey: "YOUR_SECRET_ACCESS_KEY_HERE"
};
Paste your access key ID and secret access key into the relevant text fields of the code.
- Create a file in the ./src/app directory called, 'masterConfiguration.ts'. In it, add the contents below. You can get the firebaseConfig details from your firebase console in your project.
export const masterConfigProperties = {
  lastName: "Default",
  googleSheetUrl: "https://docs.google.com/spreadsheets/d/1d28w0Trn2ST-sg7VvIeNZwzBSSth-e3z_-HYmojyKCc/edit?usp=sharing",
  googleFormUrl : "https://goo.gl/forms/d9M8EAgyg5UC1A4z2",
  amountToCharge: 300
};
export const firebaseConfig = {
    apiKey: "your_data_here",
    authDomain: "your_data_here",
    databaseURL: "your_data_here",
    projectId: "your_data_here",
    storageBucket: "your_data_here",
    messagingSenderId: "your_data_here",
    appId: "your_data_here",
    measurementId: "your_data_here"
  };
- If you don't have Node.js installed on your computer, install node (and node package manager, which should be included automatically) by following the instructions on their website.
- In your terminal, type
npm install. - In your terminal, type
ng build. - Once completed, navigate to population-fragmentation/dist (the dist directory inside your cloned project). Upload the contents of this folder into your S3 bucket as described in the S3 static website hosting tutorial video mentioned above. Make sure that the permissions of the contents are set to be publicly visible.
- Visit the url provided for your S3 bucket and share it with your students. Perhaps more easily, simply use the already-existing project at populationsimulator.com
This project was generated with Angular CLI version 6.0.8.
Run ng generate component component-name to generate a new component. You can also use ng generate directive|pipe|service|class|guard|interface|enum|module.
Run ng build to build the project. The build artifacts will be stored in the dist/ directory. Use the --prod flag for a production build.
Unit testing has not yet been implemented in DraggleSimulator.
e2e testing has not yet been implemented in DraggleSimulator.
To get more help on the Angular CLI use ng help or go check out the Angular CLI README.


