-
Notifications
You must be signed in to change notification settings - Fork 1
Home
Vault Spark is a message queue system that allows developers to use the Vault Java SDK to send and receive messages from a durable queue. It can be used to allow for loosely coupled, asynchronous integration within a vault, between different vaults, or between vault and an external system. This example use case focuses on using Spark to initiate the copying of documents from a source vault to a target vault and describes an example use cases along with sample code that you can use with your vault to step through the code in the Vault Java SDK Debugger.
The vsdk-spark-doc-copy-sample project covers the use of Spark Messaging to propagate messages from one vault (source) to another vault (target) to notify it a document needs copying. Details of individual documents to be copied are held in the integration transactions record of the source vault, which are processed within the target Vault using various document copy methods. The project will step through:
- Setup of the necessary Vault to Vault components
- Vault Connection records
- Vault Queues for the inbound and outbound Spark Messages
- Vault Connection Integrations to organize an integration business process
- Vault Integration Integration Points to organize full round-trip step in an integration
- Various Vault components for the sample project
- Sample Code for:
- Marking a record for copy and notifying the target vault - when a document's lifecycle state changes to approved, a pending entry is placed in the integration transactions record of the source vault and a Spark message is sent to the target vault to notify it the changes has occurred.
- Retrieving and copying the documents into the target vault - when the spark message is received it initiates a message processor in the target vault, which uses HTTP callouts to retrieve details of the pending integration transaction and the subsequent source documents to be copied. The copy of the document is then created in the target vault, and the integration transactions record is updated so the record isn't reprocessed.
You will need two sandbox vaults to run through this project.
A user needs to copy a document from a source vault to a document in another target vault, including some of the documents metadata, all document versions, the document rendition from the source vault and any document attachments. The document copy process should be started automatically when the document lifecycle state changes to Approved using a state change action.
There are five main steps to setup this project for use.
- Create and configure Connection records in the source and target vaults that link them together.
- Import the Vault Packages (VPKs) to create necessary components.
- Create and configure the Spark Message Queues.
- Create and configure Integrations.
- Create and configure Integration Points.
The project contains separate vault packages (VPK) in the "deploy-vpk" directory with the necessary Objects, Vault Java SDK code and Document. One is for your source vault - the vault where you want to copy documents from - and the second one is for your target vault - the vault where you want the documents to be copied to.
The Connection object is used to create records that define connections between different vaults or between a vault and an external system.
In this use case, we will create Vault to Vault records to link a source vault to a target vault.
-
Log in and navigate to Admin > Connections tab > Connections and click Create
-
Choose the Vault to Vault connection type. Select Continue.
-
Enter Doc Copy Connection in the Name field.
-
Enter vsdk_doc_copy_connection in the API Name field.
-
Select your vault owner as the Authorized Connection User.
-
Select Save.

- This connection file is uploaded into the target vault to authorize a connection back to the source vault.

- Log in and navigate to Admin > Connections tab > Connections and click Create
- Choose the Vault to Vault connection type. Select Continue.
- Enter Doc Copy Connection in the Name field.
- Enter vsdk_doc_copy_connection in the API Name field.
- Select your vault owner as the Authorized Connection User.
- Click Save.
- From the Actions menu of the new connection record, select Connect from File
- At the prompt, select Choose and locate the connection file you downloaded from your source vault.
- Click Continue.
To Activate the Connection between your two Vaults you must Approve the Connection on both Vaults.
- Log into your Source Vault
- Navigate to Admin > Connections
- Click on your newly created Connection (It should be called Doc Copy Connection
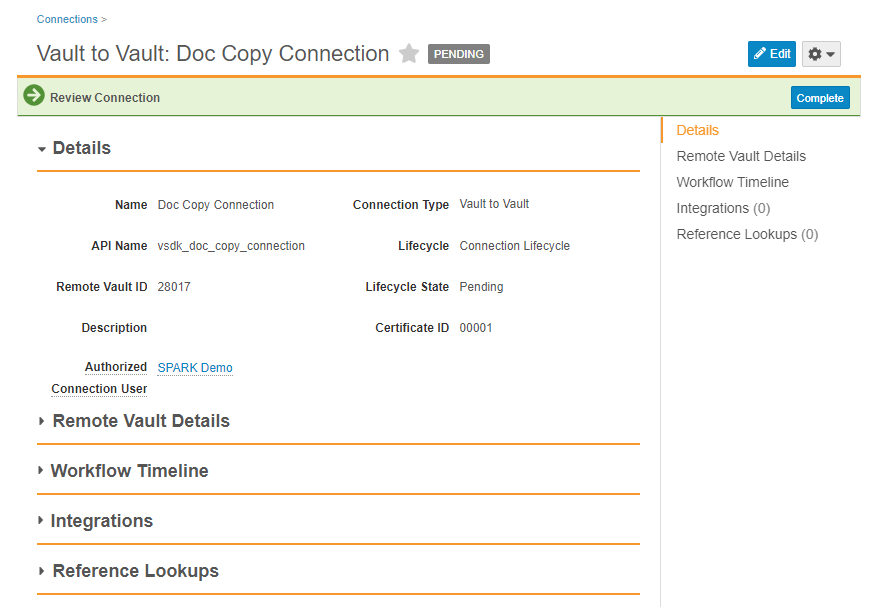
- At the top in green is a prompt (see screen shot), click on the Complete button
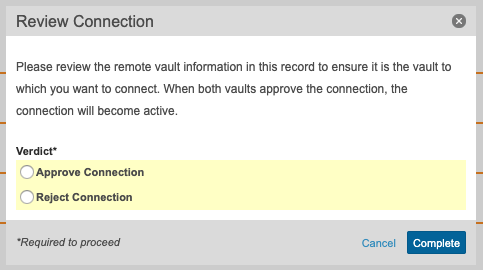
- In popup select the Approve Connection radio button, and click the Complete button
- Repeat steps 1 through 5 on your Target Vault


After a successful upload of the connection file, the connections in both vaults should have a Lifecycle State of "Active" and the "Remote Vault Details" section should be populated.
The connection between vaults is now validated and ready for use!
The VPKs need to be deployed to your vault prior to debugging these use cases.
- Clone or download the sample Maven project vSDK Spark Doc Copy Sample from GitHub.
- Run through the Getting Started guide to set up your deployment environment.
-
Navigate to Admin > Settings
-
Click the Edit button in the upper right
-
In the Configuration Management section, ensure that the Allow Inbound Packages checkbox is checked
-
Then navigate to Admin > Deployment > Inbound Packages and click Import.
-
Select the following file:
Object and code components:
<PROJECT_DIRECTORY>\deploy-vpk\source-vault\vsdk-spark-doc-copy-source-obj-components.vpk. -
From the Actions menu, select Review & Deploy. Vault displays a list of all code components in the package.
-
Review the prompts, then click Next and Finish to deploy the package. You will receive an email when the deployment is complete.
-
Repeat steps 4-7 for the following vault document component VPK:
Document components:
<PROJECT_DIRECTORY>\deploy-vpk\source-vault\vsdk-spark-doc-copy-source-doc-components.vpk.
Once the packages have been deployed, you will want to review the configuration and understand the normal behavior so you can observe the effects of the sample code. Any warnings in the deployment logs or a status of Blocked can be ignored.
-
Navigate to Admin > Settings
-
Click the Edit button in the upper right
-
In the Configuration Management section*, ensure that the Allow Inbound Packages checkbox is checked
-
Navigate to Admin > Deployment > Inbound Packages and click Import.
-
Select the following file:
Object and code components:
<PROJECT_DIRECTORY>\deploy-vpk\target-vault\vsdk-spark-doc-copy-target-obj-components.vpk. -
From the Actions menu, select Review & Deploy. Vault displays a list of all components in the package.
-
Review the prompts, then click Next and Finish to deploy the package. You will receive an email when the deployment is complete.
-
Repeat steps 4-7 for the following vault document component VPK:
Document components:
<PROJECT_DIRECTORY>\deploy-vpk\target-vault\vsdk-spark-doc-copy-target-doc-components.vpk.
Once the packages have been deployed, you will want to review the configuration and understand the normal behavior so you can observe the effects of the sample code. Any warnings in the deployment logs can be ignored.
Below is a rundown of the included components.
Source Vault:
- Integration Transaction (integration_transaction__c)
Source Vault:
- vSDK Spark Copy Document (vsdk_spark_copy_document__c)
Target Vault:
- vSDK Spark Copy Document (vsdk_spark_copy_document__c)
Source Vault:
- vSDK Spark Copy Doc Lifecycle (vsdk_spark_copy_doc_lifecycle__c)
Target Vault:
- vSDK Spark Copy Doc Lifecycle (vsdk_spark_copy_doc_lifecycle__c)
Source Vault:
- Transaction Status (transaction_status__c)
Source Vault:
- Integration Transaction Detail Page Layout (integration_transaction_detail_page_layo__c)
Source Vault:
- Record Action: com.veeva.vault.custom.actions.vSdkDocCopyDocumentAction.java
Target Vault:
- Message Processor: com.veeva.vault.custom.processors.vSDKDocCopyMessageProcessor.java
- User Defined Class: com.veeva.vault.custom.udc.vSDKDocCopy
- User Defined Class: com.veeva.vault.custom.udc.vSDKSparkHelper
A Queue on each of the target and source vaults needs to be configured to utilize the Spark messaging functionality. These queues will handle messages that are produced via the Vault Java SDK Message and QueueService.

- The target vault queue needs to be configured first.
- In the target vault, log in and navigate to Admin > Configuration > Queue Setup > Queues and click Create.
- Set the following values:
- Label: vSDK Doc Copy In Queue
- Name: vsdk_doc_copy_in_queue
- Queue Type: Inbound
- Message Processor: com.veeva.vault.custom.processors.vSDKDocCopyMessageProcessor
- Message Processor User: <Vault Owner>
- Click Save
- On the new Queue, scroll down to the Queue Connections section and click Create.
- Select the vsdk_doc_copy_connection and click Save.
- The source vault queue needs to be configured second.
- In the source vault, log in and navigate to Admin > Configuration > Queue Setup > Queues and click Create.
- Set the following values:
- Label: vSDK Doc Copy Out Queue
- Name: vsdk_doc_copy_out_queue
- Queue Type: Outbound
- Click Save
- On the new Queue, scroll down to the Queue Connections section and click Create.
- Select the vsdk_doc_copy_connection.
- For Deliver to Queue, select the vsdk_doc_copy_in_queue.
- Click Save.
Integrations are a way to organize the business process supported by the Spark integration. It gives non-coders insight into the configuration and goals of an integrations. It is recommended to use descriptive naming that indicates to a non-technical viewer what an integration is used for.
- Navigate to Admin > Connections
- Select the Connection you created earlier called 'Doc Copy Connection'
- Expand the Integrations section and click the Create button.
- Set the following values
- Name: Doc Copies
- Integration API Name: document_copies__c
- Status: Active
- Click Save

- Navigate to Admin > Connections
- Select the Connection you created earlier called 'Doc Copy Connection'
- Expand the Integrations section and click the Create button.
- Set the following values
- Name: Document Copies
- Integration API Name: document_copies__c
- Status: Active
- Click Save
Integration points are a way to organize a complete round trip of data flows. There are multiple Integration Points for each Integration. This gives a non-coder user insight into some of the details of an Integration.
- Navigate to Admin > Connections
- Select the Connection you created earlier called 'Doc Copy Connection'
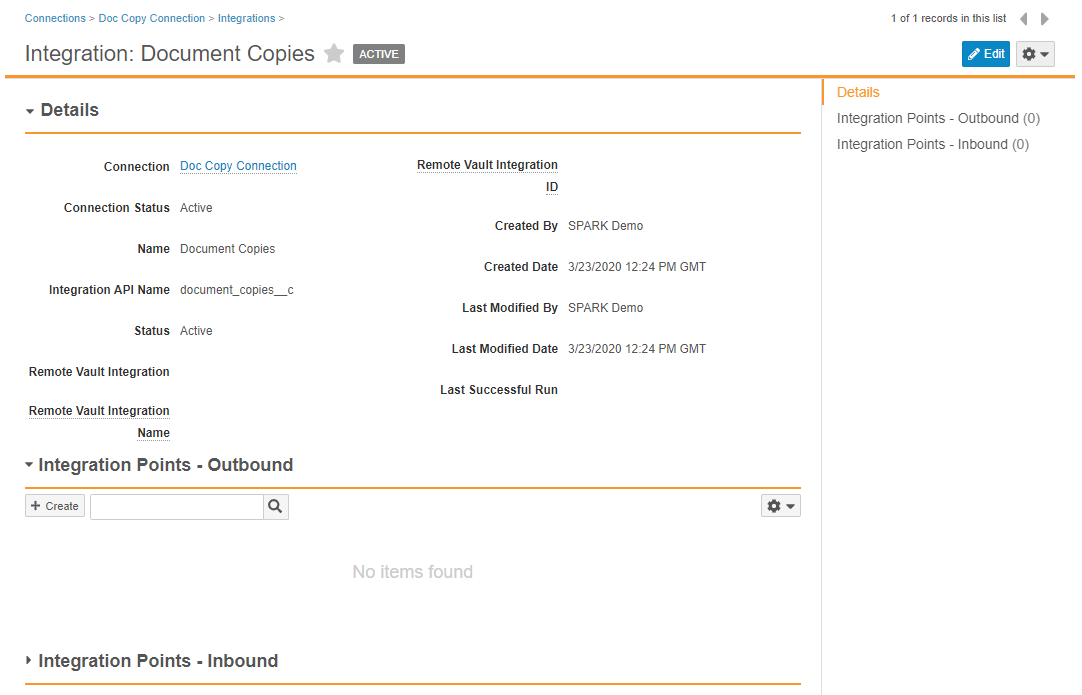
- Expand the Integration section and click on the 'Doc Copies' Integration you just created
- Expand the Integration Points - Inbound and Integration Point - Outbound sections
- Note: There is no Inbound Integration Point configured on the Source system. In this demo data only flows outbound from the source system with no inbound messages. One way integration.
- Click the Create button in the Integration Points - Outbound section.
- Set the following values
- Name: Send Doc Copies
- Integration Point API Name: send_document_copy__c
- Description: Send document for copy
- Status: Active
- Click Save

For the Target Vault we will setup Inbound Connections to support the movement of documents from the Source Vault.
- Navigate to Admin > Connections
- Select the Connection you created earlier on the source system called 'Doc Copy Connection'.
- Expand the Integration section and click on the 'Document Copies' Integration you just created
- Expand the Integration Points - Inbound and Integration Point - Outbound sections.
- Click the Create button in the Integration Points - Inbound section.
- Set the following values
- Name: Receive Doc Copies
- Integration Point API Name: receive_document_copy__c
- Description: Receive document to copy
- Status: Active
- Click Save
- Run the project provides details of how to run the project.
- Code logic provides a detailed understanding of how the sample components work for document copy.