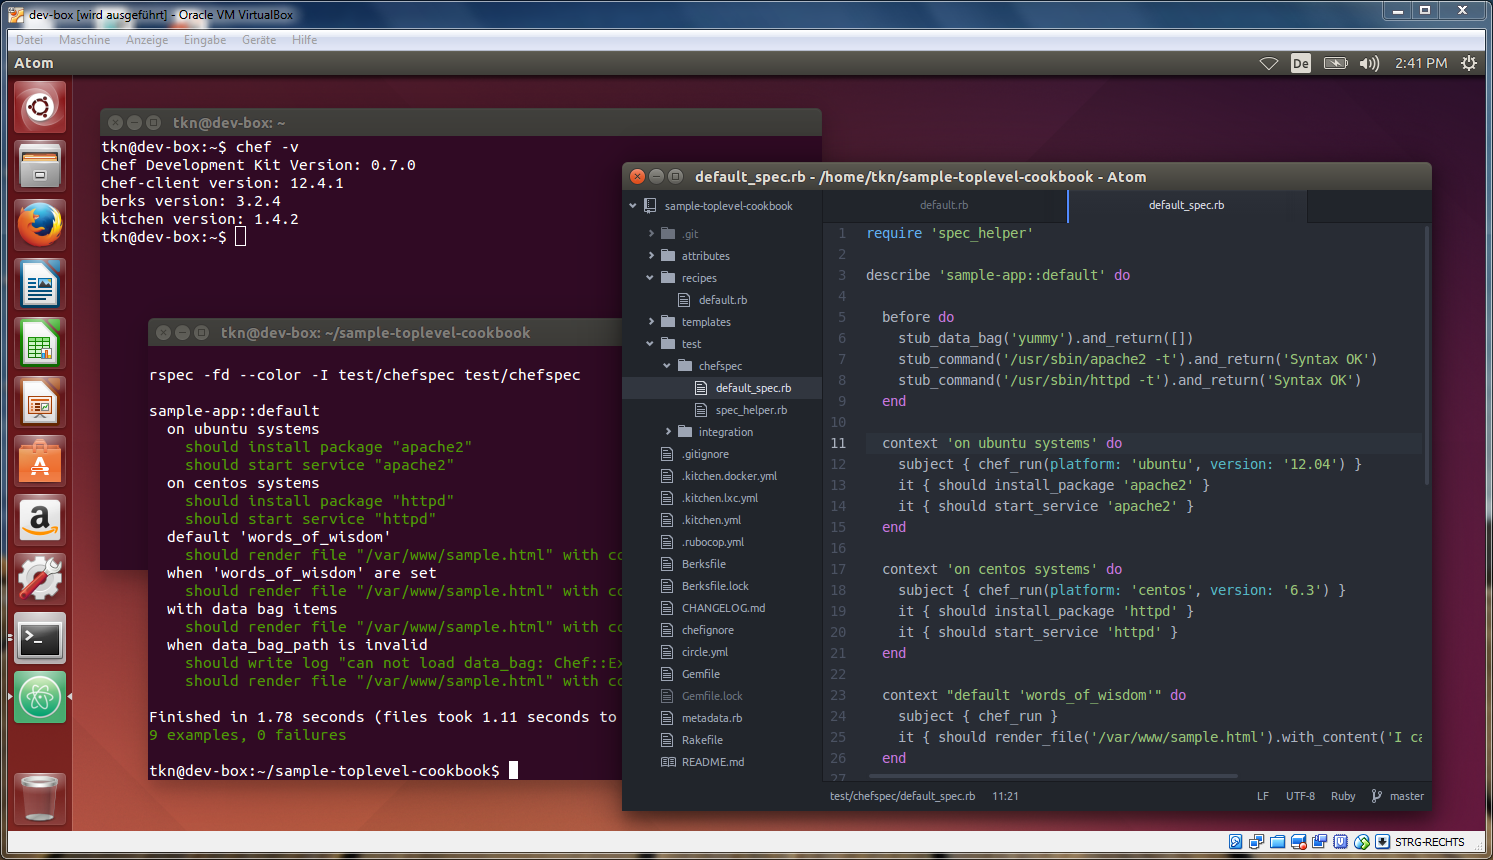
An Ubuntu Desktop 14.04 based development box for Infrastructure-as-Code development with Vagrant, Chef & Co.
Yes, it is being set up with Vagrant and Chef, so it's a bit meta... It is also the Linux based equivalent of the Bill's Kitchen DevPack.
You only need VirtualBox and Vagrant installed.
All other requirements, along with ChefDK and Git will be installed inside the Vagrant VM during provisioning, i.e. you don't need them installed on your host machine.
Bring up the linus-kitchen VM:
$ vagrant up
This will take a while, as it will do quite a few things inside the VM:
- Download and install Git and ChefDK
- Copy the current directory into the VM (will be placed in
~/vm-setup) - Install cookbook dependencies via Berkshelf to
~/vm-setup/cookbooks/vm/cookbooks - Trigger a Chef-Zero run to apply the
~/vm-setup/cookbooks/vm/recipesto the VM (see "What's included?") - Verify the installation using a battery of Serverspec tests
Watch the vagrant output on the console for seeing progress. At the end you should see all tests passing:
...
==> default:
==> default: update-vm.sh
==> default:   installs git
==> default:   installs chefdk 0.7.0
==> default:
==> default: Finished in 24.44 seconds (files took 0.81272 seconds to load)
==> default: 33 examples, 0 failures
...
You can now log in to the Desktop (the VM is started in GUI mode):
- user: "vagrant"
- password: "vagrant"
Once logged in, you can open a terminal and you will have all of the tools available (see next section).
These are the main tools included in Linus' Kitchen:
Other tweaks worth mentioning:
- Scripts in
~/.bash.d/*.share sourced from~/.bashrc, pre-configured with the following: - set up
beas an alias forbundle exec - run
chef shell-init bashfor initializing the ChefDK - configure "docker" as the
$VAGRANT_DEFAULT_PROVIDER - Bundler is configured for parallel downloading and retrying (see
~/.bundle/config) - Customized Atom config, e.g. with SublimeText-like tab behaviour (see
~/.atom/config.cson) - Customized
~/.vagrant.d/Vagrantfileand~/.kitchen/config.ymlfor caching as much as possible - Pre-installed Vagrant plugins:
- vagrant-omnibus - installs omnibus chef in a vagrant VM
- vagrant-cachier - caches all kinds of packages you install in the vagrant VMs
- vagrant-berkshelf - berkshelf integration for vagrant
- vagrant-toplevel-cookbooks - support for one top-level cookbook per vagrant VM
- vagrant-lxc - LXC provider for Vagrant
- Pre-installed Atom plugins:
- atom-beautify - code formatter / beautifier for various languages
- minimap - a SublimeText like minimap
- line-ending-converter - show and convert between line ending styles
- language-chef - code snippets for Chef recipes
- Symlinked
update-vm.shto/usr/local/bin/update-vmso it's in the$PATHand can be used for updating the VM from the inside (see below)
Even though you can trigger an update from outside the VM via vagrant provision,
you usually want to do that from inside the VM as this is your current working environment.
The update is done via Chef so it should be fully idempotent.
You can run these commands from anywhere inside the VM:
update-vm- to apply the Chef recipes of the locally checked out linus-kitchen repo in~/vm-setupupdate-vm --pull- same as above but update the repo beforeupdate-vm --verify-only- don't update the VM, only run the Serverspec tests
In addition to the Serverspec tests (which verify that the installed tools are properly configured and working as expected) you can also execute a minimal acceptance test which covers the common usage scenarios when developing with Vagrant and Chef, including:
- cloning a sample-toplevel-cookbook and sample-infrastructure-repo
- running various commands like
bundle install,vagrant plugin list,vagrant up, etc.. - running different kinds of cookbook tests via
rubocop,foodcritic,chefspecandtest-kitchen
The acceptance test is not run by default, but you can run it manually from anywhere inside the VM:
$ git clone https://github.com/tknerr/vagrant-workflow-tests
$ cd vagrant-workflow-tests
$ rspec
If all goes well you should see an output like this.
Seems to be too hard to automate for me, so you have to do this manually for now:
sudo dpkg-reconfigure keyboard-configuration
Whenever you feel like distributing a fat VM image rather than a Vagrantfile, you can package / export it as a VirtualBox image. This might be useful for distributing the initial version of the developer VM to your dev team, or simply for preserving checkpoint releases as a binary images.
First, start from a clean state, and make sure vagrant-cachier is disabled:
$ vagrant destroy -f
$ export VAGRANT_NO_PLUGINS=1
$ vagrant up
Next, unmount the /vagrant shared folder (will be restored on next vagrant up):
$ vagrant ssh -c "sudo umount /vagrant"
Also, you may want to clean out the VM for a minimal export image:
$ vagrant ssh -c "wget -qO- https://raw.githubusercontent.com/boxcutter/ubuntu/master/script/cleanup.sh | sudo bash"
Finally, shutdown the VM, remove the sharedfolder, and export the VM as an .ova file:
$ vagrant halt
$ VBoxManage sharedfolder remove "Linus Kitchen" --name "vagrant"
$ VBoxManage modifyvm "Linus Kitchen" --name "Linus Kitchen v0.1"
$ VBoxManage export "Linus Kitchen v0.1" --output "linus-kitchen-v0.1.ova" --options manifest,nomacs
Don't forget to throw away the VM enable vagrant-cachier again:
$ vagrant destroy -f
$ unset VAGRANT_NO_PLUGINS
- Fork the repository on Github
- Create a named feature branch (like
add-xyz) - Implement your changes, add tests
- Commit and push
- Submit a Pull Request using Github
