| title | category | tag | ||
|---|---|---|---|---|
Java IO 基础知识总结 |
Java |
|
IO 即 Input/Output,输入和输出。数据输入到计算机内存的过程即输入,反之输出到外部存储(比如数据库,文件,远程主机)的过程即输出。数据传输过程类似于水流,因此称为 IO 流。IO 流在 Java 中分为输入流和输出流,而根据数据的处理方式又分为字节流和字符流。
Java IO 流的 40 多个类都是从如下 4 个抽象类基类中派生出来的。
InputStream/Reader: 所有的输入流的基类,前者是字节输入流,后者是字符输入流。OutputStream/Writer: 所有输出流的基类,前者是字节输出流,后者是字符输出流。
InputStream用于从源头(通常是文件)读取数据(字节信息)到内存中,java.io.InputStream抽象类是所有字节输入流的父类。
InputStream 常用方法 :
read():返回输入流中下一个字节的数据。返回的值介于 0 到 255 之间。如果未读取任何字节,则代码返回-1,表示文件结束。read(byte b[ ]): 从输入流中读取一些字节存储到数组b中。如果数组b的长度为零,则不读取。如果没有可用字节读取,返回-1。如果有可用字节读取,则最多读取的字节数最多等于b.length, 返回读取的字节数。这个方法等价于read(b, 0, b.length)。read(byte b[], int off, int len):在read(byte b[ ])方法的基础上增加了off参数(偏移量)和len参数(要读取的最大字节数)。skip(long n):忽略输入流中的 n 个字节 ,返回实际忽略的字节数。available():返回输入流中可以读取的字节数。close():关闭输入流释放相关的系统资源。
从 Java 9 开始,InputStream 新增加了多个实用的方法:
readAllBytes():读取输入流中的所有字节,返回字节数组。readNBytes(byte[] b, int off, int len):阻塞直到读取len个字节。transferTo(OutputStream out): 将所有字节从一个输入流传递到一个输出流。
FileInputStream 是一个比较常用的字节输入流对象,可直接指定文件路径,可以直接读取单字节数据,也可以读取至字节数组中。
FileInputStream 代码示例:
try (InputStream fis = new FileInputStream("input.txt")) {
    System.out.println("Number of remaining bytes:"
            + fis.available());
    int content;
    long skip = fis.skip(2);
    System.out.println("The actual number of bytes skipped:" + skip);
    System.out.print("The content read from file:");
    while ((content = fis.read()) != -1) {
        System.out.print((char) content);
    }
} catch (IOException e) {
    e.printStackTrace();
}
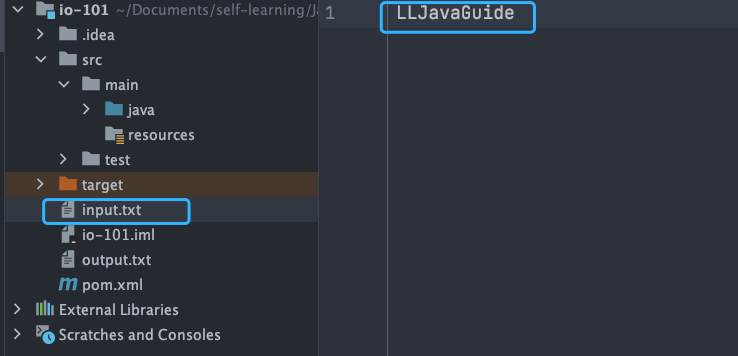
input.txt 文件内容:
输出:
Number of remaining bytes:11
The actual number of bytes skipped:2
The content read from file:JavaGuide
不过,一般我们是不会直接单独使用 FileInputStream ,通常会配合 BufferedInputStream(字节缓冲输入流,后文会讲到)来使用。
像下面这段代码在我们的项目中就比较常见,我们通过 readAllBytes() 读取输入流所有字节并将其直接赋值给一个 String 对象。
// 新建一个 BufferedInputStream 对象
BufferedInputStream bufferedInputStream = new BufferedInputStream(new FileInputStream("input.txt"));
// 读取文件的内容并复制到 String 对象中
String result = new String(bufferedInputStream.readAllBytes());
System.out.println(result);
DataInputStream 用于读取指定类型数据,不能单独使用,必须结合 FileInputStream 。
FileInputStream fileInputStream = new FileInputStream("input.txt");
//必须将fileInputStream作为构造参数才能使用
DataInputStream dataInputStream = new DataInputStream(fileInputStream);
//可以读取任意具体的类型数据
dataInputStream.readBoolean();
dataInputStream.readInt();
dataInputStream.readUTF();
ObjectInputStream 用于从输入流中读取 Java 对象(反序列化),ObjectOutputStream 用于将对象写入到输出流(序列化)。
ObjectInputStream input = new ObjectInputStream(new FileInputStream("object.data"));
MyClass object = (MyClass) input.readObject();
input.close();
另外,用于序列化和反序列化的类必须实现 Serializable 接口,对象中如果有属性不想被序列化,使用 transient 修饰。
OutputStream用于将数据(字节信息)写入到目的地(通常是文件),java.io.OutputStream抽象类是所有字节输出流的父类。
OutputStream 常用方法 :
write(int b):将特定字节写入输出流。write(byte b[ ]): 将数组b写入到输出流,等价于write(b, 0, b.length)。write(byte[] b, int off, int len): 在write(byte b[ ])方法的基础上增加了off参数(偏移量)和len参数(要读取的最大字节数)。flush():刷新此输出流并强制写出所有缓冲的输出字节。close():关闭输出流释放相关的系统资源。
FileOutputStream 是最常用的字节输出流对象,可直接指定文件路径,可以直接输出单字节数据,也可以输出指定的字节数组。
FileOutputStream 代码示例:
try (FileOutputStream output = new FileOutputStream("output.txt")) {
    byte[] array = "JavaGuide".getBytes();
    output.write(array);
} catch (IOException e) {
    e.printStackTrace();
}
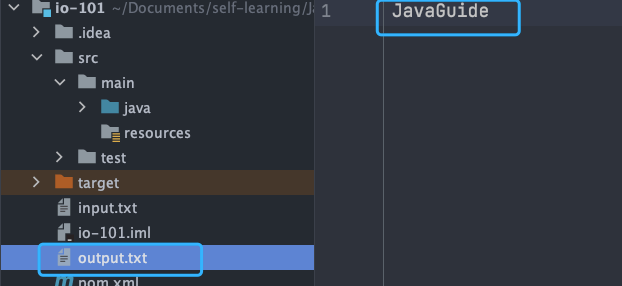
运行结果:
类似于 FileInputStream,FileOutputStream 通常也会配合 BufferedOutputStream(字节缓冲输出流,后文会讲到)来使用。
FileOutputStream fileOutputStream = new FileOutputStream("output.txt");
BufferedOutputStream bos = new BufferedOutputStream(fileOutputStream)
DataOutputStream 用于写入指定类型数据,不能单独使用,必须结合 FileOutputStream
// 输出流
FileOutputStream fileOutputStream = new FileOutputStream("out.txt");
DataOutputStream dataOutputStream = new DataOutputStream(fileOutputStream);
// 输出任意数据类型
dataOutputStream.writeBoolean(true);
dataOutputStream.writeByte(1);
ObjectInputStream 用于从输入流中读取 Java 对象(ObjectInputStream,反序列化),ObjectOutputStream将对象写入到输出流(ObjectOutputStream,序列化)。
ObjectOutputStream output = new ObjectOutputStream(new FileOutputStream("file.txt")
Person person = new Person("Guide哥", "JavaGuide作者");
output.writeObject(person);不管是文件读写还是网络发送接收,信息的最小存储单元都是字节。 那为什么 I/O 流操作要分为字节流操作和字符流操作呢?
个人认为主要有两点原因:
- 字符流是由 Java 虚拟机将字节转换得到的,这个过程还算是比较耗时。
- 如果我们不知道编码类型就很容易出现乱码问题。
乱码问题这个很容易就可以复现,我们只需要将上面提到的 FileInputStream 代码示例中的 input.txt 文件内容改为中文即可,原代码不需要改动。
输出:
Number of remaining bytes:9
The actual number of bytes skipped:2
The content read from file:§å®¶å¥½
可以很明显地看到读取出来的内容已经变成了乱码。
因此,I/O 流就干脆提供了一个直接操作字符的接口,方便我们平时对字符进行流操作。如果音频文件、图片等媒体文件用字节流比较好,如果涉及到字符的话使用字符流比较好。
字符流默认采用的是 Unicode 编码,我们可以通过构造方法自定义编码。顺便分享一下之前遇到的笔试题:常用字符编码所占字节数?utf8 :英文占 1 字节,中文占 3 字节,unicode:任何字符都占 2 个字节,gbk:英文占 1 字节,中文占 2 字节。
Reader用于从源头(通常是文件)读取数据(字符信息)到内存中,java.io.Reader抽象类是所有字符输入流的父类。
Reader 用于读取文本, InputStream 用于读取原始字节。
Reader 常用方法 :
read(): 从输入流读取一个字符。read(char[] cbuf): 从输入流中读取一些字符,并将它们存储到字符数组cbuf中,等价于read(cbuf, 0, cbuf.length)。read(char[] cbuf, int off, int len):在read(char[] cbuf)方法的基础上增加了off参数(偏移量)和len参数(要读取的最大字符数)。skip(long n):忽略输入流中的 n 个字符 ,返回实际忽略的字符数。close(): 关闭输入流并释放相关的系统资源。
InputStreamReader 是字节流转换为字符流的桥梁,其子类 FileReader 是基于该基础上的封装,可以直接操作字符文件。
// 字节流转换为字符流的桥梁
public class InputStreamReader extends Reader {
}
// 用于读取字符文件
public class FileReader extends InputStreamReader {
}
FileReader 代码示例:
try (FileReader fileReader = new FileReader("input.txt");) {
    int content;
    long skip = fileReader.skip(3);
    System.out.println("The actual number of bytes skipped:" + skip);
    System.out.print("The content read from file:");
    while ((content = fileReader.read()) != -1) {
        System.out.print((char) content);
    }
} catch (IOException e) {
    e.printStackTrace();
}
input.txt 文件内容:
输出:
The actual number of bytes skipped:3
The content read from file:我是Guide。
Writer用于将数据(字符信息)写入到目的地(通常是文件),java.io.Writer抽象类是所有字符输出流的父类。
Writer 常用方法 :
write(int c): 写入单个字符。write(char[] cbuf):写入字符数组cbuf,等价于write(cbuf, 0, cbuf.length)。write(char[] cbuf, int off, int len):在write(char[] cbuf)方法的基础上增加了off参数(偏移量)和len参数(要读取的最大字符数)。write(String str):写入字符串,等价于write(str, 0, str.length())。write(String str, int off, int len):在write(String str)方法的基础上增加了off参数(偏移量)和len参数(要读取的最大字符数)。append(CharSequence csq):将指定的字符序列附加到指定的Writer对象并返回该Writer对象。append(char c):将指定的字符附加到指定的Writer对象并返回该Writer对象。flush():刷新此输出流并强制写出所有缓冲的输出字符。close():关闭输出流释放相关的系统资源。
OutputStreamWriter 是字符流转换为字节流的桥梁,其子类 FileWriter 是基于该基础上的封装,可以直接将字符写入到文件。
// 字符流转换为字节流的桥梁
public class OutputStreamWriter extends Writer {
}
// 用于写入字符到文件
public class FileWriter extends OutputStreamWriter {
}
FileWriter 代码示例:
try (Writer output = new FileWriter("output.txt")) {
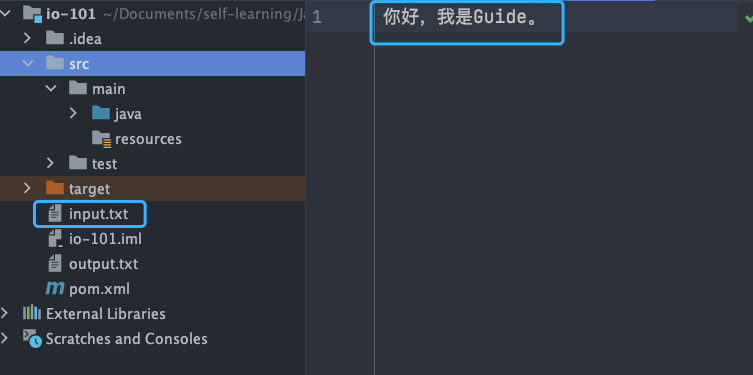
    output.write("你好,我是Guide。");
} catch (IOException e) {
    e.printStackTrace();
}
输出结果:
IO 操作是很消耗性能的,缓冲流将数据加载至缓冲区,一次性读取/写入多个字节,从而避免频繁的 IO 操作,提高流的传输效率。
字节缓冲流这里采用了装饰器模式来增强 InputStream 和OutputStream子类对象的功能。
举个例子,我们可以通过 BufferedInputStream(字节缓冲输入流)来增强 FileInputStream 的功能。
// 新建一个 BufferedInputStream 对象
BufferedInputStream bufferedInputStream = new BufferedInputStream(new FileInputStream("input.txt"));
字节流和字节缓冲流的性能差别主要体现在我们使用两者的时候都是调用 write(int b) 和 read() 这两个一次只读取一个字节的方法的时候。由于字节缓冲流内部有缓冲区(字节数组),因此,字节缓冲流会先将读取到的字节存放在缓存区,大幅减少 IO 次数,提高读取效率。
我使用 write(int b) 和 read() 方法,分别通过字节流和字节缓冲流复制一个 524.9 mb 的 PDF 文件耗时对比如下:
使用缓冲流复制PDF文件总耗时:15428 毫秒
使用普通字节流复制PDF文件总耗时:2555062 毫秒
两者耗时差别非常大,缓冲流耗费的时间是字节流的 1/165。
测试代码如下:
@Test
void copy_pdf_to_another_pdf_buffer_stream() {
    // 记录开始时间
    long start = System.currentTimeMillis();
    try (BufferedInputStream bis = new BufferedInputStream(new FileInputStream("深入理解计算机操作系统.pdf"));
         BufferedOutputStream bos = new BufferedOutputStream(new FileOutputStream("深入理解计算机操作系统-副本.pdf"))) {
        int content;
        while ((content = bis.read()) != -1) {
            bos.write(content);
        }
    } catch (IOException e) {
        e.printStackTrace();
    }
    // 记录结束时间
    long end = System.currentTimeMillis();
    System.out.println("使用缓冲流复制PDF文件总耗时:" + (end - start) + " 毫秒");
}

@Test
void copy_pdf_to_another_pdf_stream() {
    // 记录开始时间
    long start = System.currentTimeMillis();
    try (FileInputStream fis = new FileInputStream("深入理解计算机操作系统.pdf");
         FileOutputStream fos = new FileOutputStream("深入理解计算机操作系统-副本.pdf")) {
        int content;
        while ((content = fis.read()) != -1) {
            fos.write(content);
        }
    } catch (IOException e) {
        e.printStackTrace();
    }
    // 记录结束时间
    long end = System.currentTimeMillis();
    System.out.println("使用普通流复制PDF文件总耗时:" + (end - start) + " 毫秒");
}
如果是调用 read(byte b[]) 和 write(byte b[], int off, int len) 这两个写入一个字节数组的方法的话,只要字节数组的大小合适,两者的性能差距其实不大,基本可以忽略。
这次我们使用 read(byte b[]) 和 write(byte b[], int off, int len) 方法,分别通过字节流和字节缓冲流复制一个 524.9 mb 的 PDF 文件耗时对比如下:
使用缓冲流复制PDF文件总耗时:695 毫秒
使用普通字节流复制PDF文件总耗时:989 毫秒
两者耗时差别不是很大,缓冲流的性能要略微好一点点。
测试代码如下:
@Test
void copy_pdf_to_another_pdf_with_byte_array_buffer_stream() {
    // 记录开始时间
    long start = System.currentTimeMillis();
    try (BufferedInputStream bis = new BufferedInputStream(new FileInputStream("深入理解计算机操作系统.pdf"));
         BufferedOutputStream bos = new BufferedOutputStream(new FileOutputStream("深入理解计算机操作系统-副本.pdf"))) {
        int len;
        byte[] bytes = new byte[4 * 1024];
        while ((len = bis.read(bytes)) != -1) {
            bos.write(bytes, 0, len);
        }
    } catch (IOException e) {
        e.printStackTrace();
    }
    // 记录结束时间
    long end = System.currentTimeMillis();
    System.out.println("使用缓冲流复制PDF文件总耗时:" + (end - start) + " 毫秒");
}

@Test
void copy_pdf_to_another_pdf_with_byte_array_stream() {
    // 记录开始时间
    long start = System.currentTimeMillis();
    try (FileInputStream fis = new FileInputStream("深入理解计算机操作系统.pdf");
         FileOutputStream fos = new FileOutputStream("深入理解计算机操作系统-副本.pdf")) {
        int len;
        byte[] bytes = new byte[4 * 1024];
        while ((len = fis.read(bytes)) != -1) {
            fos.write(bytes, 0, len);
        }
    } catch (IOException e) {
        e.printStackTrace();
    }
    // 记录结束时间
    long end = System.currentTimeMillis();
    System.out.println("使用普通流复制PDF文件总耗时:" + (end - start) + " 毫秒");
}BufferedInputStream 从源头(通常是文件)读取数据(字节信息)到内存的过程中不会一个字节一个字节的读取,而是会先将读取到的字节存放在缓存区,并从内部缓冲区中单独读取字节。这样大幅减少了 IO 次数,提高了读取效率。
BufferedInputStream 内部维护了一个缓冲区,这个缓冲区实际就是一个字节数组,通过阅读 BufferedInputStream 源码即可得到这个结论。
public
class BufferedInputStream extends FilterInputStream {
    // 内部缓冲区数组
    protected volatile byte buf[];
    // 缓冲区的默认大小
    private static int DEFAULT_BUFFER_SIZE = 8192;
    // 使用默认的缓冲区大小
    public BufferedInputStream(InputStream in) {
        this(in, DEFAULT_BUFFER_SIZE);
    }
    // 自定义缓冲区大小
    public BufferedInputStream(InputStream in, int size) {
        super(in);
        if (size <= 0) {
            throw new IllegalArgumentException("Buffer size <= 0");
        }
        buf = new byte[size];
    }
}
缓冲区的大小默认为 8192 字节,当然了,你也可以通过 BufferedInputStream(InputStream in, int size) 这个构造方法来指定缓冲区的大小。
BufferedOutputStream 将数据(字节信息)写入到目的地(通常是文件)的过程中不会一个字节一个字节的写入,而是会先将要写入的字节存放在缓存区,并从内部缓冲区中单独写入字节。这样大幅减少了 IO 次数,提高了读取效率
try (BufferedOutputStream bos = new BufferedOutputStream(new FileOutputStream("output.txt"))) {
    byte[] array = "JavaGuide".getBytes();
    bos.write(array);
} catch (IOException e) {
    e.printStackTrace();
}
类似于 BufferedInputStream ,BufferedOutputStream 内部也维护了一个缓冲区,并且,这个缓存区的大小也是 8192 字节。
BufferedReader (字符缓冲输入流)和 BufferedWriter(字符缓冲输出流)类似于 BufferedInputStream(字节缓冲输入流)和BufferedOutputStream(字节缓冲输入流),内部都维护了一个字节数组作为缓冲区。不过,前者主要是用来操作字符信息。
下面这段代码大家经常使用吧?
System.out.print("Hello!");
System.out.println("Hello!");
System.out 实际是用于获取一个 PrintStream 对象,print方法实际调用的是 PrintStream 对象的 write 方法。
PrintStream 属于字节打印流,与之对应的是 PrintWriter (字符打印流)。PrintStream 是 OutputStream 的子类,PrintWriter 是 Writer 的子类。
public class PrintStream extends FilterOutputStream
    implements Appendable, Closeable {
}
public class PrintWriter extends Writer {
}这里要介绍的随机访问流指的是支持随意跳转到文件的任意位置进行读写的 RandomAccessFile 。
RandomAccessFile 的构造方法如下,我们可以指定 mode(读写模式)。
// openAndDelete 参数默认为 false 表示打开文件并且这个文件不会被删除
public RandomAccessFile(File file, String mode)
    throws FileNotFoundException {
    this(file, mode, false);
}
// 私有方法
private RandomAccessFile(File file, String mode, boolean openAndDelete)  throws FileNotFoundException{
  // 省略大部分代码
}
读写模式主要有下面四种:
r: 只读模式。rw: 读写模式rws: 相对于rw,rws同步更新对“文件的内容”或“元数据”的修改到外部存储设备。rwd: 相对于rw,rwd同步更新对“文件的内容”的修改到外部存储设备。
文件内容指的是文件中实际保存的数据,元数据则是用来描述文件属性比如文件的大小信息、创建和修改时间。
RandomAccessFile 中有一个文件指针用来表示下一个将要被写入或者读取的字节所处的位置。我们可以通过 RandomAccessFile 的 seek(long pos) 方法来设置文件指针的偏移量(距文件开头 pos 个字节处)。如果想要获取文件指针当前的位置的话,可以使用 getFilePointer() 方法。
RandomAccessFile 代码示例:
RandomAccessFile randomAccessFile = new RandomAccessFile(new File("input.txt"), "rw");
System.out.println("读取之前的偏移量:" + randomAccessFile.getFilePointer() + ",当前读取到的字符" + (char) randomAccessFile.read() + ",读取之后的偏移量:" + randomAccessFile.getFilePointer());
// 指针当前偏移量为 6
randomAccessFile.seek(6);
System.out.println("读取之前的偏移量:" + randomAccessFile.getFilePointer() + ",当前读取到的字符" + (char) randomAccessFile.read() + ",读取之后的偏移量:" + randomAccessFile.getFilePointer());
// 从偏移量 7 的位置开始往后写入字节数据
randomAccessFile.write(new byte[]{'H', 'I', 'J', 'K'});
// 指针当前偏移量为 0,回到起始位置
randomAccessFile.seek(0);
System.out.println("读取之前的偏移量:" + randomAccessFile.getFilePointer() + ",当前读取到的字符" + (char) randomAccessFile.read() + ",读取之后的偏移量:" + randomAccessFile.getFilePointer());
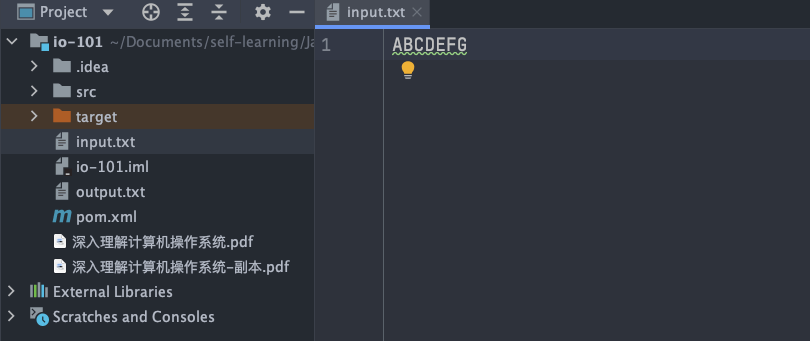
input.txt 文件内容:
输出:
读取之前的偏移量:0,当前读取到的字符A,读取之后的偏移量:1
读取之前的偏移量:6,当前读取到的字符G,读取之后的偏移量:7
读取之前的偏移量:0,当前读取到的字符A,读取之后的偏移量:1
input.txt 文件内容变为 ABCDEFGHIJK 。
RandomAccessFile 的 write 方法在写入对象的时候如果对应的位置已经有数据的话,会将其覆盖掉。
RandomAccessFile randomAccessFile = new RandomAccessFile(new File("input.txt"), "rw");
randomAccessFile.write(new byte[]{'H', 'I', 'J', 'K'});
假设运行上面这段程序之前 input.txt 文件内容变为 ABCD ,运行之后则变为 HIJK 。
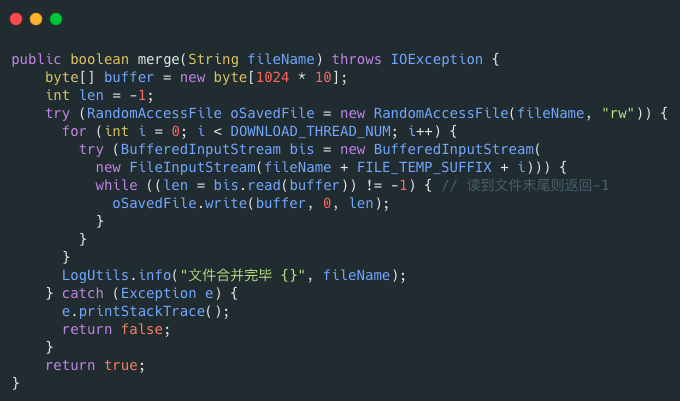
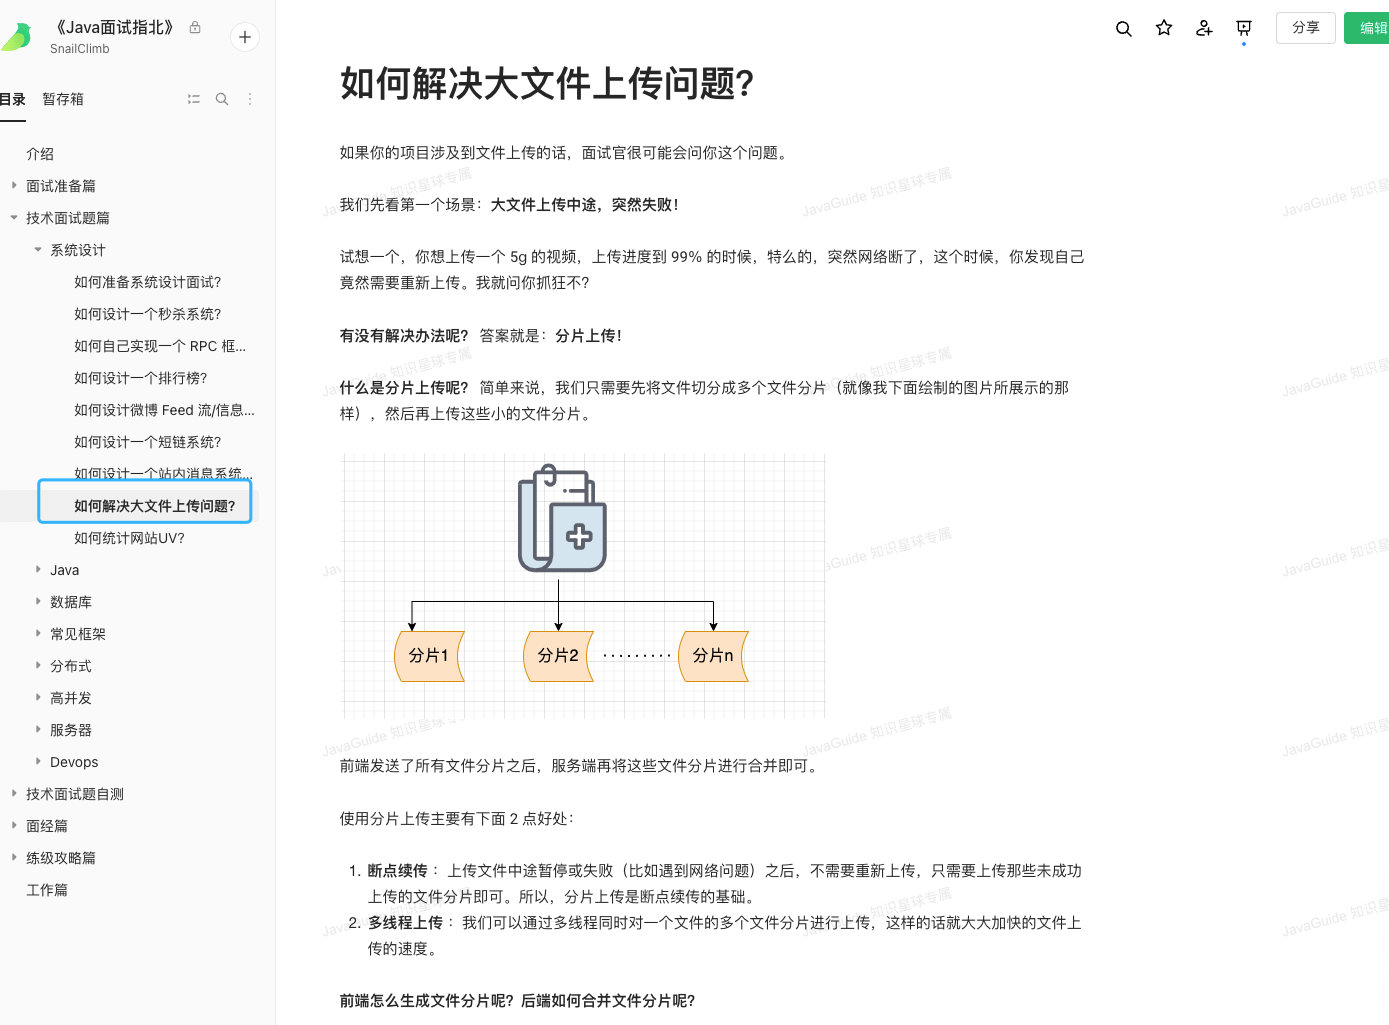
RandomAccessFile 比较常见的一个应用就是实现大文件的 断点续传 。何谓断点续传?简单来说就是上传文件中途暂停或失败(比如遇到网络问题)之后,不需要重新上传,只需要上传那些未成功上传的文件分片即可。分片(先将文件切分成多个文件分片)上传是断点续传的基础。
RandomAccessFile 可以帮助我们合并文件分片,示例代码如下:
我在《Java 面试指北》中详细介绍了大文件的上传问题。
RandomAccessFile 的实现依赖于 FileDescriptor (文件描述符) 和 FileChannel (内存映射文件)。
