-
Notifications
You must be signed in to change notification settings - Fork 5
Misc Behaviours
A collection of small, general / single purpose built behaviours
Before using any of these behaviours, check the general usage guide.
After that you might want to take a look at the Guides section that covers some real-world usage examples.
-
Parameters list describes all the public variables and settings exposed to you, some of them are UI only, so if you're planning to modify them via other udon behaviours - make sure to check the actual
UdonBehaviourcomponent on the same object. -
Events list describes all the exposed custom events the component expects to recieve. Most things that are expected to be "Triggered" in some way usually have a
Triggerevent exposed. The full list of events can also be seen at the bottom of the behaviour UI with a convinience button for you to use while testing in editor. - Usage / Examples is a free-form section with some personal usage advice and other notes
You can generally split the things below into Triggers and Actions (plus some extras), one group captures player interactions in some way - the other performs some actions in response.
Most of the time you would add a bunch of Universal Action behaviours to the scene and then trigger them from all the different trigger behaviours listed on this page. But this system can also easily interact with other things in your world outside of Udon Toolkit! So don't feel limited by the Universal Action and use the Udon Events list with other behaviours to mix and match stuff.
- Event means Udon Custom Event
-
To Trigger means to send a Custom Event or specifically send a
Triggercustom event - Action means some kind of reaction to your triggers, generally refers to using Universal Action behaviour
Check out the included Demo scene for reference usage!
Tracks the local player's Tracking Data source, or a Bone transform and copies it over to the target transform
- Track Bone: Switches between tracking a Tracking Data source (Head/Hands) and tracking Bones
- Bone: Only visible when Track Bone is checked. Specifies which Bone to track
- Track Player Base: Switches to player base tracking mode where the Target Transform will follow the player's ground position
- Track Playspace: Switches to playspace tracking mode. Allows Target Transform to persist in players playspace, only moving when the player moves with the stick
- Tracking Target: Only visible when Track Bone is unchecked. Specifies which Tracking Data target to use
- Target Transform: Transform to copy the tracked Bone / Tracking Data position and rotation to
- Track Position: Specifies whether the position should be copied
- Track Rotation: Specifies whether the rotation should be copied
- Tracking Correction: Allows to apply an extra X/Y/Z rotation to the transform after copying it over
- Follow Main Camera: For editor use only. Makes the object follow the main camera, helpful for editor testing
- Reset Offsets: Resets the player offsets from their player base tracker. Call this to calibrate player offsets at least once, otherwise the tracking will be wrong
The basic usage of this component is intended to be things like attaching objects to player's hands, head or both.
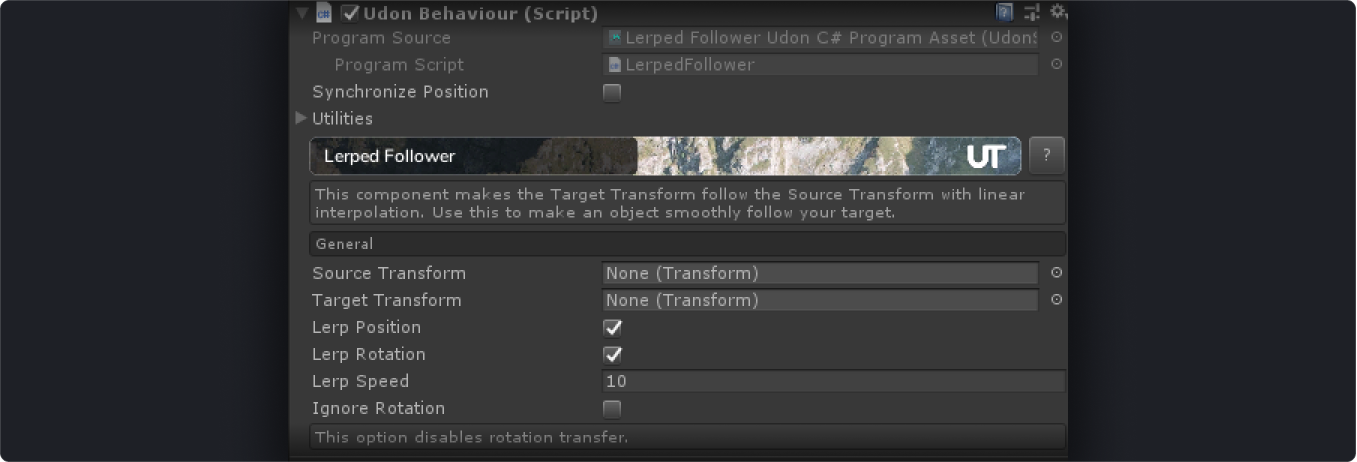
Makes an object follow another object with smooth interpolation
- Source Transform: The source of position and rotation to copy from
- Target Transform: The target of position and rotation to copy to
- Lerp Position: Specifies whether the position should be interpolated (smoothed) or instant
- Lerp Rotation: Specifies whether the rotation should be interpolated (smoothed) or instant
- Lerp Speed: A speed with which Target will achieve Source's position and rotation
- Ignore Rotation: Specifies whether to copy rotation or completely ignore it
Generally good feeling lerp value for scene objects seems to be at around 5-15, for the player attached object (like with Universal Tracker) higher values are recommended.
Ignore rotation can be used in cases where you want to have the object look at a particular spot or generally not rotate with the Source object. Thins like Rotation / LookAt or Aim constraints come to mind as good combinations.
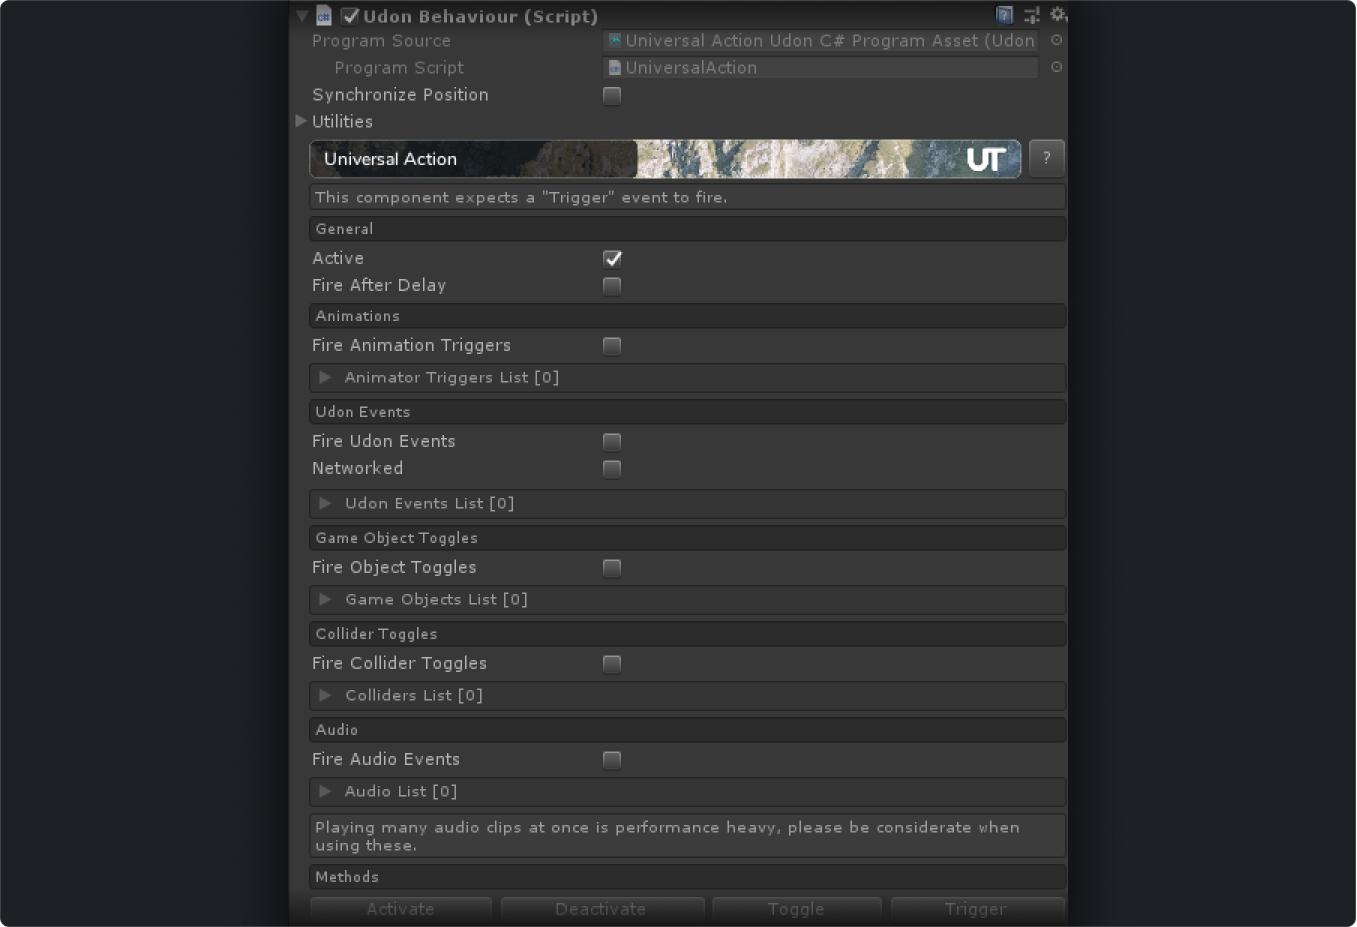
The bread and butter of any world reactivity, allows you to perform various actions in response to an incoming Trigger event. Think about it as a VRC SDK2 Triggers Lite
-
Active: Determines if the behaviour is running, since toggling game objects on and off only means they won't run
Update - Fire After Delay: Object must be enabled at all times for this to work. Specifies whether the triggers should be fired after a delay
- Delay Length: Only visible when Fire After Delay is checked. Sets the delay length in seconds
- Fire Animation Triggers: Specifies whether the Animation Triggers should be executed
- Animator Triggers List: A list of Animators and Triggers to fire, you can specify the same Animator multiple times to fire multiple triggers
- Fire Udon Events: Specifies whether the Udon Events should be sent
- Networked: When checked - Udon Events will be sent to targets set in Network Targets
- Network Target: Specifies who to send the network events to
- Udon Events List: A list of Udon Behaviours and Events to call
- Fire Object Toggles: Specifies whether to Enable/Disable/Toggle objects from the Game Objects List
- Game Objects List: A list of Game Objects to Enable, Disable or Toggle
- Fire Audio Events: Specifies whether to Play the sound clips provided in the Audio List
- Audio List: A list of Audio Sources and Audio Clips to play through them
Make sure to only use Networked option when executing this trigger locally, e.g. via a UI Button, otherwise you might cause oversync
- Trigger: Triggers this Universal Action
- Activate: Activates the behaviour, so it will react to Trigger events
- Deactivate: Deactivates the behaviour, so it will no longer react
- Toggle: Toggles the active state, provided for convenience
Universal Action will probably be the most used behaviour in your world, as its basically a simplified trigger from SDK2. It is not as deep as the original triggers, though, so you are expected to combine it with more specific behaviours from Udon Toolkit or other places to extend its functionality.
This component makes it pretty trivial to do things via UI Buttons simply by calling a SendCustomEvent on it with Trigger as the event name.
You can check out a guide on setting up a basic mirror right here which should provide a good example of Universal Action usage.
The major thing to note here is to make sure that the component, and the game object its on is always enabled if you're using the Delay parameter, otherwise it will never fire as the Update method will never be called.
Sends events to udon behaviours based on the player's name
- Active: Determines if the actions will be executed on Start
-
Actions List: A list of Player Names and Udon Behaviours to send
Triggerevents to
- Trigger: Executes the logic again, you will probably want this to be called from the network to run for everyone again
Ever wanted to have something special activate only for particular users? This behaviour does exactly that! Combine this with Universal Action to do something special for that user, or specify behaviours of your own.
Make sure whatever you're trying to send an event to actually expects the Trigger event. Most of Udon Toolkit will work with this.
If sending events once isn't enough - you can use the Trigger event to fire it again.
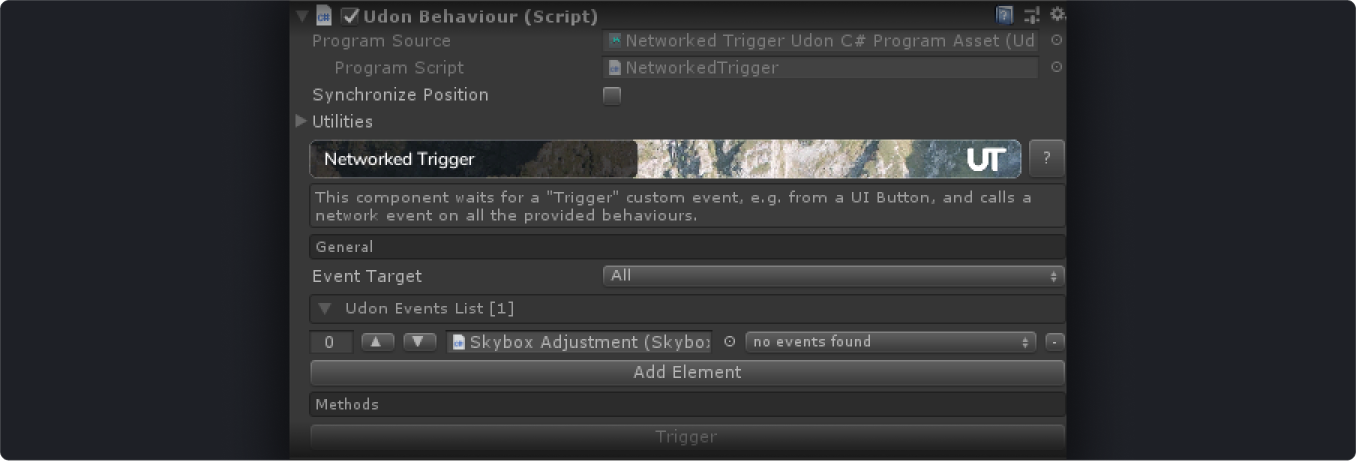
A "proxy" of sorts that expects a "Trigger" event and sends Networked events to specified behaviours
- Event Target: Specifies who to send the events to
- Udon Events List: A list of Udon Behaviours and Events to send to them
- Trigger: Fires the events on the provided behaviour over the network
Think about this as a middle-man between local only things and the network. While its not that useful on its own - it might serve as a nice layer between UI Buttons, and some other behaviours, that you want to call for everyone in the room, or their owners.
You can achieve the same results by using Universal Action and checking the
Networkedcheckbox, but this is lighter on performance, so this separation is just a way to simplify things.
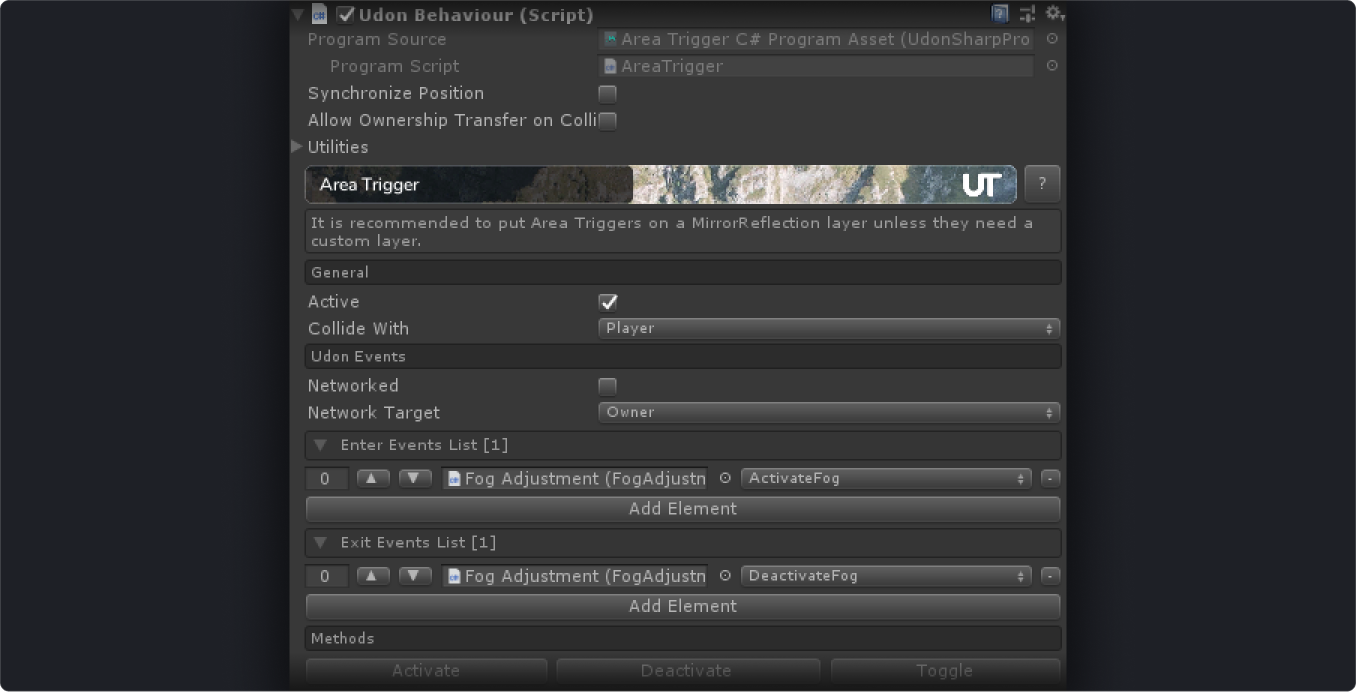
Sends events to other behaviours when an object enters and exits a trigger collider
- Active: Specifies whether the triggers will fire, as just disabling the object doesn't stop it from reacting to enter/exit events
- Collide With: Specifies the list of layers to filter out the objects you don't want to react to
- Networked: Specifies whether the events should be sent over the network or only fired locally
- Network Target: Specifies who to send the network events to
- Enter Events List: A list of Udon Behaviours and Events to send when the correct object enters the trigger collider
- Exit Events List: A list of Udon Behaviours and Events to send when the correct object exits the trigger collider
- Activate: Activates the behaviour, so it will react to objects
- Deactivate: Deactivates the behaviour, so it will no longer react
- Toggle: Toggles the active state, provided for convenience
This is an equivalent of VRC SDK2's Trigger Enter and Trigger Exit triggers with some small exceptions due to current Udon limitations (as of July 2020).
The UI will try to guide you around the main pitfalls, but in short - you should follow this small set of rules to have everything working as expected.
- Setting
Collide Withto eitherPlayerorPlayerLocalon one of the default layers - won't work, as vrchat doesn't allow us to check whether the player is local or remote. One of the solutions to this is to create a new layer in unity, make it collide with either of these and set theArea Triggerto it - Generally speaking you would want the
Area Triggerto be on theMirrorReflectionlayer to avoid some weird vrchat issues, unless you have a case where you need a custom layer, e.g. like the one described above - Do not use the
Networkedoption ifCollide Withis set toPlayer, as this will make everyone send events to everyone all the time, causing oversync and possibly desyncing people in the instance. A good rule of thumb when it comes to things like this: "if everyone can see object X enter trigger Y - you can keep everything local"
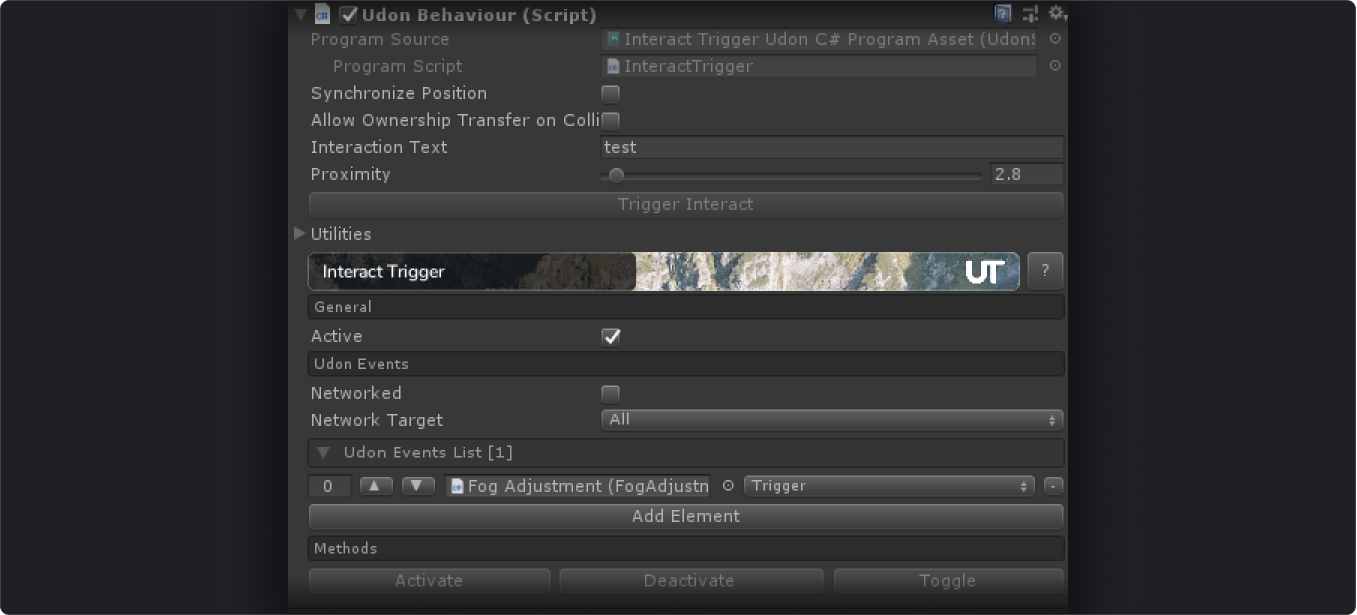
Makes something react to player interaction, VRC SDK2-style
- Active: Specifies whether the object can be interacted with
- Interaction Text: Sets the text shown when hovering over the object
- Proximity: Sets the interaction distance of the object
- Networked: Specifies whether the Udon Events should be sent to other players
- Network Target: Specifies who to send the Udon Events to
- Udon Events: A list of Udon Behaviours and Events to send
- Interact: Sends events to provided Udon Behaviours
- Activate: Activates the behaviour, so the object will become interactive
- Deactivate: Deactivates the behaviour, so the object will no longer be interactive
- Toggle: Toggles the active state, provided for convenience
This is an almost one-to-one equivalent of the VRC SDK2 Interact trigger. Use in combination with Universal Action to do something when user clicks on an object.
Activate/Deactivate/Toggle events will also allow you to disable the highlight on the object, if you don't want it to be interactive anymore.
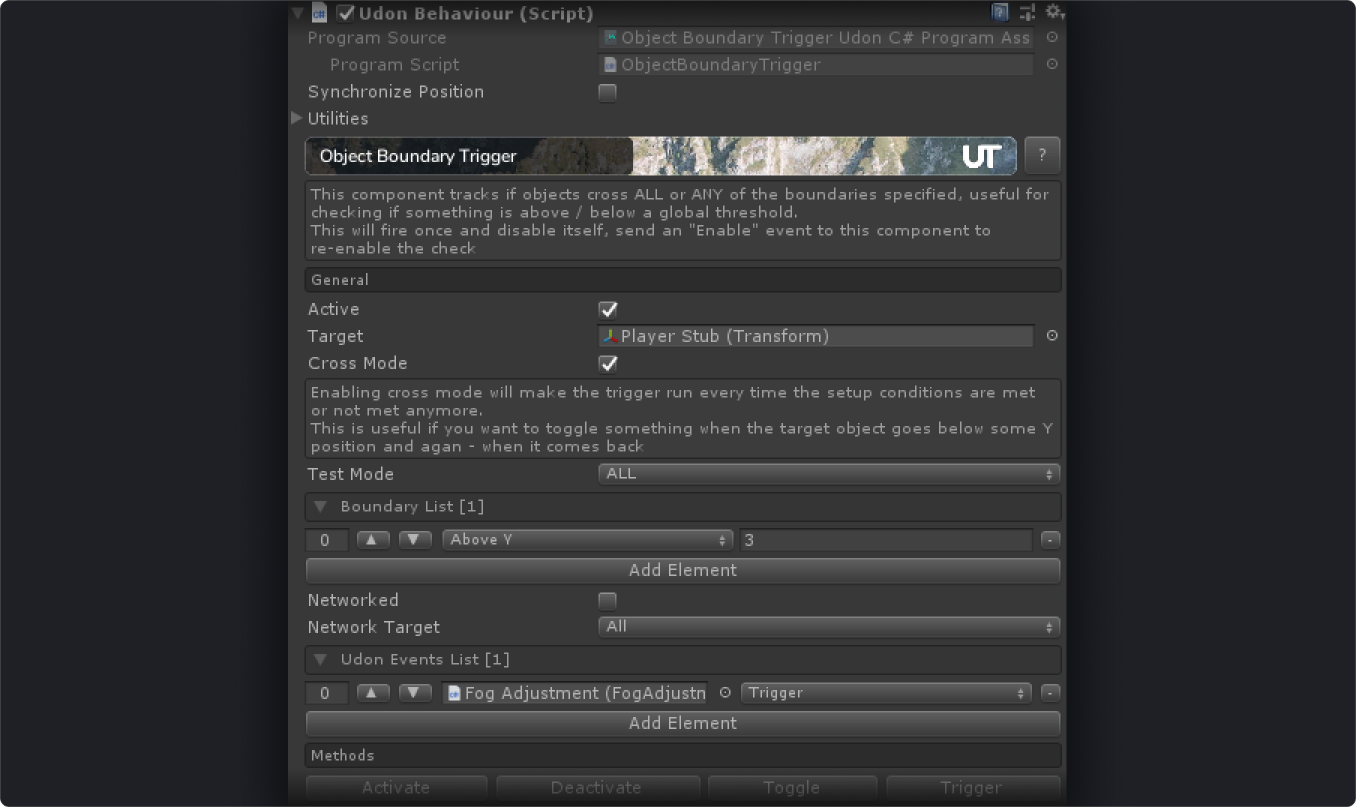
Sends Events to Udon Behaviours if a target object crosses a particular threshold and disables itself (by default)
- Active: Toggles the threshold checks on and off
- Target: The target object to observe
- Cross Mode: Makes this trigger run every time the Target crosses the threshold (either way), also makes it, so the trigger doesn't disable itself after the threshold is crossed
- Test Mode: Specifies whether the trigger will fire if ALL or ANY of the specifies boundaries are crossed
-
Boundary List: A list of conditions and coordinates to check against, e.g.
Above Y: 10will make the trigger fire events if the Target gets above 10 units on Y coordinate - Networked: Specifies whether the Udon Events should be sent to other players
- Network Target: Specifies who to send the Udon Events to
- Udon Events: A list of Udon Behaviours and Events to send
- Trigger: Fires the events specified in the Udon Events list
- Activate: Activates the behaviour, so it will start checking the boundaries
- Deactivate: Deactivates the behaviour, so it will no perform any checks
- Toggle: Toggles the active state, provided for convenience
While this might seem confusing at first, the gist of this one is to trigger something when object's position exceeds one of the limits. A good example of it would be using a player head tracker and making it so if the tracker's Y position is below your water level in the map - you enable special fog settings or something like that.
By default, the trigger will only run once and disable itself, otherwise it will start triggering things every frame which is not perfect. You can enable it again by sending an Activate even to it.
Although often you might want to trigger things when the object crosses the limit in either direction. Like turning the fog on and off in the example above. In that case you would want to use the Cross Mode option that will trigger once every time the limits are crossed.
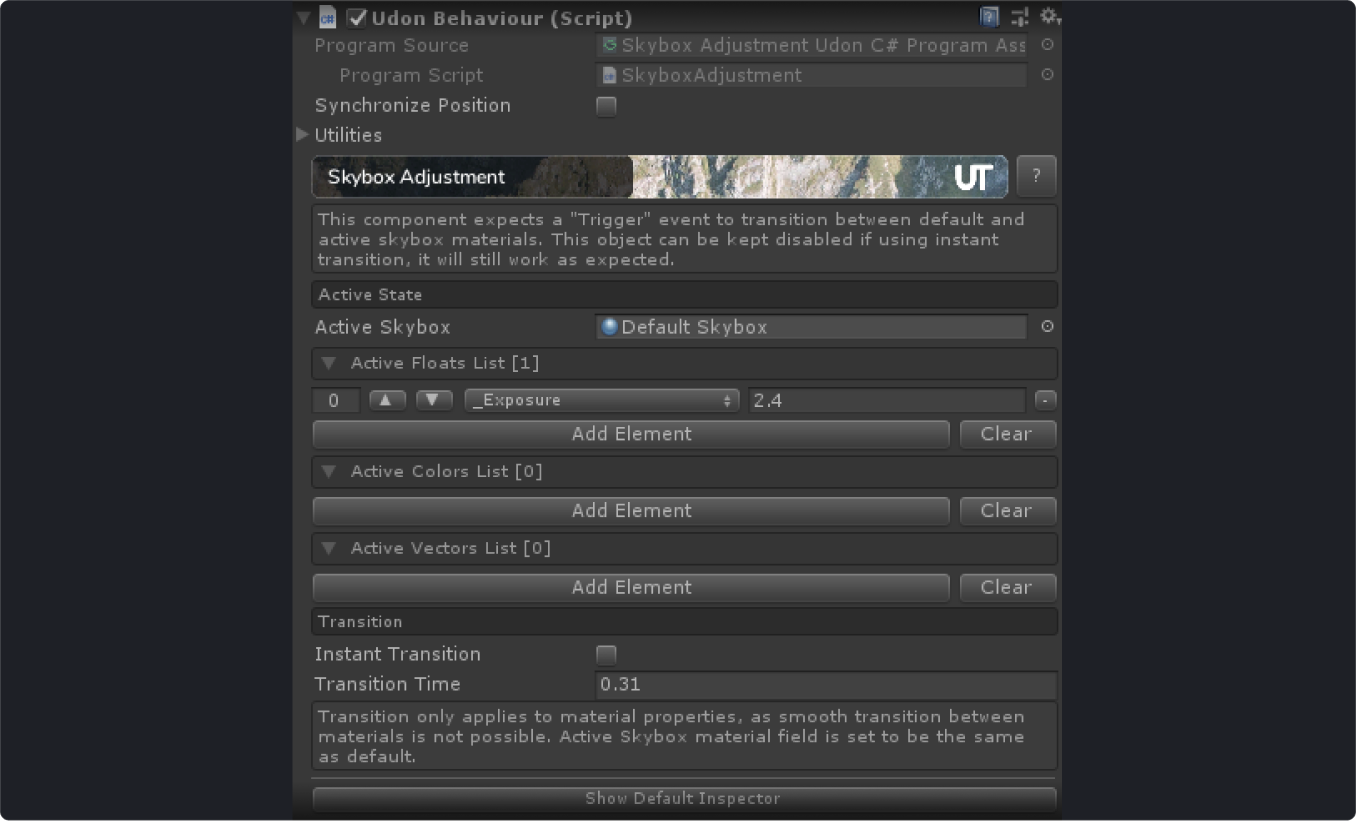
Switches skybox materials or smoothly adjusts values of a single skybox material
- Default Skybox: First skybox material to transition from
- Default Floats List: A list of numeric parameters to transition from
- Default Color List: A list of color parameters to transition from
- Default Vector3 List: A list of Vector3 parameters to transition from
-
Active Skybox: _This should be set to the
Default Skyboxmaterial if not usingInstant Transition. Second skybox material to transition to - Active Floats List: A list of numeric parameters to transition to
- Active Color List: A list of color parameters to transition to
- Active Vector3 List: A list of Vector3 parameters to transition to
- Instant Transition: Makes the skyboxes switch instantly
- Transition Time: Defines the time, in seconds, over which the Float/Color/Vector3 values will be transitioned from default values to active and vice-versa
- Trigger: Performs a transition from default to active. Send it again to transition back
Main thing to decide on when using this is whether you need to transition instantly or slowly over time. If you want to transition instantly - its very simple
- Prepare 2 skybox materials, plug one into the
Default Skyboxand the other intoActive Skybox - Send a
Triggerevent from one of the Udon Toolkit's many triggers when you want to switch - Done
If you want to slowly transition between different settings, e.g. between high exposure and low exposure to imitate the day/night cycle - its a bit of a different setup
- Uncheck the
Instant Transitioncheckbox and specify theLerp Timein seconds - Expand the
Default Floats Listand clickAdd Element - Choose
_Exposurefrom the dropdown and set the value you want to transition from (e.g. 1.3) - Expand the
Active Floats Listand clickAdd Element - Choose
_Exposurefrom the dropdown and set the value you want to transition to (e.g. 0.2) - Send a
Triggerevent from one of the Udon Toolkit's triggers when you want to start transitioning - Done
Switches between two different fog settings - instantly, or over time
- Default Fog Color: First fog color to transition from
- Default Fog Density: Only visible if the fog mode is not Linear. First fog density to transition from
- Default Fog Start: Only visible if the fog mode is Linear. First fog start range to transition from
- Default Fog End: Only visible if the fog mode is Linear. First fog end range to transition from
- Active Fog Color: Second fog color to transition to
- Active Fog Density: Only visible if the fog mode is not Linear. Second fog density to transition to
- Active Fog Start: Only visible if the fog mode is Linear. Second fog start range to transition to
- Active Fog End: Only visible if the fog mode is Linear. Second fog end range to transition to
- Fog Transition Time: Specifies the duration of the transition, 0 to make it instant
- Start Active: Makes it, so the fog will start from the active state, so the first transition will be Active to Default, instead of the other way around
-
Set Initial State: Applies the Default or Active fog settings, based on whether the
Start Activecheckbox is set
- ActivateFog: Explicitly transitions from Default to Active state
- DeactivateFog: Explicitly transitions from Active to Default state
- Trigger: Switches between the two states or starts a smooth transition
Very similar to Skybox Adjustment in terms of functionality.
Set the Default and Active setting and then use something like an Area Trigger to switch between them when a player enters or exits a particular area.
This area intended more for people developing their own Udon stuff just to make their life easier and more organized, be advised
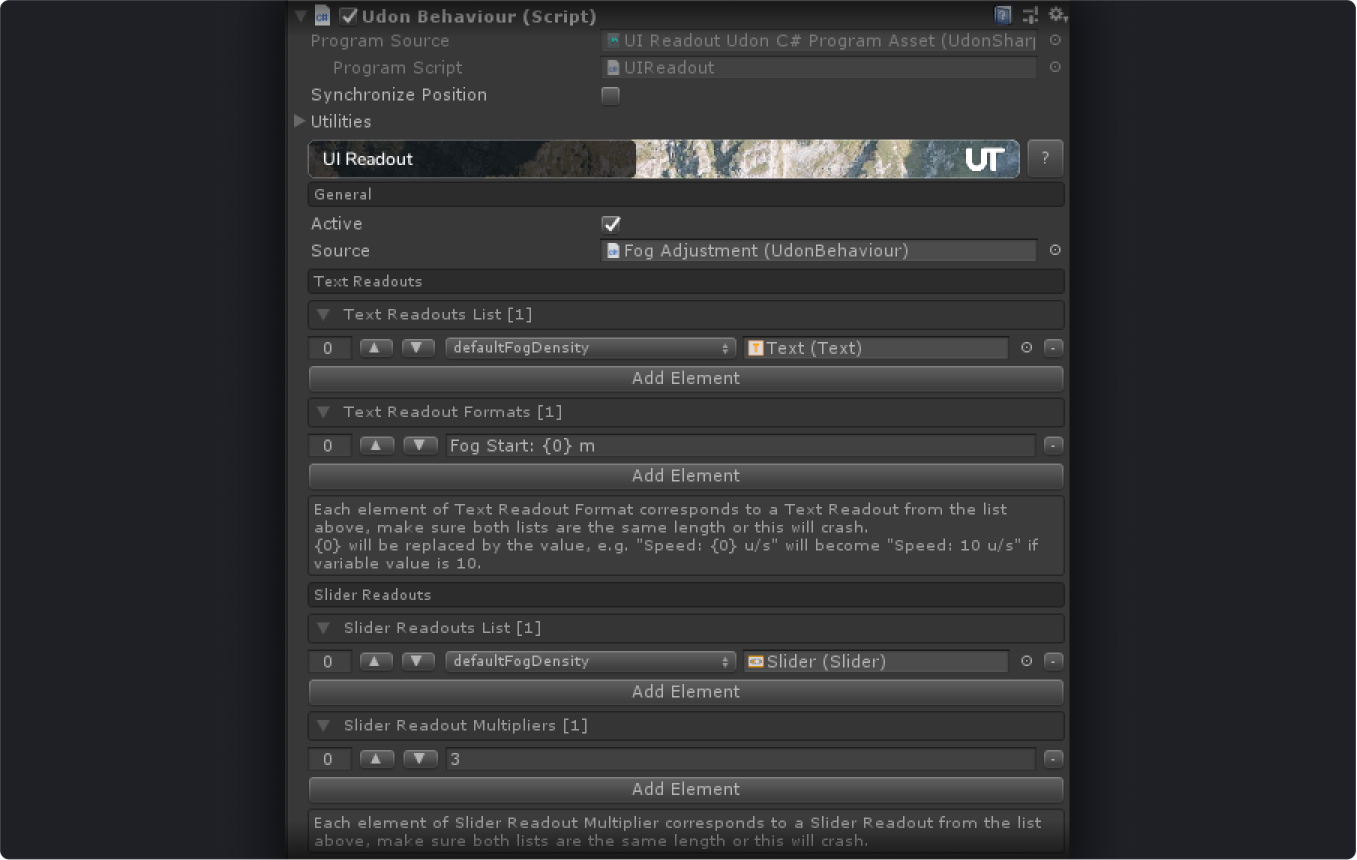
Takes compatible variable values from one Udon Behaviour and displays them in UI Text or UI Slider elements, with formatting support
- Active: Turns the value update on and off
- Source: The source of the values
- Text Readouts List: A list of variables that can be converted to text and UI Text components to display them in
- Text Readout Formats: A list of formatting rules applied to each readout value. It is very important to have the same amount of elements in both List and Format arrays. More on that below
- Slider Readouts List: A list of numeric variables that can be assigned to a value of a UI Slider
- Slider Readouts Multipliers: A list of multipliers that each variable value will be multiplied by, same rule as formats apply
- Activate: Activates the behaviour, so it will start reading fresh values
- Deactivate: Deactivates the behaviour, so it stops reading values
- Toggle: Toggles the active state, provided for convenience
The values are grabbed and assigned in
LateUpdateto have the most up to date values possible
Important: always make sure Formats and Multipliers lists have at last as many elements as Text Readouts and Slider Readouts lists respectively. The UI should generate the lists for you filled with default values, but it doesn't hurt to double check. Each row of the Formats / Multipliers list corresponds to the same row in the Text/Slider lists.
The formatter works by replacing {0} in whatever text you provide to each formatter with the value of the variable. So something like Speed: {0} u/s for a variable speed in the Target that has value of 10 will result in Speed: 10 u/s being displayed in the text element.
Multipliers work in a similar fashion - by multiplying a corresponding variable value by this multiplier before passing it to a slider.
UI Readout is built to provide a quick way of setting up something like a HUD you can attach to player's head via Unversal Tracker that would print out all the needed information from something like a flight system, or a combat system of some sorts. It will pre-populate lists of compatible variables for you, so you wouldn't need to dig into the code to figure out what you can display.
Note that this process can be performance heavy, so you don't want many of these behaviours running at all times, use the Toggle event to only read values when needed.
🚨 Found an issue? File an issue
💬 Join the Discord server
🕶 Support the project if you found it useful
