-
Notifications
You must be signed in to change notification settings - Fork 518
Using advanced shaders
In this lesson we learn about other built-in shader types and some of their uses.
First create a new project using the instructions from the first two lessons: The basic game loop and Adding the DirectX Tool Kit which we will use for this lesson.
Start by saving wood.dds and cubemap.dds into your new project's directory, and then from the top menu select Project / Add Existing Item.... Select "wood.dds" and click "OK". Repeat for "cubemap.dds"
In the Game.h file, add the following variables to the bottom of the Game class's private declarations:
DirectX::SimpleMath::Matrix m_world;
DirectX::SimpleMath::Matrix m_view;
DirectX::SimpleMath::Matrix m_proj;
std::unique_ptr<DirectX::CommonStates> m_states;
std::unique_ptr<DirectX::GeometricPrimitive> m_shape;
std::unique_ptr<DirectX::EnvironmentMapEffect> m_effect;
Microsoft::WRL::ComPtr<ID3D11InputLayout> m_inputLayout;
Microsoft::WRL::ComPtr<ID3D11ShaderResourceView> m_texture;
Microsoft::WRL::ComPtr<ID3D11ShaderResourceView> m_cubemap;
In Game.cpp, add to the TODO of CreateDevice:
m_states = std::make_unique<CommonStates>(m_d3dDevice.Get());

m_effect = std::make_unique<EnvironmentMapEffect>(m_d3dDevice.Get());
m_effect->EnableDefaultLighting();

m_shape = GeometricPrimitive::CreateTeapot(m_d3dContext.Get());
m_shape->CreateInputLayout(m_effect.get(),
    m_inputLayout.ReleaseAndGetAddressOf());

DX::ThrowIfFailed(
    CreateDDSTextureFromFile(m_d3dDevice.Get(), L"wood.dds", nullptr,
    m_texture.ReleaseAndGetAddressOf()));

m_effect->SetTexture(m_texture.Get());

DX::ThrowIfFailed(
    CreateDDSTextureFromFile(m_d3dDevice.Get(), L"cubemap.dds", nullptr,
    m_cubemap.ReleaseAndGetAddressOf()));

m_effect->SetEnvironmentMap(m_cubemap.Get());

m_world = Matrix::Identity;
In Game.cpp, add to the TODO of CreateResources:
m_view = Matrix::CreateLookAt(Vector3(2.f, 2.f, 2.f),
    Vector3::Zero, Vector3::UnitY);
m_proj = Matrix::CreatePerspectiveFieldOfView(XM_PI / 4.f,
    float(backBufferWidth) / float(backBufferHeight), 0.1f, 10.f);

m_effect->SetView(m_view);
m_effect->SetProjection(m_proj);
In Game.cpp, add to the TODO of OnDeviceLost:
m_states.reset();
m_shape.reset();
m_effect.reset();
m_inputLayout.Reset();
m_texture.Reset();
m_cubemap.Reset();
In Game.cpp, add to the TODO of Render:
m_effect->SetWorld(m_world);
m_shape->Draw(m_effect.get(), m_inputLayout.Get(), false, false, [=]{
    auto sampler = m_states->LinearWrap();
    m_d3dContext->PSSetSamplers( 1, 1, &sampler );
});
In Game.cpp, add to the TODO of Update:
float time = float(timer.GetTotalSeconds());
m_world = Matrix::CreateRotationZ(cosf(time) * 2.f);
``
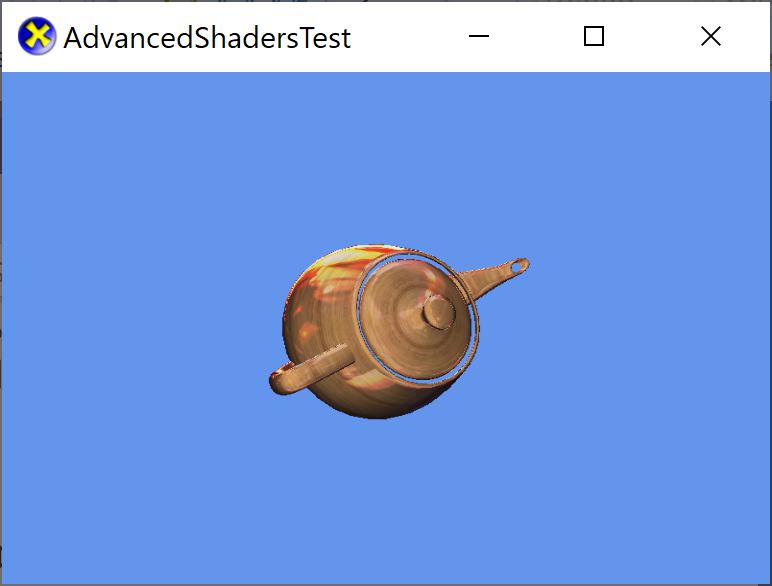
Build and run to see the teapot rendered with a fancy material.

In **Game.cpp** add the following to the TODO section of **Update**:
```cpp
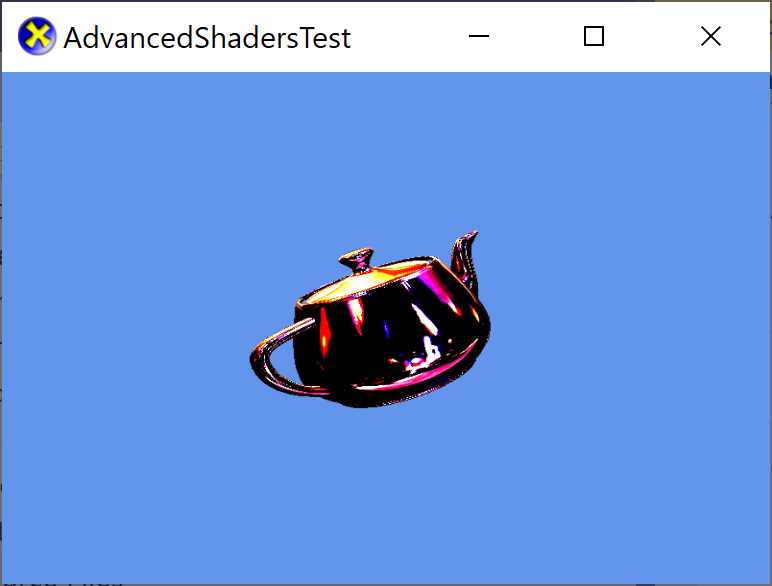
m_effect->SetFresnelFactor(cosf(time * 2.f));Build and run to see the effect of animating the Fresnel factor.
-
The NormalMapEffect is similar to the BasicEffect with the addition of a normal texture map and an optional specular texture map.
-
PBREffect is a Disney-style Physically-Based Rendering effect which uses albedo maps, normal map, and roughness/metalness/ambient-occlusion map along with two cubemaps for Image-Based Lighting.
-
DualTextureEffect is used to render a material with two textures applied. This requires the input layout to contain a second set of texture coordinates. This does not perform vertex or per-pixel lighting, as the second texture is most often a lightmap with statically computed lighting information.
.SDKMESHand the Content Exporter support exporting light-mapped models which utilize this effect (see-lightmaps). -
The AlphaTestEffect is used to perform pixel rejection based on an alpha reference value and function selection. It's primarily to implement techniques that relied on legacy Direct3D 9 alpha testing render state. This effect is independent of the depth/stencil tests set in
D3D11_DEPTH_STENCIL_DESC.DepthFuncandStencilFunc.
Next lesson: Creating custom shaders with DGSL
DirectX Tool Kit docs Effects
All content and source code for this package are subject to the terms of the MIT License.
This project has adopted the Microsoft Open Source Code of Conduct. For more information see the Code of Conduct FAQ or contact [email protected] with any additional questions or comments.
- Universal Windows Platform apps
- Windows desktop apps
- Windows 11
- Windows 10
- Windows 8.1
- Xbox One
- x86
- x64
- ARM64
- Visual Studio 2022
- Visual Studio 2019 (16.11)
- clang/LLVM v12 - v18
- MinGW 12.2, 13.2
- CMake 3.20
