R&D, Software and Electronics by Steve Richardson ([email protected])

This is the 2023 version of the custom pendant built for the MakeIt Labs Tormach CNC mill. Unlike the legacy version (circa 2017, contained in branch pathpilot1-custom-integration), which required extensive customization to PathPilot 1.x to function, this version emulates the official Tormach controls that have recently become available. This means it works with unmodified versions of PathPilot 2.9.2 onward - a vast improvement, allowing us to keep the control software up-to-date without a tedious manual patching process each time.
- physical CYCLE START, FEED HOLD, STOP buttons (potentially others)
- physical rotary encoder for max velocity control 0-100%, good when proving new G-Code or for new users
- physical rotary encoder for feed rate override 0-200%
- physical rotary encoder for spindle RPM override 0-200%
- RGB LED status indicator for error conditions, ready, etc.
- handheld pendant wheel support for step/continuous jogging of X,Y,Z,A axes with various step distances
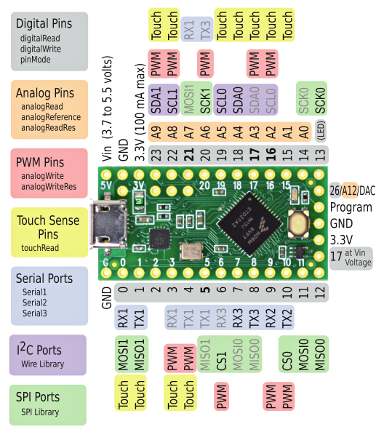
Note that other Teensy 3 devices will work if you do some work to remap the pins appropriately. The changes to the Teensy cores should work on any Teensy 3 or Teensy LC, but will not work on Teensy 4 unless the changes are ported. To date only Teensy LC and Teensy 3.5 have been tested.
The firmware builds using Teensyduino, the Arduino environment wrapper for the Teensy series of microcontroller boards. A customized version of the Teensy 'cores' are required, as it contains the customized USB HID implementation necessary for the controls to work.
This firmware was developed using the Linux version of the Arduino environment, but it should be possible to use any of the supported platforms with some changes to the process.
Extract "Legacy" Arduino 1.8.x and rename the extracted directory to denote that it is modified for this purpose, since the Teensy "cores" files will be modified.
steve@ubuntu-22:~$ cd
steve@ubuntu-22:~$ tar xvJf Downloads/arduino-1.8.19-linux64.tar.xz

[tar output...]

steve@ubuntu-22:~$ mv arduino-1.8.19 arduino-tormach
Download and install the Teensyduino add-ons from https://www.pjrc.com/teensy/td_download.html
steve@ubuntu-22:~$ wget https://www.pjrc.com/teensy/td_157/TeensyduinoInstall.linux64 -P ~/Downloads

steve@ubuntu-22:~$ chmod 755 ~/Downloads/TeensyduinoInstall.linux64

steve@ubuntu-22:~$ ~/Downloads/TeensyduinoInstall.linux64
The Teensyduino installer will ask for your Arduino folder. Make sure you point it to the one you just extracted and renamed above.

Move aside the installed cores files and clone https://github.com/makeitlabs/teensyduino-cores branch tormach-controls in its place. Be sure to clone that repo into the cores directory.
steve@ubuntu-22:~$ cd ~/arduino-tormach/hardware/teensy/avr

steve@ubuntu-22:~/arduino-tormach/hardware/teensy/avr$ mv cores cores.orig

steve@ubuntu-22:~/arduino-tormach/hardware/teensy/avr$ git clone -b tormach-controls https://github.com/makeitlabs/teensyduino-cores cores
Note: alternately, use SSH to clone if you're going to be editing the repo, e.g. git clone -b tormach-controls [email protected]:makeitlabs/teensyduino-cores.git cores
steve@ubuntu-22:~$ cd ~/Arduino/
steve@ubuntu-22:~/Arduino$ git clone https://github.com/makeitlabs/tormach-pendant
Note: alternately, use SSH to clone if you're going to be editing the repo, e.g. git clone [email protected]:makeitlabs/tormach-pendant.git
Back up the installed Teensyduino boards.txt file and replace it with the one cloned from this repository
steve@ubuntu-22:~/Arduino$ cd ~/arduino-tormach/hardware/teensy/avr
steve@ubuntu-22:~/arduino-tormach/hardware/teensy/avr$ mv boards.txt board.txt.orig
steve@ubuntu-22:~/arduino-tormach/hardware/teensy/avr$ cp ~/Arduino/tormach-pendant/boards.txt .
steve@ubuntu-22:~$ ~/arduino-tormach/arduino &

Board: Teensy LC

USB Type: Tormach Controller

If these options don't show up, something likely went wrong with your install process above.


The Arduino evironment will helpfully try to suggest upgrading your libraries. Don't do this, as it will overwrite the customized version you installed. This will happen every time you start the Arduino environment, so watch out in the future.

(This mapping is based on the legacy hardware with some additions, subject to change)
| Pin name | Pin number |
|---|---|
| PIN_BEACON_BLUE | 0 |
| PIN_BEACON_GREEN | 1 |
| PIN_BEACON_AMBER | 2 |
| PIN_BEACON_RED | 3 |
| PIN_BTN_START | 4 |
| PIN_BTN_STOP | 6 |
| PIN_BTN_FEED | 7 |
| PIN_BTN_M1 | 8 |
| PIN_BTN_FOV | 10 |
| PIN_BTN_SOV | 18 |
| PIN_ENCODER_A | 11 |
| PIN_ENCODER_B | 12 |
| PIN_JOG_A | 14 |
| PIN_JOG_B | 15 |
| PIN_LED_START | 5 |
| PIN_LED_FEED | 16 |
| PIN_LED_M1 | 17 |
| PIN_LED_RFID | 21 |