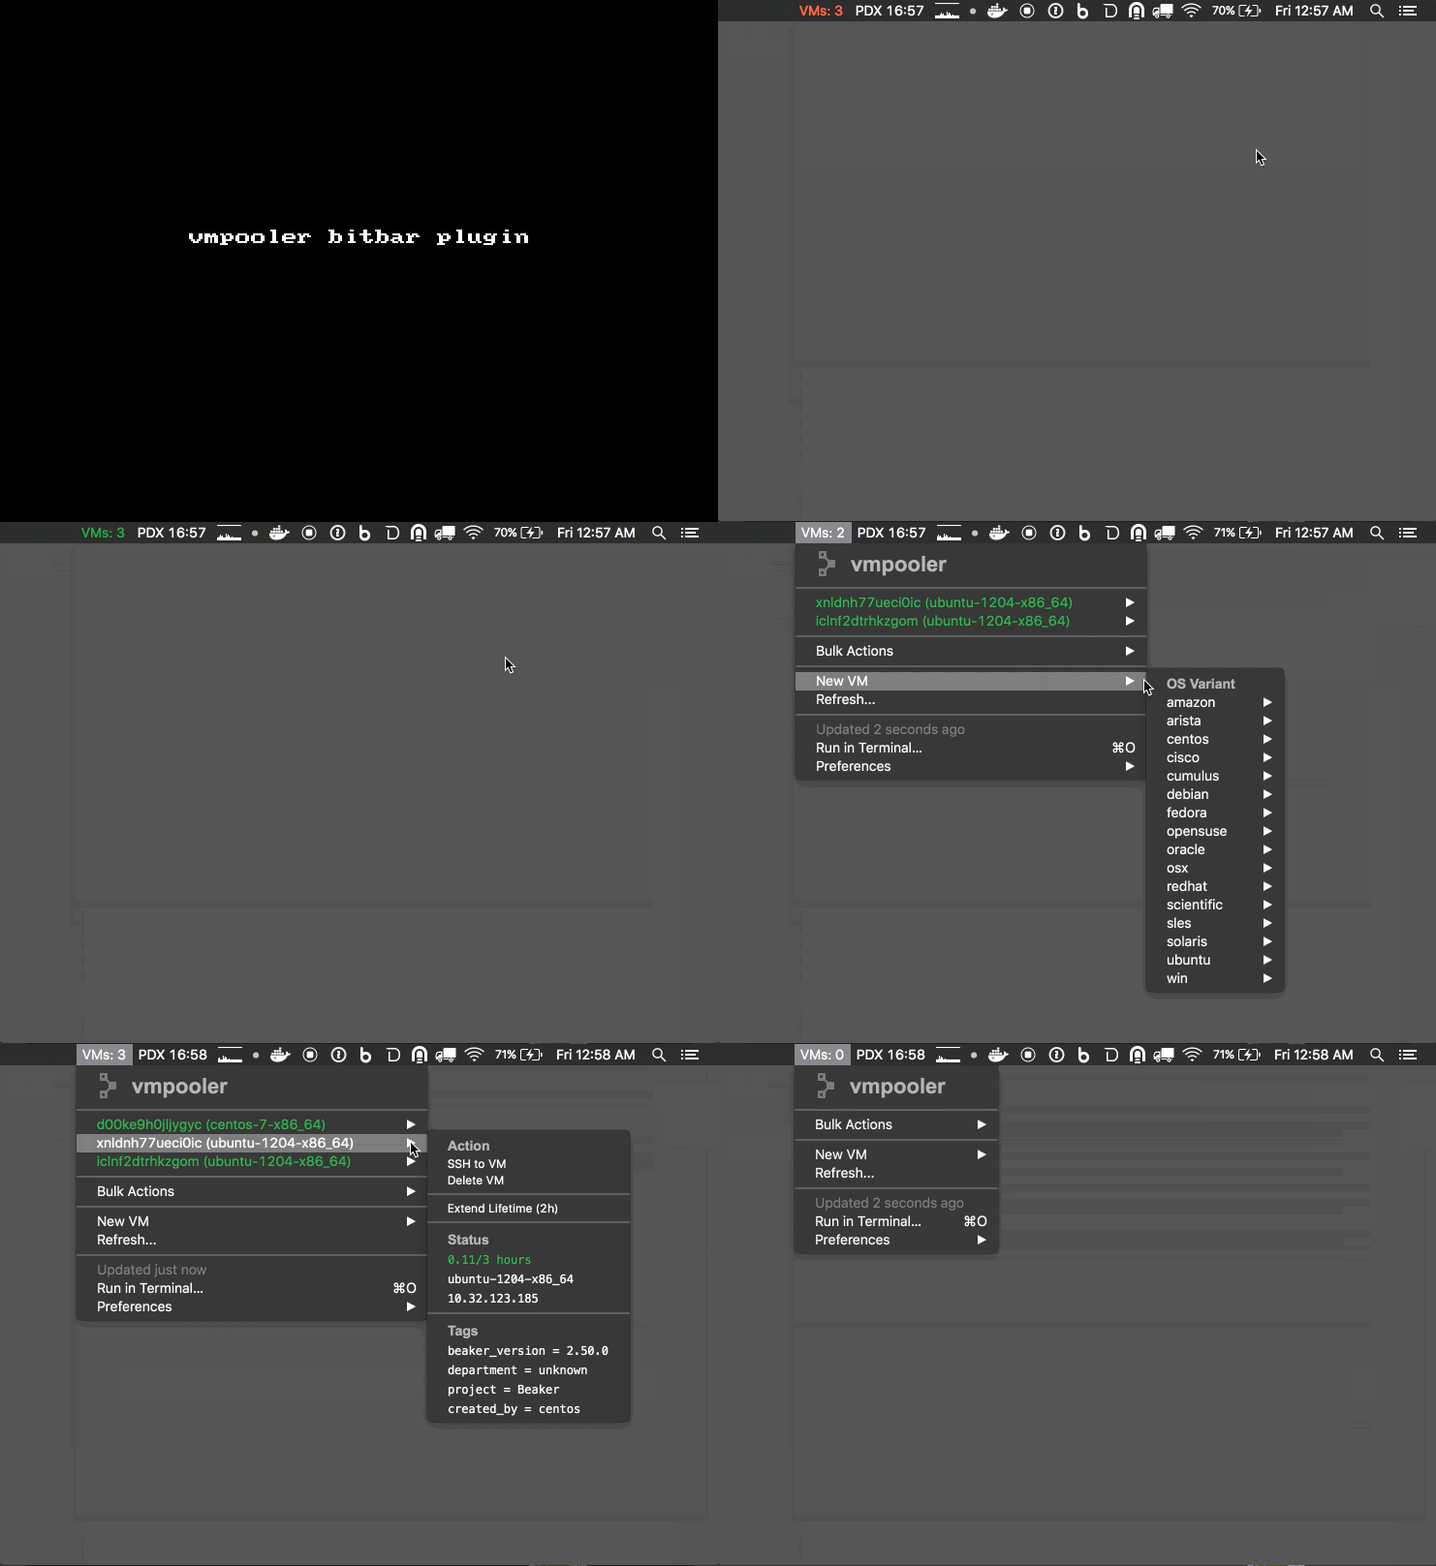
Project hasn't been actively maintained for some time so flagging it as archived. Feel free to reach out if you have any questions.
Vmpooler-bitbar is plugin for @matryer's BitBar application built on top of the go-bitbar, and go-vmpooler libraries which shows the status of all of your vmpooler instances and allows quick access to actions such as ssh'ing to a node or deleting an instance... and more.
Too much talk, have a look at it in action.
- updates with a configurable period
- shows all active vms created using your token
- vms with < 1hr before their deletion are highlighted in red
- quick access to some details of each vm
- Display Tags
- Detect Frankenbuilt PE instances
- ssh directly to a vm from the menu
- OSX Terminal supported by default
- iTerm2 can be used instead
- delete a vm from the menu
- extend the lifetime of a vm from the menu
- delete all vms from the menu
- extend the lifetime of all vms from the menu
- click on an item to copy it to the clipboard
- create a new vm from the menu (available templates pulled from vmpooler, with new vms tagged with
created_by=vmpooler-bitbar) - integrates with the OSX Notification Centre
- You must have a vmpooler token, see generating a token if you don't already have one.
- for the SSH to vmpooler instance action to work you should have the vmpooler ssh key added to the ssh agent,
ssh-add /path/to/priv/key.
If you don't already have BitBar installed you can install using brew or by grabbing a release directly from GitHub. If you already have BitBar installed you can jump to installing and running the plugin.
brew cask install bitbar
You can now start BitBar from the Applications folder or:
open /Applications/BitBar.app
If this is your first time installing BitBar you will be prompted to choose/create a plugins directory, for example ~/Documents/bitbar_plugins/.
Any executable scripts copied to this directory will be rendered in the menubar by BitBar and it is here we will copy the vmpooler-bitbar script.
Install using the provider Homebrew tap.
$ brew tap johnmccabe/vmpooler-bitbar
$ brew install vmpooler-bitbar
IF you already have a token you can jump to the next section, if not run the following command:
$ vmpooler-bitbar token
Follow the prompts, you will be asked for the following:
- vmpooler API endpoint (for example,
https://vmpooler.mycompany.net/api/v1) - username (your LDAP username, for example
joe.bloggs) - password (your LDAP password, for example,
password1)
Your token will be printed to stdout:
Token generated: pop448v0ztnwta3c964pifngrmk8ea4u
Before vmpooler-bitbar becomes available you must configure the plugin:
$ vmpooler-bitbar config
Follow the prompts, pressing ? for more details of each field, you will be asked for the following:
- vmpooler API endpoint (for example,
https://vmpooler.mycompany.net/api/v1) - vmpooler token (for example,
kpy2fn8sgjkcbyn896yilzqxwjlnfake)
Once configured you can then make the plugin available to BitBar:
$ vmpooler-bitbar install
You will be prompted for a refresh interval, I recommend using the default 30s recommendation.
If you wish to alter the refresh interval you can just run the vmpooler-bitbar install command a second time.
Note: When installing for the fist time you will need to manually restart the BitBar App, or select Preferences/Refresh all from its dropdowns.
To copy displayed text to the clipboard just click on the item in the menu, this is currently supported for:
- VM hostname (note that the full fqdn will be copied)
- Any Status or Tag entries in the VM submenu
To use iTerm2 you must first configure it as described in the 'How do I set iTerm2 as the handler for ssh:// links' section of the iTerm2 FAQ page.
If after making the changes above the OSX Terminal continues to open then you should run the following command to rebuild the launch services DB (via iTerm2 issue #5022)
/System/Library/Frameworks/CoreServices.framework/Frameworks/LaunchServices.framework/Support/lsregister -kill -r -domain local -domain system -domain user
If you encounter the following error:
Error: Cask 'bitbar' definition is invalid: Bad header line: parse failed
You will need to fix your brew cask before reattempting to install BitBar.
brew uninstall --force brew-cask; brew update
