-
Notifications
You must be signed in to change notification settings - Fork 27
/
docs.json
1 lines (1 loc) · 84.1 KB
/
docs.json
1
[{"name":"Scene3d","comment":" Top-level functionality for rendering a 3D scene.\n\nNote that the way `elm-3d-scene` is designed, functions in this module are\ngenerally 'cheap' and can safely be used in your `view` function directly. For\nexample, you can safely have logic in your `view` function that enables and\ndisables lights, moves objects around by translating/rotating/mirroring them,\nor even changes the material used to render a particular object with. In\ncontrast, creating meshes using the functions in the [`Mesh`](Scene3d-Mesh)\nmodule is 'expensive'; meshes should generally be created once and then stored\nin your model.\n\n@docs unlit, cloudy, sunny, custom\n\n\n# Entities\n\n@docs Entity\n\n\n## Basic shapes\n\n`elm-3d-scene` includes a handful of basic shapes which you can draw directly\nwithout having to create and store a separate [`Mesh`](Scene3d-Mesh). In\ngeneral, for most of the basic shapes you can specify whether or not it should\ncast a shadow (assuming there is shadow-casting light in the scene!) and can\nspecify a material to use. However, different shapes support different kinds of\nmaterials:\n\n - `quad`s and `sphere`s support all materials, including textured ones.\n - `block`s, `cylinder`s, `cone`s and `facet`s only support uniform\n (non-textured) materials.\n - `point`s, `lineSegment`s and `triangle`s only support plain materials\n (solid colors or emissive materials).\n\nNote that you _could_ render complex shapes by (for example) mapping\n`Scene3d.triangle` over a list of triangles, but this would be inefficient; if\nyou have a large number of triangles it is much better to create a mesh using\n[`Mesh.triangles`](Scene3d-Mesh#triangles) or similar, store that mesh either in\nyour model or as a top-level constant, and then render it using [`Scene3d.mesh`](#mesh).\nFor up to a few dozen individual entities (points, line segments, triangles etc)\nit should be fine to use these convenience functions, but for much more than\nthat you will likely want to switch to using a proper mesh for efficiency.\n\n@docs point, lineSegment, triangle, facet, quad, block, sphere, cylinder, cone\n\n\n## Shapes with shadows\n\nThese functions behave just like their corresponding non-`WithShadow` versions\nbut make the given object cast a shadow (or perhaps multiple shadows, if there\nare multiple shadow-casting lights in the scene). Note that no shadows will\nappear if there are no shadow-casting lights!\n\n@docs triangleWithShadow, facetWithShadow, quadWithShadow, blockWithShadow, sphereWithShadow, cylinderWithShadow, coneWithShadow\n\n\n## Meshes\n\n@docs mesh, meshWithShadow\n\n\n## Grouping and toggling\n\n@docs group, nothing\n\n\n## Transformations\n\nThese transformations are 'cheap' in that they don't actually transform the\nunderlying mesh; under the hood they use a WebGL [transformation matrix](https://learnopengl.com/Getting-started/Transformations)\nto change where that mesh gets rendered.\n\nYou can use transformations to animate objects over time, or render the same\nobject multiple times in different positions/orientations without needing to\ncreate a separate mesh. For example, you could draw a single entity and then\ndraw several more translated versions of it:\n\n\n\nThe following examples all use this duckling as the original (untransformed)\nentity:\n\n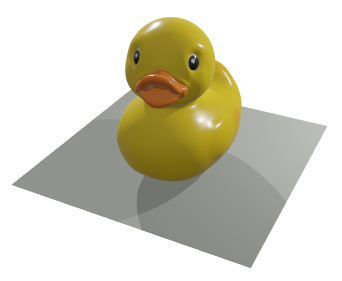\n\n@docs rotateAround, translateBy, translateIn, scaleAbout, mirrorAcross\n\n\n# Background\n\n@docs Background, transparentBackground, backgroundColor\n\n\n# Antialiasing\n\n@docs Antialiasing\n\n@docs noAntialiasing, multisampling, supersampling\n\n\n# Lights\n\n@docs Lights\n\nThe following functions let you set up lighting using up to eight total lights.\nOnly the first four of those lights may cast shadows; any light past the fourth\nmust be constructed using [`Scene3d.neverCastsShadows`](#neverCastsShadows).\n\n@docs noLights, oneLight, twoLights, threeLights, fourLights, fiveLights, sixLights, sevenLights, eightLights\n\n\n## Exposure\n\n@docs Exposure\n\n@docs exposureValue, maxLuminance, photographicExposure\n\n\n## Tone mapping\n\n@docs ToneMapping\n\n@docs noToneMapping, reinhardToneMapping, reinhardPerChannelToneMapping, hableFilmicToneMapping\n\n\n# Advanced\n\nYou're unlikely to need these functions right away but they can be very useful\nwhen setting up more complex scenes.\n\n\n## Coordinate conversions\n\n@docs placeIn, relativeTo\n\n\n## Standalone shadows\n\nIn some cases you might want to render the shadow of some object without\nrendering the object itself. This can let you do things like render a high-poly\ndoor while rendering its shadow using a simpler approximate shape like a quad or\nrectangular block to reduce rendering time (rendering shadows of complex\nmeshes can be expensive).\n\nNote that if you do something like this then you will need to be careful to make\nsure that the approximate object fits _inside_ the actual mesh being rendered -\notherwise you might end up with the object effectively shadowing itself.\n\n@docs triangleShadow, quadShadow, blockShadow, sphereShadow, cylinderShadow, coneShadow, meshShadow\n\n\n## Customized rendering\n\n@docs composite, toWebGLEntities\n\n","unions":[{"name":"Antialiasing","comment":" An `Antialiasing` value defines what (if any) kind of [antialiasing](https://en.wikipedia.org/wiki/Spatial_anti-aliasing)\nis used when rendering a scene. Different types of antialiasing have different\ntradeoffs between quality and rendering speed. If you're not sure what to use,\n[`Scene3d.multisampling`](#multisampling) is generally a good choice.\n","args":[],"cases":[]},{"name":"Background","comment":" Specifies the background used when rendering a scene. Currently only\nconstant background colors are supported, but eventually this will be expanded\nto support more fancy things like skybox textures or backgrounds based on the\ncurrent environmental lighting.\n","args":["coordinates"],"cases":[]},{"name":"Exposure","comment":" Exposure controls the overall brightness of a scene; just like a physical\ncamera, adjusting exposure can lead to a scene being under-exposed (very dark\neverywhere) or over-exposed (very bright, potentially with some pure-white areas\nwhere the scene has been 'blown out').\n","args":[],"cases":[]},{"name":"Lights","comment":" A `Lights` value represents the set of all lights in a scene. There are a\ncouple of current limitations to note in `elm-3d-scene`:\n\n - No more than eight lights can exist in the scene.\n - Only the first four of those lights can cast shadows.\n\nThe reason there is a separate `Lights` type, instead of just using a list of\n`Light` values, is so that the type system can be used to guarantee these\nconstraints are satisfied.\n\n","args":["coordinates"],"cases":[]},{"name":"ToneMapping","comment":" Tone mapping is, roughly speaking, a way to render scenes that contain both\nvery dark and very bright areas. It works by mapping a large range of brightness\n(luminance) values into a more limited set of values that can actually be\ndisplayed on a computer monitor.\n","args":[],"cases":[]}],"aliases":[{"name":"Entity","comment":" An `Entity` is a shape or group of shapes in a scene.\n","args":["coordinates"],"type":"Scene3d.Types.Entity coordinates"}],"values":[{"name":"backgroundColor","comment":" A custom background color.\n","type":"Color.Color -> Scene3d.Background coordinates"},{"name":"block","comment":" Draw a rectangular block using the [`Block3d`](https://package.elm-lang.org/packages/ianmackenzie/elm-geometry/latest/Block3d)\ntype from `elm-geometry`.\n\n\n\n","type":"Scene3d.Material.Uniform coordinates -> Block3d.Block3d Length.Meters coordinates -> Scene3d.Entity coordinates"},{"name":"blockShadow","comment":" ","type":"Block3d.Block3d Length.Meters coordinates -> Scene3d.Entity coordinates"},{"name":"blockWithShadow","comment":" 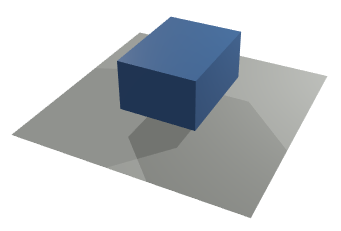\n","type":"Scene3d.Material.Uniform coordinates -> Block3d.Block3d Length.Meters coordinates -> Scene3d.Entity coordinates"},{"name":"cloudy","comment":" Render an outdoors 'cloudy day' scene. This adds some [soft](Scene3d-Light#soft)\nlighting to the scene (an approximation of the lighting on a cloudy day) so that\nall surfaces are illuminated but upwards-facing surfaces are more brightly\nilluminated than downwards-facing ones:\n\n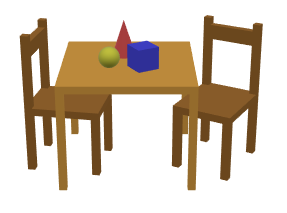\n\nNote how, for example, the top of the sphere is more brightly lit than the\nbottom, and the sides of objects are not as brightly lit as their top. For this\nto work, you must specify what the global 'up' direction is (usually\n[`Direction3d.positiveZ` or `Direction3d.positiveY`](https://package.elm-lang.org/packages/ianmackenzie/elm-geometry/latest/Direction3d#constants)).\nIf the wrong up direction is given, the lighting will look pretty weird - here's\nthe same scene with the up direction reversed:\n\n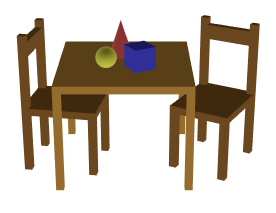\n\n","type":"{ dimensions : ( Quantity.Quantity Basics.Float Pixels.Pixels, Quantity.Quantity Basics.Float Pixels.Pixels ), upDirection : Direction3d.Direction3d coordinates, camera : Camera3d.Camera3d Length.Meters coordinates, clipDepth : Length.Length, background : Scene3d.Background coordinates, entities : List.List (Scene3d.Entity coordinates) } -> Html.Html msg"},{"name":"composite","comment":" Render a 'composite' scene where different subsets of entities in the scene\ncan use different lighting. This can let you do things like:\n\n - Work around the eight-light limitation by breaking a scene up into multiple\n sub-scenes that use different sets of lights.\n - Render very high dynamic range scenes such as an interior room with a window\n out to a bright sunny day, by rendering different parts of the scene with\n different exposure/tone mapping settings.\n\n","type":"{ camera : Camera3d.Camera3d Length.Meters coordinates, clipDepth : Length.Length, antialiasing : Scene3d.Antialiasing, dimensions : ( Quantity.Quantity Basics.Float Pixels.Pixels, Quantity.Quantity Basics.Float Pixels.Pixels ), background : Scene3d.Background coordinates } -> List.List { lights : Scene3d.Lights coordinates, exposure : Scene3d.Exposure, toneMapping : Scene3d.ToneMapping, whiteBalance : Scene3d.Light.Chromaticity, entities : List.List (Scene3d.Entity coordinates) } -> Html.Html msg"},{"name":"cone","comment":" Draw a cone using the [`Cone3d`](https://package.elm-lang.org/packages/ianmackenzie/elm-geometry/latest/Cone3d)\ntype from `elm-geometry`.\n\n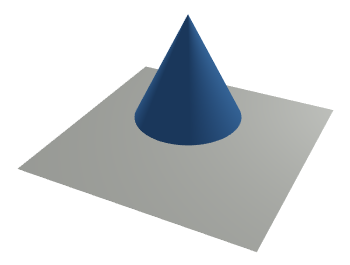\n\n","type":"Scene3d.Material.Uniform coordinates -> Cone3d.Cone3d Length.Meters coordinates -> Scene3d.Entity coordinates"},{"name":"coneShadow","comment":" ","type":"Cone3d.Cone3d Length.Meters coordinates -> Scene3d.Entity coordinates"},{"name":"coneWithShadow","comment":" 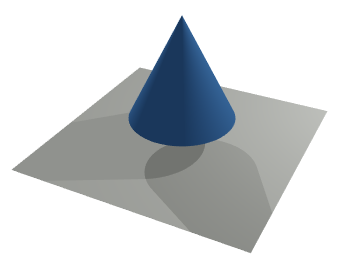\n","type":"Scene3d.Material.Uniform coordinates -> Cone3d.Cone3d Length.Meters coordinates -> Scene3d.Entity coordinates"},{"name":"custom","comment":" Render a scene with custom lighting. In addition to camera, clip depth,\ndimensions, background and entities as described above, you will need to\nprovide:\n\n - The [lights](#lights) used to render the scene.\n - The overall [exposure](#Exposure) level to use.\n - What kind of [tone mapping](#ToneMapping) to apply, if any.\n - The white balance to use: this the [chromaticity](Scene3d-Light#chromaticity)\n that will show up as white in the final rendered scene. It should generally\n be the same as the dominant light color in the scene.\n - What kind of [antialiasing](#Antialiasing) to use, if any.\n\nWhen starting out, it's usually easiest to pick a single default chromaticity\nsuch as [daylight](Scene3d-Light#daylight) and then use that for both lights and\nwhite balance. This will make all light appear white.\n\nOnce you're comfortable with that, you can start experimenting with things like\nwarm and cool lights. For example, [fluorescent](Scene3d-Light#fluorescent)\nlighting will appear blueish if the white balance is set to [incandescent](Scene3d-Light#incandescent).\n\n","type":"{ lights : Scene3d.Lights coordinates, camera : Camera3d.Camera3d Length.Meters coordinates, clipDepth : Length.Length, exposure : Scene3d.Exposure, toneMapping : Scene3d.ToneMapping, whiteBalance : Scene3d.Light.Chromaticity, antialiasing : Scene3d.Antialiasing, dimensions : ( Quantity.Quantity Basics.Float Pixels.Pixels, Quantity.Quantity Basics.Float Pixels.Pixels ), background : Scene3d.Background coordinates, entities : List.List (Scene3d.Entity coordinates) } -> Html.Html msg"},{"name":"cylinder","comment":" Draw a cylinder using the [`Cylinder3d`](https://package.elm-lang.org/packages/ianmackenzie/elm-geometry/latest/Cylinder3d)\ntype from `elm-geometry`.\n\n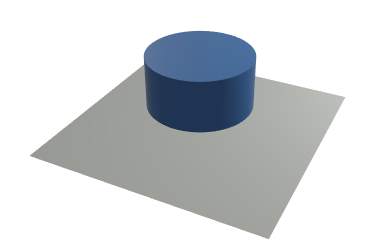\n\n","type":"Scene3d.Material.Uniform coordinates -> Cylinder3d.Cylinder3d Length.Meters coordinates -> Scene3d.Entity coordinates"},{"name":"cylinderShadow","comment":" ","type":"Cylinder3d.Cylinder3d Length.Meters coordinates -> Scene3d.Entity coordinates"},{"name":"cylinderWithShadow","comment":" 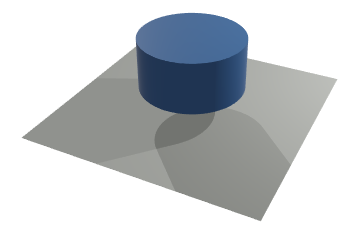\n","type":"Scene3d.Material.Uniform coordinates -> Cylinder3d.Cylinder3d Length.Meters coordinates -> Scene3d.Entity coordinates"},{"name":"eightLights","comment":" ","type":"Scene3d.Light.Light coordinates a -> Scene3d.Light.Light coordinates b -> Scene3d.Light.Light coordinates c -> Scene3d.Light.Light coordinates d -> Scene3d.Light.Light coordinates Basics.Never -> Scene3d.Light.Light coordinates Basics.Never -> Scene3d.Light.Light coordinates Basics.Never -> Scene3d.Light.Light coordinates Basics.Never -> Scene3d.Lights coordinates"},{"name":"exposureValue","comment":" Set exposure based on an [exposure value](https://en.wikipedia.org/wiki/Exposure_value)\nfor an ISO speed of 100. Typical exposure values range from 5 for home interiors\nto 15 for sunny outdoor scenes; you can find some reference values [here](https://en.wikipedia.org/wiki/Exposure_value#Tabulated_exposure_values).\n","type":"Basics.Float -> Scene3d.Exposure"},{"name":"facet","comment":" Like `Scene3d.triangle`, but also generates a normal vector so that matte\nand physically-based materials (materials that require lighting) can be used.\n","type":"Scene3d.Material.Uniform coordinates -> Triangle3d.Triangle3d Length.Meters coordinates -> Scene3d.Entity coordinates"},{"name":"facetWithShadow","comment":" ","type":"Scene3d.Material.Uniform coordinates -> Triangle3d.Triangle3d Length.Meters coordinates -> Scene3d.Entity coordinates"},{"name":"fiveLights","comment":" ","type":"Scene3d.Light.Light coordinates a -> Scene3d.Light.Light coordinates b -> Scene3d.Light.Light coordinates c -> Scene3d.Light.Light coordinates d -> Scene3d.Light.Light coordinates Basics.Never -> Scene3d.Lights coordinates"},{"name":"fourLights","comment":" ","type":"Scene3d.Light.Light coordinates a -> Scene3d.Light.Light coordinates b -> Scene3d.Light.Light coordinates c -> Scene3d.Light.Light coordinates d -> Scene3d.Lights coordinates"},{"name":"group","comment":" Group a list of entities into a single entity. This combined entity can then\nbe transformed, grouped with other entities, etc. For example, you might\ncombine two different-colored triangles into a single group, then draw several\ndifferent [rotated](#rotateAround) copies of that group:\n\n\n\n","type":"List.List (Scene3d.Entity coordinates) -> Scene3d.Entity coordinates"},{"name":"hableFilmicToneMapping","comment":" A popular 'filmic' tone mapping method developed by John Hable for Uncharted\n2 and documented [here](http://filmicworlds.com/blog/filmic-tonemapping-operators/).\nThis is a good default choice for realistic-looking scenes since it attempts to\napproximately reproduce how real film reacts to light. The results are fairly\nsimilar to `reinhardPerChannelToneMapping 5`, but will tend to have slightly\ndeeper blacks:\n\n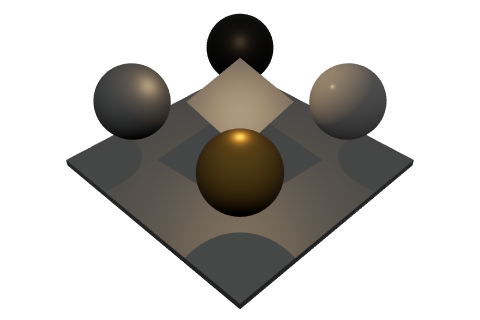\n\nNote that applying tone mapping can cause the scene to look slightly dark\n(compare the above to the example using [no tone mapping](#noToneMapping)).\nHowever, this can be compensated for by adjusting exposure (for example, by\nreducing the [exposure value](#exposureValue) by 1 or 2):\n\n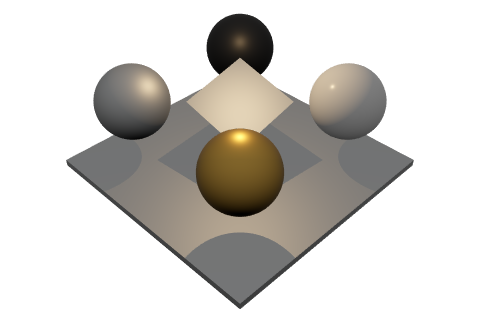\n\nNote how this version is brighter overall than the [original](#noToneMapping),\nnon-tone-mapped image but doesn't suffer from the blown-out highlights.\n\n","type":"Scene3d.ToneMapping"},{"name":"lineSegment","comment":" Draw a single line segment.\n\n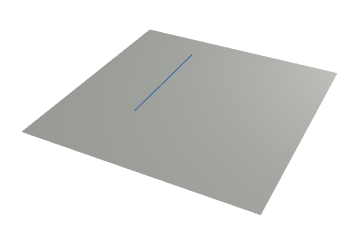\n\n","type":"Scene3d.Material.Plain coordinates -> LineSegment3d.LineSegment3d Length.Meters coordinates -> Scene3d.Entity coordinates"},{"name":"maxLuminance","comment":" Set exposure based on the luminance of the brightest white that can be\ndisplayed without overexposure. Scene luminance covers a large range of values;\nsome sample values can be found [here](https://en.wikipedia.org/wiki/Orders_of_magnitude_%28luminance%29).\n","type":"Luminance.Luminance -> Scene3d.Exposure"},{"name":"mesh","comment":" Draw the given mesh (shape) with the given material. Check out the [`Mesh`](Scene3d-Mesh)\nand [`Material`](Scene3d-Material) modules for how to define meshes and\nmaterials. Note that the mesh and material types must line up, and this is\nchecked by the compiler; for example, a textured material that requires UV\ncoordinates can only be used on a mesh that includes UV coordinates!\n\n\n\nIf you want to also draw the shadow of a given object, you'll need to use\n[`meshWithShadow`](#meshWithShadow).\n\n","type":"Scene3d.Types.Material coordinates attributes -> Scene3d.Mesh.Mesh coordinates attributes -> Scene3d.Entity coordinates"},{"name":"meshShadow","comment":" ","type":"Scene3d.Mesh.Shadow coordinates -> Scene3d.Entity coordinates"},{"name":"meshWithShadow","comment":" Draw a mesh and its shadow (or possibly multiple shadows, if there are\nmultiple shadow-casting lights in the scene).\n\n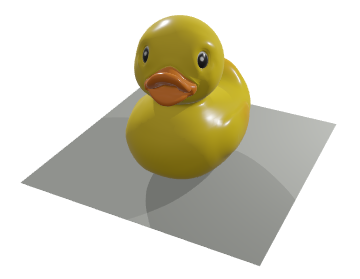\n\nTo render an object with a shadow, you would generally do something like:\n\n -- Construct the mesh/shadow in init/update and then\n -- save them in your model:\n\n objectMesh =\n -- Construct a mesh using Mesh.triangles,\n -- Mesh.indexedFaces etc.\n\n objectShadow =\n Mesh.shadow objectMesh\n\n -- Later, render the mesh/shadow in your view function:\n\n objectMaterial =\n -- Construct a material using Material.color,\n -- Material.metal etc.\n\n entity =\n Scene3d.meshWithShadow\n objectMesh\n objectMaterial\n objectShadow\n\n","type":"Scene3d.Types.Material coordinates attributes -> Scene3d.Mesh.Mesh coordinates attributes -> Scene3d.Mesh.Shadow coordinates -> Scene3d.Entity coordinates"},{"name":"mirrorAcross","comment":" Mirror an entity across a plane.\n\n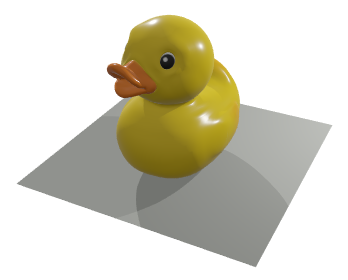\n\n","type":"Plane3d.Plane3d Length.Meters coordinates -> Scene3d.Entity coordinates -> Scene3d.Entity coordinates"},{"name":"multisampling","comment":" [Multisample](https://en.wikipedia.org/wiki/Multisample_anti-aliasing)\nantialiasing. This is generally a decent tradeoff between performance and\nimage quality. Using multisampling means that _edges_ of objects will generally\nbe smooth, but jaggedness _inside_ objects resulting from lighting or texturing\nmay still occur.\n","type":"Scene3d.Antialiasing"},{"name":"noAntialiasing","comment":" No antialiasing at all. This is the fastest to render, but often results in\nvery visible jagged/pixelated edges.\n","type":"Scene3d.Antialiasing"},{"name":"noLights","comment":" No lights at all! You don't need lights if you're only using materials\nlike [`color`](Material#color) or [`emissive`](Material#emissive) (since those\nmaterials don't react to external light anyways). But in that case it might be\nsimplest to use [`Scene3d.unlit`](Scene3d#unlit) instead of [`Scene3d.custom`](Scene3d#custom)\nso that you don't have to explicitly provide a `Lights` value at all.\n","type":"Scene3d.Lights coordinates"},{"name":"noToneMapping","comment":" No tone mapping at all! In this case, the brightness of every point in the\nscene will simply be scaled by the overall scene [exposure](#Exposure) setting\nand the resulting color will be displayed on the screen. For scenes with bright\nreflective highlights or a mix of dark and bright portions, this means that\nsome parts of the scene may be underexposed (nearly black) or overexposed\n(pure white). For example, look at how this scene is in general fairly dim but\nstill has some overexposed lighting highlights such as at the top of the gold\nsphere:\n\n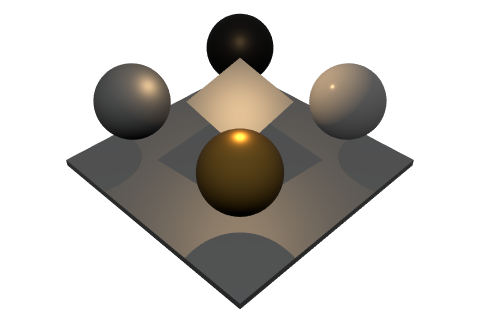\n\nThat said, it's often best to start with `noToneMapping` for simplicity, and\nonly experiment with other tone mapping methods if you end up with very bright,\nharsh highlights that need to be toned down.\n\n","type":"Scene3d.ToneMapping"},{"name":"nothing","comment":" A dummy entity for which nothing will be drawn.\n","type":"Scene3d.Entity coordinates"},{"name":"oneLight","comment":" ","type":"Scene3d.Light.Light coordinates a -> Scene3d.Lights coordinates"},{"name":"photographicExposure","comment":" Set exposure based on photographic parameters: F-stop, shutter speed and\nISO film speed.\n","type":"{ fStop : Basics.Float, shutterSpeed : Duration.Duration, isoSpeed : Basics.Float } -> Scene3d.Exposure"},{"name":"placeIn","comment":" Take an entity that is defined in a local coordinate system and convert it\nto global coordinates. This can be useful if you have some entities which are\ndefined in some local coordinate system like inside a car, and you want to\nrender them within a larger world.\n","type":"Frame3d.Frame3d Length.Meters coordinates { defines : localCoordinates } -> Scene3d.Entity localCoordinates -> Scene3d.Entity coordinates"},{"name":"point","comment":" Draw a single point as a circular dot with the given radius in [pixels](https://package.elm-lang.org/packages/ianmackenzie/elm-units/latest/Pixels).\n\n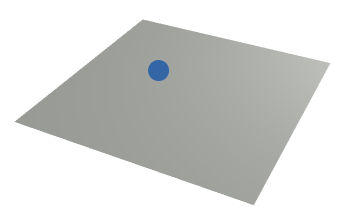\n\n","type":"{ radius : Quantity.Quantity Basics.Float Pixels.Pixels } -> Scene3d.Material.Plain coordinates -> Point3d.Point3d Length.Meters coordinates -> Scene3d.Entity coordinates"},{"name":"quad","comment":" Draw a 'quad' such as a rectangle, rhombus or parallelogram by providing its\nfour vertices in counterclockwise order.\n\n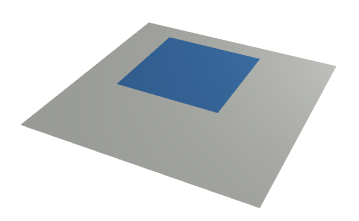\n\nNormal vectors will be automatically computed at each vertex which are\nperpendicular to the two adjoining edges. (The four vertices should usually\nbe coplanar, in which case all normal vectors will be the same.) The four\nvertices will also be given the UV (texture) coordinates (0,0), (1,0), (1,1)\nand (0,1) respectively; this means that if you specify vertices counterclockwise\nfrom the bottom left corner of a rectangle, a texture will map onto the\nrectangle basically the way you would expect:\n\n\n\n","type":"Scene3d.Material.Textured coordinates -> Point3d.Point3d Length.Meters coordinates -> Point3d.Point3d Length.Meters coordinates -> Point3d.Point3d Length.Meters coordinates -> Point3d.Point3d Length.Meters coordinates -> Scene3d.Entity coordinates"},{"name":"quadShadow","comment":" ","type":"Point3d.Point3d Length.Meters coordinates -> Point3d.Point3d Length.Meters coordinates -> Point3d.Point3d Length.Meters coordinates -> Point3d.Point3d Length.Meters coordinates -> Scene3d.Entity coordinates"},{"name":"quadWithShadow","comment":" 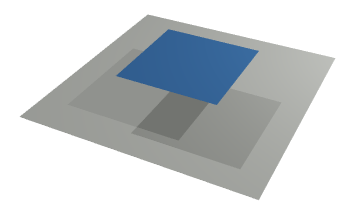\n","type":"Scene3d.Material.Textured coordinates -> Point3d.Point3d Length.Meters coordinates -> Point3d.Point3d Length.Meters coordinates -> Point3d.Point3d Length.Meters coordinates -> Point3d.Point3d Length.Meters coordinates -> Scene3d.Entity coordinates"},{"name":"reinhardPerChannelToneMapping","comment":" A variant of `reinhardToneMapping` which applies the scaling operation to\nred, green and blue channels separately instead of scaling overall luminance.\nThis will tend to desaturate bright colors, but this can end up being looking\nrealistic since very bright colored lights do in fact appear fairly white to our\neyes:\n\n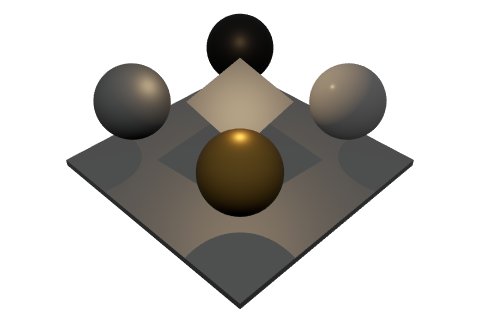\n\n","type":"Basics.Float -> Scene3d.ToneMapping"},{"name":"reinhardToneMapping","comment":" Apply [Reinhard](https://64.github.io/tonemapping/#reinhard) tone mapping\ngiven the maximum allowed overexposure. This will apply a non-linear scaling to\nscene luminance (brightness) values such that darker colors will not be affected\nvery much (meaning the brightness of the scene as a whole will not be changed\ndramatically), but very bright colors will be toned down to avoid\n'blowout'/overexposure.\n\nIn this example, note how the overall scene brightness is pretty similar to the\nexample above using no tone mapping, but the bright highlights on the gold and\nwhite spheres have been softened considerably:\n\n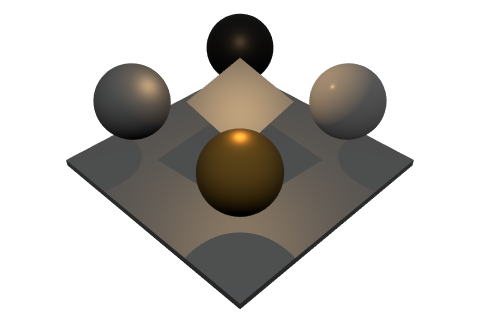\n\nThe given parameter specifies how much 'extra range' the tone mapping gives you;\nfor example,\n\n Scene3d.reinhardToneMapping 5\n\nwill mean that parts of the scene can be 5x brighter than normal before becoming\n'overexposed' and pure white. (You could also accomplish that by changing the\noverall `exposure` parameter to `Scene3d.custom`, but then the entire scene\nwould appear much darker.)\n\n","type":"Basics.Float -> Scene3d.ToneMapping"},{"name":"relativeTo","comment":" Take an entity that is defined in global coordinates and convert into a\nlocal coordinate system. This is even less likely to be useful than `placeIn`,\nbut may be useful if you are (for example) rendering an office scene (and\nworking primarily in local room coordinates) but want to incorporate some entity\ndefined in global coordinates like a bird flying past the window.\n","type":"Frame3d.Frame3d Length.Meters coordinates { defines : localCoordinates } -> Scene3d.Entity coordinates -> Scene3d.Entity localCoordinates"},{"name":"rotateAround","comment":" Rotate an entity around a given axis by a given angle.\n\n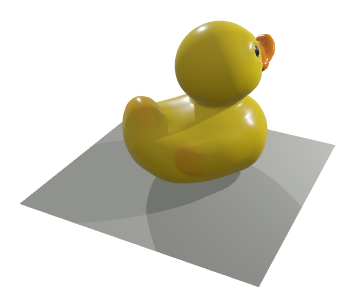\n\n","type":"Axis3d.Axis3d Length.Meters coordinates -> Angle.Angle -> Scene3d.Entity coordinates -> Scene3d.Entity coordinates"},{"name":"scaleAbout","comment":" Scale an entity about a given point by a given scale. The given point will\nremain fixed in place and all other points on the entity will be stretched away\nfrom that point (or contract towards that point, if the scale is less than one).\n\n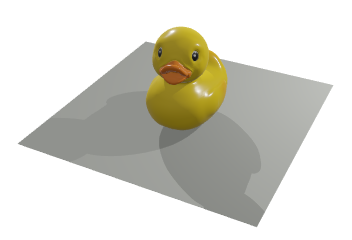\n\n`elm-3d-scene` tries very hard to do the right thing here even if you use a\n_negative_ scale factor, but that flips the mesh inside out so I don't really\nrecommend it.\n\n","type":"Point3d.Point3d Length.Meters coordinates -> Basics.Float -> Scene3d.Entity coordinates -> Scene3d.Entity coordinates"},{"name":"sevenLights","comment":" ","type":"Scene3d.Light.Light coordinates a -> Scene3d.Light.Light coordinates b -> Scene3d.Light.Light coordinates c -> Scene3d.Light.Light coordinates d -> Scene3d.Light.Light coordinates Basics.Never -> Scene3d.Light.Light coordinates Basics.Never -> Scene3d.Light.Light coordinates Basics.Never -> Scene3d.Lights coordinates"},{"name":"sixLights","comment":" ","type":"Scene3d.Light.Light coordinates a -> Scene3d.Light.Light coordinates b -> Scene3d.Light.Light coordinates c -> Scene3d.Light.Light coordinates d -> Scene3d.Light.Light coordinates Basics.Never -> Scene3d.Light.Light coordinates Basics.Never -> Scene3d.Lights coordinates"},{"name":"sphere","comment":" Draw a sphere using the [`Sphere3d`](https://package.elm-lang.org/packages/ianmackenzie/elm-geometry/latest/Sphere3d)\ntype from `elm-geometry`.\n\n\n\nThe sphere will have texture (UV) coordinates based on an [equirectangular\nprojection](https://wiki.panotools.org/Equirectangular_Projection) where\npositive Z is up. This sounds complex but really just means that U corresponds\nto angle around the sphere and V corresponds to angle up the sphere, similar to\nthe diagrams shown [here](https://en.wikipedia.org/wiki/Spherical_coordinate_system)\nexcept that V is measured up from the bottom (negative Z) instead of down from\nthe top (positive Z).\n\nNote that this projection, while simple, means that the texture used will get\n'squished' near the poles of the sphere.\n\n","type":"Scene3d.Material.Textured coordinates -> Sphere3d.Sphere3d Length.Meters coordinates -> Scene3d.Entity coordinates"},{"name":"sphereShadow","comment":" ","type":"Sphere3d.Sphere3d Length.Meters coordinates -> Scene3d.Entity coordinates"},{"name":"sphereWithShadow","comment":" 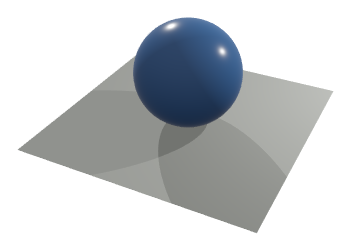\n","type":"Scene3d.Material.Textured coordinates -> Sphere3d.Sphere3d Length.Meters coordinates -> Scene3d.Entity coordinates"},{"name":"sunny","comment":" Render an outdoors 'sunny day' scene. This adds some [directional](Scene3d-Light#directional)\nsunlight to the scene, so you need to specify:\n\n - The direction of the incoming sunlight (e.g. `Direction3d.negativeZ` if\n positive Z is up and the sun is directly overhead).\n - Whether or not sunlight should cast shadows.\n\n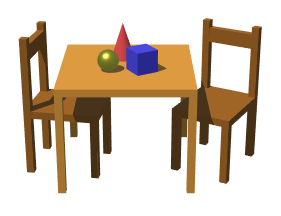\n\n","type":"{ upDirection : Direction3d.Direction3d coordinates, sunlightDirection : Direction3d.Direction3d coordinates, shadows : Basics.Bool, dimensions : ( Quantity.Quantity Basics.Float Pixels.Pixels, Quantity.Quantity Basics.Float Pixels.Pixels ), camera : Camera3d.Camera3d Length.Meters coordinates, clipDepth : Length.Length, background : Scene3d.Background coordinates, entities : List.List (Scene3d.Entity coordinates) } -> Html.Html msg"},{"name":"supersampling","comment":" Supersampling refers to a brute-force version of antialiasing: render the\nentire scene at a higher resolution, then scale down. For example, using\n`Scene3d.supersampling 2` will render at 2x dimensions in both X and Y (so\nfour times the total number of pixels) and then scale back down to the given\ndimensions; this means that every pixel in the final result will be the average\nof a 2x2 block of rendered pixels.\n\nThis is generally the highest-quality antialiasing but also the highest cost.\nFor simple cases supersampling is often indistinguishable from multisampling,\nbut supersampling is also capable of handling cases like small bright lighting\nhighlights that multisampling does not address.\n\n","type":"Basics.Float -> Scene3d.Antialiasing"},{"name":"threeLights","comment":" ","type":"Scene3d.Light.Light coordinates a -> Scene3d.Light.Light coordinates b -> Scene3d.Light.Light coordinates c -> Scene3d.Lights coordinates"},{"name":"toWebGLEntities","comment":" This function lets you convert a list of `elm-3d-scene` entities into a list\nof plain `elm-explorations/webgl` entities, so that you can combine objects\nrendered with `elm-3d-scene` with custom objects you render yourself.\n\nNote that the arguments are not exactly the same as `custom`; there are no\n`background`, `dimensions` or `antialiasing` arguments since those are\nproperties that must be set at the top level, so you will have to handle those\nyourself when calling [`WebGL.toHtml`](https://package.elm-lang.org/packages/elm-explorations/webgl/latest/WebGL#toHtml).\nHowever, there are a couple of additional arguments:\n\n - You must specify the `aspectRatio` (width over height) that the scene is\n being rendered at, so that projection matrices can be computed correctly.\n (In `Scene3d.custom`, aspect ratio is computed from the given dimensions.)\n - You must specify the current supersampling factor being used, if any. This\n allows the circular dots used to render points to have the same radius\n whether or not supersampling is used (e.g. if using 2x supersampling, then\n points must be rendered at twice the pixel radius internally so that the\n final result has the same visual size). If you're not using supersampling,\n set this value to 1.\n\nThis function is called internally by `custom` but has not actually been tested\nin combination with other custom WebGL code, so there is a high chance of weird\ninteraction bugs. (In particular, if you use the stencil buffer you will likely\nwant to clear it explicitly after rendering `elm-3d-scene` entities.) If you\nencounter bugs when using `toWebGLEntities` in combination with your own custom\nrendering code, please [open an issue](https://github.com/ianmackenzie/elm-3d-scene/issues/new)\nor reach out to **@ianmackenzie** on the [Elm Slack](http://elmlang.herokuapp.com/).\n\n","type":"{ lights : Scene3d.Lights coordinates, camera : Camera3d.Camera3d Length.Meters coordinates, clipDepth : Length.Length, exposure : Scene3d.Exposure, toneMapping : Scene3d.ToneMapping, whiteBalance : Scene3d.Light.Chromaticity, aspectRatio : Basics.Float, supersampling : Basics.Float, entities : List.List (Scene3d.Entity coordinates) } -> List.List WebGL.Entity"},{"name":"translateBy","comment":" Translate (move) an entity by a given displacement vector.\n\n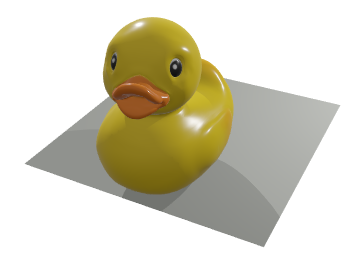\n\n","type":"Vector3d.Vector3d Length.Meters coordinates -> Scene3d.Entity coordinates -> Scene3d.Entity coordinates"},{"name":"translateIn","comment":" Translate an entity in a given direction by a given distance.\n","type":"Direction3d.Direction3d coordinates -> Length.Length -> Scene3d.Entity coordinates -> Scene3d.Entity coordinates"},{"name":"transparentBackground","comment":" A fully transparent background.\n","type":"Scene3d.Background coordinates"},{"name":"triangle","comment":" Draw a single triangle.\n\n\n\n","type":"Scene3d.Material.Plain coordinates -> Triangle3d.Triangle3d Length.Meters coordinates -> Scene3d.Entity coordinates"},{"name":"triangleShadow","comment":" ","type":"Triangle3d.Triangle3d Length.Meters coordinates -> Scene3d.Entity coordinates"},{"name":"triangleWithShadow","comment":" 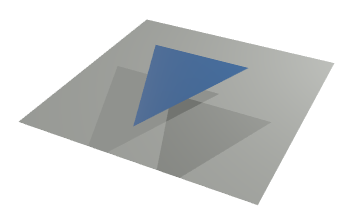\n","type":"Scene3d.Material.Plain coordinates -> Triangle3d.Triangle3d Length.Meters coordinates -> Scene3d.Entity coordinates"},{"name":"twoLights","comment":" ","type":"Scene3d.Light.Light coordinates a -> Scene3d.Light.Light coordinates b -> Scene3d.Lights coordinates"},{"name":"unlit","comment":" Render a simple scene without any lighting. This means all objects in the\nscene should use [plain colors](Material#color) - without any lighting, other\nmaterial types will always be completely black!\n\n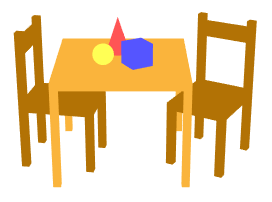\n\nYou will need to provide:\n\n - The overall dimensions in [pixels](https://package.elm-lang.org/packages/ianmackenzie/elm-units/latest/Pixels)\n of the scene (the dimensions of the resulting HTML element).\n - The [camera](https://package.elm-lang.org/packages/ianmackenzie/elm-3d-camera/latest/)\n to use when rendering.\n - A clip depth (anything closer to the camera than this value will be clipped\n and not shown).\n - What background color to use.\n - The list of [entities](#entities) to render!\n\nThe clip depth is necessary because of [how WebGL projection matrices are\nconstructed](http://www.songho.ca/opengl/gl_projectionmatrix.html). Generally,\ntry to choose the largest value you can without actually clipping visible\ngeometry. This will improve the accuracy of the [depth buffer](https://www.computerhope.com/jargon/z/zbuffering.htm)\nwhich in turn reduces [Z-fighting](https://en.wikipedia.org/wiki/Z-fighting).\n\n","type":"{ dimensions : ( Quantity.Quantity Basics.Float Pixels.Pixels, Quantity.Quantity Basics.Float Pixels.Pixels ), camera : Camera3d.Camera3d Length.Meters coordinates, clipDepth : Length.Length, background : Scene3d.Background coordinates, entities : List.List (Scene3d.Entity coordinates) } -> Html.Html msg"}],"binops":[]},{"name":"Scene3d.Light","comment":"\n\n@docs Light, CastsShadows\n\n@docs castsShadows, neverCastsShadows\n\n@docs directional, point, soft, overhead, ambient, disabled\n\n\n## Chromaticity\n\n@docs Chromaticity\n\n@docs color, daylight, sunlight, skylight, incandescent, fluorescent, colorTemperature, chromaticity\n\n","unions":[{"name":"CastsShadows","comment":" The `CastsShadows` type is used to indicate either whether a given light\ncasts shadows. Lights can usually be constructed using `Light.castsShadows True`\nor `Light.castsShadows False`, but if you want to use more than four lights in a\nscene then the extra lights must be constructed with the special\n`Light.neverCastsShadows` value. This system allows the first four lights to\nhave shadows dynamically enabled/disabled at runtime, while using the type\nsystem to guarantee that no more than four lights ever cast shadows.\n","args":["a"],"cases":[]}],"aliases":[{"name":"Chromaticity","comment":" [Chromaticity](https://en.wikipedia.org/wiki/Chromaticity) is a precise way\nof describing color independent of brightness. You can think of it as roughly\nhue and saturation without value or lightness.\n\nChromaticity is used for specifying the color of individual lights as well as\nthe white balance to use for the overall scene.\n\n","args":[],"type":"Scene3d.Types.Chromaticity"},{"name":"Light","comment":" A `Light` represents a single source of light in the scene, such as the sun\nor a light bulb. Lights are not rendered themselves; they can only be seen by\nhow they interact with objects in the scene.\n","args":["coordinates","castsShadows"],"type":"Scene3d.Types.Light coordinates castsShadows"}],"values":[{"name":"ambient","comment":" A simple version of `Light.soft` with constant intensity light in every\ndirection. Provided for completeness, but you generally won't want to use this\nas it tends to result in very flat, unrealistic-looking scenes:\n\n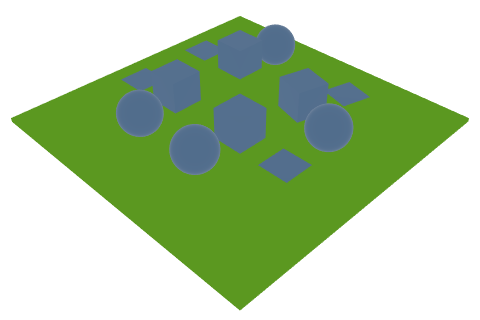\n\n","type":"{ chromaticity : Scene3d.Light.Chromaticity, intensity : Illuminance.Illuminance } -> Scene3d.Light.Light coordinates Basics.Never"},{"name":"castsShadows","comment":" Construct a `CastsShadows Bool` value used to indicate whether a given\nlight casts shadows.\n","type":"Basics.Bool -> Scene3d.Light.CastsShadows Basics.Bool"},{"name":"chromaticity","comment":" Specify chromaticity by its _xy_ coordinates in the [CIE xyY color space](https://en.wikipedia.org/wiki/CIE_1931_color_space#CIE_xy_chromaticity_diagram_and_the_CIE_xyY_color_space).\n","type":"{ x : Basics.Float, y : Basics.Float } -> Scene3d.Light.Chromaticity"},{"name":"color","comment":" Extract the chromaticity of a given color. Note that this is a lossy\nconversion since it throws away any lightness/brightness information. For\nexample, any greyscale color value will have chromaticity equal to\n`Light.daylight` (since that is the standard 'white' chromaticity for the\nsRGB color space).\n","type":"Color.Color -> Scene3d.Light.Chromaticity"},{"name":"colorTemperature","comment":" Specify chromaticity by providing a [color temperature](https://en.wikipedia.org/wiki/Color_temperature).\nFor example, `Light.daylight` is equivalent to\n\n Light.colorTemperature (Temperature.kelvins 5600)\n\nSee [here](https://en.wikipedia.org/wiki/Standard_illuminant#White_points_of_standard_illuminants)\nfor the color temperatures of many common sources of light.\n\n","type":"Temperature.Temperature -> Scene3d.Light.Chromaticity"},{"name":"daylight","comment":" The approximate chromaticity of noon daylight; this is a combination of\ndirect sunlight and blue sky, so is slightly cooler than pure [sunlight](#sunlight).\nAs a result, this is a good default choice for white balance and indirect\nlighting, but for direct lighting you'll likely want to use [`sunlight`](#sunlight),\n[`skylight`](#skylight), [`incandescent`](#incandescent) or [`fluorescent`](#fluorescent) instead.\n\nThis is standardized as [Illuminant D65, \"Noon Daylight\"](https://en.wikipedia.org/wiki/Standard_illuminant),\nand is the 'white' color of a properly-calibrated [sRGB](https://en.wikipedia.org/wiki/SRGB)\nmonitor.\n\n","type":"Scene3d.Light.Chromaticity"},{"name":"directional","comment":" Create a directional light given its chromaticity, intensity, direction, and\nwhether or not it casts shadows:\n\n sunlightAtNoon =\n Light.directional (Light.castsShadows True)\n { chromaticity = Light.sunlight\n , intensity = Illuminance.lux 80000\n , direction = Direction3d.negativeZ\n }\n\nNote that the `direction` is the direction the light is traveling (the direction\n_of_ the light, not the direction _to_ the light source from the scene).\n\nDirectional lights cast uniform light across the entire scene and result in\nrelatively simple shadows:\n\n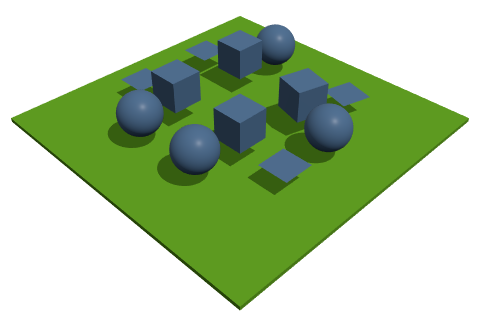\n\n(Note that this scene also includes some [soft lighting](#soft) in addition to\nthe directional light.)\n\n","type":"Scene3d.Light.CastsShadows castsShadows -> { chromaticity : Scene3d.Light.Chromaticity, intensity : Illuminance.Illuminance, direction : Direction3d.Direction3d coordinates } -> Scene3d.Light.Light coordinates castsShadows"},{"name":"disabled","comment":" A 'light' that does not actually do anything. Can be useful if you have\nsome conditional logic that decides whether a particular light is on or off:\n\n lamp =\n if model.lampIsOn then\n Light.point (Light.castsShadows True)\n { position = model.lampPosition\n , chromaticity = Light.incandescent\n , intensity = LuminousFlux.lumens 400\n }\n\n else\n Light.disabled\n\n","type":"Scene3d.Light.Light coordinates castsShadows"},{"name":"fluorescent","comment":" The chromaticity of typical fluorescent lighting. This is standardized as\n[Illuminant F2, \"Cool White Fluorescent\"](https://en.wikipedia.org/wiki/Standard_illuminant).\n","type":"Scene3d.Light.Chromaticity"},{"name":"incandescent","comment":" The chromaticity of typical incandescent/tungsten lighting. This is\nstandardized as [Illuminant A, \"Incandescent/Tungsten\"](https://en.wikipedia.org/wiki/Standard_illuminant).\n","type":"Scene3d.Light.Chromaticity"},{"name":"neverCastsShadows","comment":" Construct a special `CastsShadows Never` value used to indicate that a given\nlight never casts shadows.\n","type":"Scene3d.Light.CastsShadows Basics.Never"},{"name":"overhead","comment":" A slightly simplified version of `Light.soft` with the given intensity\nabove and zero intensity below. This can be useful if you want _color_\n(chromaticity) to also vary from above to below; for example, for and outdoors\nscene you might use two 'overhead' lights with different chromaticities and\nopposite 'up' directions to represent light from the blue sky plus some more\nneutral-colored light reflected from the surrounding environment:\n\n sky =\n Light.overhead\n { upDirection = Direction3d.positiveZ\n , chromaticity = Light.skylight\n , intensity = Illuminance.lux 20000\n }\n\n environment =\n Light.overhead\n { upDirection = Direction3d.negativeZ\n , chromaticity = Light.daylight\n , intensity = Illuminance.lux 15000\n }\n\nNote that the `environment` light has the 'up' direction set to _negative_ Z\nsince that light mostly comes from below (reflected from the ground) than above.\n\n","type":"{ upDirection : Direction3d.Direction3d coordinates, chromaticity : Scene3d.Light.Chromaticity, intensity : Illuminance.Illuminance } -> Scene3d.Light.Light coordinates Basics.Never"},{"name":"point","comment":" Create a point light given its chromaticity, intensity, position, and\nwhether or not it casts shadows:\n\n tableLamp =\n Light.point (Light.castsShadows True)\n { chromaticity = Light.incandescent\n , intensity = LuminousFlux.lumens 500\n , position = Point3d.centimeters 40 50 30\n }\n\nCompared to a directional light, the illumination from a point light varies more\nover the scene (brighter close to the light, less bright further away) and\nresults in more interesting shadows:\n\n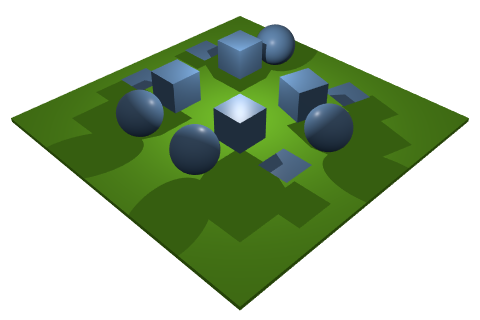\n\n(Note that this scene also includes some [soft lighting](#soft) in addition to\nthe point light.)\n\n","type":"Scene3d.Light.CastsShadows castsShadows -> { chromaticity : Scene3d.Light.Chromaticity, intensity : LuminousFlux.LuminousFlux, position : Point3d.Point3d Length.Meters coordinates } -> Scene3d.Light.Light coordinates castsShadows"},{"name":"skylight","comment":" An approximate chromaticity value for clear blue sky. There seems to be even\nless agreement on a representative value to use here, but a color temperature of\n12000 K seems fairly reasonable (see e.g. [here](https://www.researchgate.net/figure/CIE-1931-chromaticities-of-our-1567-Granada-clear-skylight-spectra-open-circles_fig2_12125220)).\n","type":"Scene3d.Light.Chromaticity"},{"name":"soft","comment":" Add some 'soft' indirect/environmental lighting to a scene: this is a rough\napproximation for light coming from all different directions, such as light\ncoming from the sky (as opposed to direct sunlight) or indirect lighting\nreflected from surrounding surfaces. The intensity of the light will vary\nsmoothly from a given intensity 'above' to 'below', based on given 'up'\ndirection and with a given chromaticity.\n\nFor example, a decent approximation to indoors office lighting might be:\n\n Light.soft\n { upDirection = Direction3d.positiveZ\n , chromaticity = Light.fluorescent\n , intensityAbove = Illuminance.lux 400\n , intensityBelow = Illuminance.lux 100\n }\n\nNote that soft lighting does not cast shadows. Soft lighting is a great way to\nmake sure the entire scene has some reasonable illumination; the [point](#point)\nand [directional](#directional) light examples both include a small amount of\nsoft lighting to 'fill in' otherwise unlit areas. For example, here's the point\nlight example _without_ any additional lighting:\n\n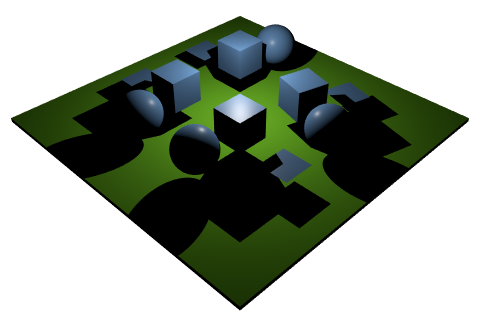\n\nConversely, soft lighting by itself can be a bit boring, so in many cases you'll\nwant to add one or more point and/or directional lights to add interest:\n\n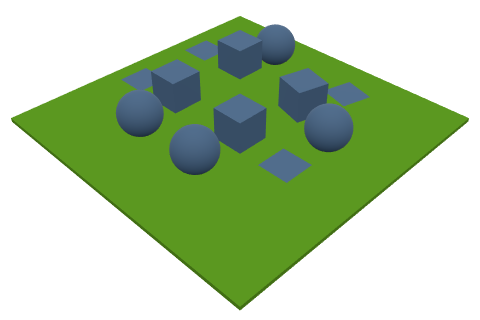\n\n","type":"{ upDirection : Direction3d.Direction3d coordinates, chromaticity : Scene3d.Light.Chromaticity, intensityAbove : Illuminance.Illuminance, intensityBelow : Illuminance.Illuminance } -> Scene3d.Light.Light coordinates Basics.Never"},{"name":"sunlight","comment":" An approximate chromaticity value for direct daytime sunlight. This doesn't\nseem to have an offically standardized value, but 'sunlight' film is apparently\ncalibrated to a color temperature of 5600 K so that is what is used here. (This\nfalls at low end of ['vertical daylight'](https://en.wikipedia.org/wiki/Color_temperature)\nand above 'horizon daylight', so should be a decent representative value.)\n","type":"Scene3d.Light.Chromaticity"}],"binops":[]},{"name":"Scene3d.Material","comment":"\n\n@docs Material\n\n\n# Simple materials\n\n@docs color, emissive, matte\n\n\n# Physically-based materials\n\n[Physically based rendering](https://learnopengl.com/PBR/Theory) (PBR) is a\nmodern rendering technique that attempts to realistically render real-world\nmaterials such as metals and plastics. `elm-3d-scene` uses a fairly simple,\ncommon variant of PBR where materials have three main parameters:\n\n - Base color\n - Roughness, with 0 meaning perfectly smooth (shiny) and 1 meaning very rough\n (matte)\n - 'Metallicness', usually either 0 or 1, with 0 meaning non-metal and 1\n meaning metal\n\n@docs nonmetal, metal, pbr\n\n\n# Textured materials\n\n[Textured](https://en.wikipedia.org/wiki/Texture_mapping) materials behave just\nlike their non-textured versions above, but require a mesh that has [UV](https://learnopengl.com/Getting-started/Textures)\n(texture) coordinates. Color, roughness and metallicness can then be controlled\nby a texture image instead of being restricted to constant values.\n\n@docs Texture, constant, load\n\n@docs texturedColor, texturedEmissive, texturedMatte, texturedNonmetal, texturedMetal, texturedPbr\n\n\n## Customized textures\n\n@docs loadWith, nearestNeighborFiltering, bilinearFiltering, trilinearFiltering\n\n\n# Type annotations\n\nThe functions in this module all return values with a 'free' type parameter -\nfor example, the return type of `Material.matte` is\n\n Material coordinates { a | normals : () }\n\nThis makes most code simpler (it means that such a material can work with _any_\nkind of mesh that has normal vectors, even if for example that mesh also has\ntexture coordinates) but makes it tricky to store a `Material` value in your own\ndata structures without those data structures _also_ needing a type parameter.\nThe `coordinates` type parameter can usually be set to just `WorldCoordinates`\n(a type you will need to define yourself), but the `a` is a bit trickier.\n\nThe type aliases and functions below help deal with this problem in a convenient\nway. To store a material in a data structure, you can use one of the type\naliases. For example, the material above might be stored as a\n\n Material.Uniform WorldCoordinates\n\nThen, if you need to turn this value _back_ into a\n\n Material coordinates { a | normals : () }\n\n(so that you could apply it to a textured mesh, for example) you can use\n`Material.uniform` to do so. You can think of `Material.uniform material` as\nsaying \"yes, I know this is a uniform material, but I still want to apply it to\nthis textured mesh\".\n\n@docs Plain, Unlit, Uniform, Textured\n\n@docs plain, unlit, uniform\n\n","unions":[],"aliases":[{"name":"Material","comment":" A `Material` controls the color, reflectivity etc. of a given object. It may\nbe constant across the object or be textured.\n\nThe `attributes` type parameter of a material is used to restrict what objects\nit can be used with. For example, `Material.matte` returns a value with an\n`attributes` type of `{ a | normals : () }`; you can read this as \"this material\ncan be applied to any mesh that has normals\".\n\nThe `coordinates` type parameter is currently unused but will be used in the\nfuture for things like [procedural textures](https://en.wikipedia.org/wiki/Procedural_texture)\ndefined in a particular coordinate system; those textures will then only be able\nto be applied to objects defined in the same coordinate system.\n\n","args":["coordinates","attributes"],"type":"Scene3d.Types.Material coordinates attributes"},{"name":"Plain","comment":" A material that doesn't require any particular vertex attributes. The only\npossibilities here are [`color`](#color) and [`emissive`](#emissive).\n","args":["coordinates"],"type":"Scene3d.Material.Material coordinates {}"},{"name":"Texture","comment":" A `Texture` value represents an image that is mapped over the surface of an\nobject. Textures can be used to control the color at different points on an\nobject (`Texture Color`) but can also be used to control roughness or\nmetallicness when using a physically-based material (`Texture Float`).\n","args":["value"],"type":"Scene3d.Types.Texture value"},{"name":"Textured","comment":" A material that requires both normal vectors and UV coordinates:\n[`texturedMatte`](#texturedMatte), [`texturedMetal`](#texturedMetal),\n[`texturedNonmetal`](#texturedNonmetal) or [`texturedPbr`](#texturedPbr).\n","args":["coordinates"],"type":"Scene3d.Material.Material coordinates { normals : (), uvs : () }"},{"name":"Uniform","comment":" A material that requires normal vectors but not UV coordinates: [`matte`](#matte),\n[`metal`](#metal), [`nonmetal`](#nonmetal) or [`pbr`](#pbr).\n","args":["coordinates"],"type":"Scene3d.Material.Material coordinates { normals : () }"},{"name":"Unlit","comment":" A material that requires UV (texture) coordinates but not normal vectors:\n[`texturedColor`](#texturedColor) or [`texturedEmissive`](#texturedEmissive).\n","args":["coordinates"],"type":"Scene3d.Material.Material coordinates { uvs : () }"}],"values":[{"name":"bilinearFiltering","comment":" Apply some simple texture smoothing; each on-screen pixel will be a weighted\naverage of the four closest texture pixels. This will generally lead to\nslightly smoother edges than nearest-neighbor filtering, at least for cases\nwhere one texture pixel is approximately the same size as one screen pixel:\n\n\n\nNo [mipmapping](https://en.wikipedia.org/wiki/Mipmap) is used, so\npixelation/aliasing may still occur especially for far-away objects where one\ntexture pixel is much smaller than one screen pixel.\n\nBilinear filtering is implemented as:\n\n bilinearFiltering =\n { minify = WebGL.Texture.linear\n , magnify = WebGL.Texture.linear\n , horizontalWrap = WebGL.Texture.repeat\n , verticalWrap = WebGL.Texture.repeat\n , flipY = True\n }\n\n","type":"WebGL.Texture.Options"},{"name":"color","comment":" A simple constant color material. This material can be applied to any\nobject and ignores lighting entirely - the entire object will have exactly the\ngiven color regardless of lights or scene exposure/white balance settings.\nHere's a rubber duck model with a constant blue color:\n\n\n\nNote that transparency is not currently supported, so any alpha value in the\ngiven color will be ignored.\n\n","type":"Color.Color -> Scene3d.Material.Material coordinates attributes"},{"name":"constant","comment":" A special texture that has the same value everywhere. This can be useful\nwith materials like [`texturedPbr`](#texturedPbr) which take multiple `Texture`\narguments; sometimes you might want to use an actual texture for color but a\nconstant value for roughness (or vice versa). For example, you might use\n\n Material.constant blue\n\ninstead of loading a `Texture Color` from an image, or\n\n Material.constant 0.5\n\nto use a constant roughness value instead of a `Texture Float` loaded from an\nimage.\n\n","type":"value -> Scene3d.Material.Texture value"},{"name":"emissive","comment":" An emissive or 'glowing' material, where you specify the [chromaticity](Scene3d#Chromaticity)\nand intensity of the emitted light. The result will be a constant color, but one\nthat (unlike [`Material.color`](#color)) will depend on the exposure and white\nbalance settings used when rendering the scene.\n","type":"Scene3d.Types.Chromaticity -> Luminance.Luminance -> Scene3d.Material.Material coordinates attributes"},{"name":"load","comment":" Load a texture from a given URL. Note that the resulting value can be used\nas either a `Texture Color` _or_ a `Texture Float` - if used as a\n`Texture Float` then it will be the greyscale value of each pixel that is used\n(more precisely, its [luminance](https://en.wikipedia.org/wiki/Relative_luminance)).\n\nThe loaded texture will use [bilinear texture filtering](#bilinearFiltering). To\nuse nearest-neighbor filtering, trilinear filtering or to customize other\ntexture options, use [`loadWith`](#loadWith) instead.\n\n","type":"String.String -> Task.Task WebGL.Texture.Error (Scene3d.Material.Texture value)"},{"name":"loadWith","comment":" Load a texture with particular [options](https://package.elm-lang.org/packages/elm-explorations/webgl/latest/WebGL-Texture#Options),\nwhich control things like what form of [texture filtering](https://en.wikipedia.org/wiki/Texture_filtering)\nis used and how out-of-range texture coordinates are interpreted (clamped,\nwrapped around, etc.).\n\nThis module contains a few reasonable defaults ([`nearestNeighborFiltering`](#nearestNeighborFiltering),\n[`bilinearFiltering`](#bilinearFiltering), and [`trilinearFiltering`](#trilinearFiltering))\nbut you can directly construct your own custom options record if desired.\nUnfortunately there's no one set of texture options that works well in all\ncases, so you may need to experiment to see what works best in your particular\nscene.\n\n","type":"WebGL.Texture.Options -> String.String -> Task.Task WebGL.Texture.Error (Scene3d.Material.Texture value)"},{"name":"matte","comment":" A perfectly matte ([Lambertian](https://en.wikipedia.org/wiki/Lambertian_reflectance))\nmaterial which reflects light equally in all directions. Lambertian materials\nare faster to render than physically-based materials like `Material.metal` or\n`Material.nonmetal`, so consider using them for large surfaces like floors that\ndon't need to be shiny:\n\n\n\n(Note that this doesn't appear to be quite the same blue as before, since the\nlights themselves are colored.)\n\n","type":"Color.Color -> Scene3d.Material.Material coordinates { a | normals : () }"},{"name":"metal","comment":" A metal material such as steel, aluminum, gold etc. See [here](https://docs.unrealengine.com/en-US/Engine/Rendering/Materials/PhysicallyBased/index.html)\nand [here](https://www.chaosgroup.com/blog/understanding-metalness) for base\ncolors of different metals. Here's what 'blue metal' might look like:\n\n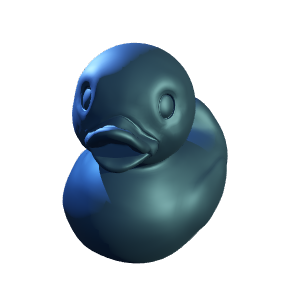\n\nAs with nonmetals, roughness can be decreased to get a shinier surface:\n\n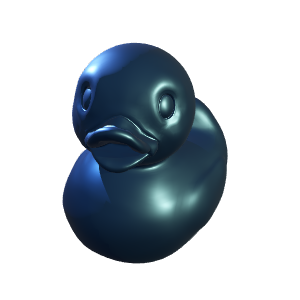\n\nNote that metals are generally more sensitive to light direction than nonmetals,\nso if you only have directional and/or point lights in your scene then metallic\nobjects will often have a couple bright highlights but otherwise be very dark.\nThis can usually be addressed by using at least a small amount of [soft lighting](Scene3d-Light#soft)\nso that there is at least a small amount of light coming from _every_ direction.\n\n","type":"{ baseColor : Color.Color, roughness : Basics.Float } -> Scene3d.Material.Material coordinates { a | normals : () }"},{"name":"nearestNeighborFiltering","comment":" Don't interpolate between texture pixels at all when rendering; each\non-screen pixel will simply get the color of the _nearest_ texture pixel. This\ncan be useful if you're deliberately going for a 'pixelated' look and want\ntexture pixels to show up exactly on screen without any blurring. In most cases,\nthough, using nearest-neighbor filtering will lead to unpleasant jagged edges\n(this is a zoomed-in portion of the Elm logo applied as a texture to a simple\n[quad](Scene3d#quad)):\n\n\n\nNote that the upper-right edge is smooth because that's actually the edge of the\ntextured quad, instead of an edge between two different colors _within_ the\ntexture.\n\nNearest-neighbor filtering is implemented as:\n\n nearestNeighborFiltering =\n { minify = WebGL.Texture.nearest\n , magnify = WebGL.Texture.nearest\n , horizontalWrap = WebGL.Texture.repeat\n , verticalWrap = WebGL.Texture.repeat\n , flipY = True\n }\n\n","type":"WebGL.Texture.Options"},{"name":"nonmetal","comment":" A non-metal material such as plastic, wood, paper etc. This allows for some\nnice lighting highlights compared to `matte`:\n\n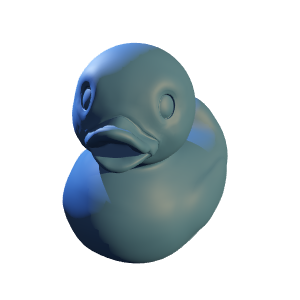\n\nAn even shinier version (lower roughness):\n\n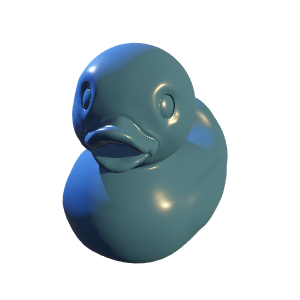\n\n","type":"{ baseColor : Color.Color, roughness : Basics.Float } -> Scene3d.Material.Material coordinates { a | normals : () }"},{"name":"pbr","comment":" A custom PBR material with a `metallic` parameter that can be anywhere\nbetween 0 and 1. Values in between 0 and 1 can be used to approximate things\nlike dusty metal, where a surface can be thought of as partially metal and\npartially non-metal:\n\n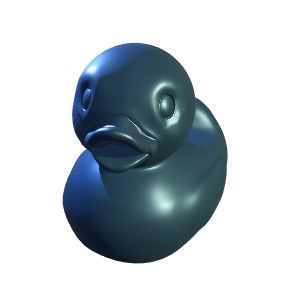\n\n","type":"{ baseColor : Color.Color, roughness : Basics.Float, metallic : Basics.Float } -> Scene3d.Material.Material coordinates { a | normals : () }"},{"name":"plain","comment":" Convert a `Plain` material (that can only be applied to a [`Plain`](Scene3d-Mesh#Plain)\nmesh) back into one that can be applied to _any_ mesh.\n","type":"Scene3d.Material.Plain coordinates -> Scene3d.Material.Material coordinates attributes"},{"name":"texturedColor","comment":" A textured plain-color material, unaffected by lighting.\n\n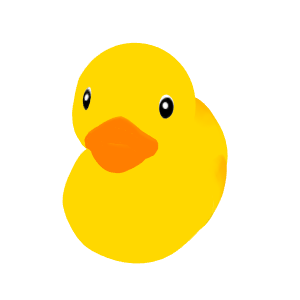\n\n","type":"Scene3d.Material.Texture Color.Color -> Scene3d.Material.Material coordinates { a | uvs : () }"},{"name":"texturedEmissive","comment":" A textured emissive material. The color from the texture will be multiplied\nby the given luminance to obtain the final emissive color.\n","type":"Scene3d.Material.Texture Color.Color -> Luminance.Luminance -> Scene3d.Material.Material coordinates { a | uvs : () }"},{"name":"texturedMatte","comment":" A textured matte material.\n\n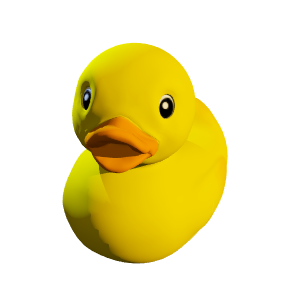\n\n","type":"Scene3d.Material.Texture Color.Color -> Scene3d.Material.Material coordinates { a | normals : (), uvs : () }"},{"name":"texturedMetal","comment":" A textured metal material.\n\n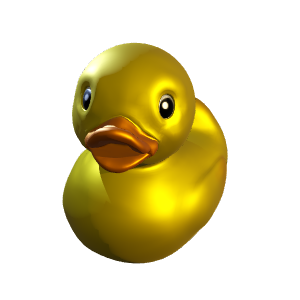\n\n","type":"{ baseColor : Scene3d.Material.Texture Color.Color, roughness : Scene3d.Material.Texture Basics.Float } -> Scene3d.Material.Material coordinates { a | normals : (), uvs : () }"},{"name":"texturedNonmetal","comment":" A textured non-metal material. If you only have a texture for one of the two\nparameters (base color and roughness), you can use [`Material.constant`](#constant)\nfor the other. Here's a model with a textured base color but constant roughness:\n\n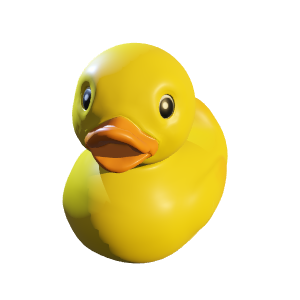\n\nThe same model but with roughness decreased for a shinier appearance:\n\n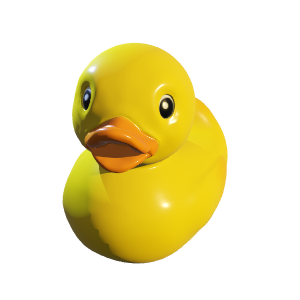\n\n","type":"{ baseColor : Scene3d.Material.Texture Color.Color, roughness : Scene3d.Material.Texture Basics.Float } -> Scene3d.Material.Material coordinates { a | normals : (), uvs : () }"},{"name":"texturedPbr","comment":" A fully custom textured PBR material, where textures can be used to control\nall three parameters. As before, you can freely mix and match 'actual' textures\nwith [`constant`](#constant) values for any of the three parameters. For\nexample, here's a sphere with textured base color and textured metallicness but\nconstant roughness:\n\n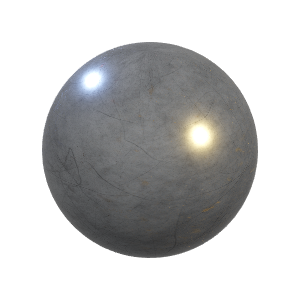\n\n(You can see the effect of the textured metallicness in the small reddish rusty\nareas on the lower right-hand side.) Here's the same sphere but with a texture\nalso used to control roughness - note how the rough scratches catch light that\nwould otherwise be reflected away from the camera:\n\n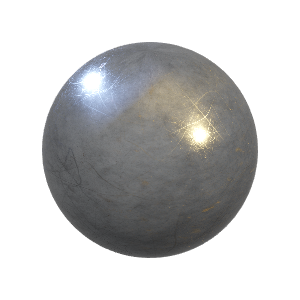\n\n","type":"{ baseColor : Scene3d.Material.Texture Color.Color, roughness : Scene3d.Material.Texture Basics.Float, metallic : Scene3d.Material.Texture Basics.Float } -> Scene3d.Material.Material coordinates { a | normals : (), uvs : () }"},{"name":"trilinearFiltering","comment":" Interpolate between nearby texture pixels as with bilinear filtering, but\n_also_ interpolate between the two nearest [mipmap](https://en.wikipedia.org/wiki/Mipmap)\nlevels. This will generally give the smoothest possible appearance, but may also\nlead to excessive blurriness:\n\n\n\nTrilinear filtering is implemented as:\n\n trilinearFiltering =\n { minify = WebGL.Texture.linearMipmapLinear\n , magnify = WebGL.Texture.linear\n , horizontalWrap = WebGL.Texture.repeat\n , verticalWrap = WebGL.Texture.repeat\n , flipY = True\n }\n\n","type":"WebGL.Texture.Options"},{"name":"uniform","comment":" Convert a `Uniform` material (one that can only be applied to a [`Uniform`](Scene3d-Mesh#Uniform)\nmesh) back into one that can be applied to _any_ mesh that has normal vectors.\n","type":"Scene3d.Material.Uniform coordinates -> Scene3d.Material.Material coordinates { a | normals : () }"},{"name":"unlit","comment":" Convert an `Unlit` material (one that can only be applied to an [`Unlit`](Scene3d-Mesh#Unlit)\nmesh) back into one that can be applied to _any_ mesh that has texture\ncoordinates.\n","type":"Scene3d.Material.Unlit coordinates -> Scene3d.Material.Material coordinates { a | uvs : () }"}],"binops":[]},{"name":"Scene3d.Mesh","comment":" This module lets you create object shapes which you can later render with\n[`Scene3d.mesh`](Scene3d#mesh) or [`Scene3d.meshWithShadow`](Scene3d#meshWithShadow)\nby applying a desired [material](Scene3d-Material).\n\n**IMPORTANT**: `Mesh` (and `Shadow`) values should _not_ be created dynamically\nin your `view` function, since this is a relatively expensive operation that can\nlead to low frame rates or even out-of-memory errors if done repeatedly.\nInstead, they should be created only once (in your `init` or `update` function,\nor even as a top-level constant), then stored in your model and reused from\nframe to frame.\n\nNote that this does _not_ mean that objects can't move around or change color -\nyou can freely change the material applied to a mesh from frame to frame, and\nyou can use the various provided [transformation functions](Scene3d#transformations)\nto transform meshes around without having to recreate them.\n\n@docs Mesh\n\n\n## Type aliases\n\nThese type aliases make it easier to write down type annotations for meshes you\nstore in your model or return from a function.\n\n@docs Plain, Uniform, Unlit, Textured\n\n\n# Constructors\n\n@docs points, lineSegments, polyline, triangles, facets\n\n\n## Indexed meshes\n\nThese functions all use the `TriangularMesh` type from the\n[`ianmackenzie/elm-triangular-mesh`](https://package.elm-lang.org/packages/ianmackenzie/elm-triangular-mesh/latest/)\npackage to allow the creation of _indexed_ meshes, where vertices can be shared\nbetween adjacent faces to save on space.\n\n@docs indexedTriangles, indexedFacets, indexedFaces\n\n\n## Textured meshes\n\nThese functions behave just like their corresponding `indexed` versions but\nadditionally require each vertex to include [UV](https://learnopengl.com/Getting-started/Textures)\n(texture) coordinates to allow [textured materials](Scene3d-Material#textured-materials)\nto be used.\n\n@docs texturedTriangles, texturedFacets, texturedFaces\n\n\n# Shadows\n\nIn `elm-3d-scene`, to render an object with its shadow you will first need to\nconstruct (and save somewhere) a `Shadow` value for that object. You can then\nrender the object with its shadow using [`Scene3d.meshWithShadow`](Scene3d#meshWithShadow).\n\n@docs Shadow, shadow\n\n\n# Optimizations\n\n@docs cullBackFaces\n\n","unions":[],"aliases":[{"name":"Mesh","comment":" A `Mesh` defines the shape of an object. It consists of a number of\n_vertices_ (points that may have additional associated data like normal vectors\nand texture coordinates) joined together into triangles or line segments (or\nsometimes just displayed as dots).\n\nThe two type parameters of the `Mesh` type define what coordinate system a mesh\nis defined in, and what attributes (in addition to position) are present on each\nvertex. For example, a\n\n Mesh WorldCoordinates { normals : () }\n\nrefers to a mesh defined in `WorldCoordinates` (a type you would typically\ndefine yourself) that has position and normal vector defined at each vertex.\n(The `()` type isn't significant; you can think of it as meaning 'present'.)\n\n","args":["coordinates","attributes"],"type":"Scene3d.Types.Mesh coordinates attributes"},{"name":"Plain","comment":" A mesh containing vertex positions only.\n","args":["coordinates"],"type":"Scene3d.Mesh.Mesh coordinates {}"},{"name":"Shadow","comment":" Represents the shadow of a particular object.\n","args":["coordinates"],"type":"Scene3d.Types.Shadow coordinates"},{"name":"Textured","comment":" A mesh with both normal vectors and UV coordinates at each vertex, allowing\nfor general-purpose texturing of lit objects.\n","args":["coordinates"],"type":"Scene3d.Mesh.Mesh coordinates { normals : (), uvs : () }"},{"name":"Uniform","comment":" A mesh with normal vectors at each vertex but no UV (texture) coordinates,\nmeaning that surface appearance will be uniform across the mesh.\n","args":["coordinates"],"type":"Scene3d.Mesh.Mesh coordinates { normals : () }"},{"name":"Unlit","comment":" A mesh with UV coordinates at each vertex but no normal vectors (normal\nvectors are required for any kind of lighting calculation).\n","args":["coordinates"],"type":"Scene3d.Mesh.Mesh coordinates { uvs : () }"}],"values":[{"name":"cullBackFaces","comment":" [Back face culling](https://en.wikipedia.org/wiki/Back-face_culling) is a\nrendering optimization that cuts down on the number of triangles drawn by not\ndrawing any triangles that are facing away from the viewer (camera). However,\nthis only really works if the mesh in question is a closed volume with all faces\nhaving the correct (counterclockwise) [winding order](https://cmichel.io/understanding-front-faces-winding-order-and-normals).\nFor example, if render a simple curved surface which might get viewed from\neither side, then you wouldn't want to enable back face culling because then the\nsurface would be invisible from one side! As a result, in `elm-3d-scene` back\nface culling is disabled by default but you can enable it per-mesh as an\noptimization where it is valid.\n\nNote that `cullBackFaces` doesn't actually strip out any faces from the mesh,\nsince which faces are culled depends on the (dynamic) viewing direction - it\nsimply sets a flag on the mesh that indicates that back face culling should be\nperformed during rendering.\n\n","type":"Scene3d.Mesh.Mesh coordinates attributes -> Scene3d.Mesh.Mesh coordinates attributes"},{"name":"facets","comment":" Construct a mesh from a list of triangles, but generate a normal vector for\neach triangle so that [`matte`](Material#matte) and [`pbr`](Material#pbr)\n(materials that react to light) can be used. Note that normal vectors will _not_\nbe smoothed, so the resulting mesh will appear to have flat [facets](https://en.wikipedia.org/wiki/Facet),\nhence the name.\n","type":"List.List (Triangle3d.Triangle3d Length.Meters coordinates) -> Scene3d.Mesh.Uniform coordinates"},{"name":"indexedFaces","comment":" Construct a mesh from a `TriangularMesh` of vertices with positions and\nnormal vectors.\n","type":"TriangularMesh.TriangularMesh { position : Point3d.Point3d Length.Meters coordinates, normal : Vector3d.Vector3d Quantity.Unitless coordinates } -> Scene3d.Mesh.Uniform coordinates"},{"name":"indexedFacets","comment":" Construct a mesh from a `TriangularMesh` of plain positions, but also\ncompute a normal vector for each triangle just like with [`facets`](#facets).\n","type":"TriangularMesh.TriangularMesh (Point3d.Point3d Length.Meters coordinates) -> Scene3d.Mesh.Uniform coordinates"},{"name":"indexedTriangles","comment":" Construct a mesh from a `TriangularMesh` of plain positions.\n","type":"TriangularMesh.TriangularMesh (Point3d.Point3d Length.Meters coordinates) -> Scene3d.Mesh.Plain coordinates"},{"name":"lineSegments","comment":" Construct a mesh from a list of line segments.\n\n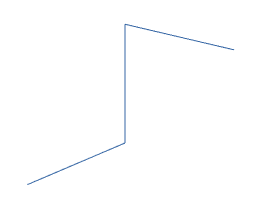\n\n(Note that this particular case, where all the line segments meet end-to-end,\ncould be rendered more efficiently as a [polyline](#polyline)).\n\n","type":"List.List (LineSegment3d.LineSegment3d Length.Meters coordinates) -> Scene3d.Mesh.Plain coordinates"},{"name":"points","comment":" Construct a mesh from a list of points that that will be displayed as\nseparate circular dots, given a particular dot radius in pixels.\n\n\n\n","type":"{ radius : Quantity.Quantity Basics.Float Pixels.Pixels } -> List.List (Point3d.Point3d Length.Meters coordinates) -> Scene3d.Mesh.Plain coordinates"},{"name":"polyline","comment":" Construct a mesh from a single polyline.\n","type":"Polyline3d.Polyline3d Length.Meters coordinates -> Scene3d.Mesh.Plain coordinates"},{"name":"shadow","comment":" Construct a `Shadow` value from a given mesh. This is an expensive\noperation, so `Shadow` values (like `Mesh` values) should be stored in your\nmodel (or as top-level constants) instead of constructed dynamically in your\n`view` function.\n","type":"Scene3d.Mesh.Mesh coordinates attributes -> Scene3d.Mesh.Shadow coordinates"},{"name":"texturedFaces","comment":" Construct a mesh from a `TriangularMesh` of vertices with positions, normal\nvectors and texture coordinates.\n","type":"TriangularMesh.TriangularMesh { position : Point3d.Point3d Length.Meters coordinates, normal : Vector3d.Vector3d Quantity.Unitless coordinates, uv : ( Basics.Float, Basics.Float ) } -> Scene3d.Mesh.Textured coordinates"},{"name":"texturedFacets","comment":" Construct a mesh from a `TriangularMesh` of vertices with positions and\ntexture coordinates, but additionally compute a normal vector for each triangle.\n","type":"TriangularMesh.TriangularMesh { position : Point3d.Point3d Length.Meters coordinates, uv : ( Basics.Float, Basics.Float ) } -> Scene3d.Mesh.Textured coordinates"},{"name":"texturedTriangles","comment":" Construct a mesh from a `TriangularMesh` of vertices with positions and\ntexture coordinates.\n","type":"TriangularMesh.TriangularMesh { position : Point3d.Point3d Length.Meters coordinates, uv : ( Basics.Float, Basics.Float ) } -> Scene3d.Mesh.Unlit coordinates"},{"name":"triangles","comment":" Construct a plain mesh from a list of triangles.\n\n\n\n","type":"List.List (Triangle3d.Triangle3d Length.Meters coordinates) -> Scene3d.Mesh.Plain coordinates"}],"binops":[]},{"name":"Scene3d.Mesh.Decode","comment":" These JSON decoders allow you to decode meshes that have been saved as JSON\nusing [`Encode.mesh`](Scene3d-Mesh-Encode#mesh) or [`Encode.shadow`](Scene3d-Mesh-Encode#shadow)\n(or from JSON that you generate yourself; read on!). All the decoders correspond\nto particular functions in the [`Mesh`](Scene3d-Mesh) module. For example, if\nyou had\n\n facetsMesh =\n Scene3d.Mesh.facets listOfTriangles\n\nwhich you then encoded as\n\n meshJson =\n Scene3d.Mesh.Encode.mesh facetsMesh\n\nyou could then decode it with something like\n\n decodeResult =\n Json.Decode.decodeValue\n Scene3d.Mesh.Decode.facets\n meshJson\n\nwhere `decodeResult` should be `Ok decodedMesh`, with `decodedMesh` being\nequal to the original `facetsMesh` (within numerical roundoff).\n\nEach function documents what JSON format it expects, so if you have some\nexisting 3D models then it should be possible to write a small script (in\nwhatever language you prefer) that converts those models into JSON that\n`elm-3d-scene` can decode. For example, you might write a command-line tool\nusing [Assimp](https://www.assimp.org/) that reads in data from one of [Assimp's\nsupported file formats](https://github.com/assimp/assimp) and writes out JSON,\nor write a [Blender script](https://docs.blender.org/manual/en/latest/advanced/scripting/introduction.html)\nthat exports the currently selected Blender object as JSON.\n\nHopefully at some point there will be good pure-Elm ways to load lots of\ndifferent 3D model formats directly, but in the meantime this JSON-based\napproach should give you a path to using existing 3D assets without _too_ much\ndifficulty.\n\n@docs points, lineSegments, polyline, triangles, facets\n\n\n## Indexed meshes\n\nThe following functions all decode indexed meshes of the form\n\n { \"vertices\" :\n [ <vertex>\n , <vertex>\n , <vertex>\n ],\n , \"faces\":\n [ [ i, j, k ]\n , [ l, m, n ]\n , ...\n ]\n }\n\nwhere the type of entries in the `\"vertices\"` list depends on the type of mesh\nbeing decoded, but the entries in the `\"faces\"` list are always lists of three\nzero-based indices into the list of vertices (the format used by\n[`TriangularMesh.indexed`](https://package.elm-lang.org/packages/ianmackenzie/elm-triangular-mesh/latest/TriangularMesh#indexed)).\n\n@docs indexedTriangles, indexedFacets, indexedFaces\n\n@docs texturedTriangles, texturedFacets, texturedFaces\n\n\n## Shadows\n\n@docs shadow\n\n","unions":[],"aliases":[],"values":[{"name":"facets","comment":" Decode a mesh of facets. This expects JSON of the form\n\n [ [ { \"x\" : x1, \"y\" : y1, \"z\" : z1 }\n , { \"x\" : x2, \"y\" : y2, \"z\" : z2 }\n , { \"x\" : x3, \"y\" : y3, \"z\" : z3 }\n ]\n , [ { \"x\" : x4, \"y\" : y4, \"z\" : z4 }\n , { \"x\" : x5, \"y\" : y5, \"z\" : z5 }\n , { \"x\" : x6, \"y\" : y6, \"z\" : z6 }\n ]\n , ...\n ]\n\nCorresponds to [`Mesh.facets`](Scene3d-Mesh#facets).\n\n","type":"Json.Decode.Decoder (Scene3d.Mesh.Uniform coordinates)"},{"name":"indexedFaces","comment":" Decode an indexed mesh of faces where each vertex is of the form\n\n { \"x\" : x\n , \"y\" : y\n , \"z\" : z\n , \"nx\" : nx\n , \"ny\" : ny\n , \"nz\" : nz\n }\n\nCorresponds to [`Mesh.indexedFaces`](Scene3d-Mesh#indexedFaces).\n\n","type":"Json.Decode.Decoder (Scene3d.Mesh.Uniform coordinates)"},{"name":"indexedFacets","comment":" Decode an indexed mesh of facets where each vertex is of the form\n\n { \"x\" : x, \"y\" : y, \"z\" : z }\n\nCorresponds to [`Mesh.indexedFacets`](Scene3d-Mesh#indexedFacets).\n\n","type":"Json.Decode.Decoder (Scene3d.Mesh.Uniform coordinates)"},{"name":"indexedTriangles","comment":" Decode an indexed mesh of triangles where each vertex is of the form\n\n { \"x\" : x, \"y\" : y, \"z\" : z }\n\nCorresponds to [`Mesh.indexedTriangles`](Scene3d-Mesh#indexedTriangles).\n\n","type":"Json.Decode.Decoder (Scene3d.Mesh.Plain coordinates)"},{"name":"lineSegments","comment":" Decode a mesh of line segments. This expects JSON of the form\n\n [ [ { \"x\" : x1, \"y\" : y1, \"z\" : z1 }\n , { \"x\" : x2, \"y\" : y2, \"z\" : z2 }\n ]\n , [ { \"x\" : x3, \"y\" : y3, \"z\" : z3 }\n , { \"x\" : x4, \"y\" : y4, \"z\" : z4 }\n ]\n , ...\n ]\n\nCorresponds to [`Mesh.lineSegments`](Scene3d-Mesh#lineSegments).\n\n","type":"Json.Decode.Decoder (Scene3d.Mesh.Plain coordinates)"},{"name":"points","comment":" Decode a mesh of points, passing in the point radius to use. This expects\nJSON of the form\n\n [ { \"x\" : x1, \"y\" : y1, \"z\" : z1 }\n , { \"x\" : x2, \"y\" : y2, \"z\" : z2 }\n , ...\n ]\n\nCorresponds to [`Mesh.points`](Scene3d-Mesh#points).\n\n","type":"{ radius : Quantity.Quantity Basics.Float Pixels.Pixels } -> Json.Decode.Decoder (Scene3d.Mesh.Plain coordinates)"},{"name":"polyline","comment":" Decode a polyline mesh. This expects JSON of the form\n\n [ { \"x\" : x1, \"y\" : y1, \"z\" : z1 }\n , { \"x\" : x2, \"y\" : y2, \"z\" : z2 }\n , ...\n ]\n\nCorresponds to [`Mesh.polyline`](Scene3d-Mesh#polyline).\n\n","type":"Json.Decode.Decoder (Scene3d.Mesh.Plain coordinates)"},{"name":"shadow","comment":" Decode a [`Shadow`](Scene3d-Mesh#Shadow) value. This expects a mesh in the\nsame form as [`indexedFaces`](#indexedFaces), but the mesh itself has to be\nconstructed in a very special way that generates a large number of auxiliary\nzero-area faces. In general you should only use this to decode a value produced\nby [`Encode.shadow`](Scene3d-Mesh-Encode#shadow).\n\nIf you are interested in generating properly-encoded shadow values yourself,\nplease reach out to me (**@ianmackenzie**) on the [Elm Slack](http://elmlang.herokuapp.com/).\n\n","type":"Json.Decode.Decoder (Scene3d.Mesh.Shadow coordinates)"},{"name":"texturedFaces","comment":" Decode an indexed mesh of textured faces where each vertex is of the\nform\n\n { \"x\" : x\n , \"y\" : y\n , \"z\" : z\n , \"nx\" : nx\n , \"ny\" : ny\n , \"nz\" : nz\n , \"u\" : u\n , \"v\" : v\n }\n\nCorresponds to [`Mesh.texturedFaces`](Scene3d-Mesh#texturedFaces).\n\n","type":"Json.Decode.Decoder (Scene3d.Mesh.Textured coordinates)"},{"name":"texturedFacets","comment":" Decode an indexed mesh of textured facets where each vertex is of the\nform\n\n { \"x\" : x\n , \"y\" : y\n , \"z\" : z\n , \"u\" : u\n , \"v\" : v\n }\n\nCorresponds to [`Mesh.texturedFacets`](Scene3d-Mesh#texturedFacets).\n\n","type":"Json.Decode.Decoder (Scene3d.Mesh.Textured coordinates)"},{"name":"texturedTriangles","comment":" Decode an indexed mesh of textured triangles where each vertex is of the\nform\n\n { \"x\" : x\n , \"y\" : y\n , \"z\" : z\n , \"u\" : u\n , \"v\" : v\n }\n\nCorresponds to [`Mesh.texturedTriangles`](Scene3d-Mesh#texturedTriangles).\n\n","type":"Json.Decode.Decoder (Scene3d.Mesh.Unlit coordinates)"},{"name":"triangles","comment":" Decode a mesh of triangles. This expects JSON of the form\n\n [ [ { \"x\" : x1, \"y\" : y1, \"z\" : z1 }\n , { \"x\" : x2, \"y\" : y2, \"z\" : z2 }\n , { \"x\" : x3, \"y\" : y3, \"z\" : z3 }\n ]\n , [ { \"x\" : x4, \"y\" : y4, \"z\" : z4 }\n , { \"x\" : x5, \"y\" : y5, \"z\" : z5 }\n , { \"x\" : x6, \"y\" : y6, \"z\" : z6 }\n ]\n , ...\n ]\n\nCorresponds to [`Mesh.triangles`](Scene3d-Mesh#triangles).\n\n","type":"Json.Decode.Decoder (Scene3d.Mesh.Plain coordinates)"}],"binops":[]},{"name":"Scene3d.Mesh.Encode","comment":" These functions let you encode [`Mesh`](Scene3d-Mesh#Mesh) and [`Shadow`](Scene3d-Mesh#Shadow)\nvalues as JSON which can later be decoded using the functions in the\n[`Mesh.Decode`](Scene3d-Mesh-Decode) module. This is useful mostly as an offline\npre-processing step to store meshes on a server in a form that can be\nefficiently loaded and parsed at runtime.\n\nSee the [`Mesh.Decode`](Scene3d-Mesh-Decode) module for documentation on the\nJSON format used by different mesh types.\n\n@docs mesh, shadow\n\n","unions":[],"aliases":[],"values":[{"name":"mesh","comment":" Encode a `Mesh` value as JSON.\n","type":"Scene3d.Mesh.Mesh coordinates attributes -> Json.Encode.Value"},{"name":"shadow","comment":" Encode a `Shadow` value as JSON.\n","type":"Scene3d.Mesh.Shadow coordinates -> Json.Encode.Value"}],"binops":[]}]