For a lot of reasons, this deployment was giving a lot of errors when validating. Spent a lot of time bug killing and now everything should work including publishing.
Updated CancelIntent
TODO: Alexa Responses customisation through the web page to be implemented.
Create your own Alexa Radio Skill with your favourite streaming stations. Once deployed, you can say Alexa, open radio and Alexa will start streaming your custom streaming station.
You can also ask Alexa for a channel or a station by name. If you say Alexa, ask radio to play Blues, the skill will first search for a channel and then the stations. If a channel is found, a random station from that channel is played.
- A responsive web page to add and delete your channels and stations.
- Alexa responses can be customized using the web page. Change what the skill says for Now playing, Next etc. Change them as often as you wish.
- Support for audiobooks. If the streaming link is an MP3 file, progress is saved. If your channel contains multiple MP3 files, the skill wil queue up the next file automatically (If shuffle is off)
- Alexa Interaction model updated to use a custom slot. You can search by channel or station name
Check out the web page demo here.
Deploying it is incredibly easy thanks to Standard Library. It involves two steps and lots of button clicking and some copy pasta.
The first step is to deploy your code to Standard Library. Right-Click on the button below to deploy.
On the new page, click on the Generate Identity button. Once that's done, click on the Deploy Project button under it to deploy the code.
After the code is deployed, you'll be taken to your project page. Here you can change your project name and add your own description.
Now click on the dev button to see all the endpoints your project has deployed.
Note down the second URL. You'll need it for the next step. If you are curious, click on the first link and you can see the web page to add and delete your custom stations.
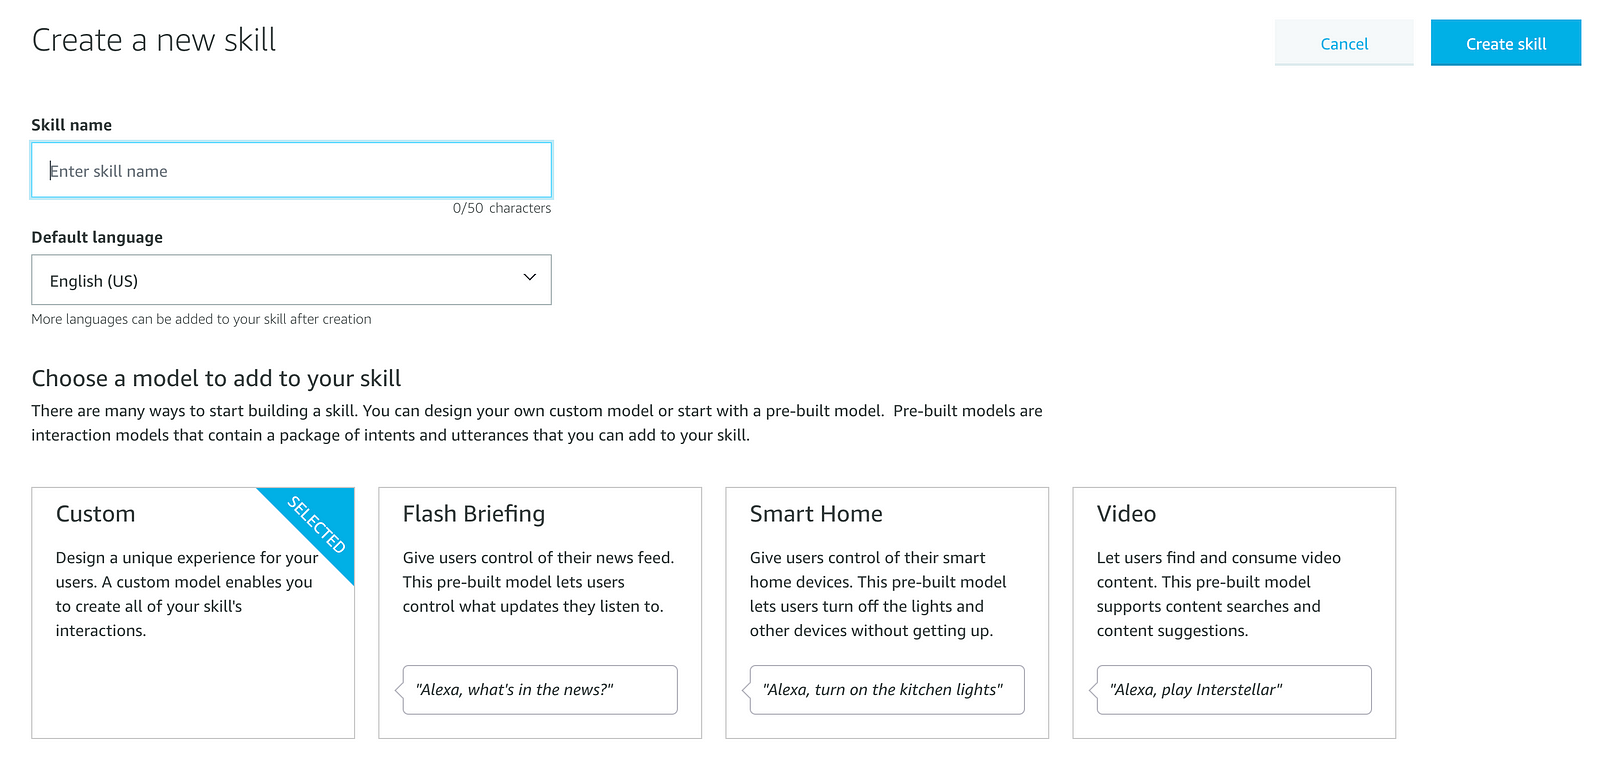
Go to developer.amazon.com to create a new Alexa Skill. If you haven't signed up for an Amazon Developer account yet, do so now. Once logged in, you should see the Create Skill button.
Give your skill a name like radio and choose your Default Language. Choose Custom for model to add to your skill and click on Create Skill.
On the next screen, choose Start from scratch.
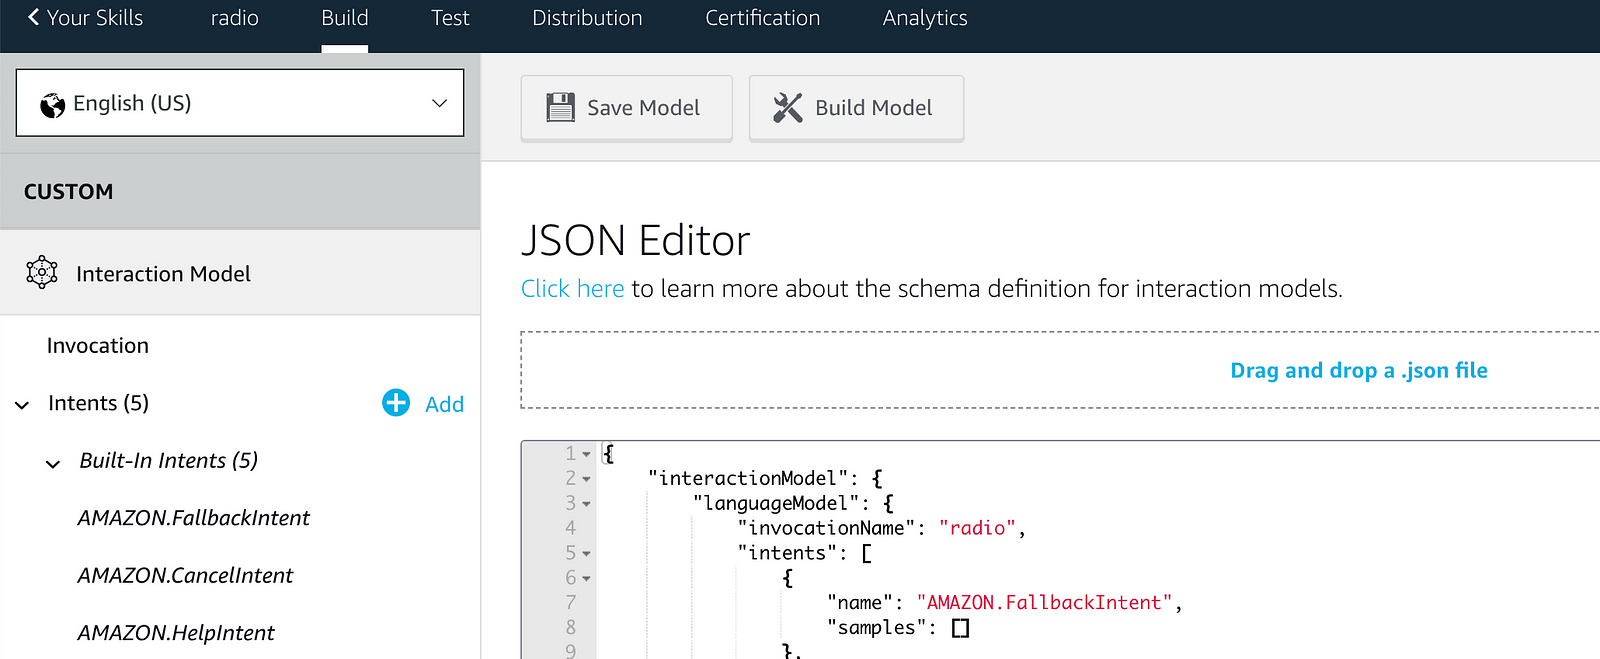
Once you have created the Alexa Skill, click on JSON Editor at the bottom left. Delete everything inside it.
Right-click and open the AlexaInteractionModel.json file on the github repo. Copy the file contents.
Go back to the Alexa developer portal, and paste it into the JSON Editor.
The invocation name is set as radio. If you want to change it, this is the time to do it. To change the name, just change the invocationName value at the top of the JSON file.
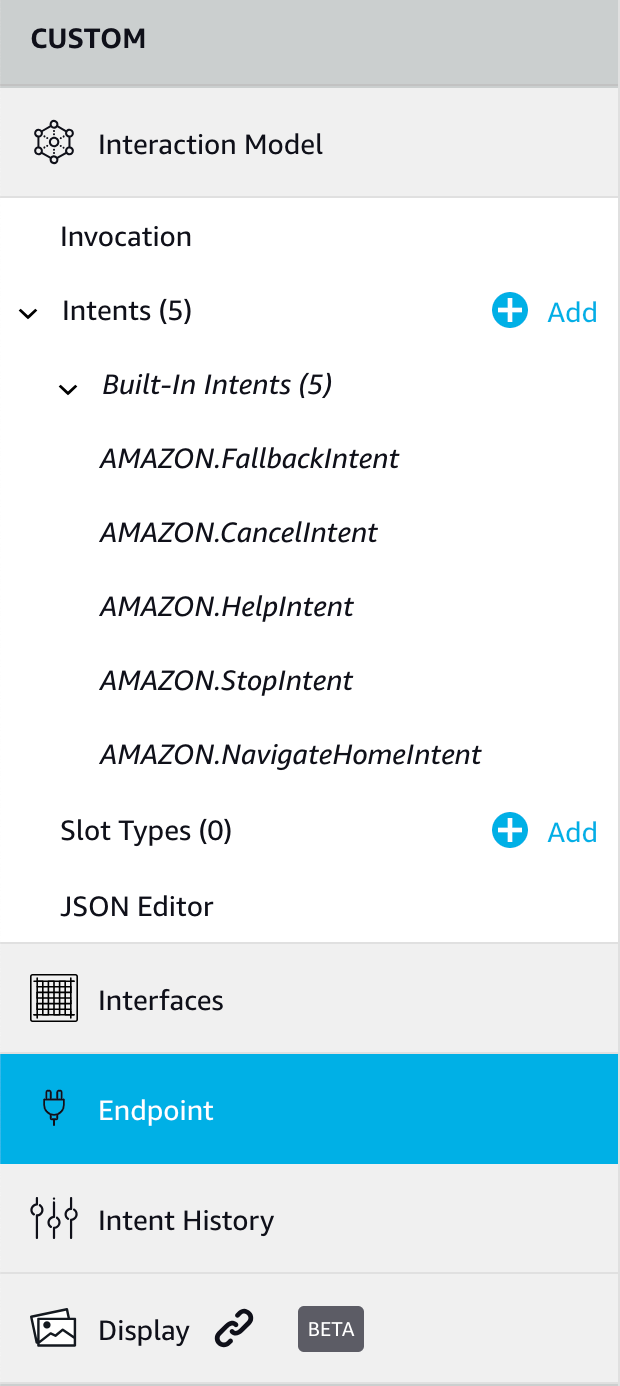
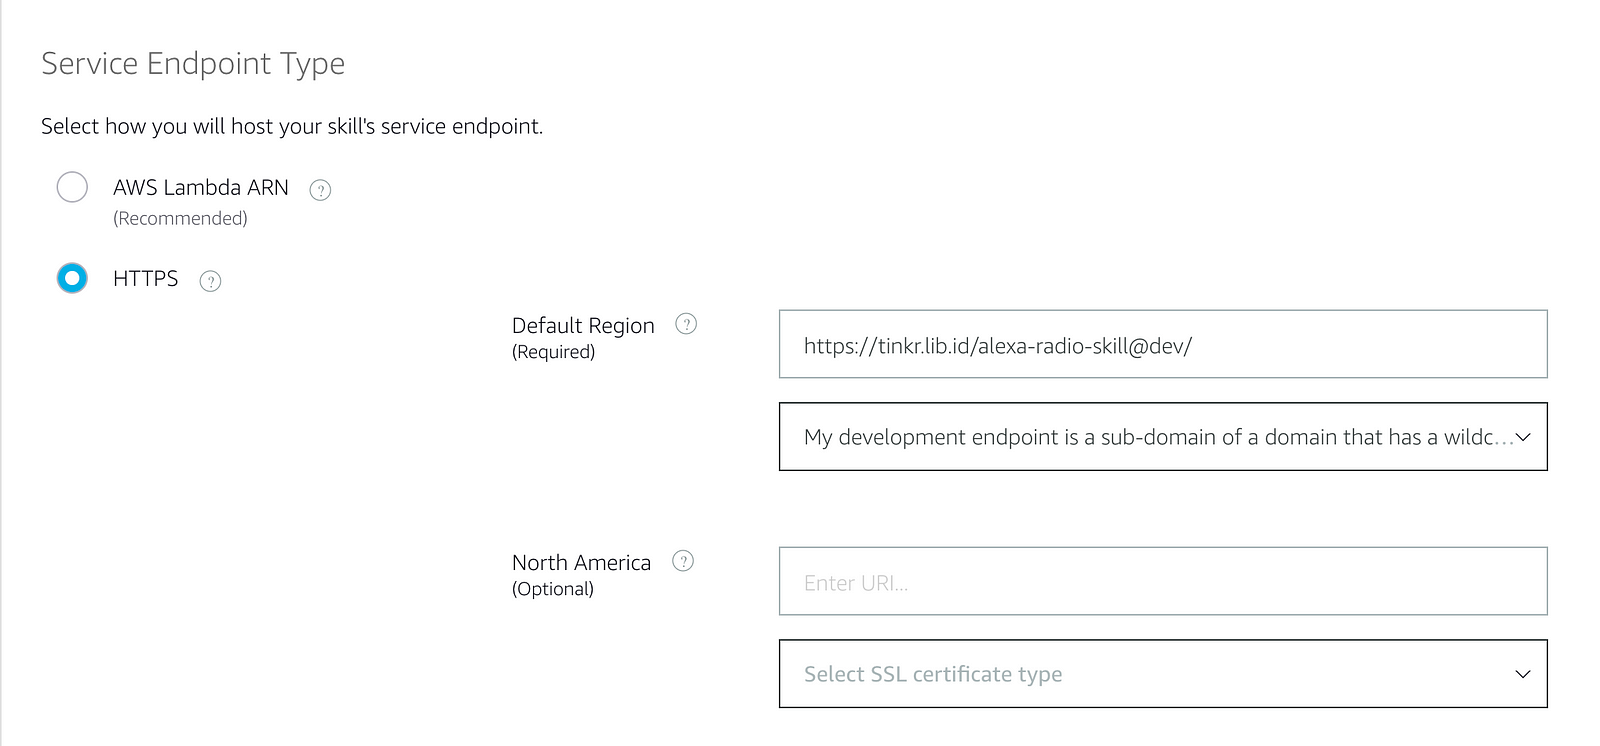
We are almost done. Click on Endpoint to link our Standard Library deployed code to the Alexa skill.
Enter the stdlib API URL you noted earlier. Your endpoint should look like https://[username].api.stdlib.com/radio@dev/alexa. Make sure you choose My development endpoint is a sub-domain of a domain option from the drop down menu.
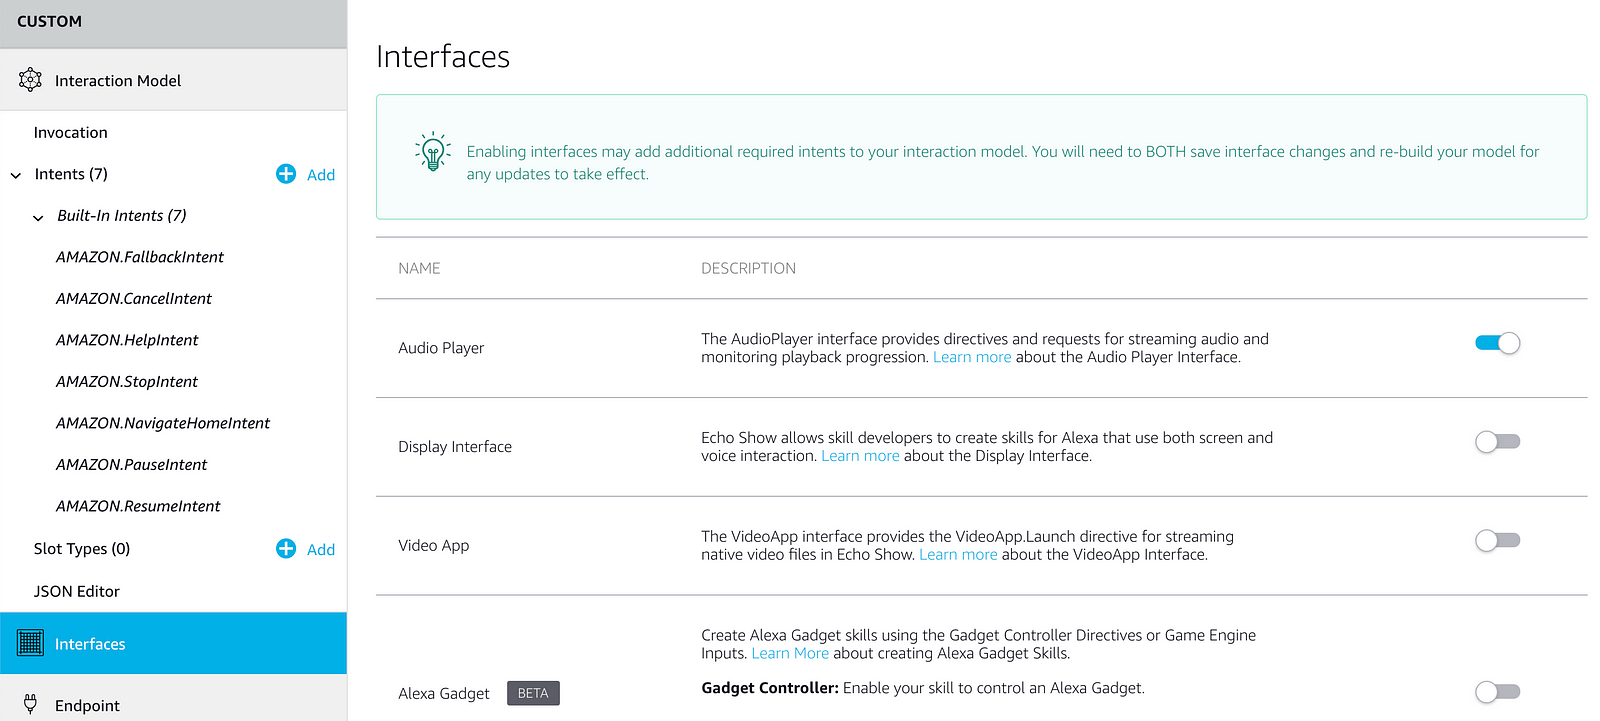
Next, click on Interfaces and turn on the Audio Player interface. The skill will not work without this being enabled.
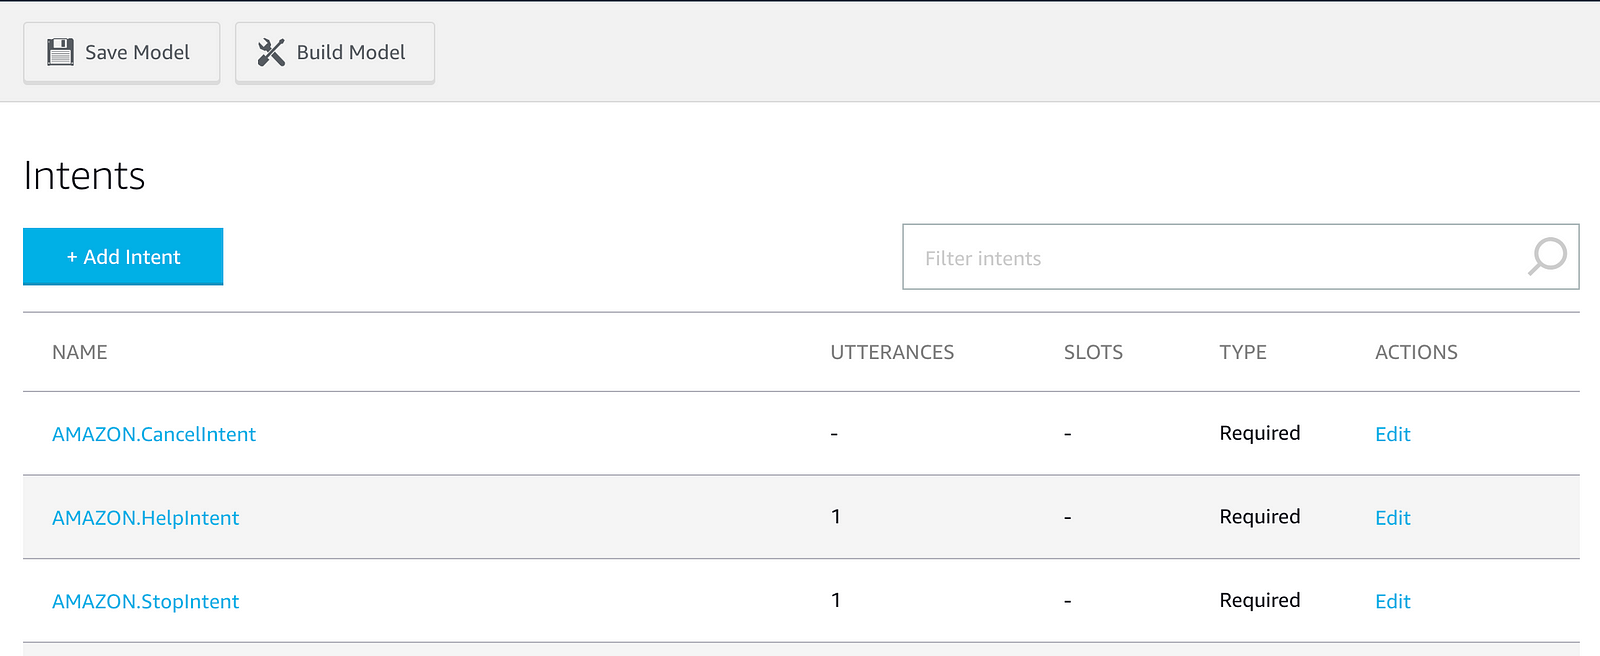
That's all the setup you need to do. In the Alexa Development portal, click on Build Model. This might take a couple of minutes.
Once you get the pop-up saying that the Build Succeeded, click on the Test tab next to Build on the Alexa Developer console. Turn on testing and type in open radio.
You should get a reply asking you to go to the web page to add your stations. Let's do that now. Go to your main stdlib URL, which is the first URL noted below.
Clicking on the above link will open a web page where you can add channels and stations, as well as customise Alexa responses.
Let's add a channel first. click on the Channel button to add a new channel.
A few things to note:
- The station URL has to start with
https - If you're adding MP3 files as part of an audiobook, make sure shuffle is off
Click on the Save button once you've added your channel. You can of course add more channels if you want.
You can cutomise Alexa responses by clicking the gear icon on the top right of the main page. Here you can add or remove the responses.
Use SSML if you want, to give it more personality.
Alexa can only play https streaming links. But André pointed out this stackoverflow answer by timguy.
I had the same issue: You can create a m3u file which is reachable via https. You could do via Amazon S3 bucket or more simple via github gist. I did the following:
http://lokruf.onlinestream.de/listen1.m3u does not have https I created this file with only one line as content: http://lokruf.onlinestream.de/listen1.m3u I used this gist https link in my skill for radio streaming instead the original http one an other example I had: for this stream http://64.71.79.181:5238/stream I created: https://gist.github.com/timguy/cc67df71e36e0698cf81084ce9f3488b and used the raw link in my skill: https://gist.githubusercontent.com/timguy/cc67df71e36e0698cf81084ce9f3488b/raw/37c995873528f85c311293dd9f3136657e98c730/radioroberto.m3u


