本文翻译自:https://docs.live2d.com/cubism-sdk-tutorials/unity-material-customization/
译者注:注意!这并不是一篇严谨的翻译,本人并不是翻译行业从业者,也根本不会日文。官网的中文翻译会连带代码一起翻译,而且还不如机翻日文,官网的英语翻译版本有的语法很奇怪,看起来也是机翻。本文主要来自日文机翻,然后再结合实际开发经验调整到通顺,修改不该翻译的东西并润色。
[最后更新日期: 2017/09/19] 译者注:这是这个日文原文的更新日期
by Traitam
首先,在 Unity 上,我们将说明如何在 Unity 上使用 Cubism 模型。
之后,使用模型导入功能导入示例中的模型
这是关于如何在 Unity 编辑器上显示 Cubism 模型的说明。
在 UnityEditor 上,通常使用名为*Live2D/Cubism/Materials/Unlit*.mat*的材料进行显示
在导入模型时,会将材料应用于模型。
在 Unity 上显示 Cubism 模型时,我们通常使用 Live2D/Cubism/Materials/Unlit*.mat 下的材料。
预期效果应该类似于 CubismEditor上的显示。
将材料应用于 Cubism 模型是在「将模型导入Unity Editor 」时完成的。
因此,将模型拖放到 Unity Editor 中时,将应用显示所需的材料。
将 Cubism 模型导入 Unity 时,将调用 CubismImporter.cs 中的 OnPickMaterial。
在这里需要利用 CubismBuiltinPickers.MaterialPicker 。
在此方法中,将材料应用于 Cubism 模型中的每个 Drawable。
之后,将对其进行预制,就可以在 Unity Editor 上自由处理。
如果要从脚本中自定义材料,则 OnPickMaterial 是切入点,因此您可以通过自己创建单独的方法并在 OnPickMaterial 调用来自定义材料。
接下来,作为示例,从脚本中自定义 Drawable 的材料,以便将其显示出来。
这是一个在导入模型时通过脚本更改指定 Drawable 的材料的示例。
创建要指定的材料,并引用指定的Drawable的名称。
如果是被指定要自定义材料的 Drawable,则使用指定的材料,其余则不指定并使用普通材料。
编写进行上述处理的代码并将其分配给 OnPickMaterial 方法。
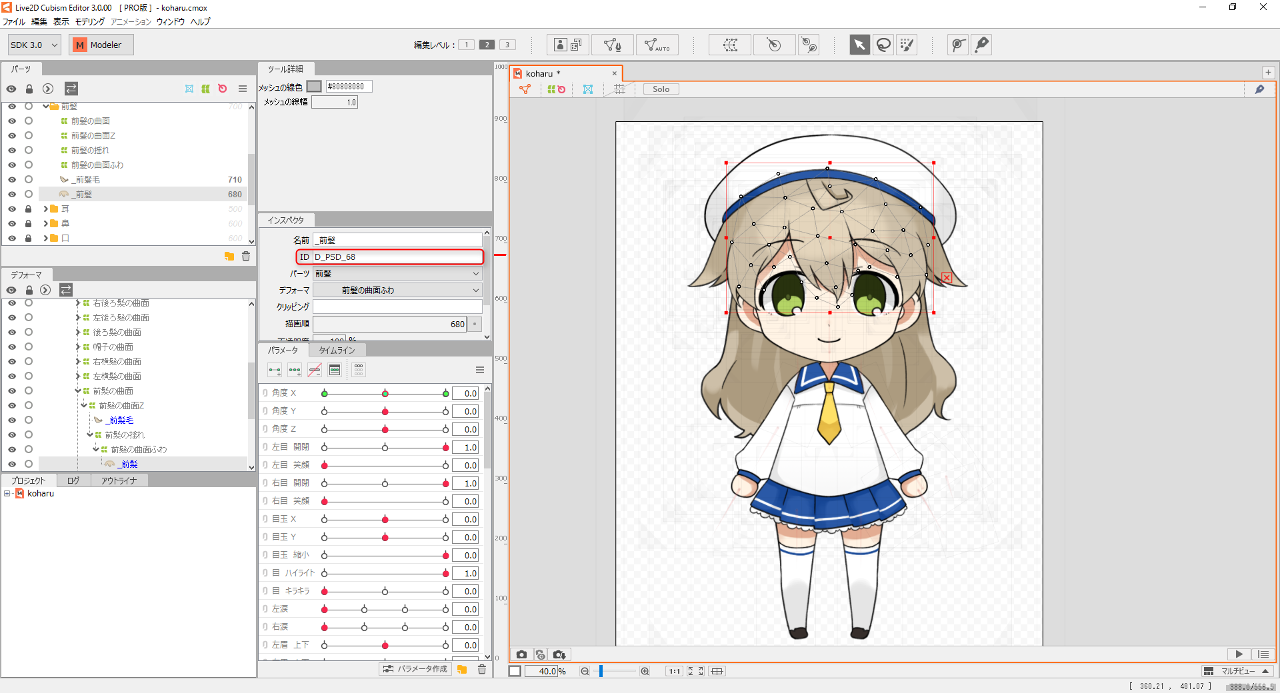
在 Unity 编辑器上指定的 Drawable 名称指定可以在 CubismEditor 上确认的艺术网格的ID。
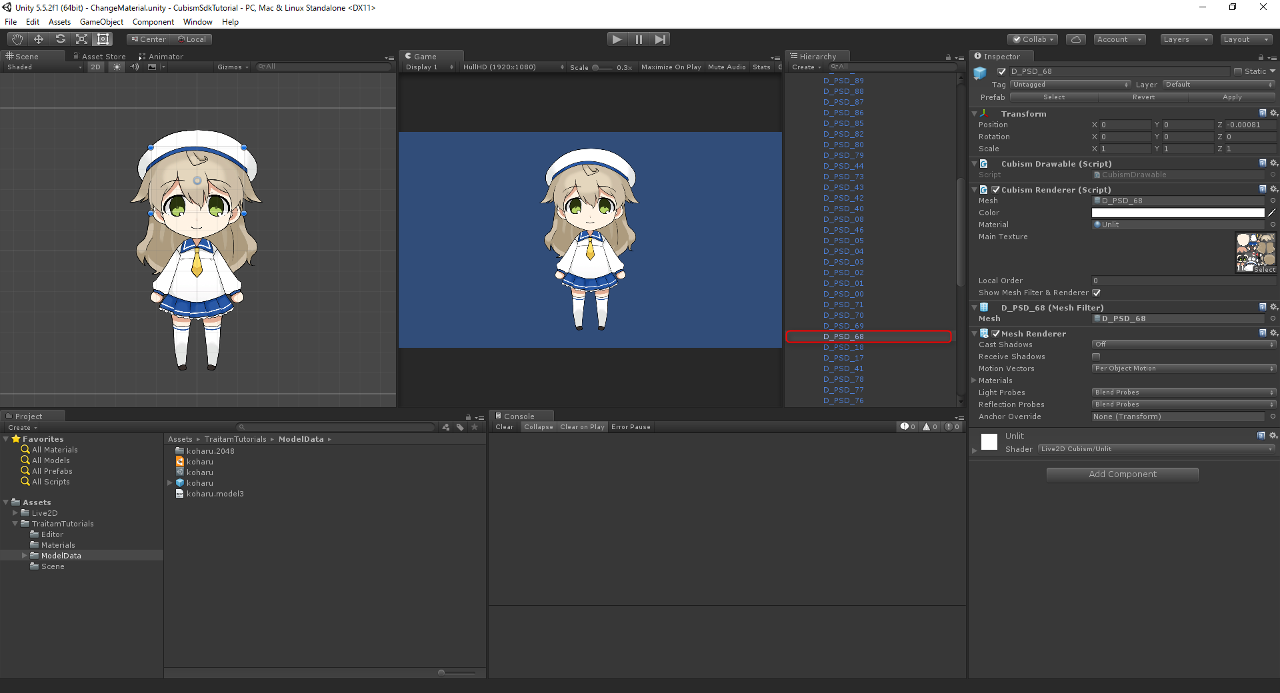
在 UnityEditor 中 Drawable 的名字是 CubismEditor 中艺术网格的 ID 。
UnityEditor 的 Drawable 名称与 CubismEditor 中的美术网格 ID 相关联,因此无法在 UnityEditor 中进行更改。
因此,如果要更改 Drawable 的名称,您需要在 Cubism Editor 上更改 ID 的名称。
这次,我们将更改整个头发的颜色,因此将使用头发的 Drawable。
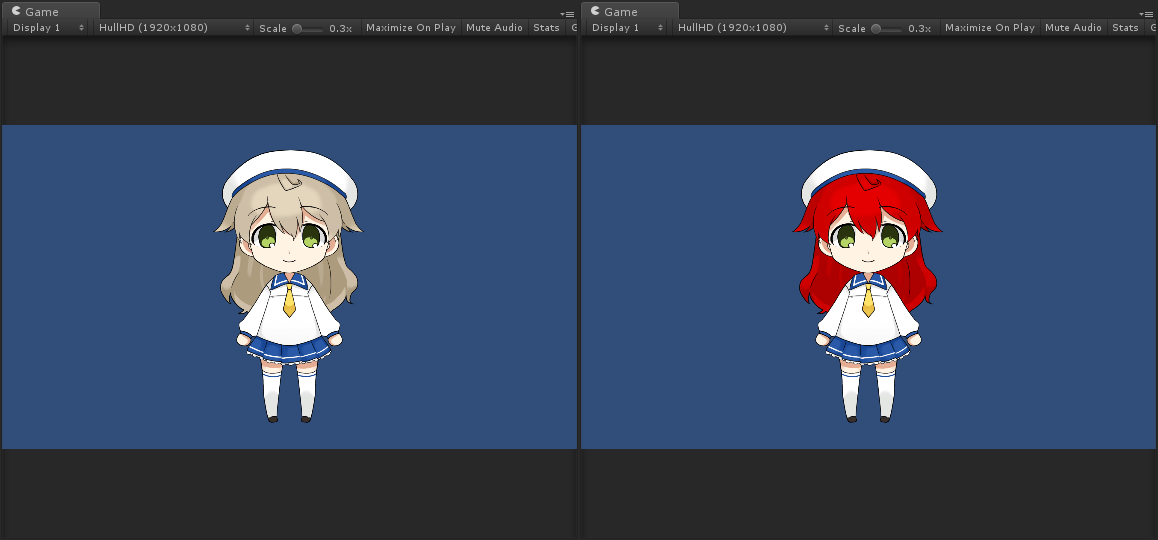
将材料应用到头发的 Drawable 时,会应用自定义材料。
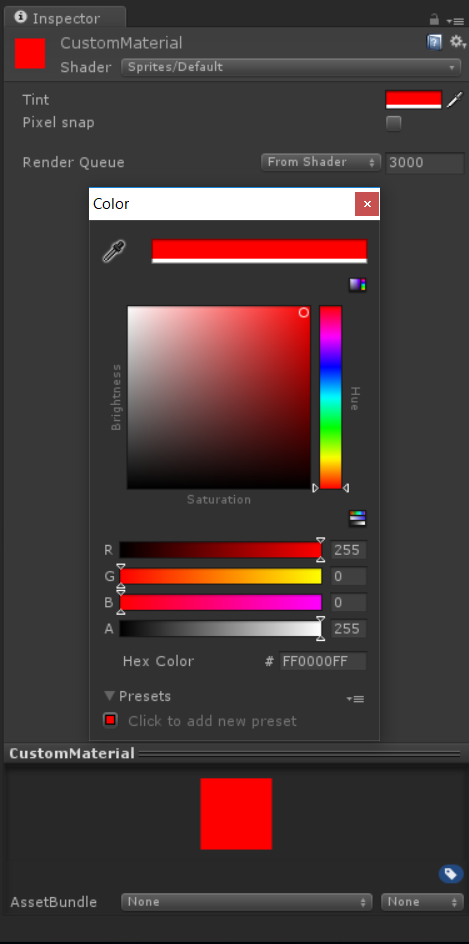
接下来,在 Unity Editor上创建 Material 文件夹并创建新材料。
我们将此材料称为 CustomMaterial。将此材料的着色器更改为 Sprites/Default。
在这里,为了清晰起见,我们将更改 Tint 的颜色。在这里,它是红色的。
最后,创建一个 Editor 文件夹,并在该文件夹中创建一个新的 C#脚本。
在这里,名称写 MaterialCustomizer 。
在脚本中,引用指定的 Drawable,如果它是同名的 Drawable,则应用先前创建的材质。
对于其他 Drawable,则使用常规材质 (Live2D/Cubism/Materials/Unlit*.mat)。
下面的代码包括该功能。
using UnityEditor;
using UnityEngine;
using Live2D.Cubism.Core;
using Live2D.Cubism.Framework.Json;
using Live2D.Cubism.Editor.Importers;
using System.Linq;

namespace TraitamTutorials
{
    /// <summary>
    /// Customizes materials of Cubism models from code.
    /// 通过代码自定义 Cubism 模型的材料。
    /// </summary>
    public static class MaterialCustomizer
    {
        /// <summary>
        /// IDs of drawables to customize.
        /// 要被自定义 drawables 的 IDs
        /// </summary>
        private static string[] _drawablesToCustomize = { "D_PSD_01" ,"D_PSD_02" ,"D_PSD_03" ,"D_PSD_04" ,"D_PSD_05" ,"D_PSD_68" ,"D_PSD_69" ,"D_PSD_70" ,"D_PSD_71"};

        /// <summary>
        /// Custom material to assign.
        /// 要被分配的自定义材料。
        /// </summary>
        private static Material _customMaterial;

        /// <summary>
        /// Make custom material available.
        /// 使自定义材料可用。
        /// And select <see cref="Material"/> as custom material or model default material.
        /// 然后选择 <see cref="Material"/> 作为自定义材质或模型默认材质。
        /// </summary>
        [InitializeOnLoadMethod]
        private static void RegisterMaterialInitialize()
        {
            _customMaterial = AssetDatabase.LoadAssetAtPath<Material>("Assets/TraitamTutorials/Materials/CustomMaterial.mat");
            CubismImporter.OnPickMaterial = CustomizeMaterial;
        }

        /// <summary>
        /// When <see cref="CubismDrawable.name"/> and <see cref="_drawablesToCustomize"/> the same, use custom material.
        /// 当  <see cref="CubismDrawable.name"/> 和 <see cref="_drawablesToCustomize"/> 相同时,使用自定义的材质
        /// Otherwise, use model default material.
        /// 其他情况下使用模型默认材质
        /// </summary>
        /// <param name="sender">Event source.</param>
        /// <param name="sender">事件发起者</param>
        /// <param name="drawable">Drawable to pick for.</param>
        /// <param name="drawable">要被自定义的 Drawable</param>
        /// <returns><see cref="Material"/> for using the model.</returns>
        /// <returns><see cref="Material"/> 要使用的模型</returns>
        private static Material CustomizeMaterial(CubismModel3Json sender, CubismDrawable drawable)
        {
            //use custom material.
            if (_drawablesToCustomize.Any(n => n == drawable.Id))
            {
                return _customMaterial;
            }


            //use default material.
            //使用默认材质
            return CubismBuiltinPickers.MaterialPicker(sender, drawable);
        }
    }
}
现在,您可以在导入模型时为指定的 Drawable 自定义材质。


