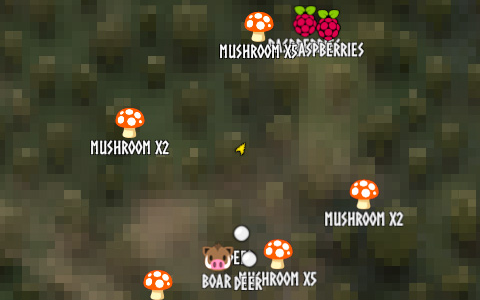
In order for Automatics to recognize the custom icon pack, the directory must first be placed in /Valheim/BepInEx/plugins; If your icon pack is named AWESOME-ICON-PACK, the directory structure of the required files is as follows.
- /Valheim/BepInEx/plugins/AWESOME-ICON-PACK
-
- automatics-child-mod
- Textures
-
- custom-map-icon.json
- ICON_1.png
- ICON_2.png, ICON_3.png, …
Next, let’s look at the details of each file.
- automatics-child-mod
-
This file is required for Automatics to recognize the icon pack and must be placed directly under AWESOME-ICON-PACK. The extension must not be present, and zero byte files are fine.
- Textures
-
Folder where custom-map-icon.json and image files are placed.
- custom-map-icon.json
-
This file is used to define custom icons and should be placed directly under the Textures. The format is described in detail in Format of custom-map-icon.json.
- ICON_X.png
-
An image file of the icon. PNG files with alpha channel are preferred. Prepare as many as you need.
See custom-map-icon.json below. The first item applies the boar.png icon only to the level 1 Boar. Nametag is hidden and the icon is displayed at a 2x scale, as specified in options; The next item applies the deer.png icon to all levels of Deer. Since options is omitted, the nametag is visible, and the icon is displayed at 1x scale.
[
  {
    "target": {
      "name": "$enemy_boar",
      "metadata": {
        "level": 1
      }
    },
    "sprite": {
      "file": "boar.png",
      "width": 32,
      "height": 32
    },
    "options": {
      "hideNameTag": true,
      "iconScaleLargeMap": 2,
      "iconScaleSmallMap": 2
    }
  },
  {
    "target": {
      "prefabName": "Deer"
    },
    "sprite": {
      "file": "deer.png",
      "width": 32,
      "height": 32
    }
  }
]
Now let’s look at the details of each item.
- target
-
Describes information about the target to which the icon is applied.
- name
-
Specify a display name such as
Boaror an internal name such as$enemy_boar; See the Matching by "Display name" and "Internal name" section for the difference between matching by display name and internal name. - prefabName
-
Specify Unity prefab names such as
Greydwarf_EliteorGreydwarf_Shaman. It can be specified together with the "name" field. - metadata
-
Describe if you want to further narrow down the target by information other than a name. If omitted, the icon will be applied to all targets matching the name.
- level
-
By setting up this field, it is possible to assign a different icon for each level of animal or monster. Note that the unstarred state is level 1. One star is level 2 and two stars are level 3.
- sprite
-
Describes information about the image file.
- file
-
Describes the path to the image file. This path is handled as relative to the Textures folder. In other words, if icon1.png is Textures/icon1.png, the file Textures/sub/icon2.png will be loaded; if sub/icon2.png, the file Textures/sub/icon2.png will be loaded.
- width
-
Width of the image file. Please describe the size including the transparent area.
- height
-
Height of the image file. Please describe the size including the transparent area.
- options
-
Options to control pins in Minimap. You can omit the options if you don’t need it.
- hideNameTag
-
When true, the name tag on the map pin will be hidden.
- iconScaleLargeMap
-
Specify the scale of the icon on the map when zoomed in. 0.0 or higher enables it.
- iconScaleSmallMap
-
Specify the scale of the icon on the minimap. 0.0 or higher enables it.
I don’t feel I have explained it very well, so I have prepared a sample file. Please click here to check the structure of the file that actually works. You can also download the zip file and check the operation on your PC.
|
Note
|
Zip is not guaranteed to work with mod loaders other than Vortex; if you are using a mod loader other than Vortex, please manually place the files in the Zip into the appropriate directory. |
