本文由 简悦 SimpRead 转码, 原文地址 austinlasseter.medium.com
This is a step-by-step guide to deploying your first Python app. It’s intended for a complete beginne......
This is a step-by-step guide to deploying your first Python app. It’s intended for a complete beginner.
Start out on github — a development platform for sharing and developing code. After signing up for a free github account, fork my repo — it will have all the files you need to get started. It’s easy: at the top right, click on the fork button (note that in the screenshot it’s greyed out for me because I can’t fork my own repo):

After a brief wait, you should now see the same repo but under your own name, not mine. While github makes sure to provide a reference to the source author of forked code, this is now yours to play with and develop as you please!
A quick tour of the necessary files in here:
app.pyis the most important file. It contains all the code to personalize and get creative with the app, and most of your development work will happen here. Note that it must be named exactly like this if you want to deploy on Heroku — nothing other thanapp.pywill work!requirements.txtcontains a list of all the Python libraries which Heroku will need to install in order to run your app. You’ll need to update this file from time to time, as requirements may change.runtime.txttells Heroku which version of Python to install. You’ll need to update this, too.Procfilelinksapp.pyto thegunicornlibrary in yourrequirements.txt. You should never change the contents of this file.- The
assetsfolder is where Heroku will look for any images or other secondary files to be used byapp.py. - The
README.mdfile is an optional description of your project. - The
.gitignoreis an optional housecleaning file that prevents you from showing the dirty laundry to your guests. - You can read more about all of these files and their purpose here.
Okay, we’ll come back to github in a moment. First let’s go to Heroku, a free platform for deploying code. After signing up for an account, create your first app like this:
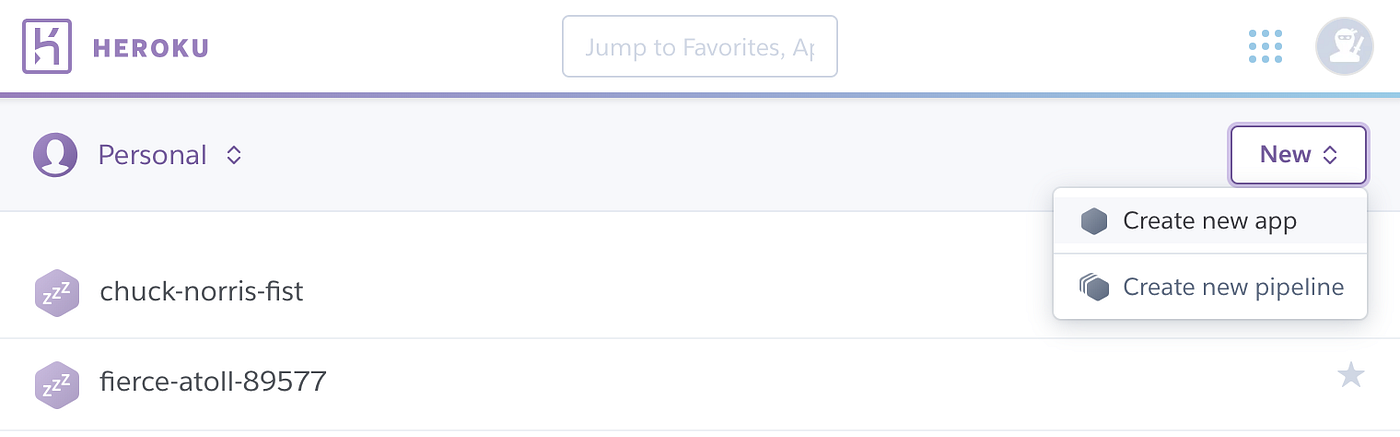
Give it a memorable name and create:

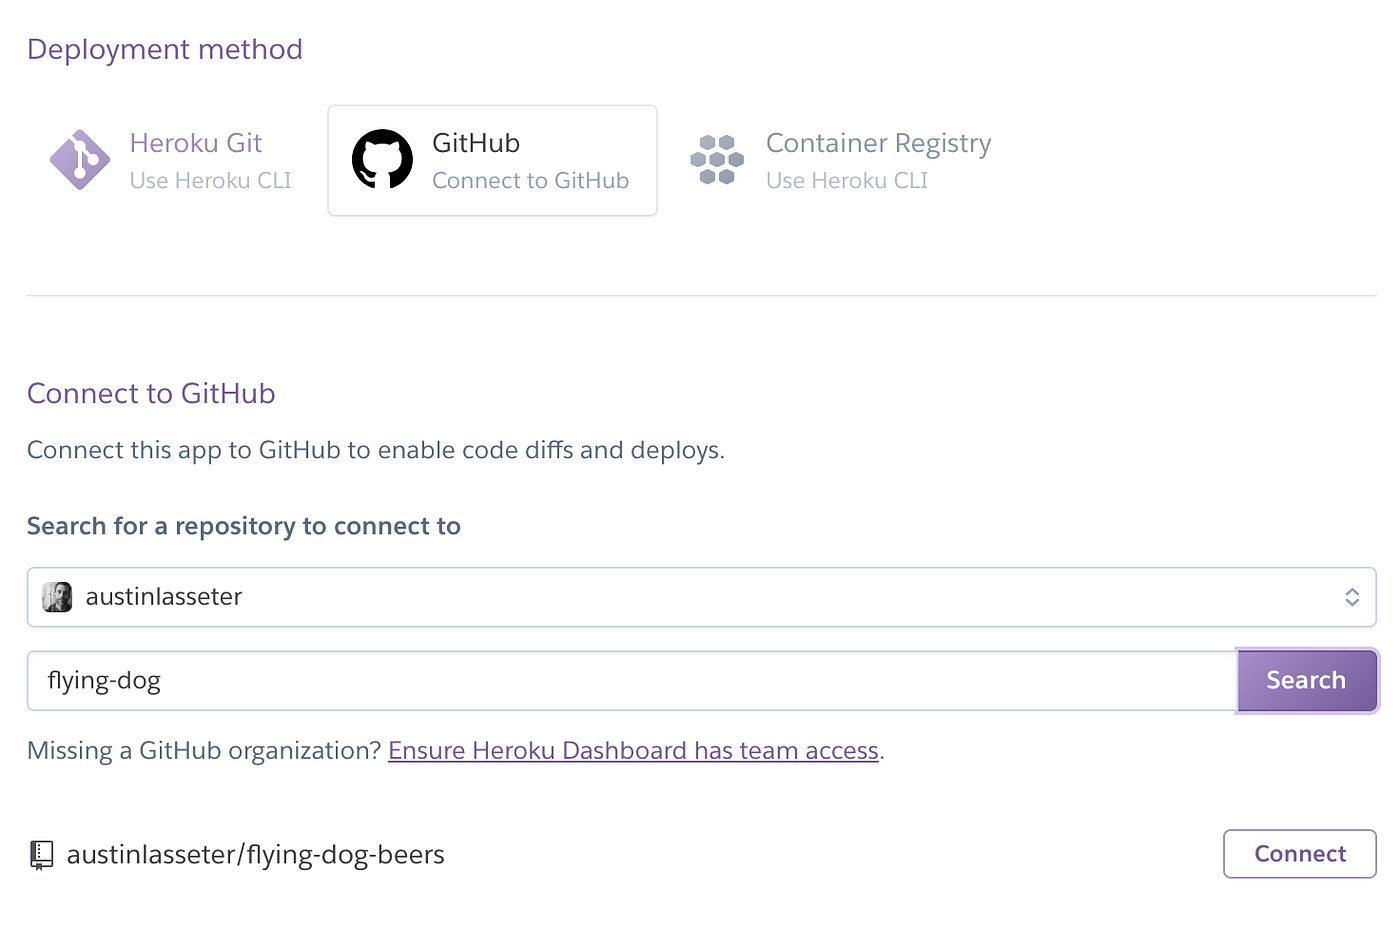
Select github as your deployment method, and then search for your repo (note that it will appear under your name, not mine, since you already forked it!). Go ahead and pick “connect”.
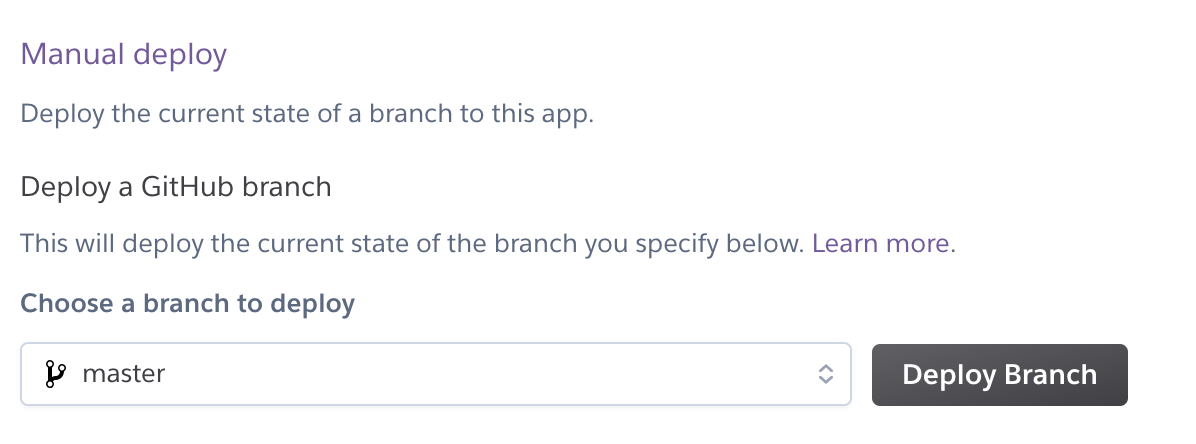
Heroku will offer you the option to enable automatic deploys, but just skip that for now and select manual deploy, “deploy branch”.
Heroku will display a status window showing the steps in the deployment process. This will take a couple of minutes.
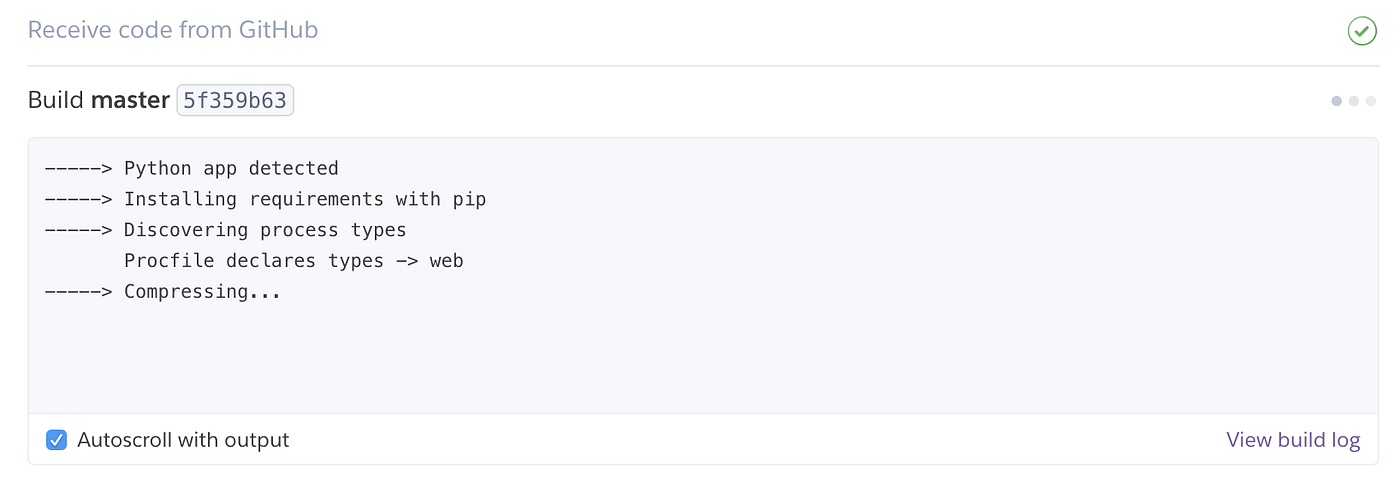
When it’s finished, Heroku will give you the option to view your app.

Your app should now be running smoothly on Heroku’s web service:

Now to modify the appearance of the app, go to github and click onapp.py as follows:

You’ll notice there’s a small pencil icon at the right hand side, which will allow you to edit the file.

Let’s take a look:

As we can see from the import statements, we’re using a Python library called Dash by Plot.ly. Other popular libraries for deploying Python apps are Flask and Bokeh. Most of the code in this file you’ll want to leave untouched until you become more familiar with Dash, but lines 7–19 should be pretty safe for you to tinker with. This is where we’re defining the data (bitterness and alcohol for four beers from Flying Dog Brewery). For example, we have a Python variable named beer whose value is a list — which is why the values are written inside square brackets. Below that, inside bitterness (which is known in Python as an instance of a Class object) we see four more Python variables: x, y, name, and marker. (Note: the screenshots below probably have a different color scheme from what you’re seeing on Github, but the code is the same).

The first three are lists, like beer. The last one, marker, is a dictionary — which is why its values are inside curly brackets.
Try changing the color from lightblueto darkgreen. Try replacing one of the beers, too — for example, you might replace the Chesapeake stout with blood orange ale, which has an ABV of 7.0 and an IBU of 40. Save the app.py file when you’re done. Make sure that you update the y values in both the bitterness and the alcohol class objects.

When you’re finished editing, write a short message to yourself (describing what you did) and commit your changes.

Back on the main page of the repo, you should now see your commit message appearing by the name of the app.py file:

Return to Heroku, click on your app, and select “deploy”:

Scroll to the bottom of the page, and under “Manual Deploy”, select “Deploy branch”:

Wait for a minute, and then select “View”. Your updates should now be visible on your app. You can view mine here. Congratulations! You’ve just built and updated your first Python app.