本文章来源于:https://github.com/Zeb-D/my-review ,请star 强力支持,你的支持,就是我的动力。
[TOC]
自从看了AQS相关的类后,特别看了ReentrantReadWriteLock源码后,都感受到自己在并发编程越发迷茫,回归正传吧,看了ReentrantReadWriteLock源码给我的感受:使得多个读线程同时持有读锁(只要写锁未被占用),而写锁是独占的。但是,读写锁如果使用不当,很容易产生“饥饿”问题。。。
这个时候StampedLock的出现就是解决了ReentrantReadWriteLock在多线程下争夺读写锁的饥饿问题
比如在读线程非常多,写线程很少的情况下,很容易导致写线程“饥饿”,虽然使用“公平”策略可以一定程度上缓解这个问题,但是“公平”策略是以牺牲系统吞吐量为代价的。
StampedLock类,在JDK1.8时引入,是对读写锁ReentrantReadWriteLock的增强,该类提供了一些功能,优化了读锁、写锁的访问,同时使读写锁之间可以互相转换,更细粒度控制并发。
首先明确下,该类的设计初衷是作为一个内部工具类,用于辅助开发其它线程安全组件,用得好,该类可以提升系统性能,用不好,容易产生死锁和其它莫名其妙的问题。
StampedLock的主要特点概括一下,有以下几点:
- 所有获取锁的方法,都返回一个邮戳(Stamp),Stamp为0表示获取失败,其余都表示成功;
- 所有释放锁的方法,都需要一个邮戳(Stamp),这个Stamp必须是和成功获取锁时得到的Stamp一致;
- StampedLock是不可重入的;(如果一个线程已经持有了写锁,再去获取写锁的话就会造成死锁)
- StampedLock有三种访问模式: ①Reading(读模式):功能和ReentrantReadWriteLock的读锁类似 ②Writing(写模式):功能和ReentrantReadWriteLock的写锁类似 ③Optimistic reading(乐观读模式):这是一种优化的读模式。
- StampedLock支持读锁和写锁的相互转换 我们知道RRW中,当线程获取到写锁后,可以降级为读锁,但是读锁是不能直接升级为写锁的。 StampedLock提供了读锁和写锁相互转换的功能,使得该类支持更多的应用场景。
- 无论写锁还是读锁,都不支持Conditon等待
我们知道,在ReentrantReadWriteLock中,当读锁被使用时,如果有线程尝试获取写锁,该写线程会阻塞。 但是,在Optimistic reading中,即使读线程获取到了读锁,写线程尝试获取写锁也不会阻塞,这相当于对读模式的优化,但是可能会导致数据不一致的问题。所以,当使用Optimistic reading获取到读锁时,必须对获取结果进行校验。
我从Oracle官方 看到了一个例子
class Point {
    private double x, y;
    private final StampedLock sl = new StampedLock();

    void move(double deltaX, double deltaY) {
        long stamp = sl.writeLock();    //涉及对共享资源的修改,使用写锁-独占操作
        try {
            x += deltaX;
            y += deltaY;
        } finally {
            sl.unlockWrite(stamp);
        }
    }

    /**
     * 使用乐观读锁访问共享资源
     * 注意:乐观读锁在保证数据一致性上需要拷贝一份要操作的变量到方法栈,并且在操作数据时候可能其他写线程已经修改了数据,
     * 而我们操作的是方法栈里面的数据,也就是一个快照,所以最多返回的不是最新的数据,但是一致性还是得到保障的。
     *
     * @return
     */
    double distanceFromOrigin() {
        long stamp = sl.tryOptimisticRead();    // 使用乐观读锁
        double currentX = x, currentY = y;      // 拷贝共享资源到本地方法栈中
        if (!sl.validate(stamp)) {              // 如果有写锁被占用,可能造成数据不一致,所以要切换到普通读锁模式
            stamp = sl.readLock();
            try {
                currentX = x;
                currentY = y;
            } finally {
                sl.unlockRead(stamp);
            }
        }
        return Math.sqrt(currentX * currentX + currentY * currentY);
    }

    void moveIfAtOrigin(double newX, double newY) { // upgrade
        // Could instead start with optimistic, not read mode
        long stamp = sl.readLock();
        try {
            while (x == 0.0 && y == 0.0) {
                long ws = sl.tryConvertToWriteLock(stamp);  //读锁转换为写锁
                if (ws != 0L) {
                    stamp = ws;
                    x = newX;
                    y = newY;
                    break;
                } else {
                    sl.unlockRead(stamp);
                    stamp = sl.writeLock();
                }
            }
        } finally {
            sl.unlock(stamp);
        }
    }
}
当前为代码写了注释,建议看看,还是非常有意思的:
distanceFromOrigin方法,这个方法中使用了“Optimistic reading”乐观读锁,使得读写可以并发执行,但是“Optimistic reading”的使用必须遵循以下模式:
long stamp = lock.tryOptimisticRead();  // 非阻塞获取版本信息
copyVaraibale2ThreadMemory();           // 拷贝变量到线程本地堆栈
if(!lock.validate(stamp)){              // 校验
    long stamp = lock.readLock();       // 获取读锁
    try {
        copyVaraibale2ThreadMemory();   // 拷贝变量到线程本地堆栈
     } finally {
       lock.unlock(stamp);              // 释放悲观锁
    }

}
useThreadMemoryVarables(); // 使用线程本地堆栈里面的数据进行操作看代码第一件事情,就是看它的内部属性,方法只不过是操作这些属性,这个时候你可能得发挥出 属性是静态的,方法是动态,那么你要如何去 动静结合 去看源码哈!
常规套路,先观察StampedLock 内部属性,再通过多个线程去执行相关代码,这也是模拟我们在生产环境可能会去执行的节奏,总之,业务上的场景 来增加方法的连续性,换种方式去分析工作原理。
StampedLock虽然不像其它锁一样定义了内部类来实现AQS框架,但是StampedLock的基本实现思路还是利用CLH队列进行线程的管理,通过同步状态值来表示锁的状态和类型。
StampedLock内部定义了很多常量,定义这些常量的根本目的还是和ReentrantReadWriteLock一样,对同步状态值按位切分,以通过位运算对State进行操作:
对于StampedLock来说,写锁被占用的标志是第8位为1,读锁使用0-7位,正常情况下读锁数目为1-126,超过126时,使用一个名为
readerOverflow的int整型保存超出数。
首先看下代表资源有关的常量
/** The number of bits to use for reader count before overflowing */
private static final int LG_READERS = 7;
// Values for lock state and stamp operations
private static final long RUNIT = 1L;               //一单位读锁          0000 0001
private static final long WBIT  = 1L << LG_READERS; //写锁标识位			 1000 0000
private static final long RBITS = WBIT - 1L;        //读锁标识位 		 0111 1111
private static final long RFULL = RBITS - 1L;       //读锁的最大数量  	    0111 1110
private static final long ABITS = RBITS | WBIT;     //用于获取读写状态     1111 1111
private static final long SBITS = ~RBITS; // note overlap with ABITS
// Initial value for lock state; avoid failure value zero
private static final long ORIGIN = WBIT << 1; //初始化资源值state
/** Lock sequence/state */
private transient volatile long state; //同步状态,写锁第8位(为1表示占用),读锁使用前7位(1-126,超过则使用readerOverflow去排队)
/** extra reader count when state read count saturated */
private transient int readerOverflow;//读锁超过了前7位后,则使用int 记录部分常量的比特位表示如下:

另外,StampedLock相比ReentrantReadWriteLock,对多核CPU进行了优化,可以看到,当CPU核数超过1时,会有一些自旋操作:
/** Number of processors, for spin control */
private static final int NCPU = Runtime.getRuntime().availableProcessors();

/** Maximum number of retries before enqueuing on acquisition */
private static final int SPINS = (NCPU > 1) ? 1 << 6 : 0; //自旋阈值,失败加入等待队列

/** Maximum number of retries before blocking at head on acquisition */
private static final int HEAD_SPINS = (NCPU > 1) ? 1 << 10 : 0;//等待队列的头节点,自旋阈值,失败则阻塞

/** Maximum number of retries before re-blocking */
private static final int MAX_HEAD_SPINS = (NCPU > 1) ? 1 << 16 : 0; //再次进入阻塞之前的重试次数假设现在有五个线程:ThreadA、ThreadB、ThreadC、ThreadD、ThreadE。操作如下:
ThreadA调用writeLock, 获取写锁ThreadB调用readLock, 获取读锁ThreadC调用readLock, 获取读锁ThreadD调用writeLock, 获取写锁ThreadE调用readLock, 获取读锁
我们从这四个线程去模拟一些操作,然后分别去执行writeLock、readLock,这些底层发生的原理是什么个情况:
StampedLock的构造器很简单,构造时设置下同步状态值:
/**
 * Creates a new lock, initially in unlocked state.
 */
public StampedLock() {
    state = ORIGIN;
}
另外,StamedLock提供了三类视图:
// views
transient ReadLockView readLockView;
transient WriteLockView writeLockView;
transient ReadWriteLockView readWriteLockView;
这些视图其实是对StamedLock方法的封装,便于习惯了ReentrantReadWriteLock的用户使用(具体实现还是在StamedLock,执行是它的方法),先看个ReadLockView长眼吧:
// view classes
final class ReadLockView implements Lock {
    public void lock() { readLock(); }
    public void lockInterruptibly() throws InterruptedException {
        readLockInterruptibly();
    }
    public boolean tryLock() { return tryReadLock() != 0L; }
    public boolean tryLock(long time, TimeUnit unit)
        throws InterruptedException {
        return tryReadLock(time, unit) != 0L;
    }
    public void unlock() { unstampedUnlockRead(); }
    public Condition newCondition() {
        throw new UnsupportedOperationException();
    }
}

final class WriteLockView implements Lock {
    public void lock() { writeLock(); }
    public void lockInterruptibly() throws InterruptedException {
        writeLockInterruptibly();
    }
    public boolean tryLock() { return tryWriteLock() != 0L; }
    public boolean tryLock(long time, TimeUnit unit)
        throws InterruptedException {
        return tryWriteLock(time, unit) != 0L;
    }
    public void unlock() { unstampedUnlockWrite(); }
    public Condition newCondition() {
        throw new UnsupportedOperationException();
    }
}/**
* 获取写锁,如果后期失败,则阻塞
* 注意:这里不响应中断
* @return 返回非0 表示成功
*/
public long writeLock() {
long s, next; // bypass acquireWrite in fully unlocked case only
return ((((s = state) & ABITS) == 0L &&
U.compareAndSwapLong(this, STATE, s, next = s + WBIT)) ?
next : acquireWrite(false, 0L));
}StampedLock中大量运用了位运算,这里(s = state) & ABITS == 0L 表示读锁和写锁都未被使用,这里写锁可以立即获取成功,然后CAS操作更新同步状态值State。
操作完成后,等待队列的结构如下:
注意:StampedLock中,等待队列的结点要比AQS中简单些,仅仅三种状态。 0:初始状态 -1:等待中 1:取消
另外,结点的定义中有个cowait字段,该字段指向一个栈,用于保存读线程,这个后续会讲到。
// Special value from cancelled acquire methods so caller can throw IE
private static final long INTERRUPTED = 1L;
// Values for node status; order matters
private static final int WAITING = -1;
private static final int CANCELLED = 1;
// Modes for nodes (int not boolean to allow arithmetic)
private static final int RMODE = 0;
private static final int WMODE = 1;
/** Wait nodes */
static final class WNode {
volatile WNode prev;
volatile WNode next;
volatile WNode cowait; // list of linked readers
volatile Thread thread; // non-null while possibly parked
volatile int status; // 0, WAITING, or CANCELLED
final int mode; // RMODE or WMODE
WNode(int m, WNode p) { mode = m; prev = p; }
}
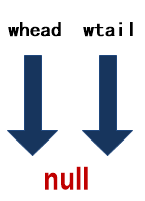
/** Head of CLH queue */
private transient volatile WNode whead;
/** Tail (last) of CLH queue */
private transient volatile WNode wtail;来看下readLock方法: 由于ThreadA此时持有写锁,所以ThreadB获取读锁失败,将调用acquireRead方法,加入等待队列:
/**
 * Non-exclusively acquires the lock, blocking if necessary
 * until available.
 *
 * @return a stamp that can be used to unlock or convert mode
 */
public long readLock() {
    long s = state, next;  // bypass acquireRead on common uncontended case
    return ((whead == wtail && (s & ABITS) < RFULL &&
             U.compareAndSwapLong(this, STATE, s, next = s + RUNIT)) ?
            next : acquireRead(false, 0L));
}acquireRead方法非常复杂,用到了大量自旋操作,大概看下,到后面记得看黑体,这些是关键处:
/**
 * See above for explanation.
 *
 * @param interruptible true if should check interrupts and if so
 * return INTERRUPTED
 * @param deadline if nonzero, the System.nanoTime value to timeout
 * at (and return zero)
 * @return next state, or INTERRUPTED
 */
private long acquireRead(boolean interruptible, long deadline) {
    WNode node = null, p;
    for (int spins = -1;;) {
        WNode h;
        if ((h = whead) == (p = wtail)) {
            for (long m, s, ns;;) {
                if ((m = (s = state) & ABITS) < RFULL ?
                    U.compareAndSwapLong(this, STATE, s, ns = s + RUNIT) :
                    (m < WBIT && (ns = tryIncReaderOverflow(s)) != 0L))
                    return ns;
                else if (m >= WBIT) {
                    if (spins > 0) {
                        if (LockSupport.nextSecondarySeed() >= 0)
                            --spins;
                    }
                    else {
                        if (spins == 0) {
                            WNode nh = whead, np = wtail;
                            if ((nh == h && np == p) || (h = nh) != (p = np))
                                break;
                        }
                        spins = SPINS;
                    }
                }
            }
        }
        if (p == null) { // initialize queue
            WNode hd = new WNode(WMODE, null);
            if (U.compareAndSwapObject(this, WHEAD, null, hd))
                wtail = hd;
        }
        else if (node == null)
            node = new WNode(RMODE, p);
        else if (h == p || p.mode != RMODE) {
            if (node.prev != p)
                node.prev = p;
            else if (U.compareAndSwapObject(this, WTAIL, p, node)) {
                p.next = node;
                break;
            }
        }
        else if (!U.compareAndSwapObject(p, WCOWAIT,
                                         node.cowait = p.cowait, node))
            node.cowait = null;
        else {
            for (;;) {
                WNode pp, c; Thread w;
                if ((h = whead) != null && (c = h.cowait) != null &&
                    U.compareAndSwapObject(h, WCOWAIT, c, c.cowait) &&
                    (w = c.thread) != null) // help release
                    U.unpark(w);
                if (h == (pp = p.prev) || h == p || pp == null) {
                    long m, s, ns;
                    do {
                        if ((m = (s = state) & ABITS) < RFULL ?
                            U.compareAndSwapLong(this, STATE, s,
                                                 ns = s + RUNIT) :
                            (m < WBIT &&
                             (ns = tryIncReaderOverflow(s)) != 0L))
                            return ns;
                    } while (m < WBIT);
                }
                if (whead == h && p.prev == pp) {
                    long time;
                    if (pp == null || h == p || p.status > 0) {
                        node = null; // throw away
                        break;
                    }
                    if (deadline == 0L)
                        time = 0L;
                    else if ((time = deadline - System.nanoTime()) <= 0L)
                        return cancelWaiter(node, p, false);
                    Thread wt = Thread.currentThread();
                    U.putObject(wt, PARKBLOCKER, this);
                    node.thread = wt;
                    if ((h != pp || (state & ABITS) == WBIT) &&
                        whead == h && p.prev == pp)
                        U.park(false, time);
                    node.thread = null;
                    U.putObject(wt, PARKBLOCKER, null);
                    if (interruptible && Thread.interrupted())
                        return cancelWaiter(node, p, true);
                }
            }
        }
    }

    for (int spins = -1;;) {
        WNode h, np, pp; int ps;
        if ((h = whead) == p) {
            if (spins < 0)
                spins = HEAD_SPINS;
            else if (spins < MAX_HEAD_SPINS)
                spins <<= 1;
            for (int k = spins;;) { // spin at head
                long m, s, ns;
                if ((m = (s = state) & ABITS) < RFULL ?
                    U.compareAndSwapLong(this, STATE, s, ns = s + RUNIT) :
                    (m < WBIT && (ns = tryIncReaderOverflow(s)) != 0L)) {
                    WNode c; Thread w;
                    whead = node;
                    node.prev = null;
                    while ((c = node.cowait) != null) {
                        if (U.compareAndSwapObject(node, WCOWAIT,
                                                   c, c.cowait) &&
                            (w = c.thread) != null)
                            U.unpark(w);
                    }
                    return ns;
                }
                else if (m >= WBIT &&
                         LockSupport.nextSecondarySeed() >= 0 && --k <= 0)
                    break;
            }
        }
        else if (h != null) {
            WNode c; Thread w;
            while ((c = h.cowait) != null) {
                if (U.compareAndSwapObject(h, WCOWAIT, c, c.cowait) &&
                    (w = c.thread) != null)
                    U.unpark(w);
            }
        }
        if (whead == h) {
            if ((np = node.prev) != p) {
                if (np != null)
                    (p = np).next = node;   // stale
            }
            else if ((ps = p.status) == 0)
                U.compareAndSwapInt(p, WSTATUS, 0, WAITING);
            else if (ps == CANCELLED) {
                if ((pp = p.prev) != null) {
                    node.prev = pp;
                    pp.next = node;
                }
            }
            else {
                long time;
                if (deadline == 0L)
                    time = 0L;
                else if ((time = deadline - System.nanoTime()) <= 0L)
                    return cancelWaiter(node, node, false);
                Thread wt = Thread.currentThread();
                U.putObject(wt, PARKBLOCKER, this);
                node.thread = wt;
                if (p.status < 0 &&
                    (p != h || (state & ABITS) == WBIT) &&
                    whead == h && node.prev == p)
                    U.park(false, time);
                node.thread = null;
                U.putObject(wt, PARKBLOCKER, null);
                if (interruptible && Thread.interrupted())
                    return cancelWaiter(node, node, true);
            }
        }
    }
}
我们来分析下这个方法,结合关键黑体处。 该方法会首先自旋的尝试获取读锁,获取成功后,就直接返回;否则,会将当前线程包装成一个读结点,插入到等待队列。 由于,目前等待队列还是空,所以ThreadB会初始化队列,然后将自身包装成一个读结点,插入队尾,然后在下面这个地方跳出自旋:
if (p == null) { // initialize queue
    WNode hd = new WNode(WMODE, null);
    if (U.compareAndSwapObject(this, WHEAD, null, hd))
        wtail = hd;
}
else if (node == null)
    node = new WNode(RMODE, p);
else if (h == p || p.mode != RMODE) {
    if (node.prev != p)
        node.prev = p;
    else if (U.compareAndSwapObject(this, WTAIL, p, node)) {
        p.next = node;
        break;
    }
}
此时,等待队列的结构如下:

跳出自旋后,ThreadB会继续向下执行,进入下一个自旋,在下一个自旋中,依然会再次尝试获取读锁,如果这次再获取不到,就会将前驱的等待状态置为WAITING, 表示我(当前线程)要去睡了(阻塞),到时记得叫醒我:
if (whead == h) {
    if ((np = node.prev) != p) {
        if (np != null)
            (p = np).next = node;   // stale
    }
    else if ((ps = p.status) == 0)
        U.compareAndSwapInt(p, WSTATUS, 0, WAITING);
    else if (ps == CANCELLED) {
        if ((pp = p.prev) != null) {
            node.prev = pp;
            pp.next = node;
        }
    }
最终, ThreadB进入阻塞状态:
else {
        long time;
        if (deadline == 0L)
            time = 0L;
        else if ((time = deadline - System.nanoTime()) <= 0L)
            return cancelWaiter(node, node, false);
        Thread wt = Thread.currentThread();
        U.putObject(wt, PARKBLOCKER, this);
        node.thread = wt;
        if (p.status < 0 &&
            (p != h || (state & ABITS) == WBIT) &&
            whead == h && node.prev == p)
            U.park(false, time);
        node.thread = null;
        U.putObject(wt, PARKBLOCKER, null);
        if (interruptible && Thread.interrupted())
            return cancelWaiter(node, node, true);
    }
}
U.park(false, time) ,就是这里阻塞了;
最终,等待队列的结构如下:

这个过程和ThreadB获取读锁一样,区别在于ThreadC被包装成结点加入等待队列后,是链接到ThreadB结点的栈指针中的。调用完下面这段代码后,ThreadC会链接到以Thread B为栈顶指针的栈中:
else if (!U.compareAndSwapObject(p, WCOWAIT,
                                 node.cowait = p.cowait, node))
    node.cowait = null;
else {
注意:读结点的cowait字段其实构成了一个栈,入栈的过程其实是个“头插法”插入单链表的过程。比如,再来个ThreadX读结点,则cowait链表结构为:
ThreadB - > ThreadX -> ThreadC。最终唤醒读结点时,将从栈顶开始。
然后会在下一次自旋中,阻塞当前读线程:
if (whead == h && p.prev == pp) {
    long time;
    if (pp == null || h == p || p.status > 0) {
        node = null; // throw away
        break;
    }
    if (deadline == 0L)
        time = 0L;
    else if ((time = deadline - System.nanoTime()) <= 0L)
        return cancelWaiter(node, p, false);
    Thread wt = Thread.currentThread();
    U.putObject(wt, PARKBLOCKER, this);
    node.thread = wt;
    if ((h != pp || (state & ABITS) == WBIT) &&
        whead == h && p.prev == pp)
        U.park(false, time);
    node.thread = null;
    U.putObject(wt, PARKBLOCKER, null);
    if (interruptible && Thread.interrupted())
        return cancelWaiter(node, p, true);
}
U.park(false, time); 阻塞开始了
最终,等待队列的结构如下:

可以看到,此时ThreadC结点并没有把它的前驱的等待状态置为-1,因为ThreadC是链接到栈中的,当写锁释放的时候,会从栈底元素开始,唤醒栈中所有读结点。
ThreadD调用writeLock方法获取写锁失败后(ThreadA依然占用着写锁),会调用acquireWrite方法,该方法整体逻辑和acquireRead差不多,首先自旋的尝试获取写锁,获取成功后,就直接返回;否则,会将当前线程包装成一个写结点,插入到等待队列。
/**
 * Exclusively acquires the lock, blocking if necessary
 * until available.
 *
 * @return a stamp that can be used to unlock or convert mode
 */
public long writeLock() {
    long s, next;  // bypass acquireWrite in fully unlocked case only
    return ((((s = state) & ABITS) == 0L &&
             U.compareAndSwapLong(this, STATE, s, next = s + WBIT)) ?
            next : acquireWrite(false, 0L));
}重点看下acquireWrite:
/**
 * 尝试自旋的获取写锁, 获取不到则阻塞线程
 *
 * @param interruptible true 表示检测中断, 如果线程被中断过, 则最终返回INTERRUPTED
 * @param deadline      如果非0, 则表示限时获取
 * @return 非0表示获取成功, INTERRUPTED表示中途被中断过
 */
private long acquireWrite(boolean interruptible, long deadline) {
    WNode node = null, p;

    /**
     * 自旋入队操作
     * 如果没有任何锁被占用, 则立即尝试获取写锁, 获取成功则返回.
     * 如果存在锁被使用, 则将当前线程包装成独占结点, 并插入等待队列尾部
     */
    for (int spins = -1; ; ) {
        long m, s, ns;
        if ((m = (s = state) & ABITS) == 0L) {      // 没有任何锁被占用
            if (U.compareAndSwapLong(this, STATE, s, ns = s + WBIT))    // 尝试立即获取写锁
                return ns;                                                 // 获取成功直接返回
        } else if (spins < 0)
            spins = (m == WBIT && wtail == whead) ? SPINS : 0;
        else if (spins > 0) {
            if (LockSupport.nextSecondarySeed() >= 0)
                --spins;
        } else if ((p = wtail) == null) {       // 队列为空, 则初始化队列, 构造队列的头结点
            WNode hd = new WNode(WMODE, null);
            if (U.compareAndSwapObject(this, WHEAD, null, hd))
                wtail = hd;
        } else if (node == null)               // 将当前线程包装成写结点
            node = new WNode(WMODE, p);
        else if (node.prev != p)
            node.prev = p;
        else if (U.compareAndSwapObject(this, WTAIL, p, node)) {    // 链接结点至队尾
            p.next = node;
            break;
        }
    }

    for (int spins = -1; ; ) {
        WNode h, np, pp;
        int ps;
        if ((h = whead) == p) {     // 如果当前结点是队首结点, 则立即尝试获取写锁
            if (spins < 0)
                spins = HEAD_SPINS;
            else if (spins < MAX_HEAD_SPINS)
                spins <<= 1;
            for (int k = spins; ; ) { // spin at head
                long s, ns;
                if (((s = state) & ABITS) == 0L) {      // 写锁未被占用
                    if (U.compareAndSwapLong(this, STATE, s,
                        ns = s + WBIT)) {               // CAS修改State: 占用写锁
                        // 将队首结点从队列移除
                        whead = node;
                        node.prev = null;
                        return ns;
                    }
                } else if (LockSupport.nextSecondarySeed() >= 0 &&
                    --k <= 0)
                    break;
            }
        } else if (h != null) {  // 唤醒头结点的栈中的所有读线程
            WNode c;
            Thread w;
            while ((c = h.cowait) != null) {
                if (U.compareAndSwapObject(h, WCOWAIT, c, c.cowait) && (w = c.thread) != null)
                    U.unpark(w);
            }
        }
        if (whead == h) {
            if ((np = node.prev) != p) {
                if (np != null)
                    (p = np).next = node;   // stale
            } else if ((ps = p.status) == 0)        // 将当前结点的前驱置为WAITING, 表示当前结点会进入阻塞, 前驱将来需要唤醒我
                U.compareAndSwapInt(p, WSTATUS, 0, WAITING);
            else if (ps == CANCELLED) {
                if ((pp = p.prev) != null) {
                    node.prev = pp;
                    pp.next = node;
                }
            } else {        // 阻塞当前调用线程
                long time;  // 0 argument to park means no timeout
                if (deadline == 0L)
                    time = 0L;
                else if ((time = deadline - System.nanoTime()) <= 0L)
                    return cancelWaiter(node, node, false);
                Thread wt = Thread.currentThread();
                U.putObject(wt, PARKBLOCKER, this);
                node.thread = wt;
                if (p.status < 0 && (p != h || (state & ABITS) != 0L) && whead == h && node.prev == p)
                    U.park(false, time);    // emulate LockSupport.park
                node.thread = null;
                U.putObject(wt, PARKBLOCKER, null);
                if (interruptible && Thread.interrupted())
                    return cancelWaiter(node, node, true);
            }
        }
    }
}acquireWrite中的第一个自旋操作,用于将线程包装成写结点,插入队尾,
插入完成后,队列结构如下:

然后,进入下一个自旋,并在下一个自旋中阻塞ThreadD,最终队列结构如下:

同样,由于写锁被ThreadA占用着,所以最终会调用acquireRead方法,在该方法的第一个自旋中,会将ThreadE加入等待队列:

注意,由于队尾结点是写结点,所以当前读结点会直接链接到队尾;如果队尾是读结点,则会链接到队尾读结点的cowait链中。
然后进入第二个自旋,阻塞ThreadE,最终队列结构如下:

上面都是都是获取读写锁的流程分析,那么我们继续看看释放的操作吧
通过CAS操作,修改State成功后,会调用release方法唤醒等待队列的队首结点:

release方法非常简单,先将头结点的等待状态置为0,表示即将唤醒后继结点,然后立即唤醒队首结点:

此时,等待队列的结构如下:

ThreadB被唤醒后,会从原阻塞处继续向下执行,然后开始下一次自旋:

第二次自旋时,ThreadB发现写锁未被占用,则成功获取到读锁,然后从栈顶(ThreadB的cowait指针指向的结点)开始唤醒栈中所有线程,
最后返回:

最终,等待队列的结构如下:

ThreadC被唤醒后,继续执行,并进入下一次自旋,下一次自旋时,会成功获取到读锁。

注意,此时ThreadB和ThreadC已经拿到了读锁,ThreadD(写线程)和ThreadE(读线程)依然阻塞中,原来ThreadC对应的结点是个孤立结点,会被GC回收。
最终,等待队列的结构如下:

ThreadB和ThreadC调用unlockRead方法释放读锁,CAS操作State将读锁数量减1:

注意,当读锁的数量变为0时才会调用release方法,唤醒队首结点:
队首结点(ThreadD写结点被唤醒),最终等待队列的结构如下:

ThreadD会从原阻塞处继续向下执行,并在下一次自旋中获取到写锁,然后返回:

最终,等待队列的结构如下:

ThreadD释放写锁的过程和(ThreadA调用unlockWrite释放写锁)完全相同,会调用unlockWrite唤醒队首结点(ThreadE)。

ThreadE被唤醒后会从原阻塞处继续向下执行,但由于ThreadE是个读结点,所以同时会唤醒cowait栈中的所有读结点,过程和(ThreadB被唤醒后继续向下执行)完全一样。最终,等待队列的结构如下:

至此,全部执行完成。
看的我头皮发麻,终于大概看完了,感觉还是不过瘾,看下官网怎么说的
参考Oracle官方文档:https://docs.oracle.com/javas...
类声明:

方法声明:

StampedLock的等待队列与RRW的CLH队列相比,有以下特点:
- 当入队一个线程时,如果队尾是读结点,不会直接链接到队尾,而是链接到该读结点的cowait链中,cowait链本质是一个栈;
- 当入队一个线程时,如果队尾是写结点,则直接链接到队尾;
- 唤醒线程的规则和AQS类似,都是首先唤醒队首结点。区别是StampedLock中,当唤醒的结点是读结点时,会唤醒该读结点的cowait链中的所有读结点(顺序和入栈顺序相反,也就是后进先出)。
另外,StampedLock使用时要特别小心,避免锁重入的操作,在使用乐观读锁时也需要遵循相应的调用模板,防止出现数据不一致的问题。