-
Notifications
You must be signed in to change notification settings - Fork 33
Debug Environment Setup
The setup instructions are enabling the build of the project and some debugging. Full debugging of the site requires additional settings.
For easy nesting of file in Visual Studio follow the changes describe in the following comment.
The tiles are external to this repository. Therefore, without additional setup, only Google Earth imagery can be seen. If needed, the Hiking and Biking tiles can be setup using external or local sources.
External map sources added as new layers, just as done by users of the site. For example:
| Map Source | Tiles Address |
|---|---|
| Hebrew Hiking | https://IsraelHiking.osm.org.il/Hebrew/Tiles/{z}/{x}/{y}.png |
| Hebrew MTB | https://IsraelHiking.osm.org.il/Hebrew/mtbTiles/{z}/{x}/{y}.png |
| English Hiking | https://IsraelHiking.osm.org.il/English/Tiles/{z}/{x}/{y}.png |
| English MTB | https://IsraelHiking.osm.org.il/English/mtbTiles/{z}/{x}/{y}.png |
| Marked Trails | https://IsraelHiking.osm.org.il/English/OverlayTiles/{z}/{x}/{y}.png |

Note: Some features of the site, such as changing the map language, are not available when using external tile sources.
Local tiles take about 35Gb of disk space! They are expected at IsrealHiking.Web\wwwroot\Hebrew, IsrealHiking.Web\wwwroot\English, and IsrealHiking.Web\wwwroot\OverlayTiles.
If the tiles exist in some other location, such as the Map project, it is advised to create a symbolic link to the existing location, rather than a physical copy. For example if Site and Map repositories are located under the same parent folder:
cd IsrealHiking.Web
mklink /D Hebrew ..\..\Map\Hebrew
mklink /D English ..\..\Map\English
mklink /D OverlayTiles ..\..\Map\Hebrew\OverlayTiles
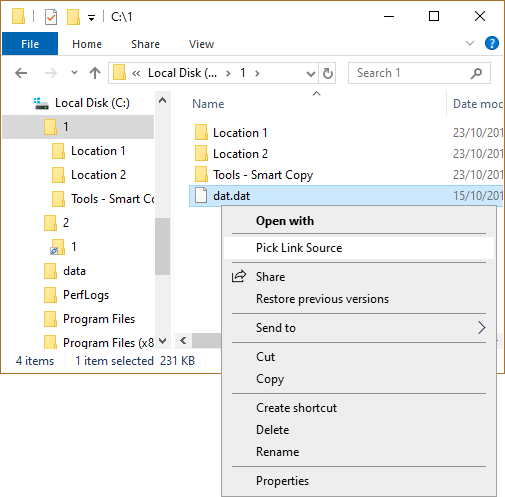
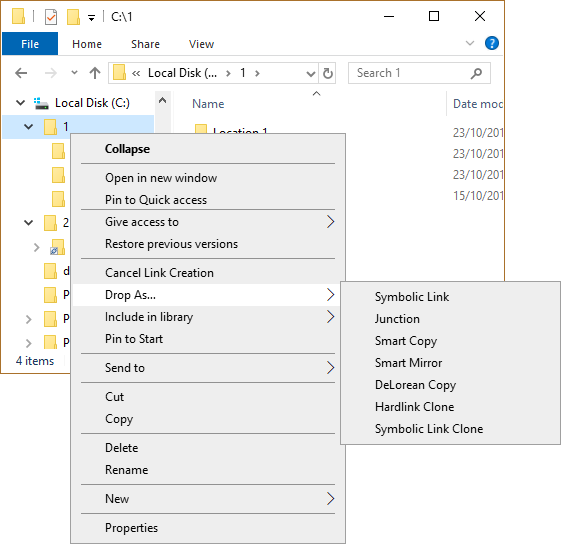
An alternative way to create the symbolic links is the excellent Link Shell Extension for Windows' File Explorer. It allows you to pick a directory and drop it as a symbolic link, just like copy-paste.
The extension also supports Hardlinks, Junctions, Volume Mountpoints, and several ways of using them for copying directory trees.
- Open Visual Studio
- Open
IsraelHiking.sln. You may use File → Recent Projects and Solutions - In Package Manager Console (at the bottom pane)
- Type the following commands at the
PM>prompt to start the search and routing servers. Alternatively, you may set them as a service
cd IsraelHiking.Web\bin\Debug\netcoreapp3.0 Start-Process -WindowStyle Minimized ElasticSearch\bin\Elasticsearch.bat Start-Process -WindowStyle Minimized GraphHopper\GraphHopper.cmd - Type the following commands at the
In order to regenerate the client code on every change use the following command inside IsraelHiking.Web folder:
npm run build -- --watch
This will keep the wwwroot typescript transpiled files up-to-date so you can change the code and instantly see the changes.
Do not run it inside Visual Studio as package manager can't stop this process and the terminal will become unusable.
- Press F5 to start the server. A browser window will be opened for you
- Surf to
localhost:<port>/swagger/and you should be presented with the API of the site- Expand the POST under Update
- Select the relevant configuration and click try it out!
- An error will be returned after a while but this is due to timeout, the update of the database will be running for about 20 minutes
- Once completed (can be seen in the logs under
IsraelHiking.Web\Debug\...\Logs\Site-<date>) the server is ready!
- To run UI tests use
npm run-script testinIsraelHiking.Webfolder - To run server tests use Visual Studio's Test Explorer window.

