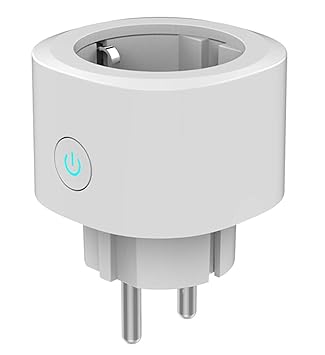
A library to control Tuya smart home devices via local TCP connection.
// Once you setup a device...
socket = new Woox_R4026()
{
    IP = "192.168.0.100",
    port = 6668,
    protocolVersion = "3.1",
    name = "Lounge Light Socket",
    devId = "<DEV_ID>",
    localKey = "<LOCAL_KEY>"
};

// ...you can simply set states via device wrapper.
socket.TurnOn();Based on Max Isom's reverse engineered TuyAPI library (and corresponding TuyaCore .NET port by Marcus Lum).
Tuya distributed devices are mostly controlled with an ESP8266 WiFi module with a specific firmware (see Module Overview). By default you can control the devices via a Tuya specific app, like Tuya Smart, Smart Life, Jinvoo Smart, Lohas Smart or Woox Home to name a few. Under the hood they are all various derivatives of the white labeled Tuya Smart Cloud Service (brands have separate containers for device data though).
Once you have registered your device with one of the apps, it will have a localKey assigned upon pairing. From then on the app encrypts device requests with that key.
This library just does the same. Once you have the corresponding device data it orchestrates the encryption and the communication protocol via local TCP connection.
After you registered you device in one of the consumer apps mentioned above, you can find device information details in there somewhere. It tells you the devId (Smart Life app calls it Virtual ID) and the Mac Address. Having the Mac Address you can look up the Local IP Address of the device in the DHCP Client List of your WiFi Router. Port number and Protocol Version is set to 6668 and 3.1 by default.
Getting the localKey can be tricky. Luckily Max Isom created a tool tuya-cli to extract device data from the network traffic. See Linking a Tuya Device for a detailed breakdown.
To obtain the dps schema (the device properties you can manage) I simply inspected the console output of the Android Smart Life app using adb logcat. It gives you a pretty detailed log when navigating to the Device Information view. For a Woox R4026 Smart Plug it shows this schema:
{
  "initialProps": {
    "devInfo": {

      ...

      "dps": {
        "1": true,
        "9": 0
      },

      ...

      "schema": {
        "1": {
          "type": "obj",
          "name": "开关1",
          "mode": "rw",
          "code": "switch_1",
          "id": "1",
          "schemaType": "bool",
          "iconname": "icon-dp_power2",
          "property": "{\"type\":\"bool\"}"
        },
        "9": {
          "type": "obj",
          "name": "开关1倒计时",
          "mode": "rw",
          "code": "countdown_1",
          "id": "9",
          "schemaType": "value",
          "iconname": "icon-dp_time2",
          "property": "{\"max\":86400,\"min\":0,\"scale\":0,\"step\":1,\"type\":\"value\",\"unit\":\"s\"}"
        }
      }

      ...

    }
  }
}
It shows a bool switch on ["dps"]["1"] and a countdown value (seconds) on ["dps"]["9"].
After you created a Device instance, you can send any JSON data to it using a Request object.
// Get device properties.
JObject response = await new Request().SendJSONObjectForCommandToDevice(
    new Dictionary<string, object>
    {
        ["gwId"] = socket.gwId,
        ["devId"] = socket.devId
    },
    Request.Command.GetStatus,
    socket);
A Woox R4026 Smart Plug responds with a status like below:
{
    "devId":"58205000840d8e46ebb0",
    "dps":
    {
        "1" : true,
        "9" : 0
    }
}
It gives you a status report according the very same control schema obtained above. To cut boilerplate, it is wrapped into a simple Get() method in Device class that gives you back only the dps data you care about.
// Get device properties.
Dictionary<string, object> dps = await socket.Get();
{
"1" : true,
"9" : 0
}
To set dps you can use Device.Set().
// Set device properties.
await socket.Set(
    new Dictionary<string, object>
    {
        ["1"] = false,
        ["2"] = 0
    }
);
Once you have a specific device, you can wrap up dps all communication into a Device subclass (see Woox_R4026.cs for more).
...
public async void TurnOff()
{
    await Set(
        new Dictionary<string, object>
        {
            ["1"] = false,
            ["2"] = 0
        }
    );
}

public async void TurnOn()
{
    await Set(
        new Dictionary<string, object>
        {
            ["1"] = true,
            ["2"] = 0
        }
    );
}
...
After that you can use pretty much without any boilerplate.
socket.TurnOn();Will probably implement retry attempts, also I'm planning to create the library for iOS.
Furthermore, would be great if you guys could contribute with various Device implementations. I saw that there is a myriad of manufacturers out there, let me just highligt some of the brands I encountered.
Cotify, Ushawn, Elegant Choise, Cxy, Zenic, Sonew, Venoro, Innens, Oittm, Lixada, Woox
Licensed under the MIT license.
